Until recently, there was practically no alternative to the traditional cement-sand screed, but now many other methods of leveling the floor have appeared, and one of them is leveling with a semi-dry screed. In this case, a cement-sand mortar with a minimum amount of water is used to level the surface , and its high strength is achieved by adding fiber fiber or using a reinforcing mesh.
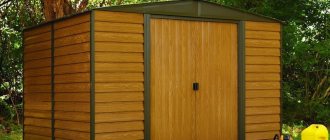
This option is perfect for creating a floor in a garage, and knowing the technology for laying it, you can do all the work yourself. If, after laying a traditional sand-cement screed, it can be used no earlier than 28-30 days, then in this case, the coating gains strength within 4-5 days.
Preparing the base
Before the concrete pouring of the floor, the owner had already built a strip foundation and walls.
Inside the foundation, the top layer of soil is removed by 30-40 cm and the earth is compacted as much as possible. Preparing the pit takes some time, but this will allow you to remove all the fertile soil and move on to creating a cushion for the base. Special markings are made to evenly distribute the cushion of sand and crushed stone. For this purpose, wooden pegs or reinforcing rods and cord are used. Opposite rods are connected with a cord using the letter X.
Preliminary and mandatory work - removal of the fertile layer, down to clean soil
Choosing a floor installation method
Before installation of the floor base begins, soil studies and assessment of terrain unevenness in the area are carried out. If a high groundwater level is detected, drainage work is carried out. If the garage is located on a slope and there is a large difference in height, the site is first leveled and the top layer of soil is removed.
Pay attention to the location of your garage to choose the best flooring option
Then the optimal method of installing the floor covering is selected.
For the floor in the garage the following can be used:
- wooden flooring;
- monolithic reinforced concrete slab;
- concrete screed.
Changing the thickness of the floor due to the concrete layer and the consequences of this manipulation
By reducing the thickness of the concrete layer in the overall floor structure, the following calculations are ultimately obtained: the thickness of the concrete layer in the ratio of each layer and the total thickness is less than the sum of all other layers, which, in essence, protect and strengthen the concrete floor. Increasing the concrete layer will not harm the overall concept - on the contrary, it will increase the level of reliability of such a floor. But at the same time, the following parameter is also important - between the ground located up to the garage and the garage floor there should be either a uniform descent or a slight gap. Otherwise, entering and leaving the garage will harm both the wheels, the body and the entire car as a whole, as well as the floor - this design will not be able to tolerate such experiments for a long time and, sooner or later, will begin to crack and collapse.
Thus, by following the technology, you can get an excellent result that will delight its owner for many years.
Basic entry requirements
The convenience of entering the garage largely depends on the angle at which it is located, the length of the span, as well as its width. If we are talking about a private house, then the restrictions depend on the available area in front of the building. In the available conditions, you can build what will be the most suitable option for a particular owner. Often the entrance to a garage near a private house goes directly into the roadway. If the ramp is too narrow, then turning it at a right angle will be quite problematic. That is why it is worthwhile to provide a slight expansion at the base. Often it is 4x3 meters. This applies to ordinary passenger cars.
If we are talking about a rear-wheel drive vehicle or a pickup truck, then the width and length of the entrance can be increased to 5 meters. In this case, the width of the gate should not exceed 3 meters. The slope of the ramp should not be too great. If you do not adhere to this rule, then visibility when entering or exiting will be limited, which will create certain problems when entering and exiting. One of them will be limited visibility, and the second will be poor handling in the presence of ice.
That is why a maximum of 18° is taken as a basis; the minimum slope can be 6°. A minimum slope is required to properly implement a drainage system for a specific structure. If the length of the ramp is 5 meters, then the height difference with a minimum slope will be approximately 25 cm. This will not pose any particular problems for the driver, but the ease of use of the garage will increase. If we are talking about a room that is located in the basement of a building, then the difference can exceed one meter. If a larger drop is required, the ramp will need to be lengthened. In some cases, when the difference exceeds two meters, a ride length will be required, which will be at least 10 meters. How to do this in a limited area was discussed above. In the case where the angle of rotation cannot be smooth, you will need to make a small platform where it will be convenient to make the turn.
Note! In some cases, the slope of the garage entrance may be variable. This applies to situations where other buildings are close to the garage door
In this case, the rise begins with a gentler slope and ends with a steeper one. This approach somewhat reduces the comfort when driving, but it makes it possible to go around the obstacle without much difficulty.
Pouring a concrete floor in a garage
The fastest way to concrete a garage floor is by ordering a mixer with ready-mixed concrete. This will simplify the work process, save time and effort. However, you can pour a concrete floor yourself. Such independent work requires additional assistants and a concrete mixer.
Most often, concrete of grade 300 or 400 is ordered. The thickness of the solution should reach 7-10 cm. To prepare the concrete mixture you will need:
- cement M500;
- river sand with granules up to 2 mm;
- crushed stone fraction 10–20 mm.
Concrete proportions for pouring a garage floor:
- One bucket of cement is mixed with two buckets of sand.
- The components are filled with water until the consistency of sour cream.
- Four buckets of crushed stone are added and mixed as much as possible.
- Before pouring, you can add a hydraulic additive.
For subsequent finishing, the poured concrete floor is ground. Sanding the floor should be done no earlier than a week after pouring. For this, professional equipment or a regular grinder with a diamond bowl is used.
Concrete grade for garage floors - M250
Required materials and tools
To make a semi-dry floor screed in the garage with your own hands, you will need the following tools and materials:
- laser and construction level;
- rule;
- grater;
- spatula and trowel;
- construction knife;
- drill with attachment or mixer;
- cement and sand;
- metal reinforcing mesh with cell dimensions 10x10 cm;
- fiberglass;
- waterproofing material;
- profile for beacons.
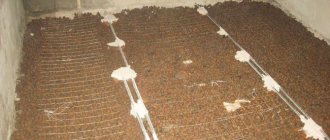
When making a cement-sand mixture, it is necessary to strictly observe the proportions of all components. To do this, you can take cement grade M400-M500; there should be no large inclusions in the sand, so before use, it must be sifted. Coarse sand with a fraction size of 2.5-3 mm is best suited.
The water must be clean; it is better to take it not from the water supply, but from a non-chlorinated well. Fiber fiber should be 20-40 mm long. First, sand and cement are mixed, and then water and fiberglass are added.
1 square meter of semi-dry screed in the garage , then for this you need 15 kg of cement, 0.065 m3 of sand, 40 grams of fiber fiber and about 2-3 liters of water, an additional plasticizer can be used - about 50 ml.
Attention! In order to check the quality of the prepared solution, it must be squeezed in a fist; if this results in a strong lump and a little moisture is released, then it is prepared correctly.
Curing
Caring for a concrete garage floor is possible with your own hands.
There is nothing complicated about this, but it is very important because when the concrete dries, the water evaporates and cracks appear. To avoid them, after pouring a concrete floor in a garage at hot outside temperatures, you should close the windows and gates, and cover the floor itself with plastic film or burlap
Over the course of a week, you should irrigate the surface of the concrete with water, first lifting the film or watering directly over the burlap. For irrigation, use a nozzle with a large number of holes.
The concrete finally dries and sets in 7 to 20 days.
Possible problems
After some time of operation, cracks may appear in the concrete floor.
During the period of operation of the concrete floor, surface defects such as cracks and cavities may form. They are eliminated by filling with cement-sand mortar. Pre-embroider, removing all loose particles, remove dust and apply 1-2 layers of primer.
One of the troubles when using concrete surfaces is the formation of specific fine dust. It can be removed by priming, ironing or finishing with facing materials.
The hygroscopicity of concrete is reduced using special means - water repellents. One of them is Penetron. The solution is prepared in accordance with the manufacturer's instructions and applied to the floor surface with a paint brush or roller. For these purposes, you can use other compositions:
- "AQUATRON";
- "HYDROHIT";
- "KALMATRON";
- "HYDROTEX";
- "WASCON"
They all work on the same principle: they fill the smallest pores of concrete, crystallize and form a moisture-proof layer.
Briefly about the main thing
The modern market is able to provide the developer with any materials. Moreover, the garage owner can decide what he will focus on when arranging the floor. Will he choose only practicality and try to save as much as possible, or will he spare no expense to add beautiful decor to the interior. Everyone only has their own capabilities.
But most garage owners follow the classic path and choose pouring concrete. Moreover, screed is necessary for many coatings. Without it, you cannot lay porcelain stoneware and acid-resistant tiles. It is also needed for self-leveling coating. Rubber, steel and even wooden floors cannot do without it.
But in the case where simple concreting is chosen, you can always modify and embellish the surface. The easiest way is painting. But, if you try, you can even make a good imitation using improvised means.
Semi-dry screed
With a semi-dry screed, instead of expanded clay or other dry filler, a cement-sand mixture with plasticizers, fiber and similar additives is used. Expanded clay or perlite may also be present in the mixture or replace part of the sand. The main difference between a semi-dry screed and a dry one is the use of liquid when preparing the backfill and the absence of a rough layer. The finishing coating is laid directly on the hardened screed in accordance with the technology of the selected type of floor.
Semi-dry differs from ordinary cement screed in the minimal amount of liquid used - it is enough to start the hydration process, but the batch turns out to be almost dry and is laid out on the base rather than poured. The molding process produces a smooth, streak-free floor that does not require finishing. Among our forum members, many use semi-dry screed as something between dry and regular. It can withstand dynamic and vibration loads, which are contraindicated in the dry method, but it is done faster and with less labor than pouring with a liquid solution.
I myself am engaged in the construction of such couplers; in Moscow we were one of the first to offer this technology, although we were looked at wildly because of the cost at that time. As practice shows, the semi-dry method quickly replaces the classic liquid styling method. Semi-dry screed usually does not require additional leveling with self-leveling floors or levelers, and they cost quite a lot of money, although a lot depends on the master layers.
I think that at the moment this is the optimal screed option: no dirt, no need to worry about flooding someone, no problems with delivery, no problems with lifting the mixture to a height, no need to worry about where to get a concrete mixer, you can start the next day for further finishing work. The screed is made on the basis of sand and cement, even if there are water leaks somewhere in the future, it will survive it without problems, and the price, in my opinion, is reasonable.
Unlike dry screed, semi-dry screed needs to be moistened during the hardening process.
steel doors in Chernogolovka
Moisturize, at least once, but it is necessary! In order for cement to fully gain strength, it requires moisture; the reaction occurs only in the presence of liquid (hydration). The first time moistening is carried out five days to a week after installation; before this period, the screed contains its own moisture, and it gains a primary compressive strength of up to 15 MPa. This, in principle, is enough for a household floor, but it is advisable to increase it to 20 MPa by humidifying it.
A semi-dry screed is often made to float due to the high thermal conductivity of concrete - a layer of insulation can significantly improve the heat-saving parameters of a room if there is an insulating layer under the screed. In addition, a floating semi-dry screed is less susceptible to deformation, cracking and shrinkage. And due to the absence of direct contact between the ceiling, the wall and the screed, sound insulation is also effective.
A reliable base for garage flooring
The main problem with arranging a garage floor is that it is located close to the ground, which contains a large amount of moisture. This feature can cause serious trouble to the car owner and cause significant material damage. The concrete floor screed in the garage is laid on the prepared base. Concreting the floor in the garage and installing the floor covering is carried out according to the so-called “pie” principle, which is considered the most optimal option.
The sequence of layers in the direction from the ground upward looks like this:
- Gravel (crushed stone) embankment. Performs the function of a kind of drainage that helps remove excess liquid and prevent its penetration into the concrete.
- Soft clay or sand. This layer is responsible for removing moisture from the concrete and transferring it to the gravel.
- Strengthening layer of concrete mixture.
- Waterproofing. Thanks to it, groundwater does not penetrate into the floor of the building. The starting layer is made of mastic, and the main layer is laid in two layers.
- Insulating material.
- Concrete screed plus reinforcement.
- Self-leveling floor covering. This layer is poured at the request of the garage owner and is not necessary, but it will significantly improve the quality of the concrete-based screed. By the way, a properly made base allows you to pour inexpensive compounds.
Different combination - does it change the concept?
In various instructions you can see different versions of laying this type of floor - in most cases, the only difference between these theories is the sequence of stages of laying the floor. Some people's eyes widen, but in their heads there is the same, very adequate question - is there a fundamental difference between the numerous options for the sequence of laying layers and is there a most successful option?
The answer is simple - consistency does not play a huge role. It is much more important to adhere to the norms of layer thickness of one level or another.
An example of arranging a floor on the ground. Scheme
Concrete floor in garage
The most versatile floor is concrete. And we are talking not only about its finishing, but also about how it can be made. If we talk specifically about how to make a concrete floor in a garage with your own hands, you must first of all start from what kind of foundation you have. If it is a monolithic slab, there is very little work. If the surface is not level enough, all that remains is to fill in the leveling screed and then begin laying the finishing coating. If the differences do not exceed 1 cm per square meter, you can immediately lay any of the suitable finishing materials.
Layer order
With any other foundation, the beginning of the work coincides with all those described above: we remove the fertile layer, level it, and tamp it. Further, no news either: pour crushed stone in layers, tamp it, the total thickness of crushed stone is from 10 cm. The next layer is sand.
But then there may be options. If you want an insulated floor in the garage, install thermal insulation material. Better - extruded polystyrene foam with a density of 35 kg/m3. It will support both the weight of the screed and the machine. This cannot be said about all the others. You can use a bulk thermal insulator such as expanded clay, but it is ineffective and also absorbs moisture. Then you need to lay a layer of waterproofing underneath it. Better - granulated foam glass. It has low thermal conductivity and does not absorb water. It is problematic to use ordinary polystyrene foam (foam) and mineral wool - they can wrinkle under the weight, which will lead to a loss of thermal insulation efficiency.
A film is spread over the thermal insulation layer, and a reinforcing belt is placed on it. Here again there are two options: tie it from reinforcement (8-10 mm in diameter in increments of 20 cm) or lay a ready-made metal mesh (wire from 6 mm with a cage size of 10 cm). If you choose a mesh, lay it overlapping, overlapping at least one cell, and tie it together (with knitting wire or plastic clamps). Fill everything with concrete (grade M 250 is more than enough), level it well.
After the reinforcing frame, concrete can be laid
To make leveling concrete in the garage easier, beacons are placed at the required level. These are even planks - special metal, metal pipes, or, in extreme cases, wooden planks (they are not always even, and they can even lead to moisture). They are positioned so that their top edge is aligned to the same level. The distance between the slats is 40-60 cm less than the length of the rule. The solution is poured in portions. Supporting the rule on the beacons, it is stretched, leveling the surface. The entire perimeter is gradually filled
Please note that for concrete to set normally, it needs a temperature of about +20°C and sufficient humidity. That is, it is better to pour concrete on the floor in the garage in the summer.
But if it is too dry during this period, you will have to water the screed - a sufficient amount of moisture is also important. To prevent it from evaporating less, cover the screed with film or burlap.
If the film is used, each time you water the screed, it must be removed and spread. If burlap is laid, you can water from above. Under such conditions, the screed will gain its design strength in approximately 28 days. Afterwards, you can move on - laying the finishing coating.
Another option in the video.
Bulk
In order to improve an ordinary concrete floor in a garage, modern self-leveling mixtures are ideal. These compositions are usually two-component, containing a polymer resin and a hardener. When applied in liquid form to a surface, an absolutely flat, wear-resistant, impact-resistant and frost-resistant base is formed. All these advantages will manifest themselves fully only with a certain base thickness - at least 5 mm.
Self-leveling floors boast not only their practicality, but also their beauty. Their aesthetics are up to par. This is a perfectly smooth, glossy or matte finish that can be painted in different colors. Along with plain coatings, self-leveling coatings with patterns are becoming very popular.
A bright self-leveling floor dictates the design of the garage
Entering the box in reverse step-by-step instructions
While studying at a driving school, you will visit a racing track. There, an instructor will help you park in reverse correctly. The technique here is almost the same as when driving into a garage in reverse.
Below we provide you with a video on how to do this maneuver correctly. But first, let's describe it to you verbally. Imagine that the garage entrance is to the right of the car (otherwise, do the opposite). The car is parked perpendicular to the gate:
- drive three meters away from them and stop. The distance between the gate and the machine should be approximately one and a half widths of the model;
- Engage reverse gear. Turn the steering wheel to the right so that the car is heading straight towards the gate leaf. At the same time, turn your entire torso and head to the right. You should drive little by little, releasing the clutch pedal and lightly pressing the gas;
- when the rear bumper is on the goal line, stop driving. Leave a little space between the side gate leaves. Don't play it safe and don't be afraid. If there is at least 10 centimeters between the fender and the wall, you will have a great ride without scratching anything. Also, if you leave a long distance, you can scratch the left side of the car;
— turn the steering wheel to the right to the extreme point. It will turn out that the drive wheels will turn in the direction of the gate, and the remaining two tires will turn in an arc;
— start driving lightly until the car is parallel to the side wall of the box;
— straighten the front wheels and drive into the garage. Start looking at the back wall of the box to brake in time.
Of course, if your car has parking sensors, maneuvering becomes much easier. But it’s best to learn how to reverse into a garage without it. After all, technology is technology, and it can fail at the most crucial moment.
In general, this is all you need to know about how to properly reverse into a garage. The main thing is to clearly imagine the end result, and practical skills will be acquired very quickly.
A neat, clean and convenient garage entrance is not a luxury, but a necessity.
A skillfully arranged area in front of the garage structure not only makes it easier to move the car to its place, but also protects the structure from the penetration of dirt, snow and other phenomena.
Making your own entry is within the power of every car owner. The main thing is to choose the right materials and follow the technology as accurately as possible. Such devices are made from different materials - concrete, metal, wood and paving slabs.
The metal version is strong and reliable, but negative air temperatures make it slippery. The entryway made of wood is simple to make, but is the most short-lived and requires replacement after 2-3 years.
The area in front of the garage, carefully laid out with paving slabs, looks beautiful and, under favorable conditions, lasts a long time. But it also has disadvantages - a tendency to icing and instability to salt. Therefore, the optimal entry option is concrete - an inexpensive and durable material with excellent performance properties.
Construction of a garage is impossible without a well-equipped entrance.
This device, simple to use, simultaneously performs the following functions:
- Smoothes out the difference in the plane in front of the garage door;
- Reduces the load on the vehicle's chassis and ensures easy, hassle-free parking;
- Protects the interior space from precipitation and dirt.
There are three options for arranging the entrance to the garage - a ramp, a screed and a blind area.
Depending on the location of the entrance, the ramp can be straight or rotary, and if it leads to an underground garage, it can be made with a descent.
Arranging this type of check-in requires compliance with the following rules:
- The optimal length is 5-6 meters;
- The width depends on the dimensions of the garage; on each side the device must protrude at least 30 centimeters;
- The optimal angle of inclination is 25⁰ (if this value is exceeded, the length of the ramp should also be increased).
The blind area is a strip with a slope from the building to drain water. It is made of concrete or asphalt.
A screed made of concrete or cement-sand mixture is made to give greater rigidity to the soil layer. This level area provides comfortable parking for the car and prevents dirt from penetrating into the garage.
What is the correct thickness of concrete garage floors?
We are planning to install concrete floors in a detached garage. What is the optimal thickness of a concrete floor on the ground? Where can I find recommendations for choosing the thickness of a concrete floor for our case?
You cannot simply lay concrete on the ground, since it will quickly collapse under the variable load when a car enters. To avoid destruction of the floor, I recommend that you perform the following work.
When installing a garage floor, you must first level the ground. Then it must be compacted by embedding crushed stone of a fraction of 20-40mm into the soil. This can be done using a hand tamper. You can take a round log with a diameter of 20-25mm or a beam of the same size - a transverse strip about 45cm long is attached to one end, which serves as a handle when lifting such a “rammer”. Removing the crushed stone with a tamper, we gradually embed it into the ground. During the process of compacting crushed stone, it is necessary to add new portions of crushed stone a little.
When the tamping is completed, it is necessary to add a layer of sand at least 50 mm thick, which also must be compacted with a tamper. Then a steel mesh is laid on “crackers” with a diameter of 3-5mm with a cell size of 100-150mm. Now special plastic latches are sold, used when laying the mesh, which allow you to create a gap between the mesh and the sand of about 20mm. As a last resort, you can place pieces of crushed stone under the mesh so that the gap between the mesh and the sand is about 20mm. The mesh is needed in order to distribute the concentrated wheel load over the entire floor area.
Then you need to lay the concrete. The thickness of the concrete layer must be at least 100mm. During the laying of concrete, it must be compacted with a vibrating screed. If it is not available, you can use a bayonet. As a bayonet, you can use ordinary round reinforcement with a diameter of 10-20mm. As a last resort, you can use a wooden stick.
When laying concrete, you need to ensure that the surface is even and creates a slight slope towards the garage door.
During the process of concrete gaining strength, it must be watered for 10 days. It’s even better if you cover the floor with cellophane film, under which there will always be a damp environment.
Under no circumstances should concrete be dried while it is gaining strength, as this can lead to cracks due to internal stresses that arise in the concrete when the cement hydrates due to lack of moisture.
The final strength gain of concrete occurs after 28 days. The brand of concrete mixture for flooring should be chosen at least M200.
After the hardening is completed, you can safely drive the car into the garage and be sure that the floor will not collapse.
Conclusion
In some situations, the only correct solution was and remains a conventional screed using the wet method as it best meets the conditions of use. And nothing can be done about the phlegm, dirt and other associated inconveniences. In places where increased loads and dancing for days on end are not envisaged, dry screed and its variations can be a worthy alternative.
Dry screed is one of the suitable types of base for an infrared film floor, which is described in the article “Infrared heated floor - from theory to practice.” To prevent the heat retained by the floor from escaping through the windows, read the article about do-it-yourself wooden Euro-windows. In a video about working with floors and walls, a specialist will demonstrate a light screed device.
Subscribe to our Telegram channel Exclusive posts every week
Creating a Basic Fill Layer
For a self-leveling mixture, which forms a layer of up to 10-15 centimeters, a reinforcing mesh is not needed. If you want to get a strong screed with a thickness of more than 150 mm, you can lay a mesh of 8 mm reinforcement with a cell of 100-150 mm. It should occupy up to 50% of the planned thickness of the self-leveling floor layer.
Beacons will be useful for work, especially if you need to make an inclined surface. They are installed so that the horizon of the self-leveling floor covers them by about a centimeter. After preparing the mixture, it is poured out in sections and leveled. Degassing must be done using a thorough treatment with a needle roller.
The next portion of the fill is done so as to overlap the surface of the previous floor area by 3-4 cm. You should work from the wall farthest from the gate. If you are making a sloping floor, you need to start pouring from the top point of the future surface. To make the work easier and simpler, it is recommended to dilute the self-leveling mixture to a fairly thick consistency, and not runny, as recommended by the manufacturer.
"Floating" dry screed
It differs from the classic dry screed in that it has a base - an additional layer of thermal insulation materials is placed under the backfill: EPS boards or mineral wool (hard). The screed is called a floating screed because the backfill is isolated from the base by a layer of insulation, and from the walls by a damper tape, and due to the absence of a rigid ligament, it is not subject to deformation. This cake allows you to maximally soundproof the room, which is especially important in high-rise buildings or private houses for children's rooms and bedrooms.
The installation of a floating dry screed is no different from the installation of a classic one, only the installation of insulation is added, it is laid closely, the seams are taped. Forum member Alexcrab used a floating screed specifically to drown out extraneous sounds.
There is a reinforced concrete floor, the main purpose of the screed is sound insulation. There will be a dry screed throughout the apartment (except for the kitchen), I will make a “floating” screed on extruded polystyrene foam, 30 mm thick. There is also wiring running along the floor, high-power - in corrugated pipes, low-power - without, all wiring is laid with a reserve cross-section.
Considering that the main purpose of the slabs is insulation, such a screed is indispensable in cold regions or when the slab is laid directly on the ground, or dampness and cold are drawn from the basement.
Repairing cracks
Over time, cracks form on old screeds or newly filled screeds, but incorrectly.
In order to eliminate such defects:
- Insert a chisel into the crack.
- Start hitting the chisel with a hammer to expand the damage. This is necessary to fill the voids as much as possible with the leveling mixture, and also allows you to identify hidden chips.
- Remove loose concrete pieces, dust and dirt.
- If the cracks are deep, it is recommended to perform reinforcement. To do this, create small depressions at several points across the crack and place short metal rods in them.
- Rinse the inside of the crack with water to remove dust.
- Wait until it dries completely and treat the crack with a primer.
- Prepare the leveling solution by mixing M400 cement and water to a creamy consistency. After this, you need to add PVA glue or liquid glass to the composition in a 1:1 ratio and mix the solution using a construction mixer.
- Pour the mixture into the crack (it should protrude slightly above the surface, as shrinkage will occur during hardening).
- After the mixture has dried, grout it (it’s most convenient to use a grinder, but if you don’t have one, you can get by with an abrasive wheel or coarse sandpaper).
Additional Tips
To ensure a truly high-quality entry, it is important to take into account the requirements for each of the components of the solution. Optimal grades of cement - M400 and M500
Its consistency should be dry and free-flowing
The optimal grades of cement are M400 and M500. Its consistency should be dry and free-flowing.
It is best to use river sand with a fraction of 1.5 to 5 millimeters.
It is recommended to use crushed stone or gravel as a filler, the size of which varies from 8 to 35 millimeters. Sea pebbles, due to their polished surface, are not able to provide reliable adhesion to the solution.
When preparing the solution, it is necessary to use clean water, free of acids and alkalis. Therefore, river and lake water are not suitable.
Adding auxiliary components to the solution will help improve the quality and performance properties of a concrete structure. These include:
- Plasticizers for adjusting fluidity and viscosity;
- Slaked lime, which facilitates the installation process;
- Reinforcing agents to increase strength (for example, polyvinyl chloride or polypropylene fiber).
It is best to carry out work on creating a concrete entrance at temperatures from +3 to +25⁰С. If the process occurs in winter, it is necessary to heat the solution, organize uniform heating of the structure, and also use special additives with antifreeze properties.
Share this article with your friends on social media. networks!
The process of pouring a concrete floor
How to make a garage floor. Layer thickness
Initial stage - gravel and sand
Crushed stone backfill
sand cushion
The bottom of the future area for pouring the floor must be compressed and leveled as much as possible, for which a number of columns are driven into the ground at a distance of one meter to determine the required level of gravel, and then, as it is filled in, stones are carefully pressed and removed, which contribute to subsequent unevenness. After the gravel layer there is an even layer of sand, with a pre-calculated width.
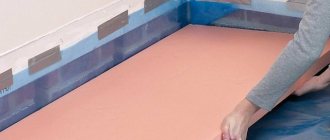
Waterproofing is a necessary layer
Before laying the concrete base, you need to take care of waterproofing the floor - an important function, especially for a garage. The best way to provide protection from moisture are special membranes or their analogues, polyethylene films, overlapped and glued together with polyvinyl chloride tape.
To avoid subsequent unevenness, as in the previous stage, the layer, namely the film, is carefully leveled and smoothed.
roll waterproofing
The main and most important part of building a floor is pouring concrete mortar.
The process of knitting reinforcement
Reinforcement is an important step in arranging a concrete floor in a garage
The solution is fed onto the laid reinforcing mesh
Pouring concrete solution
Pouring concrete
Before pouring, it is necessary to carry out reinforcement - the process of strengthening the metal mesh in order to improve the strength and resistance to external loads of the floor. The process of applying the concrete layer directly is carried out by installing slats and subsequent pouring. It is also necessary to first select the desired brand and the desired subtype. The composition of the solution for pouring the concrete layer includes the following materials:
- sand
- cement;
- water.
The process of creating floor insulation
It is necessary to insulate the floor before carrying out the final screed - the best material for this work, accepted by many, is polystyrene foam (Penoplex) and a subsequent layer of film for reliability.
| Styrofoam | Polyurethane foam | Min. plate |
| Open cell structure | There is both open and closed cell structure | Fibers randomly located in vertical and horizontal directions |
| Poor moisture permeability | Almost impermeable to moisture | Almost does not absorb moisture |
| Lightweight material | Lightweight material | Medium-light material |
| Average strength | Low strength | Low/medium strength |
| Average compressive strength | Low compressive strength | Low to medium compressive strength |
| Non-toxic | Non-toxic, emits carbon monoxide and carbon dioxide at a temperature of 500 degrees | Non-toxic |
| Not suitable for use under high load | Not suitable for use under high load | Not all slabs are suitable for use under high loads |
| Subject to decay | Durable enough | Durable enough |
| Affected by ultraviolet radiation | Virtually unaffected by ultraviolet radiation | Sufficient resistance to UV influence |
| Name | Dimension | Penoplex 31C | Penoplex 31 | Penoplex 35 | Penoplex 45C | Penoplex 45 |
| Density | kg/m³ | 28,0-30,5 | 25,0-30,5 | 28,0-37,0 | 35,0-40,0 | 38,1-45,0 |
| Compressive strength at 10% linear deformation, not less | MPa (kgf/cm²; t/m²) | 0,20 (2; 20) | 0,20 (2; 20) | 0,25 (2,5; 25) | 0,41 (4,1; 41) | 0,50 (5; 50) |
| Ultimate strength during static bending, not less | MPa | 0,25 | 0,25 | 0,4 | 0,4 | 0,4-0,7 |
| Elastic modulus | MPa | 15 | 15 | 15 | 18 | 18 |
| Water absorption in 24 hours, no more | % by volume | 0,4 | 0,4 | 0,4 | 0,4 | 0,2 |
| Water absorption in 30 days | % by volume | 0,5 | 0,5 | 0,5 | 0,5 | 0,4 |
| Fire resistance category | group | G4 | G1 | G1 | G4 | G4 |
| Thermal conductivity coefficient at (25±5)°С | W/(m°K) | 0,030 | 0,030 | 0,030 | 0,030 | 0,030 |
| Vapor permeability coefficient | mg/(m h Pa) | 0,008 | 0,008 | 0,007 | 0,007 | 0,007 |
| Specific heat capacity, s | kJ/(kg °K) | 1,45 | 1,45 | 1,45 | 1,4 | 1,4 |
| Operating temperature range | °C | -50…+75 | -50…+75 | -50…+75 | -50…+75 | -50…+75 |
| Width | mm | 600 | 600 | 600 | 600 | 600 |
| Length | mm | 1200 | 1200 | 1200 | 2400 | 2400 |
| Thickness | mm | thirty*; 40; 50; 60; 80; 100 * – for PENOPLEX type 31 (type 31 C) slabs with a thickness of 30 mm, compressive strength of at least 0.15 MPa | thirty*; 40; 50; 60; 80; 100 * – for PENOPLEX type 31 (type 31 C) slabs with a thickness of 30 mm, compressive strength of at least 0.15 MPa | 20**; thirty***; 40; 50; 60; 80; 100 ** – for PENOPLEX type 35 slabs, 20 mm thick, compressive strength is not less than – 0.18 MPa *** – for PENOPLEX type 35 slabs, 30 mm thick, compressive strength is not less than – 0.20 MPa | 40; 50; 60; 80; 100 | 40; 50; 60; 80; 100 |
polystyrene foam insulation
Final layer – floor screed
Leveling concrete using the rule
The most crucial moment is the final floor screed. This process consists of leveling the already poured floor layer using a rule strip and smoothing it using a steel trowel.
Leveling poured concrete
Smoothing tool - a tool for leveling screeds
Dry screed laying technology
Installation of dry screed is carried out according to the standard algorithm:
The average thickness of the dry screed layer varies from 30 to 40 mm; if it is necessary to increase the thickness to 60 mm, the rough coating is reinforced with a second layer of slabs. Dry screed provides a reliable, durable coating that can withstand dispersed loads of up to a ton per 1 m², and a point load of 360 - 400 kg. The popularity of this method is explained by the characteristics of the resulting base.
In addition, dry screed is attractive due to its ease of installation, speed and the absence of wet and dirty processes; concrete mixers, mixers, heavy containers with mortar and other “delights” of pouring are eliminated. The limitation for dry backfill is the slope of the surface; it is also not designed for heavy partitions, only light frame ones. Although a dry screed is “afraid” of moisture, and if the coating is poured, it will have to be dismantled, when using moisture-resistant gypsum plasterboard, this danger can be avoided. In rooms with high humidity (bathroom, kitchen), ceramic tiles are used as the finishing layer. If the technology for preparing the base and masonry is followed, the coating becomes airtight.
In order to reduce the cost of dry screed as much as possible, forum member dusha82 decided to turn the rough coating into a finishing coating, saving on finishing.
As I decided, I will make the floor using dry screed technology - loose screed, but with some finishing touches. I chose this floor for several reasons:
Loose flooring is simple, quick and relatively inexpensive. Now about the finishing touches: the dry screed itself is leveling and the subfloor, but I need (to save money) to have a finishing coating right away, so instead of gypsum fiber sheets, I decided to take plywood, then coated with varnish, which will work for the first time. I chose two sheets of 8 mm each - I think it’s more difficult to mill a thicker one for a rebate. But one problem arose in the process - when I poured expanded clay and put one piece of plywood on it for testing, it turned out that all the “rustle” of the expanded clay could be heard. Fortunately, I had polyethylene foam at hand, the sound stopped after I laid it under the plywood.
Repairing cracks
Cracks are the most common defects.
To eliminate them you need to do the following steps:
- Widen the crack using a chisel. This way it will be possible to detect hidden defects and fill them as efficiently as possible.
- Clean the crack from dirt, dust and loose concrete.
- In case of deep cracks, perform reinforcement - creating recesses across the cracks and placing metal rods in them.
- Rinse the crack with water to remove dust and wait until it dries completely. Treat the crack with primer.
- Preparation of the solution. Mix M400 and water to the consistency of sour cream, then add PVA glue or liquid glass to the solution in a 1:1 ratio. Use a stand mixer to mix.
- Fill the crack with mortar. Fill so that the solution extends beyond the crack, since shrinkage will occur during the hardening process.
- Sand the hardened surface using a grinder or coarse sandpaper.
Subfloor layer
The underlying floor layer acts as a damper between the floor screed and the base. In theory, it is made from options (either/or):
- A layer of sand 60 mm thick;
- Layer of gravel (crushed stone) 80 mm;
- Concrete 100 mm thick.
For garage construction, underlying layers of concrete are used. This underlying layer is called hard and is performed:
- Made of monolithic concrete;
- Made of reinforced concrete;
- Made of reinforced concrete;
- Made from SFRC (steel fiber reinforced concrete)
- From SFBZh (steel-fiber-reinforced concrete);
, where the concrete class must be at least B22.5.
Concrete class B22.5
At home, concrete class B22.5, concrete grade M300, is “prepared” as follows (read concrete grades):
- Cement M400 (cement: sand crushed stone) 1: 1.9: 3.7 (kg) /// 1: 1.7: 3.2 (liter)
- Cement M500 (cement: sand: crushed stone) 1: 2.4: 4.3 (kg) /// 1: 2.2: 3.7 (liter)
The price of a cubic meter of ready-mix concrete B22.5 in the Moscow region is about 2700 (gravel) - 2950 (granite) rubles. For a garage 3 by 6 meters, you need 1.8 -2.0 cubic meters of concrete, without building driveways.
Waterproofing garage floor
In the garage, you need to ensure minimal humidity: for the best safety of the car and various things that will be stored there. To do this you will need waterproofing of the floor. The choice of waterproofing option depends on the location of groundwater under the garage. If they are far away, then you can limit yourself to plastic film (250 microns) laid on the sand. If the waters come close to the surface, then you need to use waterproofing or similar materials. The thickness of the concrete floor in the garage increases. The waterproofing panels are laid with an overlap of 10 cm and taped. The film should end above the damper tape. It is attached with tape to the wall and trimmed afterwards.
Concrete floor construction options
If the garage is heated, then an insulated floor must be installed. This will give big savings: it will not allow heat to go down. Slab extruded polystyrene foam up to 10 cm thick is used as insulation. Of course, this significantly increases the thickness of the screed in the garage and requires consideration when marking on the walls.
Implementation methods
As practice shows, only a concrete floor can withstand such loads. It can be created in two ways:
- Lay the reinforced concrete floor slab.
- Pour a thick concrete screed (up to 10 cm) over the ground.
Let's just say that the first option is faster, but more expensive. The floor slab is not cheap; its installation can only be done with the help of a crane, for which you will have to pay for its services. But even a beginner can do concreting on the ground with his own hands. The main thing is to know the technology and nuances of the process.
Types of heated floors
Most often, an electric or water floor is installed in the garage. Next, we will consider the main types, which differ in their characteristics and installation principles.
Characteristics of electric heated floors
The principle of operation of an electric floor is reduced to heating the floor due to the release of heat in the conductor under the influence of electric current. The conductor thereby heats the screed. It is already sending heat into the garage. The main types of electric heaters: convection and infrared.
- easy installation;
- reliable in operation, does not break;
- no need for system maintenance;
- there is a thermostat.
Important! When choosing an electric floor in your garage, you need to take into account the thermal insulation of the garage. It requires quality
The final load should be calculated before installation. To do this, multiply 140 W/m by the garage area.
Floor installation
1. Prepare the foundation for future installation. Isolate the garage from groundwater penetration using a concrete screed. It should be level and have no differences in height. The screed should harden.
2. After this, proceed to laying thermal insulation. It is advisable to stop the choice of material at:
Thickness – 30-80 mm depending on weather conditions.
3. Install the temperature sensor.
4. Lay waterproofing.
5. Test the operation of the floor heating.
6. Start pouring the screed (the thickness is less than a regular floor without an electrical system). In places where cars pass, you can leave a regular floor.
Advice! When using a heating wire, secure it with mounting tape (50 cm), which will secure the turns of the wire. The tape will be attached to the rough screed using dowels.
Important! After complete installation, the floor cannot be turned on. Duration – 28 days
Characteristics of water heated floor
A water floor in a garage is a system of metal-plastic pipes located in a screed. And the heat source is a boiler. Due to savings, a water floor is installed most often. Allows you to save energy and ensure uniform heating in the garage.
Important! When starting to use heated floors, it is recommended to increase the heating temperature gradually
Floor installation
To make a water heated floor, you should follow the following sequence:
- Carry out general cleaning of the surface and achieve a smooth surface using an additional screed.
- Lay heat-insulating material (thickness should exceed 3 cm). In addition to polystyrene and penoplex, special mats equipped with special fasteners are used for the water floor.
- Attach the damper tape to the wall. It compensates for the thermal expansion of the screed.
- Lay down thick plastic film and reinforcement mesh to which the pipe will be attached. The pipe is fixed with plastic clamps. A corrugated pipe is installed at the seams.
- Carry out tests, creating a pressure of 3 - 4 bar, for at least 24 hours.
- Fill with concrete screed.
- Leave for 28 days to dry completely. Can't be turned on.
- The finished water-heated floor in the garage can be covered with ceramic tiles.
To build a garage, basic structures alone are not enough. It makes more sense to invest money in additional equipment. After all, a warm floor will not only provide convenience in the garage for a person, but will also create the ideal place and temperature for the car.
What can the entrance be built from?
The choice of material for the construction of the entrance area in front of the gate should be based on the parameters of a particular site
It is recommended to pay special attention to:
- height difference, which can reach a couple of tens of centimeters;
- vehicle parameters so as not to touch the bottom of the entrance;
- natural phenomena: constant moisture or soft subsiding soil.
Depending on the results of the analysis, it is recommended to select the material for the ramp. This could be: wood, metal, rubber or laying with concrete.
Wood
A simple way to create a decent entrance is to build a ramp from wood. For the structure you will only need boards and bars of different thicknesses (to create a slope). It is permissible to combine materials into a single system yourself. However, the tree is very sensitive to moisture and will become damp in the autumn-winter season. Regardless of the strength of the chosen rock, dampness will lead to decomposition of the material; it is only a matter of time.
To extend its service life, such a structure must be regularly lubricated with special impregnations, be sure to be tinted or put away in a dry, safe place each time after use.
However, this option is well suited for a country garage, which is used only during certain seasons. With constant use, a wooden porch loses to other structures.
Metal
The metal structure made of profile pipe and metal mesh is stronger. This blind area is also susceptible to the influence of accumulated moisture: traces of corrosion will certainly appear on the metal.
To avoid such complications, the ramp requires additional care:
- regular coating with anti-corrosion paint;
- If possible, it is worth keeping the ramp in a dry place.
Also, metal buildings are not suitable if there is soft soil in the entrance area. With each use, the structure will sink deeper into the ground, and subsequently it will be more and more difficult to pull it out.
Asphalt crumbs
One of the best options for building an entrance to a garage is asphalt chips or, more simply, an asphalt driveway. This installation has many undoubted advantages:
- immunity to temperature changes;
- moisture resistance;
- good tire grip;
- not affected by salts and reagents.
You can lay the crumbs yourself, but professionals recommend turning to asphalt pavers for help for compaction. In general, the entry procedure is not complicated. It is recommended to cover everything with crushed stone and cover the top layer with asphalt. If all the subtleties of the technology are followed, the material does not sag.
Paving slabs
Covering the entrance with paving slabs eliminates the influence of external conditions on the condition of the site. However, the cost of preparing and laying the entrance is very high. To comply with the technology you will need:
- remove top layers of soil;
- cover the area with crushed stone 15 centimeters (depending on the situation);
- cover the surface with sand and let it compact;
- then apply a layer of geotextile;
- then tiles are laid on the cement mixture, filling the cracks with the same cement mortar.
If the threshold is not very high, it is permissible to buy a ready-made rubber ramp. To do this, you will need to measure the lift level, select the appropriate one and install it at the entrance. Among the advantages of this design are:
- availability (sold in any large auto store);
- moisture resistance;
- ease of installation (some models are portable, they don’t even need to be secured).
However, depending on operating conditions, the rubber ramp will have to be replaced, on average, once every two years. After all, rubber is susceptible to the influence of chemicals and absorbents that are used when treating roads in winter.
Concrete screed is the best option when creating an entrance to a garage. Laying concrete does not require large financial and labor costs. The material is also resistant to external influences, durable, and even in the event of icing, the consequences are easily eliminated. Creating a concrete entrance provides:
- smooth level changes allow you to create the required slope;
- hassle-free car parking;
- removal of precipitation and pollution from the internal space.
When pouring the screed, it is important to maintain the proportions of the solution and also pay attention to natural conditions. It is not recommended to work with the material at high humidity: the concrete will take a long time to dry, and subsequently subsidence is possible
Filling the final layer
Epoxy and polymer self-leveling floors have one requirement: an ideal base
Following this rule is especially important in the garage. The floor is subject to heavy loads, so if the base is uneven, the final coatings can quickly collapse and crumble
Before applying the final layer, the surface of the main screed is treated with a grinder and dust is removed. Thin-layer self-leveling floors can be applied as recommended by the manufacturer. That is, pour, distribute, level the mixture, remove gas bubbles with a needle roller. But to form a very thin protective layer, you can apply the composition with a brush. This work will take more time, but will show high-quality results.
If you follow a two-layer algorithm, even a person who does not have much experience in carrying out such work can make a self-leveling garage floor
All that is required is to carefully examine the existing conditions, act slowly, carefully, with attention to all details. And then the new self-leveling floor will definitely delight you with its quality for decades
Dry screed: classics, variations on a theme, experience of portal participants
The screed is most often a leveling, load-distributing layer, but depending on the type and purpose, it can also serve as additional sound insulation and thermal insulation, as one of the elements of the heated floor system. In some situations it is also a topcoat, for example in a garage or utility room. For a long time, the traditional screed remained the most popular - pouring with liquid concrete mortar followed by hardening with humidity control. Today, dry screed in several versions is becoming increasingly widespread, and FORUMHOUSE users, based on classical technologies, come up with their own and share the results of successful experiments with everyone interested.
Content
Work order
Below are step-by-step instructions on how to properly grout your garage floor.
Digging a pit
The depth of the pit should be 30 cm relative to the intended floor level. After digging, the soil is thoroughly trampled down
It is important to remove all fertile soil with plant seeds that can destroy the coating below
In temperate climates, it is advisable to insulate the floor with foam plastic slabs laid under the reinforcing mesh above the waterproofing. In this case, the pit is dug another 10 cm deeper.
Making a pillow
For the cushion, you should only use materials that can be compacted tightly: broken bricks and similar construction waste are not suitable. The most reliable option includes (from bottom to top) a layer of clay as additional waterproofing, a layer of river sand and a layer of fine crushed stone or expanded clay. Sand and crushed stone are laid in several passes, each portion is compacted, and the sand is also watered. The pillow is sealed with a thin layer of concrete and left to settle for 2-3 days.
Waterproofing
The concrete base is coated with molten bitumen resin and overlapping strips of roofing material are laid. An edge strip is glued to the walls along the entire perimeter so that its height exceeds the zero mark by several centimeters: after laying the floor, the excess will be cut off.
Reinforcement
Rods with a cross-section of about 8-9 mm are laid on supports (for example, bricks) overlapping in increments of 15 cm and tied with wire.
Installation of beacons
Perfect leveling of the coating for a garage is not as important as in a residential building, so you can save on a beacon profile and use wooden blocks. They are installed at a distance of 20 cm from the walls and then at intervals of 10-15 cm less than the length of the rule. Beacons are leveled at zero level.
Some sources advise installing beacons with a slight slope towards the gate so that the water condensing in the spring flows towards the exit. However, this is a dubious decision: during the melting period, night frosts are not uncommon, and the accumulated water can turn into ice by the morning and block the gate.
Fill
Dry concrete weber.vetonit S 100 is ideal for preparing the mixture. It has high moisture and frost resistance, and is also resistant to vibration, which is an important advantage for a garage floor. The concrete is laid in layers until it reaches a level just above the beacons, and is leveled using the rule.
Freezing
During the entire curing period, the screed is protected from drafts and sudden temperature changes, so it is better to pour the concrete floor in the warm season. For 3-7 days, depending on the outside temperature (the hotter, the longer), the screed is watered with a small amount of water and covered with polyethylene. After a day, you can take out the beacons and seal the resulting seams with the mixture. You can use the garage one month after filling.
The advantage of concrete screed
Long gone are the days when the flooring in a car “house” was constructed using thick wooden boards and thick logs. After they dried, cracks of varying widths appeared in the flooring. Small parts could even fall through them during the next car repair. But it was convenient to sweep away clods of dirt that had fallen off the body and wheels of a stored vehicle. Many car enthusiasts considered installing a concrete surface in a garage to be an unaffordable luxury.
But gradually, cement-sand floor screed in the garage began to become increasingly popular among car enthusiasts. This demand is quite justified. After all, this poured coating is capable of providing all the necessary parameters required for a floor covering in a private garage. For example:
Variety of floor ties in a garage box
Concrete
It is in great demand in cases where it is necessary to install a floor covering in a garage box on an “empty” area, that is, there is no preliminary foundation. An earthen area was used directly for parking the car. Screeding a floor in a garage using a concrete mixture must be done with reinforcement. In this case, the layer is poured with a thickness of at least 15 cm. In addition, filler with large fractions must be added to the solution: expanded clay, crushed stone, gravel.
Cement-sand mixture
A screed made from this composition is in most cases used as a final layer on top of a rough base made of concrete mortar. With its help, you can effectively level the floor surface, for example, previously made using reinforced concrete slabs. This solution is also popularly used when repairing existing concrete pavement. In this case, a filler having small fractions is added to the cement-sand mixture.
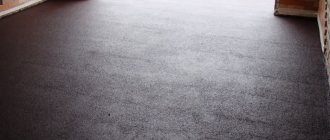
Semi-dry floor screed in the garage
Visually, it resembles a traditional solution of sand and cement. But unlike the usual composition, in this version it contains a minimal amount of water. Instead, special reinforcing additives are added, usually fiber. This mixture can be used not only in its finished state (packaged in bags), but also in its own preparation.
If you want to prepare a floor screed in a semi-dry garage with your own hands, then you need to perform the following operations:
A semi-dry garage floor screed can be considered ready if, when compressed, its portion in the palm becomes dense. In addition, it did not crumble when the fingers were unclenched. Experts recommend covering the prepared or purchased mixture with a layer more than 4 cm thick.
Dry
This type of floor screed in the garage is completely water-free. This mixture is “poured” in a layer of 12 to 4 cm. It must be carefully leveled along the box. And then compact it well.
Floor screed in the garage: structural features
It visually represents a kind of multi-layered “floor pie”:
Source
Option No. 7. Acid resistant tiles
Naturally, we are not talking about the tiles that lie in the bathrooms and decorate the walls in the kitchen - such tiles will not withstand the loads typical of a garage. Special acid-resistant tiles, which are usually used in workshops of industrial enterprises, are suitable. The material is produced on the basis of refractory clay, to which substances are added that provide resistance to negative environmental factors.
Pros:
- high strength and ability to withstand heavy loads. The material can easily withstand the weight of heavy factory machines, so it will certainly withstand garage loads;
- moisture resistance;
- resistance to aggressive substances;
- resistance to temperature changes and frost;
- the tiles do not absorb grease and dirt, therefore they are easy to clean;
- The non-slip surface will make moving around the garage safe in any weather.
Among the minuses, one can note, perhaps, a small assortment of tile shades, but when we are talking about arranging a garage and not an apartment, then this nuance can hardly be considered a serious minus.