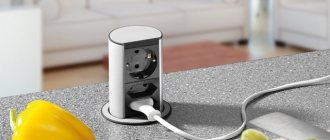
The most common option for installing kitchen units in standard apartments is to arrange the furniture at an angle. Professional installation of corner elements guarantees ergonomics and ease of use of the lower tier of the kitchen. In addition, the corner countertop significantly increases the working area, allowing you to use additional space for installing household appliances and a sink.
Material options:
1. Chipboard. A corner tabletop made of laminated chipboard is a widespread and most economical option offered by most furniture companies.
2. Natural wood. Corner countertops made of solid wood are short-lived. They are “afraid” of moisture and are not resistant to temperature fluctuations.
28 examples of how white kitchens look with wooden countertops
3. Artificial stone (more about this material). The only material used for the installation of corner countertops without joints. Durable products and structures of any size and shape are made from stone.
Wooden countertops are best installed in small kitchens. Corner countertops made of laminated chipboard are the prerogative of standard rooms, while stone countertops are an ideal option for complex and large kitchens.
Next, let's look at everything using the example of a laminated countertop.
Kitchen. How to extend the countertop and fit a compact dishwasher.
When buying an apartment, I received a good kitchen set from the old owners.
The downside is that the kitchen is not large, I wanted to install a dishwasher, but there was no room for it in the unit. But everything turned out somehow on its own!
The old owners inherited a round sink, so a new large two-section sink was purchased from IKEA. It turned out that the new sink is wider than the old round one, but the length is the opposite. If I had taken this into account right away, there would have been no continuation of this story, but I had to think it out and finish it! I tried it on, cut out a new rectangular hole instead of the old round one, and after trying on the sink, a “bald spot” was visible.
After consulting, I decided to make a patch. I placed a sheet of paper to the edge and traced the outline of the opening. I applied my stencil to the scrap of the hole and cut out a “patch”. Afterwards I further refined it with sandpaper and a file so that the joint would be as tight as possible.
I glued transparent tape to the laminate of the tabletop (you could have used masking tape) and cut it along the edge of the cutout so that the glue would not stick to the laminate.
I marked and drilled holes for self-tapping screws to tighten the patch. I made sure that the tap would not come into contact with these screws during installation.
I mixed up household epoxy resin and liberally coated the patch and the cutout itself. I tightened the patch with screws, and tightened it with clamps from below and above through even pads. I also coated the entire perimeter of the cutout under the sink with epoxy to protect it from moisture penetration.
A day later I removed the fasteners
The epoxy resin soaked into the chipboard very well and we had to additionally add epoxy into the gap until it stopped being absorbed. I cut off the protruding remains with a knife.
Unfortunately, the pattern of the patch did not match the tabletop, but this is not very noticeable. The tabletop initially did not have a corner plinth. I also decided not to install it, because... it eats up 2 cm, and screwed aluminum strips to the ends at the back and right of the tabletop. I couldn’t coat them with varnish, no matter how much I degreased them, the varnish still flowed into drops in some areas. I wanted to coat it with a thin layer of epoxy diluted with a solvent, but I didn’t have time to wait 24 hours for curing.
After installing the flat siphon, it turned out that there was quite a lot of space under the sink! And after taking measurements, it turned out that a compact dishwasher fits there!
After acquiring it, two new obstacles arose. 1) The drain in all the drawings of the instructions is connected below the level of the dishwasher, but in mine the hole in the bellows is higher 2) The door hinges reduce the cabinet opening and the dishwasher does not fit
I began to solve these issues sequentially. Having surfed the Internet, I found several similar installations of dishwashers, there were no complaints about the work. I called the manufacturer’s hotline, where they didn’t tell me anything worthwhile, being puzzled by the pictures in the instructions. You cannot simply connect the hose to the sewer, because... Without a siphon (water seal), sewer gases will penetrate through the hose into the dishwasher, which is far from good. The dimensions did not allow installing an additional siphon from below, so I decided to connect it as is, cutting the drain hose to the minimum required length. I made the loop of the drain hose higher at the top so that when the wash siphon overflows, the water does not flow into the dishwasher.
Dishwasher on site
I solved the second problem by replacing and re-hanging the hinges from the door to the cabinet. The doors had hinges of the “overhead” type, which is when the door closes the cabinet opening. I drilled new holes in the cabinet and installed inset hinges. In my version of installing hinges, the front of the door still covers the cabinet opening, but the thickness and seating depth of the hinge is less than the previously installed “overlays”. One of the peculiarities is that now the cabinet door goes behind the cabinet wall, so I had to move the set a couple of centimeters to the left.
A filter for drinking water was installed, for which there was a place in the cabinet on the left. To install it, I cut a hole in the back wall of the cabinet with a grinder; there was a lot of smoke. The filter was attached to the wall. The cabinet drawers do not reach the filter by some 3 millimeters!
In the end, everything turned out functional and compact! I have used the dishwasher more than once since then. There are no leaks, problems in operation or maintenance.
Source
Increasing the depth of the tabletop
There is a tabletop 61 cm deep, but behind the walls there are pipes with an indentation of
5 cm. You can file the frames, but then the oven will be very close to the pipes.
The ideas are as follows. 1) Fix the guide/rack profile horizontally to the wall, lay a block, and cover it with the same one, on top of the drywall on which to lay the tiles. Fill the joint between the countertop and the tiled part with sealant. 2) Similar to step 1, but instead of a profile, make a layered sandwich from several sheets of drywall and also attach it to the wall. 3) Use a wooden beam of the required thickness, securing it to the wall.
Or he can make a protrusion from rotband - just up to 50 mm, plus the thickness of the tile. The main thing is to bring the planes with the tabletop on the same level. Or a ledge-step.
2 GKLV+Perlfix under the comb for tiles+tiles.
Do the upper cabinets seem to rest on this ledge?
Electrical - how is it (socket boxes)?
First the drywall, then the socket boxes.
Or he can make a protrusion from rotband - just up to 50 mm, plus the thickness of the tile.
I think that gypsum board is better (2x12.5 mm + perlfix 2x8 mm).
The main thing is to bring the planes with the tabletop on the same level. Or a ledge-step.
Vadim M Thank you very much!
You can make a niche and secure the tiles with sealant so that you can cut them later if necessary.
But still, the idea of a step sits in my head so that it will already be in line with the countertop when a layer of tiles falls on it. Place the profile under the bottom edge as a support, then take three-layer plasterboard blocks glued on top of each other using perlfix through a small comb, glue them onto it on the wall, and on top of a sheet of plasterboard along the entire length. It will be like formwork for the rotband, which will be used to fill the cavities, and on top there will be another sheet of drywall, and then tiles.
It confuses me that Knauf doesn't say anywhere about more than two layers. Yes, and the plane will be difficult to derive. Or make a step and use a plinth to form the joint.
I look at photos of kitchens with stone countertops - they have a thin side. It can also be done this way, only it won’t be a side, but a 5x5 cm step. And make a false wall from a ceiling profile with two layers of gypsum fiber board (gypsum plasterboard?) followed by waterproofing. Maybe even make this step a little higher than the baseboard.
Here I have an idea like in the picture:
Source
Euro-sawing – flawless connection of tabletops without seams
The guarantee of long service life of a kitchen work surface is the reliable connection of its parts. It is possible to connect the tabletop at a right 90 degree angle or in a straight line, if the kitchen footage allows for placement along one wall. There are three main methods of merging, but you should always adhere to one result - the surface should give the impression of a single whole:
You will have to familiarize yourself with all the methods, not only with the euro saw. After this, you can decide how to connect the countertops to each other and make a choice among these options.
Attention!
A kitchen designer
has started working on our website . You can get acquainted with it and design the kitchen of your dreams completely free of charge! A wardrobe designer can also be useful.
How to join a tabletop without an aluminum strip?
This operation is performed in the same way, except that the ends are glued together with sealant. After pressing the two planes, the excess is removed with a sponge or clean rag. But many people refuse to use this type of countertop connection. The seam between surfaces will not be protected. Connecting a countertop without a strip with sealant is only temporary and unreliable protection. Over time, such sealant will come off due to frequent and constant mechanical stress.
Tabletop connector - euro saw: hidden docking (photo)
A method of processing ends that uses patterns. To create it you need a milling machine. Only with high-quality equipment it turns out flawless.
narrow room for two boys
Sometimes euro-sawing is produced on a cutting machine - this significantly reduces the cost of production, however, with such economical production, the ends are obtained with fluctuations of a millimeter or more. Therefore, when purchasing, you should check this point very carefully, especially if the price of a prefabricated kitchen surface is significantly reduced. A poorly made joint will not connect as it should, leaving gaps.
Correctly executed ends after assembly form a surface on which the gap is not visible at all - it is there, but its width is a fraction of a millimeter. If the coating is dark in color, it will not be easy to find where the euro-cut table top was cut (photo).
Such ideal quality can only be obtained using a router, and the patterns must be new or at least not worn out.
pros
- Aesthetic appearance . The main advantage of the euro saw is what the kitchen looks like after it. It takes on more expensive features, and quality work will immediately catch your eye. Of course, even small gaps will not go unnoticed, so you will need the help of a professional.
- Easy to care for . It will be a pleasure to care for a kitchen surface that is connected to the correct technique. Due to the fact that there will be no gaps at the joints, dirt and grease cannot accumulate between them, which greatly simplifies kitchen maintenance.
- No dampness . When installing the countertop, a sealant is used, which provides protective properties to the joints, preventing moisture and microbes from entering there. This way there is no dampness at all.
- Smooth surface . Achieving this is not at all easy, especially if you perform Euro sawing on your own and without experience. But a high-quality connection at a professional level will make the kitchen surface smooth.
- No edges . With a high-quality euro-sawing, the edges will not be visible, especially if the work was done on a dark-colored kitchen surface.
Disadvantages of Eurosaw connection
The positive side of the euro saw is its smooth surface, on which the joint is not visible.
There are also disadvantages, they are few, but they are quite noticeable. Eurozapil is a lock that requires a clearly defined arrangement of parts of the tabletop; they cannot be moved. Placing a headset with a top panel requires an absolutely flat wall and correct angles. If the walls are uneven, then the countertop will not adhere to it, and there will be a gap between it and the wall. It cannot be closed by changing its position. You will have to cover it with a table plinth. If the curvature is significant, then the gap will still remain. You'll have to level the wall.
If you plan to install a set with the letter “P”, then the curvature of the walls will disrupt the arrangement - there will be gaps along all the walls.
In this case, small irregularities will have to be covered in this way: the installation is carried out as close to the wall as possible, and the surface should be worked on separately. The gaps in it will have to be sealed with special planks, and the sides adjacent to the wall will have to be filed down. Therefore, in addition to the question of how to connect a tabletop without a joint, you can immediately figure out how to quickly make the walls straight and even.
For a kitchen with uneven walls and corners that are far from correct, it is better to make a connection using a different type of connection.
What is Eurobutt
Euro-sawing is one of the methods of hidden joining with the preliminary creation of a pattern. The work uses a milling machine. The manufacturer, in an effort to save money, performs the work on a cutting table.
The price is getting lower, but the quality still needs to improve. The difference in the height and radius of the ends reaches a millimeter or more.
It is almost impossible to disguise such a seam. If a manufacturer or seller unjustifiably reduces the price of a countertop, you should take a closer look at it.
It is possible that for the next 5-10 years you will have to admire not the smooth surface, but the jagged and uneven joints visible from afar.
If the ends are processed properly, a drawing is drawn up in advance, a pattern is developed, the surface will be almost uniform and smooth. The width of the gap will not exceed tenths of a millimeter. It will be difficult to find it on a dark or bright stove no matter how hard you try. The main condition is the use of a milling machine, not a cutting machine, and new patterns.
Disadvantages of Euro saw
Everything is clear about the advantages of the Euro junction. The owner receives a perfectly smooth surface without nicks, cracks, or discrepancies. But do not forget about the disadvantages:
- The tabletop is given a certain shape. You won't be able to change its configuration depending on your mood. It will not be possible to rearrange the set along another partition. Even laying a new apron won't help. The exception is absolutely identical walls;
- partitions and apron should be smooth, corners should be correct. Otherwise, the slab will not adhere closely to them. It will not be possible to eliminate the gap by moving the furniture. A small discrepancy is masked by the cornice, a large discrepancy will be visible.
Attention is paid to the alignment of the walls if the set has the shape of the letter “P”. A lot of time and money are spent on eliminating gaps.
If the walls have significant unevenness and it is not possible to obtain smooth surfaces, choose other types of joining parts that are not so demanding on the environment, for example, using an aluminum profile and silicone sealant.
The advantage of this joining method is water resistance. This is important when installing a sink.
And after 10 years the surfaces will not swell and will retain their original appearance. Eurozapil is not the best option for rooms with high humidity.
Expert opinion
Mikhailova Maria Vasilievna
Furniture store manager. Knows everything about comfort and interior design
Plastic or acrylic are not afraid of water, but chipboard or MDF will swell very soon. This can be avoided by treating the ends and cuts with plumbing sealant before assembly.
Trapezoid - the best way to design a corner
Important : making a trapezoid yourself without sufficient experience is almost impossible, and factory modifications are expensive. But this is practically the only acceptable way to design and develop a working angle.
Doing Euro-sawing at home with your own hands, as experts say, is possible, but only if you have the necessary tools and the appropriate skills. Installing an aluminum profile is a simpler option.
No professional skills are required for installation. The main thing is not to rush, look at different methods of joining.
Before cutting an expensive slab, make a model from cheap material.
If you don’t want to have protruding elements on the work surface, you’ll have to work on a Euro joint or cut. On one of the parts to be joined, the end is processed, on the other, the longitudinal edge is processed. The main problem is that the seam is not even, there is a corner with a smooth rounding. For a strong connection, the sections are covered with a layer of sealant, preferably colorless.
Important : if you are planning a tabletop with curves, it is better to initially purchase parts with a ready-made cut. Refinement is always more difficult; you will have to spend time looking for a good specialist who can work according to patterns and templates.
What is the best way to connect two countertops at a right angle of 90 degrees?
L-shaped arrangement of furniture in the kitchen is a common option for most apartments, especially in older houses. To arrange the set, connecting the tabletops at an angle of 90 degrees with a small room area is the only option that allows you to fit everything you need. This leaves room for a dining table if the rooms are not combined.
The best solution to the problem is to level the wall before installing the furniture and achieve right angles and a flat wall surface.
A connection using an aluminum profile may be more practical than a Euro saw. During installation, the aluminum profile is treated with silicone sealant, which makes the connection airtight. The connection becomes impervious to water, so its location near the sink will not affect its service life and appearance.
In this case, the euro saw may begin to swell from water entering the gap. If the coating is plastic, then water will not spoil it, but more often chipboard or chipboard is used for kitchen countertops. When moisture gets on it, especially with regular exposure, it begins to increase in size. To prevent this, before installation, you need to carefully cover the ends with a waterproof sealant; a colorless plumber's sealant will do. Everything needs to be processed, all cuts.
A convenient option for placing parts of a prefabricated panel is a double connection with a trapezoidal part - it is placed in the corner, at an angle of 135 0 relative to the other two. The design with a corner element has 2 joints, which can also be connected with a euro saw or closed with profiles. Making a trapezoid yourself is very difficult; factory-made options are quite expensive. But this is one way of connecting - with an insert, which will create a more comfortable working surface and work out the corner better.
In principle, you can make a euro-sawing tabletop with your own hands - by purchasing a solid slab, but for this you need to have a special tool and solid skills in working with it. In this sense, self-assembly of the surface for the plank seems more accessible - normal connections can be made by a person who does not even have professional skills, if he puts in the effort and figures out how to connect two tabletops together.
Eurojoint (photo) looks more neat and forms a surface without protruding parts. The end of one part is processed, and the longitudinal edge of the other. The difficulty is that the cut goes straight along almost the entire length, and then smoothly turns to an angle.
All cuts are treated with sealant on two parts. On plain surfaces, especially dark ones, the connection between the tabletops will be almost invisible, but if there is a textured pattern, then you can determine the place of the joint.
If you do not buy parts with ready-made cuts for joining, then you can order modifications to the joint at the place where you purchased the slab or find a production facility with the appropriate equipment.
Euro-sawing: how to join kitchen countertops “without seams”
If you have a small set of tools and have the skills to work with polymer resins, you can make a corner table or a rounded tabletop yourself. Main stages of work:
Installation of cabinets
First, the floor cabinets are installed, they are placed along one line and leveled to a single level. The basis will be a chipboard sheet with a minimum thickness of 15 mm.
Installation of formwork
The base is fixed on the surface of the modules, and formwork is installed around its perimeter. For its manufacture, polystyrene sheets or plywood are used. Where holes for a sink or slab will be cut, restrictive edges are installed inside the formwork itself. The shape and size of the internal formwork follows the configuration of future installation holes.
To give the product rigidity, reinforcement is placed on the base. Welded steel mesh or rods connected with knitting wire can be used as a reinforcing material. The mesh is laid in such a way that after filling with the solution it is exactly in the middle of the slab at a horizontal level.
Pouring formwork
After all preparation is completed, you can begin preparing the solution. To do this, mix cement and sand in a certain proportion, add granite chips and coloring pigments. To obtain a panel with the desired properties, modifying additives and plasticizers are introduced into the solution. The mixture is mixed well, poured into the formwork in one go, leveled, and left until completely dry and strengthened.
Finishing
When the material hardens, the formwork is removed. The ends are ground, polished, and coated with a compound that fills the pores. After processing, the surface takes on the appearance of natural polished stone. Plates made of composite materials are very durable, they do not absorb water, and are not afraid of temperature changes or hot steam. They are easy to care for - to remove dirt from the surface, just wipe with a damp sponge. If the table is heavily soiled, you can wash it using any household cleaners and detergents.
Making a tabletop with a corner connection from MDF
For high-quality joining of two slabs, strips, ties, and euro-sawing technology are used.
Docking using a strip
The plank is attached with self-tapping screws to the ends of both elements. Such connections require the mandatory use of sealant; it protects the connections from moisture. For light-colored slabs, it is better to use colorless silicone sealants. Decorative connecting plates hide uneven joints well, so they are often used for installing corner kitchen countertops. The slats are made of aluminum, which greatly simplifies the work.
Among the disadvantages of this method, it should be noted that there is a small selection of profile colors, as well as the fact that the connecting part protrudes above the main surface.
Connection with ties
A screed is a furniture fitting that allows the elements to fit tightly together. Before embedding the ties, places for their fastening are marked on the inner surface of both parts. Despite the rigidity of the fastenings, they need reliable support. This must be taken into account when arranging the lower modules. Do not load the joint with household appliances or embed a sink and hob very close to the connection. With heavy load or pressure, the risk of connection rupture increases.
Eurozapil
You can make a reliable connection between two corner elements of the table top using a Euro saw. This is the name for hidden joining, since if done correctly, the parts are connected without visible seams or joints. To install a corner tabletop you will need a milling machine and patterns.
When using a euro saw, the parts must be located strictly on the same level. Otherwise, the joints will be visible, especially for light-colored tables or patterned slabs. To protect the seams from moisture, they are coated with silicone before joining.
This method requires good skills in working with the machine because you can easily ruin the MDF. To minimize the likelihood of damage to the material, you should take parts that are slightly longer than necessary. If the Eurosawing is successful, the far edges of both plates are cut to the specified size.
Assembly: eurojoint kitchen countertop
The assembly of the tabletop parts is carried out using ties-clamps, as is the assembly under the plank.
However, in the case of connection with a euro saw, you will have to carefully control the relative position of the parts being connected until the nuts are completely tightened - they must be strictly at the same level. It is better to connect the table top with ties after first fixing both parts. If there is a displacement of the planes, this can be corrected using self-tapping screws - simply by pulling the protruding part to the desired level.
Plates with this type of connection are difficult and time-consuming to install, but there is an advantage - you can order a design of almost any configuration, in which the joining of the tabletop at an angle is not limited to anything: a complex shape, with smooth turns.
Connection with T-profile
This connection is made without a Euro joint. Here the connection is closed with a profile strip (top). But such a design is subject to special requirements for tightness. Therefore, the ends and the stand of the plank are treated with sealant.
Why is aluminum profile relevant? This type of connection has an important advantage over the euro saw. Typically, the parts of the countertop are joined in the area of the sink, which is located in the corner (since communications are installed there). Eurozapil does not have protection against moisture. Therefore, at the joint the material may swell under the influence of moisture. Since the aluminum profile is treated with a sealant, water does not enter the material. But in case of dismantling, it is not so easy to disconnect such a connection. It can only be torn apart.
How to dock and do it yourself (video)?
If you purchased a solid canvas with the expectation of completing it yourself, then before purchasing it would be a good idea to assess the amount and complexity of the upcoming work. At the same time, you need to understand that a general idea of how to connect a countertop does not mean that it is a simple process. To really assess whether you can solve the problem yourself, you need to find and watch a couple of videos that tell you how to make a Euro-cut tabletop with your own hands.
Despite the difficulty of doing it by non-professionals, you can do it yourself if you think about each stage of the work. There are a lot of tips online on how to join a kitchen countertop without a plank.
And one more thing - you should remember that this is not a solid canvas, so there must be a strong support under the tabletop. If you press on the joint, the parts should not change their position in any way. If possible, it is recommended to secure the seam with the euro saw with a chipboard tire on the bottom side.
How to seal the gap between the stove and the countertop
No kitchen set can do without a countertop. Countertops can be made from a variety of materials, and prices can vary widely. The most popular countertops are made of chipboard. They have high performance characteristics and moderate cost.
A chipboard tabletop is a chipboard slab lined with plastic.
When making countertops, moisture-resistant chipboard is often used. Visually, it differs from the usual one by a greenish tint. Fig.1.
The tabletop, made using postforming technology, consists of a chipboard slab impregnated with a special moisture-proof compound. Wear-resistant, heat-resistant plastic is glued on top of the chipboard board. The lower part of the tabletop is a paper-based rough covering.
The plastic used for cladding countertops is temperature-resistant and wear-resistant, which ensures high performance characteristics of the countertops. The plastic is glued to the chipboard using hot-melt adhesive.
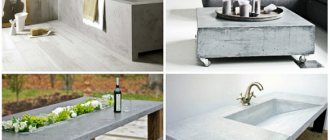
No. 5. Natural stone countertop: luxury and durability
Natural stone is an excellent material for a kitchen countertop. Its undoubted advantages include:
- an appearance that amazes with its luxury, beauty and unique texture;
- moisture resistance;
- resistance to high temperatures.
Countertops made of natural stone are very expensive, heavy, and some are also quite difficult to maintain . However, it is worth considering the characteristics of such countertops separately for each type of stone:
- granite and basalt are most often used to make kitchen countertops. Slabs 2-3 cm thick are used, which are processed by polishing, giving the required shape, cutting holes for the sink, etc., but all these operations make the finished product even more expensive. Granite is a fairly dense material that is less hygroscopic than other rocks, and its pattern is unique;
- marble has the highest decorative qualities and will decorate any kitchen. This stone is not at all afraid of moisture, but it cannot boast of high mechanical strength, and lemon, coffee or wine can leave noticeable stains on it.
Types of chipboard countertops
Chipboard countertops can have different sizes. Ready-made countertops, which can be purchased in the store, have dimensions of 600x3000 mm. Standard tabletop thickness is 28, 32, 38 mm.
A chipboard tabletop can be made to order, in which case the dimensions can be arbitrary. It is advisable to do this in the case when the kitchen set has non-standard elements, for example, a corner sink.
The appearance of a chipboard countertop is determined by the color and texture of the plastic. There are a huge number of plastics. Therefore, the tabletop can be made to look like stone, wood, mosaic, wood, single-color, glossy, matte, etc.
plastering work on the facade of the house
Fig. 2. Fig.3. Fig.4. Fig.5.
Chipboard countertops can have a different front edge shape.
The edge can be round or straight. A straight edge is made if the color of the edge differs from the color of the tabletop itself. A straight edge is also made to facilitate joining tabletops at an angle. Fig.6. Fig.7. Fig.8. Fig.9.
Special strips are used to join finished countertops.
They can be plastic or aluminum. These strips are only suitable for factory-made countertops. Fig. 10.
Metal strips are available for all possible occasions. To protect the ends of the tabletop - an end strip, a connecting strip for joining tabletops at an angle of 90 degrees, a T-shaped strip for splicing tabletops or joining at an angle of 180 degrees.
An important element of the countertop is the drip tray.
It protects the kitchen set from moisture. The drip tray is a strip of plastic 3–5 cm wide. Fig. 11.
When choosing or ordering a tabletop, it is necessary to provide a drip tray. This is a strip of plastic from the bottom of the tabletop, sometimes with a bend, 3-5 cm wide. The drip tray will protect not only the tabletops, but also the facade from excess moisture, for example, when washing dishes.
To seal the joint between the table top and the wall, the table tops are equipped with special skirting boards.
This allows, on the one hand, to beautifully decorate the tabletop, and on the other hand, to hide the gap between the wall and the tabletop. Skirting boards come in various shapes and designs. Fig. 12. Fig. 13. Fig. 14. Fig. 15.
At the same time as the countertop, an apron can be made, which will give the kitchen set completeness.
The apron can be made in the color of the tabletop or create a contrast. Fig. 16. Fig. 17. Fig. 18. Fig. 19.
Corner countertop for the kitchen in a modern interior
A corner kitchen is becoming an increasingly common way to organize the interior space of an apartment. It is not always possible to place kitchen furniture and household appliances along one wall, and the L-shaped layout allows for rational use of space in both standard apartments and studio apartments. In this case, when installing a kitchen unit, you will need a corner kitchen countertop.
Corner kitchen styles
- Classic design requires clear contours of furniture and the mandatory presence of space for built-in appliances. Expensive materials are used to create a classic interior.
- Country style is appropriate in a country house. The interior may have a rustic and deliberately rough appearance. The peculiarity of the country style is naturalness, so the materials used in its creation are wood and textiles with discreet prints.
- Furniture designs in high-tech style are made of metal and glass, which makes the kitchen simple, but light and spacious.
- Art Nouveau style does not have the luxury of classics and the asceticism of high-tech. Art Nouveau style sets are simple but beautiful. The furniture in the setting can be almost anything, even the cheapest, the main requirement for it is convenience.
When choosing corner countertops for the kitchen, you need to take into account the features of its style. Today the market offers materials for every taste and budget.
Surfaces made of chipboard or MDF are the cheapest and at the same time different in texture and color. A popular material is stainless steel. Surfaces made of transparent or colored glass look original. The most expensive materials are natural wood or natural stone, and they also require careful handling. Therefore, artificial stone countertops may be preferable.
Technology for connecting tabletop parts
Connecting a countertop at right angles is not an easy operation, so the qualities of a craftsman such as experience and skill in working with tools are valued.
Preparatory stage
To join two parts of the tabletop at an angle of 90°, you will need the following set of tools:
Materials you will need:
First you need to mark the installation locations of the fasteners. The locations are chosen so that the fasteners do not subsequently interfere with the installation of built-in appliances or sinks in the kitchen set. At the same time, you need to understand that a combined tabletop is inferior in strength to a solid one. Therefore, even at the stage of designing a kitchen set, it is necessary to take into account the installation of additional side walls on which the edges of the worktop parts will rest. That is, the joint should not hang. And although the connection is made with clamps that can withstand tensile loads, they will be weak when deflected. Therefore, a pan of water placed on a hanging joint will easily press through the edges.
Dimensional installation positions for clamps depend on the parameters of the fastener. They are available in different diameters and lengths and are used depending on the thickness of the material from which the countertop is made. The most common and convenient to use are ties with a length of 100 millimeters and a diameter of 6 millimeters. We will consider joining parts of the table top with such a product.
First of all, on the back side of the surface of the products, markings are made for the C-shaped washers of the clamps and grooves for the ties. The distance from the edges of the tabletop parts to the washers should be 55 millimeters. The same markings are made identically on all connected planes. It should be noted that this distance also takes into account the use of a T-shaped profile, the thickness of which is 1.5 millimeters.
If a sink or built-in appliances will be installed in the connecting area, then the distance from the edge that will be adjacent to the wall and the outer edge of the countertop should be within 70-150 millimeters. We take into account that the standard tabletop width is 600 millimeters. If it is not possible to install two ties, then install one, but closer to the middle.
If a T-shaped strip is used to join two parts, then holes will need to be drilled in it to precisely determine the location of the clamps. That is, the aluminum profile must be clamped with ties that pass through its vertical strip. Therefore, the profile is applied to the installation site, and marks are made on its vertical plane through the grooves made. The holes are made with a drill with a diameter of 8 millimeters.
Instead of drilling the metal, you can make slits in it. To do this, two vertical slits are made at the location of the hole with a hacksaw, and the cut part of the profile is torn off from the main one using pliers. The folded edge is smoothed with a hammer. The result is an opening located exactly at the location where the clamps are installed. The T-shaped profile must be attached to the end of one of the parts of the tabletop, so holes for self-tapping screws must be made in two or three places. Keep in mind that the heads of the fasteners should not interfere with the joining, so you need to make sure that the latter fit flush into the profile. Before this, you need to trim the profile. Since the width of the tabletop is 600 millimeters, the length is cut with a hacksaw to this size.
Preparing seats for clamps
Connecting parts
The seats for the tightening products are ready. Now you need to install the T-shaped profile. It is applied to one of the parts (to the end) and screwed to the latter with self-tapping screws, recessing the caps into the body of the metal. In this case, you must first lubricate the end and part of the surface of the tabletop, which will be covered by the vertical wing of the profile, with silicone sealant. After attaching the strip, other surfaces are also coated with a sealing compound. Craftsmen recommend treating grooves and blind holes with sealant. The more of this material, the lower the likelihood of moisture penetrating inside.
In the same way, tabletops can be joined without an aluminum strip. Everything is done in the same way, but taking into account the fact that the ends will have to be glued together with silicone sealant, the excess of which, after pressing the two planes, must be removed with a clean cloth or sponge. But the disadvantage of such a connection is obvious - the seam between the two surfaces is not protected by anything. Sealant is a temporary protection that loses its qualities over the years.
How to get EUROZAPIL countertops
The manufacturer of cabinet and upholstered furniture “MebelArt” invites you to familiarize yourself with the EUROSAPILA method. You can see samples of our work here.
Eurosawing is the joining of surfaces at right angles. The first tabletop is sawed deep, the second - from the end.
An unusual treatment for assembling an L- or U-shaped kitchen, when the surfaces are tightly connected without the use of aluminum strips. The gap in this case is tenths of 1 mm.
On the back side of the tabletop, recesses are made for the screeds. Where there is a cut, it is coated with glue or sealant of a similar shade to the front color.
All that remains is to tighten the tabletops. (Catalog of kitchen countertops)
Docking is not an easy process. To do it smoothly, you need tools. We have German equipment FESTOOL APS 900. If you order the docking separately, you will have to pay about 1500 UAH for it. And if you order a kitchen wall from us, then this technological operation will cost much less.
The headset is included in the total price and costs the client much less. (see Tools for kitchen assembly)
The Euro sawing technique is as follows. We do, as mentioned above, trim the tabletops, observing the exact value of the angle. In our work we use a Festool TS 55 EBQ saw. Jigsaw lovers should be warned that their tool will create a wavy edge. The sawn-off side of the tabletop will become a limiting stop for the rods (“fingers”) of the APS 900 template.
They can be seen in the figure. Using clamping clamps, it is possible to reliably press the template to the workpiece due to the existing groove. Shown here is only the area for obtaining a corner connection between the panels of the kitchen unit; the device makes it possible to make round and rectangular cutouts. In this case, very little time is spent on rearrangements.
Expert opinion
Mikhailova Maria Vasilievna
Furniture store manager. Knows everything about comfort and interior design
In the process we use a router, a groove cutter with a shank (12 mm), a copy ring (30 mm), D14 mm. These dimensions correspond to the guide groove parameters in the APS 900 template.
Photo of the router, where you can see the cutter and copy ring.
Ring in guide groove.
We make the 1st small pass, the template is in a stationary position. The excess is removed with a jigsaw or you can work right through with a cutter.
Pay attention to the corner: smooth edges, no chips.
When starting to work with the second tabletop, we do everything in the same way, only we first lay the panel with the back side up. We stick to the basics: the cutter should touch the surface of the finishing coating .
Internal groove for corner joint
Let's deal with the mounting recesses for the ties. We use countertop ties QUICK 35, Italliana Ferramenta. The work will take a few seconds if you use a 6-point wrench and use a screwdriver with a hex head. A decorative plug is installed in the hole.
The groove turned out very smooth and beautiful.
Let's see how the countertops will connect to each other. It turned out great! The ends matched as if they were “native”. Gluing and screeding will be done when the kit is assembled. The result is a beautifully assembled connection without connecting metal strips.
Features of manufacturing countertops from chipboard
Today, there are several types of chipboard countertops. But postforming is the most popular. This article and the features of these countertops will be discussed.
Postforming is actually laminated chipboard, with the only exception that plastic is glued as a decorative surface, which resists mechanical and thermal influences well.
The basis of this type of countertops is chipboard, treated with a special compound, which gives it moisture-resistant qualities. Fig.20.
The variety of colors and textures of plastic for countertops is enormous. Almost every manufacturer has more than 100 options. So choosing the right color will not be difficult.
The advantage of countertops made by postforming is the huge variety of sizes. Also, countertops of this type can be produced in various shapes.
The disadvantage of chipboard countertops, despite the anti-moisture treatment, is the fear of water.
Therefore, it is necessary to pay great attention to the joints of the countertops and the places where the plastic coating breaks, in order to protect them from moisture. Fig.21.
Despite the moisture resistance of the board and the high resistance of plastic, the weak point of countertops made of laminated chipboard is the end and the joints of the countertops. It is also necessary to glue plastic in these places. It will protect the countertop slab from moisture.
There are two types of tabletops.
Custom made and factory produced. Factory-made countertops are available in thicknesses of 28, 32, 38 mm. They have a rectangular shape with a size of 3000x600 mm. The most commonly used countertops are 38 mm thick. In addition, for factory-made countertops there are additional fittings for processing the edges and joints of the countertops. Fig.22.
The great advantage of making custom-made tabletops is not only the huge variety of colors, but also the ability to choose the edge of the tabletop. So, by choosing a tabletop without a chamfer, the work surface can be made one color and the edge another. It looks very impressive.
Making countertops to order has one very significant advantage: the ability to make a countertop of a non-standard size. This is relevant when making corner kitchens and installing corner sinks. At the same time, this approach has a big drawback. This is the absence of standard fittings, as is the case with factory countertops.
Connection using a euro saw - the joint is almost invisible
Euro-sawing is a method of pattern processing of the ends of joined parts. A high-quality milling machine is used to make patterns.
There are cases when eurosawing is carried out on a cutting machine. This option is more budget-friendly, but the gaps between the ends are formed by a thickness of a millimeter or more. For this reason, when purchasing, you need to pay attention to the machine for making countertops.
Correctly manufactured ends after installation form a canvas on which the gap is not visualized at all - its width does not exceed a fraction of a millimeter. On dark countertops the joint is especially invisible.
Parts for countertops of the highest specifications are made exclusively on a milling machine, taking into account that the patterns must be relatively new.
Marking and milling of drywall
First, we measure the dimensions of the future countertop by laying out the tiles on some plane. Don't forget to take into account the seams between the tiles. We reconfigure the router to work with 15 mm thick drywall.
insulation of the external wall of a brick house
We make a test pass and, making sure that everything is in order, we begin making the tabletop.
We make three passes on each side in order to simulate the thickness of the countertop, and the thickness of this countertop will be a multiple of three small mosaic tiles.
Our vacuum cleaner does not cope well when milling such thick drywall, so we had to work in respirators. We remove the corner elements and cut out the embed so that later we have something to attach the legs to.
We make the embedment from 20 mm plywood, although 12 mm would be perfect, I just happened to have 20 mm on hand at that time. Next, we cut the corners at 45° with a hacksaw, bend them and get a rigid and perfectly even blank for our future tabletop:
Polyurethane foam is excellent for gluing such parts.
Tabletop connection
Particular attention should be paid to connecting the countertops and protecting them from moisture.
This problem is quite common. The only exception is when one continuous countertop is installed throughout the entire kitchen. This happens when the kitchen set is located along one straight line, while the stove is built-in and not traditional. In all other cases, the problem of processing the ends and joints of tabletops remains. Fig.23.
If the kitchen set is located along one wall, then it is advisable to purchase a solid countertop, so there will be no joints. Standard countertops are 3050 mm long, which is sufficient in most cases. You can make a tabletop to order, which will increase the choice of colors.
There are various options for connecting tabletops, the simplest of which is joint-to-joint.
This can be done with your own hands without using a special tool. There are special strips for standard countertops. Fig.24.
The planks are available in two types: polished and matte. Matte ones are convenient because scratches and abrasions are not visible on them, but if they are severely damaged they cannot be restored. On polished planks, scratches are more visible, but they can be polished, thereby giving the plank a new look.
You should not avoid using planks, although in some cases this spoils the appearance of the countertop.
By using planks, even if not standard ones, you will extend the life of the countertop many times over. Fig.25.
An important accessory for the tabletop is the wall corner. It protects the countertop, apron and kitchen furniture from moisture. It is fixed directly to the tabletop with self-tapping screws. For decoration, a strip (30-35 mm wide) of the same plastic with which the tabletop is lined is inserted into it.
Countertops without joints: practicality and functionality
Due to their high performance properties and numerous advantages, the popularity of artificial stone products is constantly growing. Reliability, beautiful appearance, impressive decorative capabilities and variety of textures make the material suitable for any modern interior. In addition to the main operational properties, artificial stone has another undeniable advantage - the ability to manufacture solid parts of any shape, without seams or joints. Countertops without joints look beautiful and are functional to use.
Seamless production technology allows us to produce tabletops without seams of all shapes and sizes. They are not afraid of moisture, they are easy to clean, dirt does not accumulate on them, and germs do not multiply. Solid countertops look luxurious in any interior, be it a kitchen or a bathroom.
The process of creating seamless artificial stone countertops
Artificial stone slabs come in different sizes, so you can make kitchen countertops without seams without much difficulty. Seamless technology is especially often used when creating corner furniture for the kitchen. Depending on the chosen material - acrylic or quartz agglomerate - a certain technology is used.
1. Making a kitchen countertop without joints from acrylic stone.
One of the visible advantages of acrylic stone is the ability to create an almost invisible seam. The process of gluing an acrylic tabletop is quite simple:
- preparation of end surfaces (processing, grinding);
- installation of special ties at the ends;
- applying two-component glue and fixing parts of the tabletop until the glue dries completely;
- grinding and polishing the surface.
If all work is carried out at a high professional level with precise adherence to technology, the seam on the countertop is almost impossible to see with the naked eye.
2. Manufacturing of countertops from quartz agglomerate.
The process of preparing and gluing kitchen countertops without joints made of quartz stone is more labor-intensive and requires the use of specialized equipment. The entire surface preparation process is carried out at the factory:
- Machining the ends of parts;
- preparation of seats for screeds is carried out using high-precision equipment;
- application of polyester glue and installation are carried out directly at the installation site of the tabletop;
- Screed the surfaces to be glued as tightly as possible until the glue completely hardens.
The resulting seams can only be seen by carefully examining the surface.
The use of seamless countertops in the bathroom
Due to their high performance properties, durability and resistance to external influences, countertops made of artificial stone are used in the most difficult operating conditions. One of the most common options are seamless bathroom countertops. They are not afraid of water, are not susceptible to mold, and are resistant to chemical cleaning agents. Countertops made of artificial stone are not susceptible to changes in temperature and humidity. The absence of seams makes them practical and functional, and their impeccable appearance allows them to be used to solve any design problems in various interiors. Bathroom countertops that imitate various surfaces are almost as common as models for kitchens.
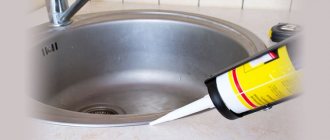
Protecting the countertop from moisture
The first thing you should pay attention to is the processing of the ends.
When making custom tabletops, be sure to order plastic stickers on all ends, including the joints of the tabletops. Fig.26.
If the tabletop is composite, then it is necessary to provide for processing of the ends. The ends of the table top are well protected by a plastic sticker similar to the plastic on the work surface of the table top.
In addition, it is necessary to provide a drip tray; this is a strip of plastic 4-5 cm wide glued to the bottom of the tabletop. This element will prevent moisture from entering the chipboard and causing it to swell.
If the tabletop is standard, then naturally you won’t be able to glue the plastic edge on yourself, so you need to use special strips.
However, the planks themselves will only partially protect the untreated end; additional treatment with a sealant is required. Fig.27.
In addition to the plastic edge sticker, you can protect the end of the tabletop using a special metal pad. However, overlays only exist for industrial countertops. If the tabletop is made to order, then often the shape of the plank and the profile of the tabletop do not match.
The sealant is applied to the strip and screwed to the countertop. You should not immediately remove the protruding sealant, it will simply smear and erasing it in the future will be very problematic. You should wait until it hardens and carefully cut off the excess with a stationery knife.
Laminated chipboard countertops, due to their practicality, variety of colors and low cost, have become extremely widespread. Most kitchen sets are equipped with countertops of this particular type. The choice of countertop is primarily related to the design of the kitchen unit. If you have a limited budget and the kitchen unit will be located along one wall, then it is advisable to consider a standard countertop option. Otherwise, it is worth considering the option of having a custom countertop. However, regardless of how the countertop is made, it is important to protect weak areas with edging or caps. This way your countertop will last a long time and will delight you every day.
Eurozapil: features
This is a method of processing the end parts of a tabletop according to a pattern. The ends are cut on a milling machine. But some companies, in order to reduce production costs, use a cutting machine for this. However, the end result is uneven planes of the ends (with an allowance of more than a millimeter). Parts of the table top do not fit smoothly. Typically, small companies resort to this technology. Well-known manufacturers have specialized machines on which you can obtain high-quality end cuts.
The ends processed on a milling machine also have a gap, but it is insignificant. It is not visible to the naked eye, and visually such a surface appears solid. To achieve this result, the patterns must not be worn out, and the machine must be level. By the way, on dark countertops, a connection at an angle of 90 degrees is almost invisible. The surface seems absolutely solid.
But this type of connection has a couple of disadvantages. Since the euro saw is a locking connection, it is impossible to rotate the plane relative to each other. Otherwise, the integrity of the structure will be interrupted. If the corner in the kitchen is uneven, when installing the set in the corner of the room there will be a gap (between the countertop and the wall). And if you move the plane to close the gap, a new gap will appear between the parts of the tabletop. A more rational option is to use skirting boards.
When ordering a U-shaped set, it will not be possible to solve the problem with cracks using a plinth, so it is better to install it exactly along the walls. And the gaps between the parts of the tabletop can be closed with a T-shaped strip.
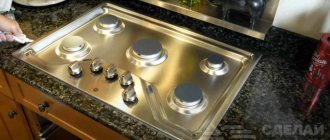
Stove in countertop
Manufacturers of stoves attach special limiters to them, because of which it is impossible to place the stove close to the lower modules of the kitchen. This creates a gap between the stove and the countertop
© DepositPhotos
He's not that useless. After all, when there is a gap, nearby furniture does not overheat, and this is a plus. But that doesn't make cleaning any easier.
© DepositPhotos
Anything can get into the gap, this huge gap, during the cooking process: grains, drops of fat, dust, dirt. We have to fight this.
© DepositPhotos