Home / Types of ceilings / Wooden / Shingled ceiling - how to repair?
Long before the advent of modern materials, the method of plastering over shingles was widely used for finishing ceilings. Such coatings are encountered by those who have apartments in so-called “Stalin buildings” or who live in their own old houses. Until a certain time, the shingles hold up the plaster perfectly, but over time everything becomes unusable and the ceiling is no longer pleasing with its appearance, which means repairs are necessary.
Siding shingles: photos and descriptions - advantages and disadvantages of the material + Video from the masters
Shingled siding: photo, description, advantages and disadvantages. If you are not delighted with the appearance of the siding, but understand that for northwestern Russia this will be the best finishing option, you should pay attention to shingle siding. These are panels for facade decoration that imitate the cladding of a house with wooden shingles. The prototype for the manufacture of such a material is a real wood material, which was used to cladding houses in Canada and the USA to protect them from the weather and create a beautiful appearance. In addition to the fact that shingle siding is very different in appearance from other varieties, it has many other differences that are less obvious. We will talk about this in the article.
Armstrong ceilings description
Armstrong ceilings are considered simple, given their design and construction. Their design is really simple, it consists of lightweight metal profiles and panels made of mineral fiber. However, simplicity of design today is often a common stereotype when it comes to the Armstrong ceiling system. Modern suspended ceilings are characterized by a wide variety of colors, materials and shapes.
Advantages
This method of finishing ceilings hides surface unevenness and makes it possible to lay communications under the ceiling. This could be electrical wiring, fire alarms, fire extinguishing, ventilation or climate control systems.
— Easy to install.
— Easy access to hidden wiring and pipes.
— A wide variety of materials, color spectrum of cassettes, textures.
— Good sound insulation properties.
— The materials from which the system is made do not harm the environment.
— Good resistance to moisture and safety in case of fire.
- Acceptable price.
Flaws
There are not many disadvantages to this type of ceiling. These include a slight (8-10 cm) reduction in ceiling height and instability to large amounts of moisture. If the roof starts to leak or the neighbors flood, the cassettes will begin to deform.
If exposed to a very large amount of water, they may even fall. However, installing new cassettes is not difficult and will take little time. Another drawback is that the cassettes are easily damaged mechanically.
Armstrong slabs are not suitable for lovers of complex curved surfaces. Although modern systems provide curved cassettes, they are intended for halls with high ceilings and large areas.
General information
Difference between wood chips and shingles
The “chip” variety is more textured and rough, while shingles are considered a well-processed material. For this reason, the appearance of shingle and chip siding panels, despite many similarities, is different. In shingles, each “scale” is usually either the same or similar in size, while in chips it is specially made in relief and different to imitate untreated wood.
Manufacturers of shingles
T-siding, TZK Tekhosnastka LLC
Despite the fact that you can buy shingled siding in Russia, no one complained that the material was from a domestic manufacturer. There are no complaints about the quality, and this is pleasing, especially since the plant has been operating since 2009. The T-siding collection with imitation wood chips is called “Chip Oak”, and as the name implies, it imitates oak chips.
A house that is covered with such material will be 100% different from neighboring houses with a unique appearance. And one more interesting property: you can install “Chip Oak” panels on the roof as a roofing material. In this case, you will get an interesting house that is different from the rest. Naturally, when finishing a roof with this type of siding, you should very well prepare the base on which it will be installed, and the installation method will differ from the standard installation of a siding panel on the walls. T-siding is precisely the material that has been tested by time, so that you can safely recommend it to customers when covering a house.
Nailite facade panels (USA)
This type of panel was the very first to appear in Russia. Most often they were installed on the base during the process of covering the house with siding. They are quite expensive, and not every person can afford such finishing of the basement, not to mention the entire house. Now, due to the fact that the dollar exchange rate has become higher, the panels have become even less affordable, but it is still possible to buy them and even save a little (but we will talk about this at the end of the article). Nailite produces shingle siding in as many as three collections:
All photos were taken from the official website of the production nailite-siding.ru. If you want to order siding with imitation shingles or wood chips from this company in St. Petersburg, then there is a high probability that it will be made to order and you will have to wait from 1 to 1.5 months. Take this into account when upholstering your house.
Facade panels Foundry (USA)
Oddly enough, information about these panels was found by accident. They were used already in 2012, in particular for the construction of frame houses. Such panels can imitate cedar chips, and are quite realistic in both appearance and touch. The interesting thing is that even to the touch the panels give the impression of wood - warm and rough, like real wood, although they are completely made of artificial material.
Surface of panels under shingles
As a rule, all manufacturing companies that produce facade panels make material with imitation shingles or wood chips, which are as similar as possible to real wood. For this reason, most often you will feel that the surface of the material is rough, and even more so than that of standard siding panels. In the case of shingles, the roughness is not so great, but the chips will always be rough.
Color palette
It is interesting that although there are not many manufacturers of shingle siding, there are more than enough colors. The problem is that most colors of panels for facades under shingles or wood chips are made only to order. Each manufacturer has panels that are painted in 2 or more colors, which makes it possible to give the panels the appearance of natural wood and avoid that unwanted “artificiality” for which ordinary siding is disliked.
T-shaped siding for wood chips is available in 5 colors. Nylight is 18 for shingles and 12 for chips, and Foundry is 9 (in the vintage collection) and 21 shades in the standard one. If you want to cover your house with “chip” façade panels, or vice versa, shingles, then no matter which manufacturer you choose, you will probably get the shade you wanted.
Dimensions
Most often, the sizes of shingle or chip siding panels are smaller than those of conventional siding panels.
Installation
As with other façade panels, installation of siding under wood chips and shingles is practically no different from installation of standard siding panels. It is required to make the same frame, ventilation gap and protection from wind and water. If you plan to insulate the house under the panels, be sure to install a vapor barrier film under the insulation layer.
T-shaped siding is a little easier to install, since the panels are not too long (they are 1.5 times shorter than those of Foundry and Nylight). If installation work is carried out by non-professionals, then such siding will help hide some of the mistakes. But it will still be better if you ask for help so that everything is completed on time, accurately and according to technology.
Reviews
Since shingle and chip siding panels are not as common as the standard type of siding, there are also fewer reviews about the material. From the reviews that are available on the Internet, it is already becoming clear that there are several characteristic differences :
Be that as it may, from experience it can be noted that chip and shingle siding is quite a good material, and if you have the opportunity to buy it, it will help to perfectly protect the walls of your house from bad weather, insulate the structure and make it special against the background of houses your neighbors.
Cost in St. Petersburg
As you guessed, the façade panels described above are not the cheapest. As a rule, such materials are bought by those people who do not intend to save money, do not chase after the cheapest, but value high quality, beautiful appearance and uniqueness. For this reason, the cost of panels with imitation shingles and wood chips is quite high.
The cost of T-siding under shingles in St. Petersburg in 2022 from different suppliers ranged from 450 to 500 rubles per panel. Foundry and Nylight cost approximately 490 rubles per panel. If you have already decided for yourself what types of panels you want to buy, then remember that many colors need to be ordered in advance and you will have to wait a certain time (1-1.5 months).
Source
Basic principles of plastering work
The quality of plaster application depends on the preparation of the base and the prepared mixture. It is necessary to follow the manufacturer’s recommendations and be guided by SNIP. The human factor is also important: the qualifications of the master.
As a result of treating walls with plaster, the surface should be smooth and free of cracks. The mixture recipe largely depends on the base material: brick, wood, concrete. An important factor is the operating conditions of the structures: the exterior decoration or the interior of the room. Plastering various surfaces involves applying the mixture in several ways:
Main stages of repair
Repairing the ceiling yourself should start with planning and drawing up a simple estimate. For a separate stage of work, the cost of materials will differ.
Repair work consists of the following stages:
- during preparatory work, the furniture set is removed from the rooms and layers of old finishing are dismantled;
- Ceiling repairs continue, leveling the surfaces. First, the surfaces are plastered and then puttyed. During preparation, the electrical wiring is changed and taps are made for lighting sources mounted inside;
- uneven places and seams are treated with gypsum mixtures. The surface is checked for evenness using a hydraulic level;
- after leveling, finishing putty is performed;
- When all the preparatory stages have been completed, the final cladding of the ceiling is performed.
Preparatory work
Preparatory work begins with cleaning the surfaces. In this case, the floors are cleaned in the following ways:
- Whitewash and old wallpaper are removed using a roller soaked in water and a special spatula. The surface is wetted, and then the remaining finishing is removed;
- the old putty is tested for strength; if it holds tightly, then it is not touched. And the flaking material is removed;
- The paint in the house is properly washed off using a remover intended for this purpose or with sandpaper.
Ceiling surface sedum
Padding
After cleaning, priming is performed. This process promotes better adhesion. Before priming, you need to check the surface for joints and seams. All holes are sealed with cement mortar. To apply the primer, use a roller or brush. When the primed layer dries, the following work is performed.
Ceiling primer
Puttying and plastering
DIY ceiling includes these works. Which leveling option to choose depends on the skill of the specialist. Plaster will reduce the height of the ceiling by a couple of centimeters and has a significant mass.
The putty is characterized by high shrinkage and is characterized by the application of many layers. When plastering, it is recommended to use a gauze bandage or a respirator.
Puttying the ceiling
Plastering is done correctly in the following way:
- using painting thread, markings are made for the guide;
- holes are drilled for fasteners;
- the guides are mounted using self-tapping screws. They must be horizontal and in the same plane;
- after setting the guides, they are fixed with a layer of plaster;
- the gaps are filled with plaster mixture.
Plastering process
After drying, putty and finishing coat are applied to the floors.
Puttying is performed in a certain way:
- Several layers of putty are applied to the uneven surface. To remove excess solution, use a wide spatula;
- when coarse putty is applied, a special mesh is placed on top;
- after the material has dried, you need to do the finishing putty;
- To create a leveled surface, special graters are used.
Also, to level the ceiling surface in the apartment, plasterboard panels are used.
Leveling the ceiling with plasterboard
Modern methods of plastering wooden walls
The plaster shingles are first filled across the entire width of the working surface - this is the beginning of the process. The name speaks for itself. The shingle is a kind of base on which the second layer of shingle is attached at an angle of 450 relative to the floor. In this case, you can use curved and narrow dies.
The thickness of the working dies should be less than 3 millimeters. Using a material of less thickness will not allow the shingles and mortar to bond well; we need adhesion.
The second layer is filled with the exit shingles at the same angle as in the first case. And in relation to each other, the location should be perpendicular: the contact angle is 900. The distance between the dies should be 450 mm. These indicators must be maintained in the second row. As a result of the work carried out, a mesh with cells of 450/450 mm should be obtained. This will give rigidity to the entire structure.
When arranging wooden buildings, thick, even dies up to 5 mm thick and 15 to 20 millimeters wide are selected for the second layer.
It is important to observe the specified dimensions, since the use of material less than 10 millimeters wide may “fail” when driven in: it will simply crack.
If you use material more than 20 mm wide, this may cause the dies to bend and not have time to dry.
Specifics of preparing wooden surfaces
In order to ensure adhesion of plaster to a wooden wall, special surface preparation is required. For these purposes, a kind of retainer is used - a lathing made of wood or metal.
A wooden lattice or shingles is made from narrow slats that have a thickness of 3 to 5 mm, a width of 15 to 20 mm and a length of 1 to 2 m. Such slats are called shingles and are sold in packs of 50 or 100 pieces.
To make shingles with your own hands you will need:
The shingles are applied to the wall in two layers. For the first layer, which is called prostyle, thinner and uneven slats with a thickness of 3 mm are used. They are placed on the wall surface at an angle of 45⁰ relative to the floor line at a distance of about 50 cm from each other. For the second, output layer, smoother and wider strips with a thickness of 4 to 6 mm are selected. They are mounted on the wall at the same angle, but tilted in the other direction. Thus, the crosswise arranged layers form a kind of grid with cells.
Plaster application process
Plastering a wooden wall with your own hands is carried out in the usual sequence:
Before starting plastering work, beacons must be installed on the walls to determine the thickness of the required layer of plaster. To secure beacons, quick-setting mortars, such as gypsum or alabaster, are usually used.
The first rough plaster layer is done using the spray method. The solution for this layer is made more liquid, having the consistency of sour cream; to improve adhesion, you can add PVA glue to it. It fills the shingle cells and existing depressions on the surface of the walls. The thickness of the first layer should be no more than 9 mm, taking into account the thickness of the shingles. The mixture must be poured at an angle of 45⁰ on both sides of the sheathing to fill the entire space under the shingles and not leave any voids under the planks. If you do not have experience in plastering work, instead of a trowel or trowel to spread the mortar, use a broom tied from 5-7 twigs. Dip it into the solution and quickly spray the mixture onto the wall.
The next plaster layer, called primer, is applied to the rough layer after it has dried. For lime-gypsum mortar, the thickness of the soil when applied in one layer should not exceed 7 mm; for cement-based mortars it should be no more than 5 mm. For simple plaster, the final thickness of the soil should not be more than 12 mm, for improved plaster - more than 15 mm. The soil can have from one to three layers, each of which is compacted and leveled using a long two-meter rule.
Important! Limitations on the thickness of the plaster layer cannot be neglected. The solution has high humidity, so when applying excessively thick layers, it will not have time to dry, and moisture will be absorbed into the wood, which in turn will lead to its rotting.
The covering layer is made from a more liquid solution than that used for the soil. This layer must be especially thin and have a thickness of no more than 2 mm.
Important! Each plaster layer must be applied after the previous one has hardened. It is also unacceptable to maintain too long intervals between application of layers, since overdrying of the previous layer reduces the quality of adhesion of the material. If the layer of plaster has dried out, the entire surface must be moistened with water and notches should be made on it with the sharp angle of a spatula.
And finally, it is worth mentioning the rules for drying plaster on a wooden wall or interior partition.
Source
What is shingles
Plastering on shingles involves the use of natural materials - wood. Shingles are a narrow plank 2-5 mm thick with a length of up to 1-2 meters. The most common material for covering a plastered ceiling and not only is coniferous trees. They contain large quantities of resin substances, which, as a natural antiseptic, resist the development of mold and bacteria.
You can make plaster slats yourself, but this is not cost-effective: it’s a lot of hassle. The cost of slats, which are made from third-grade wood in finished form, is small. Therefore, it is better to buy a ready-made mesh with cells in the form of diagonal diamonds. They are always on sale and sold in packs of 50 or 100 pieces. The use of shingles in plastering work facilitates the process and allows us to talk about reducing the cost of surface treatment.
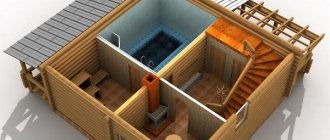
Metal slatted ceiling
One of the most original ceiling finishing options is a slatted ceiling, made from panels (steel or aluminum). This type of ceiling is ideal for large rooms. Previously it was used exclusively in offices and shopping centers, but now it is a popular option for residential buildings.
Metal slatted ceiling
Metal slatted ceiling
The ceiling structure is a frame consisting of suspensions and support rails.
With the help of the latter, alignment and fastening are carried out. The tires have special grooves in which the installed rail snaps into place. There is a hole at the top of the tire for installing hangers.
This is what all the elements of this design look like
Installation of a metal structure
Slat ceiling
Stage 1. Remove all residual materials from the ceiling.
Stage 2. We beat the level at a distance of twenty centimeters from the base ceiling.
Stage 3. We attach a special guide profile around the perimeter of the room. Usually its length does not exceed three meters, but if necessary, you can use ordinary scissors for cutting metal or a grinder for cutting. The profile is mounted in increments of 50 cm.
Installation of slatted ceiling
Stage 4. We stretch the fishing line according to the profile level.
Stage 5. Install the hangers according to the stretched fishing line. The distance between them should not exceed 1.2 m. The step is 30 cm.
Stage 6. We mount the traverses so that the panels fit tightly into the profile.
Stage 7. We stretch the fishing line perpendicular to the suspensions and install the traverses.
Stage 8. Install the panel. To do this, we adjust its length, cut it and insert it into the profile.
Stage 9. Snap the traverse.
Installation of slatted ceiling
Stage 10. We install the remaining panels by analogy.
Stage 11. Trim the outermost rail.
At this point, the installation of the metal ceiling can be considered complete.
Finishing shingles on the facade of a house
More and more often, many people planning or building their own home , in search of novelty and originality, are turning to the experience of ancient masters, trying to bring traditional building materials and technologies back to life.
Shingles have been known to mankind for a long time, since man learned to process wood and build houses from wood. By splitting the wood, the builders of the past, without even knowing it, deprived the tree of its main drawback - torsion due to internal tension. This method of wood processing allows you to use even coniferous wood such as spruce as a roofing and finishing material. Anyone who has dealt with it at least once knows: when it dries, the spruce twists in a spiral, and it is impossible to prevent this. At the same time, in the form of shingles, it feels great both on the roof and as a material for finishing the facade of a house. The result is an effective, inexpensive and very original solution.
It is durability and stability of shape that distinguish chipped shingles from their sawn counterparts.
In addition to spruce, aspen, oak, larch, and cedar are used to make shingles. All these materials behave differently under the influence of time, changing color from year to year. For example, after a certain period of time, aspen becomes silver, oak acquires a noble, deep gray shade.
The shingle production process is quite painstaking; 80% of everything is done by hand (the thickness of each plank should be approximately 100 mm). This is exactly the case when a machine is not able to repeat the creation of human hands. This makes the shingles even more valuable.
Finishing the facade of the house with shingles. Shingles - wall material
Shingles are not just a very beautiful material for finishing the facade, it is guaranteed protection of your home from bad weather. Shingles can be used as a curtain wall for thermal insulation of any type of house (wooden, stone, frame). The facade of the house, finished with shingles, will be in harmony with the environment; it will look great both in a forest clearing, on the river bank, and in a densely populated cottage village.
Unlike roofing material, the facade of a house finished with shingles does not require additional processing, with the exception of the facade finished with spruce shingles.
The technology for finishing the facade of a house with shingles is such that the material is ventilated from all sides during operation, which means it does not rot or become moldy. And the wood itself, which is used in the production of shingles, is resistant to biological damage.
Finishing the facade of a house with shingles can increase the durability of the building, while the aesthetics will only improve over time.
Finishing the facade of the house with shingles. Installation diagram
At the stage of preliminary work, on top of the windproof film, if we are talking about finishing the façade of a frame house with shingles, a horizontal sheathing is laid (the timber can be treated with bioprotective impregnations) in increments of 150 mm (a ventilation gap must be left in this case), then the shingles themselves are stuffed onto it. In this case, only nails are used, since they do not limit the movement of the tree. Rice. 1 Scheme of three-layer laying of wooden tiles (shingles) The fact is that with high humidity, the wood swells and the surface of the flooring closes, preventing moisture from penetrating inside; In the sun, the wood dries out and opens up a little, ventilating the underlying layers.
Rice. 2 Finishing the facade of the house with shingles. Scheme of two-layer laying of shingles The head of the nail is slightly recessed, but not too much so that the shingles do not bend. The nail is driven into the central part of the shingles. In this way a row is laid out. The shingles of the second row are mounted with the seam offset, and the nail, driving into the central part, also passes through the upper part of the board of the lower row. Thus, each part is fixed in two places.
Rice. 3 Finishing the facade of the house with shingles. Installation of shingles on a solid flooring In addition to the classic one, there is another way of finishing the facade of a house , when the shingles are laid directly onto the OSB board without a gap. It is impossible to say unequivocally that this is absolutely correct, since the absence of a gap can lead to damage to the wood, but if there are large overhangs, even in this form the shingles will last at least 50 years.
Benefits of use
Laying shingles is a long and labor-intensive process that requires professional skills and certain financial investments. At the same time, shingles have a number of advantages compared to many modern types of finishing:
- is a pure natural material that allows air to pass through, perfect for interior decor in any room, including bedrooms and children's rooms;
- simple and accessible, does not burden the structure of the house, installation does not require complex equipment or additional materials;
- resistant to winds, precipitation, ultraviolet radiation, provides sound and heat insulation;
- can be installed at any time of the year due to its resistance to temperature changes, suitable for unheated rooms.
Also worth adding:
- Versatility. Shingles can be used not only when cladding the roof, but also when decorating the façade of a building, walls and enclosing structures.
- Long operational period. Such a roof will last you from thirty to fifty years. If you treat the materials with a primer and varnish before use, this will extend their service life by another ten years.
- Light weight. Wooden plates are lightweight, so they can be mounted on any structure, regardless of the type of base.
Shingles look organic and natural in any application; the variety of shades and textures of wood allows you to create original compositions indoors and outdoors and give homes a unique look.
Author: A.N. Ivanova
How to choose material for shingles
To fasten the mortar of the walls of a wooden house, thin plaster shingles with a thickness of 3-5 mm and a length of 1.5-2 meters are used. Experts recommend these particular material parameters, since it is convenient to attach a narrow strip in several layers. They are usually used on small work areas.
When finishing large areas, it is better to use a shingle panel. This is a ready-made structure of large dimensions, which, after fastening it to the work surface, is ready for use.
There is one inconvenience: transporting the assembled shield is problematic.
In addition to wood, thermal insulation materials are needed for work. It can be felt, matting or burlap. The material must be laid out under the structure and treated with an antiseptic.
Lighting fixtures and ventilation grilles
How and with what can you wash laminate flooring and what tool to use
These elements are most often used in office, retail and medical institutions. They have the same dimensions as decorative panels, which allows installation in any part of the suspension system. Electrical power for the lamps is provided by wiring installed in the ceiling space. Its organization is facilitated by the use of metal trays or cable channels fixed to a rough base.
Ventilation grilles are used extremely rarely in houses and apartments. This is due to the leakage of the structure and the presence of perforations on the panels. As a result, air circulates independently through the decorative surface. In cases where natural ventilation is weak, you can always replace the panel in any area with a grille. Sometimes, in order to reduce its size, niches are cut directly into the decorative slab.
Preparation for plastering
Working with wood involves the use of certain fasteners. Experts recommend abandoning self-tapping screws and using ordinary nails.
Their length can vary from 25 to 40 millimeters. It all depends on how many layers of shingles are used. Usually this is two layers, although it can be more. The diameter of the products is 1.5-2 mm.
Those who want the thermal insulation functions of a wooden house to be at a high level should use the simplest thermal insulator, which is felt.
It is rolled out along the entire perimeter of the wall, nailed, after which the felt must be treated with antiseptic compounds. Before putting shingles on it, the felt is allowed to dry a little.
To plaster shingles correctly, you need to use a special tool, which you can read about below.
Tools needed
Installing suspended ceilings is not new. Almost everyone can do the work themselves. The process will require the following tools:
- roulette;
- level;
- drill;
- square;
- hacksaw;
- pencil;
- special knife;
- fishing line;
- putty knife;
- emery;
- putty;
- reinforcing tape.
The step-by-step instructions described above will help anyone without special construction skills to finish both a square and rectangular ceiling. It is important to prepare the necessary tools in advance so as not to be distracted during the process by purchasing goods.
The following video presents options for decorating walls and ceilings using plasterboard:
Reasonable planning and preparation will help to avoid unnecessary costs for the work of an invited master. If you buy materials and tools in advance, the installation can be completed in a few days. A beautiful ceiling will delight the residents of the house and invited guests for a long time with the comfort and warmth it creates.
The tiles are mounted on the ceiling using heavy-duty adhesive, which will firmly hold the coating on the ceiling surface even if there are uneven surfaces. To make the ceiling more original, experts recommend installing tiles diagonally.3. A chemical method that involves the use of a special solution to remove paint, after application of which it will come off easily.
Shindel (wooden plates)
- one of the types of wooden roofing, which has a long history. Its name (from the German Holzschindeln) is typical for Western European countries adjacent to the foot of the Alps. Siberian larch wood is used to create tiles.
Shingles, shingles (shingles) are piece roofing materials , where each plank is made almost by hand, using German technology in compliance with all the norms and conditions of the German standard DIN 68119.
The shingle is made using the splitting method, the whole secret of the durability of split wooden tiles lies precisely in this. In the process of splitting into planks, the wood fibers are broken and the internal capillaries of the wood are not disturbed.
Unlike sawing, this method extends the service life of the coating by almost 30% and gives a natural, original relief surface, which dampens the noise of hail and rain. Shindel allows you to create a beautiful, completely sealed roof.
Wooden tiles have little weight (1 m2 weighs 15–18 kg) and can be used at temperatures from –70 to +40°C. The planks are laid on the roof like scales of conifer cones - overlapping, in two or three layers.
After the rain dries, the boards bend slightly and rise into a dome, which ensures complete ventilation and removal of excess moisture.
Due to the fact that wood itself breathes, and if during construction an additional air gap is created between the covering and the supporting structures of the roof, the roof is ventilated, which significantly extends the service life of the supporting structures and the covering itself.
Thanks to this, in the summer it will be cool in such a house, since the wooden covering itself will not heat up very much, and some of the warm air that still collects under the roof due to ventilation will simply be blown out. In winter, especially in snowy areas, ventilation will eliminate the problem of ice formation on the eaves line, and a thick layer of wooden covering will retain some of the heat emanating from the house.
Wooden shingles are suitable for roofs with a slope of 18–90°, and can also be used for exterior walls of the house. The most common wooden tiles are 40 cm long. it is used on roofs with an area of 100 to 500 sq.m. The end of the board is wedge-shaped, its thickness at the thick end is 9-10 mm and at the thin end 5-6 mm. The width varies from 6 to 20 cm. It depends on the piercing. In the process of laying three layers per 1 sq.m of wooden roofing, an average of 75-80 planks are used. The shingles are packaged in a bundle of 27 x 30 x 45 cm with two tapes at the rate of 1 sq.m of three-layer roofing.
Manufacturing Features
The technology for making shingles is quite simple. You can do it yourself. To do this, you will need to create a special machine, which you cannot do without. No hand tool will allow you to obtain plates of the required thickness.
It is equally important to take into account the properties of the tree itself. Often spruce or pine is used for manufacturing, but they have many knots that will cause difficulties during the work process. It is recommended to give preference to deciduous trees.
Wood requirements
When choosing source materials, a tree trunk, it is worth considering several important requirements. If they are not followed, then there is a risk of encountering problems not only during the manufacturing process, but also during the operation of the roof.
Primary requirements:
- Hard center in the barrel - if it is soft, durability will be compromised.
- Lack of knots - an excessive number of branches will increase the risk of rotting.
- Freshness – freshly cut wood is damp, making work much easier.
- The length of the logs is from 40 cm - it is recommended to cut the tree into equal parts with a length of 40 cm.
- Tree health – it is important that the tree shows no signs of disease.
Only about 40% of the starting material will be used to make the plates, and the rest will become unusable. If desired, you can find another use for it (cut out decorative elements).
What is shingles, facade installation technology, experience of portal participants.
Such classic finishing materials as stone and wood never lose their relevance, although they lose ground somewhat with the advent of various imitations. Despite the abundance of facade panels that both visually and tactilely copy the texture of wood at a fairly high level, they are not able to completely replace the original. What’s interesting is that the participants of our portal sheath their houses not only with molded lumber (block house, planken, lining, board), but also with small-piece lumber. Of course, shingles on facades are much less common, but houses only benefit from this.
Content
About shingles
The name of the coating comes from the production method - “tore” the workpiece using a special device. As a result, plates of the required thickness break off from the lump, the surface of which is smooth on the back side, and embossed, chipped on the front side. Thanks to this, when fixing, the rather thin plates do not split. Shingles are cut from almost any species, both deciduous and coniferous, but coniferous ones are preferable due to their biostability, although in relation to the facade this property is not important.
But even with the use of modern equipment, splitting shingles is time-consuming and labor-intensive, which explains the high cost of purchased material. Some manufacturers replace splitting with sawing to increase production rates and reduce costs. This negatively affects the result, since fibers damaged during cutting become permeable and the durability of the coating decreases. In addition, the decorative value of sawn shingles is lower than that of chipped shingles, which retain their natural texture.
Roofing shingles, regardless of the type of wood, require mandatory treatment with special means, since during operation they are constantly in contact with moisture. The facade is used as a facing screen in hanging ventilated systems, where there is no stagnation of water and constant ventilation. The use of ventilation as an effective protection for wood began in our villages.
On the weekend I was in the outback of the Kaluga-Bryansk region, there are hundred-year-old houses covered with shingles, the locals say it’s a very simple technology, for themselves in the villages they sheathed roofs and walls until the 60s, there was no more material. There, on old houses there are not only shingles and shingles, but also casings on the windows, and strips on the walls (under the gable and on the plinth) to protect against slanting rain: they direct the rising air along the wall from bottom to top and dry the walls.
Shingles, like shingles, are wooden dies, but not flat, but with a thickening along one of the lengths where a groove is cut, so their manufacture is an even more labor-intensive process.
But due to the fact that shingles are also called wooden shingles, the tiles themselves are often called shingles.
Although shingles do not need to be treated with impregnations, in order to preserve the original shade, it must be coated with a protective and decorative agent. Today, a special oil is used for these purposes, which creates a permeable film on the surface - the wood breathes, but does not become waterlogged and does not change color. Without treatment, shingles over time acquire shades of gray, the intensity of which depends on the type of wood. For example, aspen becomes silver, and oak becomes rich gray. Many people deliberately leave the wood uncoated in order to achieve deep gray tones in a few years.
Raw materials
Coniferous species with smooth fibers that split well are excellent as raw materials: larch or pine. Soft deciduous wood is also used: aspen or linden. But the strongest and most practical are considered to be dies made of durable wood - oak or beech. To ensure water-repellent properties, increase resistance to rotting, and exposure to adverse weather conditions, the finished plates are coated with natural impregnations or soaked in drying oil.
Technology for installing shingles on the facade
Like any finishing material for a curtain wall, shingles are mounted on a subsystem - a wooden sheathing made of timber. The pitch of the horizontal guides is determined by the dimensions of the dies.
Although I purchased shingles of the promised length of 40 cm, in packs I came across dies from 37 to 44 cm. For the sheathing, I made a jig - a 14.5 cm long strip. He placed the conductor on the previous guide and received a place for attaching the next one, the main thing was to align the first batten of the sheathing at the level. Thus, when using slats 40 mm wide, the axes between them turned out to be exactly 18.5 cm, for dies 40 cm long. And those that were shorter were put aside and used under the windows and above the slopes along the gables.
Depending on the type of house, the walls are pre-treated with a deep penetration sealant/antiseptic or covered with a membrane. It is also advisable to treat the lathing with a special impregnation. The shingles are attached to the sheathing with nails - you cannot use self-tapping screws, since the dies must be able to “play” with fluctuations in temperature and humidity conditions.
On the roof, shingles are laid in horizontal rows in a three-layer manner to prevent the possibility of leaks, although the main task of sealing is taken on by the insulation layer. On the facade there are both three-layer and two-layer installations - the bottom row is double, all subsequent ones are overlapped by half.
Regardless of the number of layers, the dies in horizontal rows are sure to shift. The result is ordinary, rectangular or “brick” masonry.
Less common is “wild” (in a checkerboard pattern).
It is even rarer to see a “wave” on facades.
And the figured variations are rather exclusive.
The shingles are sold in bundles, which simplifies the calculation of the amount of material required for cladding; it is enough to know the area of the facade.
The shingles are sold in bundles of 1 m² for three-layer installation; for two-layer installation, the bundle yields 1.5 m² of covered area. Plus a margin of at least 10%. For example, for 100 m² the calculation is as follows: divide 100 by 1.5 and multiply by 1.1, we get 73 riots for a two-layer coating.