Smooth walls are the key to quality repairs. And one of the simple and reliable ways to level and decorate walls is to plaster them. In this article we will examine in detail all the issues related to gypsum plaster: what it is needed for, what its features and technical characteristics are, pros and cons, and areas of application. We will also clearly show how to work with this material.
Application of gypsum plaster
Plaster mixtures based on gypsum are used primarily for finishing walls and ceilings of living rooms, as well as other rooms with normal humidity.
It can be placed on such bases as:
- brickwork and clay walls;
- over concrete walls and cement plaster (requires concrete contact treatment);
- on old gypsum plaster, provided it has good strength;
- for cellular foam concrete, aerated concrete and expanded clay concrete;
Since gypsum is capable of absorbing moisture, it is used only for interior decoration in dry rooms when preparing the surface for painting or wallpapering.
This is interesting! View user ratings for gypsum plasters and take part in the voting.
Current prices:
Gypsum plaster
Plaster application technology
Between the beacons, a so-called marking is applied to the wall using a trowel - an excess amount of mortar. It is leveled from bottom to top by a rule that is based on neighboring beacons. If the plaster needs to be applied in a thick layer, the marking is applied using a rough method without leveling along the beacons. After the solution dries a little, it is leveled using the rule.
At the next stage, the solution is dried and polished in order to get rid of minor surface defects.
- How is an apartment insulated using spray polyurethane foam? What is the final result?
- Development of an individual project for a prefabricated hangar, full analysis of the procedure
- Registration of SRO admission
What's included
The main component of this type of plaster is building gypsum - calcium sulfate hydrate, obtained by firing gypsum stone and crushed to a powder state. The following may also be added to the composition:
- fillers that reduce weight and increase the thermal insulation properties of light plaster: perlite, vermiculite, foam glass or expanded polystyrene;
- plasticizers and retarders;
- additives that increase the whiteness of the surface - salts of various metals (zinc or titanium white) or lime;
- components that increase their strength;
- additives that regulate the setting time of the solution and its hardening time.
Gypsum plaster is an environmentally friendly material and is absolutely not hazardous to health. Moreover, due to its hygroscopicity, it is able to “breathe”, that is, absorb excess moisture and, on the contrary, release it, thus regulating the microclimate in the room.
A separate type of gypsum plaster is gypsum polymer. It is used for leveling brick and concrete surfaces. In some cases, gypsum polymer compositions can also be used for exterior finishing work.
Purpose of the components of the plaster mortar
As we already know, the plaster mixture consists of many different components. Each of which is important and performs its own functions. An excess or deficiency of one of the components of the solution will lead to a loss of quality. That is why it is important to know the purpose and functions of the components of the mixture.
Binder in plaster mortar
If the plaster solution contains only one binder, the composition is called simple. If there are two or more binders - complex. Not all binders get along with each other. For example, gypsum and cement are chemically unfriendly to each other. Therefore, they are used separately or with other binders.
All binders, except polymers, are mineral substances, which is why plasters have the same name. Gypsum, cements and lime are pre-treated thermally, as a result they lose water and are able to react to its presence. When combined with water, these substances form saturated solutions and create crystals.
Liquid in plaster
The solution usually contains more water than is required for crystal formation. Liquid is also needed to give the mixture mobility (workability). In this case, excess moisture can be harmful (the strength of the solution decreases). It is for this reason that the ratio of water and other components must be observed.
Fillers
The production of binders, in addition to clay, requires a lot of costs, so they are much more expensive than fillers such as sand or sawdust. In addition, a solution containing only binders cracks when hardening. Therefore, to reduce the amount of binders (the cost of the solution), as well as to reduce cracking, fillers are introduced into the composition.
Fillers also give solutions a certain structure, for example, coarse sand is used for “bark beetle”; for other decorative mixtures, artificial or natural fibers and shell fragments are used as fillers.
It is better to purchase decorative mixtures ready-made. Their composition was developed and tested in practice by specialists.
Rough (leveling) plaster more often than other components has to be prepared on site. The consumption of leveling plaster mixture is higher, and the cost of a mixture prepared by yourself is lower.
Special additives for plaster mortars
To provide the plaster solution with the desired properties, modifying additives (universal and narrowly targeted) are used. Additives affect the binder (cement), enhancing or neutralizing its individual properties.
In solutions, additives perform the following functions:
- accelerate/slow down the process of crystal formation (setting), for example, for gypsum, the retarder is bone glue, milk, PVA;
- increase frost resistance (ferric chloride and other salts);
- improve plasticity (serve for some retention of water in the solution, prevent the process of delamination of the mixture), for example, liquid glass;
- increase the strength of the mixture (for example, reinforcing fibers (fiber) or additional binders).
Specifications
The quality of mixtures using gypsum binder is regulated by GOST 31377-2008 . According to this document, the main indicators of dry material include:
- humidity: moisture content is allowed no more than 0.30% of the total mass;
- maximum size of granules (grains);
- volumetric weight: 800-1100 kg/m3 (loose) and 1250-1450 kg/m3 (compacted).
Properties of the prepared solutions:
- water consumption when mixing - 0.6-0.65 l/kg
- mobility: the ability to spread under the influence of its own weight; according to GOST 31376, the diameter of the melted sample of the prepared solution (~600 g) should not exceed 165 mm (±5);
- setting time - at least 90 minutes for machine-applied mixtures and 45 minutes for manual plastering;
- complete drying time - after 5-7 days; this indicator depends on the additives in the mixture and differs among different manufacturers; You can find out exactly how long it takes for the plaster to dry in the instructions on the package;
- ability to retain moisture without allowing it to drain: at least 90%;
- consumption for a layer of 10 mm is 8.5-10 kg/m2 (manual application) and 7.5-9 kg/m2 (machine application).
Properties of gypsum plaster in hardened form:
- compressive strength - 2.5 MPa;
- surface adhesion force - 0.3 MPa;
- density - 950 kg/m3;
- vapor permeability - 0.11-0.14 mg/ppa;
- thermal conductivity - 0.25-0.3 W/m*C;
- shrinkage - does not shrink
Although the vapor permeability (the ability to transmit water vapor) of plastered surfaces is not regulated by GOST, it is also an important technical characteristic that determines the scope of application of the plaster.
When purchasing gypsum mixtures, you should pay close attention to their shelf life. Due to their ability to easily absorb moisture, they cannot be stored for longer than 6 months from the date of release. After this period, their properties change, they begin to clump, and high-quality leveling of walls with them becomes problematic. It is also necessary to pay attention to the tightness of the packaging, which protects against excess moisture - you should not purchase plaster in torn bags.
Specifics of plaster compositions
Since buildings need to be plastered outside and inside, where the finishing is exposed to different conditions for a long time, the compositions of plastering solutions are also specific. Facade surfaces are subjected to more severe mechanical stress, are watered by rain, hit by hail, endure frost and heat, and are scorched by direct sunlight. Therefore, solutions for external conditions should be more resistant to all these “troubles”.
There are mixtures for facades, interior work and universal ones. The latter can be equally used for outdoor and indoor decoration.
All basic data on the proportions of plaster solutions for exterior and interior decoration are contained in the table from the standard.
spray and soil during external and internal plastering
The following figure shows the proportions of the covering.
cover - proportions
Composition of mortar for plastering external walls
Mortars for external walls differ in their base. Gypsum and lime compounds are not used for exterior finishing. An exception is plastering of closed loggias and balconies, where there is protection from water ingress. Therefore, the main binder for facade compositions is cement. Cement-lime (popular) and cement-polymer (more expensive) compositions are also used.
Clay is not afraid of frost and sunlight. But clay plaster must be protected from erosion. For facades in regions with a dry climate, if water does not directly fall on the plaster, plastering with lime-clay and lime-gypsum mixtures is used.
Advantages and disadvantages
The main disadvantages of this material include
- Low moisture resistance;
- Low strength - a surface plastered with gypsum can be scratched or chipped quite easily.
- The cost is slightly higher than the cement-sand mixture, about 15-20%, but this is an insignificant disadvantage.
But still, gypsum has many more advantages.
- High plasticity: working with gypsum mortar is easier than with others; the labor intensity of the process is significantly reduced, and this is a significant plus;
- No shrinkage: for cement mixtures it is a couple of millimeters per square meter;
- Surfaces plastered with gypsum are smoother, without pores or graininess;
- Good adhesion: gypsum mortar adheres to the surface much better than sand-cement mortar; therefore, reinforcing mesh may not be used to strengthen the surface; it is required only in new stands due to possible shrinkage of the building;
- Good heat and sound insulation properties: a wall covered with a layer of gypsum retains heat and protects against noise better than concrete surfaces;
- It can be applied in a thicker layer (up to 50 mm) without reinforcing mesh;
- Light weight: walls covered with gypsum place less load on the foundation;
- Cost-effective: when comparing costs, many people pay attention only to the weight of the pack; however, it is also necessary to take into account the specific gravity of the mixture - after all, the consumption of gypsum per 1 m2 is 9-10 kg, while cement for plastering the same area will require 16-18 kg.
Expert opinion
Alexander Guryanov
Plasterer and decorator
Many people attribute the advantages of gypsum to a higher setting speed than that of cement-sand mortar. However, it is difficult to call this a significant advantage. Indeed, a surface treated with gypsum plaster hardens 1-1.5 hours faster than one coated with a cement composition.
You should not hesitate when working with it - smoothing out the solution that begins to harden will be problematic. Do not dilute the mixture too much if you are working on your own. It is better if one person does the cooking and the other does the plastering.
Proportions for preparing solutions yourself
Dry cement mixture has different markings, for example:
- M50 is used only for grouting, since the strength of the layer is low and shrinkage is minimal. Proportions 1:6.3 (for 1 part of cement 6.3 parts of sand).
- M100 is used for interior finishing work. Proportions - 1:5.
- M150 and others are used for interior finishing work in rooms with high humidity, and for exterior work. Proportions - 1:3.
The most common solution is mixed in proportions of cement and sand 1:3, but depending on the brand of binder, the ratio of sand and cement can change several times.
We described in more detail how to choose the right plaster for walls here.
How to dilute dry mixture
Let's consider the preparation process and proportions of the gypsum solution.
The dry mixture from the bag is poured into a prepared container already filled with water. According to the instructions, 1 kg requires 600-700 ml of liquid, that is, a 30-kg bag of plaster will require about 20 liters of water. A small amount of solution can simply be mixed with a trowel or trowel. If it is difficult to make large volumes with your own hands, then it is better to use a hammer drill with a mixing attachment or a construction mixer.
The solution should stand for 3-5 minutes (reaction time of the components). Then it is thoroughly mixed again until all lumps disappear completely. The solution should be viscous and plastic, but under no circumstances should it flow off the instrument.
How to mix?
The mortar for plaster must be mixed as follows::
- Cement and sand are poured into a large container (or a concrete mixer if you plan to perform a large amount of work) in the required proportions. Sand is usually poured 3-4 times more than cement. Cement and sand are thoroughly mixed dry. The sand must be sifted.
- Water is added. Water must be poured in small portions until the desired consistency of the solution is obtained. The composition is stirred periodically.
Experts advise adding a certain amount of detergent to the mixture to improve plasticity. The product is added at the rate of 30-50 ml per 5 liters of water.
The finished solution must be used within an hour. If you add water to the solution, this will prolong its viability, but reduce its quality.
Advice
The dry mixture should be poured with warm water at a temperature of 20-25 °C. This is especially true for working outdoors at low above-zero air temperatures.
We talked in more detail about how plaster is prepared and calculated for various types of mixtures here.
Plaster
Dry gypsum mixture is prepared from gypsum with the addition of various components. Each manufacturer creates its own powder composition, so when mixing it is better to follow the manufacturer’s instructions (given on the packaging).
Rotband
How to mix Rotband plaster:
- The bag is opened and the contents are poured into a 3-4 kg bucket.
- Water is added. The manufacturer recommends adding 6-7 liters of water per 10 kg of dry semi-finished product. You can take the average value - 6.5 liters. If the volume of the bucket is less than 10 kg, then the amount of water is calculated as follows:
10 kg – 6.5 l. 3 kg (bucket volume indicated for example) - X l. X=6.5*3/10 =1.95 liters of water.For 3 kg of dry mixture you will need approximately 2 liters of water. It is added to the water, which is poured into a separate basin.
- A mixer is installed on an electric drill. The dry semi-finished product is mixed with water. It is necessary to mix until the solution takes the form of thick sour cream.
- After initial mixing, it is recommended to wait 5 minutes and mix again. The plaster mortar is ready for use (we have provided recommendations on how to properly plaster and use ready-made mortar for beginners here).
We invite you to watch a video on how to mix Rotband plaster:
Gypsum plasticizers
Manufacturers strongly do not recommend mixing ready-made mixtures with any extraneous additives. After all, an excess of plasticizers can significantly affect the strength of the future surface.
However, at home it is quite possible to make gypsum-based mixtures with your own hands, for example, quite plastic lime-gypsum. But the reaction between gypsum and water occurs quite quickly, so gypsum plaster hardens quickly.
To make a solution convenient to work with, one of the plasticizers must be added to it:
- diluted PVA glue , about 1% of the total volume;
- lime, used as a plasticizer and to increase hardening time;
- Tartaric and citric acid will also slow down setting. Special liquids, for example, Plast Retard PE, can extend the setting time to several hours, prevent cracks and improve the wear resistance of gypsum.
Additional components
Manufacturers often add special components to their ready-made mixtures, which increase the ductility and strength of the material and add moisture-repellent properties to it. The following additional components are often used :
- Lime (lime paste). Increases plasticity and makes the material moisture-proof. The proportions of lime to cement are 1:2. The additional component cannot be larger than the main component. Lime is added only to mixed cement and sand.
- Clay . Increases plasticity and makes the material moisture-proof. Clay is added at the rate of 50-100 g per 15 liters of water. To prevent the formation of lumps in the solution, the clay is first ground in a small amount of water to form a cloudy liquid. The component is then added to the dry mixture.
- Detergent (liquid soap, washing powder, etc.). Increases plasticity and adhesion. The amount of product should not exceed 3% of the total mass.
- PVA glue . Increases ductility and increases service life. The volume of the added component should not exceed 3% of the total mass of the mixture.
Use in damp rooms and outdoors
As we have already mentioned, gypsum plaster is capable of absorbing moisture, so its use in wet rooms and especially for facade finishing is not advisable.
If it is necessary to make the gypsum surface moisture-resistant (for example, when preparing to lay tiles in the bathroom), it is coated with a deep penetration primer based on acrylic. Concrete contact soil is ideal for tiles.
Polymer waterproofing mastic, for example, Plitonit Gidroelast, also has good moisture-proof properties. It is applied on top of a thoroughly dried layer of plaster using a brush or roller in several layers. Each of them must be applied after the previous one has dried. Gluing of tiles is allowed only one day after application. It is recommended to fill the outlets of pipes and corners of various structures with the same mastic.
Installing beacons on the wall
Lighthouses are made from perforated profiles in the form of T-roll. The width of the beacons is selected based on the thickness of the plaster layer. It is best to use specialized beacons. After plastering, they will not need to be removed, which greatly facilitates the work and reduces material consumption.
Before installing beacons, it is necessary to find out the deviation of the shape of the room from the correct geometry using a bubble level, a square and a tape measure and rules. All angles between walls are checked with a square, and the verticality of surfaces with a plumb line. After this, using the rule, you should measure the evenness of the surface. A tape measure is necessary in order to accurately measure the diagonals of a room and draw a conclusion about the correct shape of the room.
After all measurements have been taken and the geometry of the room has been adjusted, beacons are placed. They are placed on pre-applied vertical strips of mortar as shown in the photo (Fig. 1). The distance is selected in such a way that the rule between the beacons does not slip, but can move freely.
The consumption of plaster per 1 m2 depends on the materials used and the wall covering.
How to plaster with gypsum mortar (video)
You can work with gypsum plaster using a plastering station or manually. Machine application is a separate topic for discussion, and we will consider it in another article. And here we will analyze the nuances of manual application.
- the thickness of each layer can be 30-50 mm; if necessary, a new layer can be applied only after the previous one has dried;
- dry mixture consumption in the absence of large irregularities with a layer thickness of 1 cm is on average 9-10 kg/m2;
- gypsum mortar can be applied not only to brick, concrete surfaces and aerated concrete, but also to the previous layer of cement or gypsum plaster;
- surface leveling is carried out using beacon profiles or gypsum beacons - a small amount of mixture, which is applied pointwise or along a line to the wall and leveled; after they have dried, a mortar is poured between them, and then the entire plaster mass is leveled using building rules; the thickness of the layer will be equal to the height of the beacons;
- to remove dust, protect against the shedding of small particles and strengthen the surface after plastering, the surface must be primed;
- to obtain a flat surface, the walls are additionally puttied before painting or gluing thin wallpaper;
The video below shows all the stages of finishing: how to properly knead, apply and grout.
Expert advice
Adviсe:
- Before mixing the solution, it is necessary to prepare the surface. It is recommended to thoroughly wash the walls with water, dry them, then treat the surface with deep penetration primer to prevent the appearance of fungus and mold and increase the level of adhesion.
- The quality of work with dry mixtures is also affected by weather conditions. It is not recommended to plaster in hot weather, during bright sunshine (the plaster dries too quickly), or during rain (due to humidity, the plaster dries too slowly). Wind is also bad, as it can raise dust.
- For different layers (there can be 1, 2 or more) a solution of different consistency is needed. For example, for casting you need a thicker mass, so less water is added here. The base layer will be a little thinner. And the finishing coat is applied in a very thin layer, so it should be liquid, but not spread over the base.
The quality of the solution and the outcome of the finishing work depend on how correctly the composition for plastering walls is mixed. An incorrectly mixed solution will cause the dried layer to quickly become cracked or crumble. To prepare plaster with your own hands, craftsmen advise using universal calculations, but to prepare a ready-made store-bought mixture, it is best to follow the manufacturer’s instructions.
Grouting and glossing
Grouting is the manual removal of small irregularities, seams, and transitions between layers. Usually they are rubbed down after the plaster has dried. To do this, take a metal or plastic grater. The tool is moistened with water or a primer intended for application after plastering, and the surface is treated with circular or vertical and horizontal movements, periodically clearing the grater of the solution. Particular attention is paid to the corners.
The video above (time 5:35) shows the process of glossing the surface - creating an ideal plane without finishing putty. Glossing and rubbing are very similar methods, using the same tools and techniques. But the difference is that this happens on plaster that has just set and is still wet. This saves time and eliminates the need to apply putty.
Necessary tools and materials for work
To prepare mortar for plaster, you need the appropriate tools and equipment. You can mix the plaster manually (with a shovel in a trough) or in a mortar mixer (mechanically). It all depends on the amount of work and capabilities. To mix a small portion, you can use a mixer.
To get started, you should purchase the appropriate materials in advance with a reserve (about 20%):
- individual components or dry mixtures ready for mixing;
- color or pigments;
- prepare clean water (tap or rain);
- additives (available in hardware stores);
- containers;
- a shovel is useful for pouring filler into the mortar mixer;
- To open the packages you will need a knife;
- trowel (and other tools for applying compounds).
Finishing of aligned walls
After applying a layer of plaster, it is necessary to determine how further finishing will take place:
- when preparing walls for painting or thin wallpaper, the surface after grouting is additionally processed with a special tool with a rubber or metal base - a trowel; sticking thick wallpaper for painting does not require such leveling;
- water-based, water-dispersed or acrylic paints are suitable; the walls are puttied, this makes it possible to fill even the smallest voids and cracks; also be sure to prime to increase adhesion, protect the walls and ceiling from shedding and distribute the dye evenly;
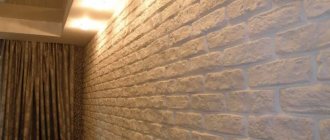
- textured and relief plasters fit perfectly on gypsum plasters; the pattern is created with a decorative roller or stamp, improvised means are often used: brushes, brooms, plastic bags - the creation of a unique design is limited only by the imagination and skill of the craftsman;
- especially stands out from decorative plasters - Venetian, colorful glossy surface like marble or granite; it is created in several thin layers, which are tinted in different shades; the effect of a smooth stone is obtained by applying special wax.
As you can see, gypsum mixtures are extremely in demand in finishing and repair work and are used everywhere.
We hope that this article was useful to you and that you found the information you were interested in. Please leave your questions and comments in the comments below.
Previous
Types of plaster Comparing the properties of gypsum and cement plaster: when is it better to choose which one, and can it be mixed?
Next
Types of plasterPreparation of cement mortar for plaster: selection of material, proportions, mixing
Types of mixture and its features
Most often, plaster is used to level surfaces. This mixture is cheaper than plaster for decorative work. Common types of mixtures (by composition):
- Cement .
Contains cement and sand. This plaster is most often used during rough finishing work. To properly dilute such a mixture, it is recommended that you first read the instructions given by the manufacturer (printed on the packaging). The proportions of the mixture and water for specific tasks will be indicated there. Attention: After applying the solution, you must carefully level it with a spatula or rule before it dries, since with this type of plaster it is difficult to achieve a flat surface. - Limestone . Contains cement, sand, lime. Lime gives the material plasticity and lightness. It is easier to work with lime plaster, but in terms of strength it is inferior to the previous option.
- Plaster . It contains gypsum. It has a high absorption rate and quick drying. This plaster is used for interior finishing work. Since the solution dries quickly, it is recommended to prepare it in small portions. Unlike other types of plaster, a decorative coating can be immediately applied over gypsum plaster.
More expensive types:
- Acrylic . Contains acrylic resins. Pros: climate resistance, moisture resistance, ease of application. Acrylic plaster can be applied to any mineral base, even old ones.
- Silicate . Contains “liquid” potassium glass. Sold as a dry mixture or diluted. Has increased vapor permeability. Apply only to silicate primers.
- Silicone . Contains silicone resins. It has good vapor permeability and a rich palette. The material is non-staining, breathable, durable.
It is worth highlighting the following types of dry mixtures:
- Coating room . This mixture is used when it is necessary to prepare the surface for applying a decorative layer: decorative plaster, wallpaper, tiles, etc.
- Finish . Final coating. This plaster has a different texture or structure. More often used for external work than for internal work.
We invite you to watch a video about the types of plaster for finishing work and the features of its use:
How to level a ceiling with plaster
If the ceiling has multiple defects, deep potholes or cracks, before applying the base layer, the following work must be done:
- Any defect on the floor slab must be cleaned - cracks are opened, deep potholes are cleaned of old materials, dust and dirt.
- The inner surface of the defects is primed with the same composition as the main plane of the ceiling.
Filling potholes in the ceiling
- The plaster mixture is applied to cracks and potholes, compacted to fill every pore and void, and then smoothed to achieve a flat surface with a common floor slab.
- Before applying the plaster, an elastic polymer sickle mesh is glued over the cracks along the entire length of the defect, which plays the role of reinforcing the element.
Repairing cracks in the ceiling
- Next, plaster is applied to the lower surface of the floor slab in the same sequence as described above - with or without beacons. If plastering is carried out without leveling slats, then a string is stretched along the ceiling to achieve an even plane.
After installation and hardening of the mixture, it is necessary to check compliance with the horizontal plane using a construction water, bubble or laser level.
In conclusion
In the photo in this article you can see what the surface looks like after applying decorative gypsum putty to it: In conclusion, I would like to say that there is no such thing as a bad mixture, the main thing is to know how to choose the right type of putty for the job, prepare it correctly, and follow the technology application, as well as working conditions.
Source
Caring for plastered ceilings
The ultimate goal of plastering the ceiling surface is to apply a final finish - interior paintwork. In order for the result to allow you to comfortably operate the room, it is necessary to ensure proper care of the freshly laid ceiling plaster:
- When installing gypsum material, you should open the windows for ventilation, ensuring a slight draft in the room.
Draft in the room during finishing work
- When applying cement or synthetic binders, on the contrary, it is recommended to create the effect of a thermos.
- Before applying the topcoat and paint primer, you must wait until the rough finish is completely dry.
- If defects or an uneven surface of the ceiling are detected, all work to eliminate the defects must be carried out strictly before the mixture hardens.
- After the ceiling has dried, before applying primer and paint, you need to dust and sweep the surface.
Final cleaning of the ceiling before applying paint
If cracks form on the surface of the plaster after hardening, the area must be repaired. Applying a paint coating over such a layer of rough finishing will lead to a defect in the ceiling and, accordingly, to a violation of the aesthetic properties of the new interior.
Preparing walls for plastering
Proper preparation of walls is the key to the beauty and durability of future renovations. The previous cladding must be removed from the walls. It is better to remove paint, decorative plaster and wallpaper from wet walls, but you need to wait until they dry before plastering.
The next stage is getting rid of dust. Remove dust from the wall with a dry, thick cloth or brush. Metal surfaces must be treated with anti-corrosion impregnation. All others are primed.
In areas of high humidity, it is recommended to use an antibacterial or antifungal soil mixture. For porous surfaces, it is recommended to use Knauf Haft-Emulsion primer, which is diluted with water in a ratio of 1:3.
When the wall is dry, you can begin plastering. It is important that the room temperature does not drop below +5°C.