Decorative stone in the hallway is a modern solution for decorating a room that can harmoniously fit into almost any interior. You can decorate the corridor yourself, using stone as the main type of covering or an original accent in a separate area. The advantage over natural stone is that artificial stone is much lighter and more affordable from a financial point of view.
Hallway interior with artificial stone Source th.aviarydecor.com
Finishing the arch in the corridor Source stroychik.ru
Advantages of using decorative stone
This method owes its popularity to the presence of a number of advantages, such as:
- Affordable price.
- Large selection of models.
- Beautiful interior style.
- Combines perfectly with other finishing materials.
- Does not require preliminary preparation of the wall.
- The surface of the material is resistant to moisture.
In addition to all these features, it is quite difficult to damage such a coating - the structure of the stone is strong and resistant to mechanical stress.
Style selection
Modern
Modern style is characterized by restraint and straight lines and maximum utilization of usable space.
Classic
Soft shades of the walls, elegant furniture and decorative items that match in color will create a delicate, classic hallway interior.
Provence
Provence style is romantic and light; the interior, as a rule, is made in light colors and is complemented by wooden pieces of furniture. A brick wall will be an unusual addition.
Loft
Loft style and stone are almost inseparable concepts; it is used in almost every design.
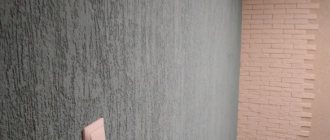
The photo shows a hallway decorated with brick-like wallpaper. The interior is designed in loft style.
Features of interior decoration
The choice of decorative coating is not the only issue that the master needs to decide before starting work.
Before decorating the walls with stone in the hallway, it is worth calculating the square footage of the room, the required amount of stone and auxiliary building materials.
When working with expensive and complex relief types of stone, it is worth getting specialist advice or using the services of a professional interior finishing specialist.
The steps to decorate the hallway include the following steps:
- Preparation of material and tools.
- Dismantling the old covering.
- Alignment of walls.
- Surface priming.
- Laying stone.
Decorating the hallway walls with decorative stone is an activity that requires clarity and a strict procedure. By performing all actions strictly according to the scheme, you can achieve an excellent result without disturbing the overall style of the interior in the hallway.
Preparation for finishing
First you need to calculate the amount of material. If the stone will cover the entire area of the walls in the hallway, you should subtract the area of the openings and add 10%. If the decor will be located around openings, niches, in separate fragments on open walls, draw a rough sketch of the decoration and take measurements of each area. Then add up the area and add 10-15% for trimming. When purchasing material, you should remember that the amount of stone with an angular shape is calculated in linear meters, and of a regular shape - in square meters.
Artificial stone in the hallway
Additionally you will need:
- hacksaw or grinder (depending on the type of stone); Bulgarian
- simple spatula 7-9 cm;
Putty knife - notched spatula 15-17 cm; Notched trowel
- level; Professional cast Kapro level
- long ruler;
- pencil;
- paint brushes;
- varnish;
- file;
- acrylic primer. Acrylic primer for walls
Artificial stone can be attached using liquid nails, cement-based or gypsum-based glue. The glue consumption must be indicated on the packaging, so when purchasing, you should know exactly the finishing area and take it with a small margin.
Liquid nails Types of liquid nails
If you use gypsum stone, you will need a special miter box with high sides for cutting.
Plastic miter box
When everything you need has been purchased, you should start preparing the surface.
Step 1. Dismantling the coating
Removing the coating
If the stone covers the hallway walls completely, the old coating is removed completely to the base. If separate areas are intended for decoration, the coating must be dismantled very carefully. On the wallpaper, mark the boundaries of the finish with a pencil and carefully trim it with a utility knife, leaving a margin of 1-2 cm wide for stones. The wallpaper glue is soaked in water and removed with a spatula, and the walls are thoroughly washed. They also remove the paint if it is peeling or cracked, and clean off any loose plaster.
Step 2. Leveling the walls
Putty
Laying the stone should be done on a flat, smooth surface - this will facilitate the work process and increase the strength of the decorative coating. Therefore, all small cracks, gaps, and depressions are filled with putty, and if there are differences of more than 5 mm, it is better to plaster the entire area. Particular attention should be paid to doorways: deep cracks may form around the perimeter of the frame, for sealing which it is recommended to use a cement solution.
Prices for mixtures for leveling walls and ceilings
Mixtures for leveling walls and ceilings
Step 3: Priming
Priming
Dry walls must be lightly sanded to smooth out the unevenness of the puttied areas, and then wiped with a rag to remove dust. After this, the surface is treated 1-2 times with an acrylic primer. If there is wallpaper around the perimeter of the areas to be treated, the primer should be applied so as to cover an edge 1 cm wide - what will be hidden under the cladding.
Preparation of material and tools
When purchasing decorative stone, you should immediately stock up on the following tools that will be needed when carrying out repair work:
- Hacksaw or grinder (depending on what type of stone will be used).
- A set of spatulas of various sizes and shapes.
- Construction level to control the even laying of the coating.
- File for grinding parts of stone.
- Varnish and paint brushes (acrylic varnish will create a glossy shine and an additional protective layer on the surface of the coating).
- Primer for walls.
- Glue (it is better to choose gypsum or cement based types).
Auxiliary tools such as a pencil and a ruler for marking stone parts can be prepared as you go.
Advantages and disadvantages of gypsum brick
Gypsum bricks are quite a convenient, common, universal construction tool, which is used to lay out entire walls or certain areas of the room.
Gypsum brick can be combined with wallpaper and plaster to make the design more interesting.
The main advantages include:
- Environmental friendliness. They are made from environmentally friendly material that does not emit harmful substances that are harmful to human health, since they are made from natural materials;
- Low cost. Gypsum brick is considered the most affordable material for creating a brick wall. It is popular due to its low cost;
- A large assortment. On sale you can find bricks of different shapes, colors and textures. Thus, the design of the room will not be of the same type; everyone will be able to find and select a brick suitable for the overall design of the room;
- Prostate application. You can install gypsum bricks yourself; they adhere well to various surfaces. To do this, you do not need to have any specific experience or contact specialists;
- Light weight. Gypsum bricks do not put pressure on the surface and do not lead to its distortion, since they weigh little.
There are not many disadvantages, their main disadvantage is that they are very fragile. They may break if transported and used carelessly.
They are also afraid of dampness and high humidity. An element of a brick wall damaged during operation can be replaced without completely damaging the entire wall.
Dismantling the old coating
The old coating is thoroughly removed to completely clean the wall of any remaining glue, paper, plaster, or plaster.
If the previous material was wallpaper, then after removing it the wall must be cleaned of dried glue. To do this, the glue is soaked in water and removed using a utility knife. Use a spatula to remove paint or plaster.
Material shape design
Small hallways should not be weighed down with pretentious elements, otherwise the result will be an uncomfortable hallway, overwhelming with an excess of texture. Among the popular forms are:
- shells;
- brick;
- cobblestone;
- figured tiles.
The stone should fit into the hallway, flowing around the walls. In the case of a small area, simple solutions are suitable for the interior, for example, colored imitation brick. For a spacious entrance area, you can consider massive and textured products.
Has antibacterial and dirt-repellent properties.
Preliminary leveling of walls
This procedure is necessary so that the decorative stone fits better and more evenly on the underlying base.
All minor defects (small cracks, gaps) are covered with a layer of putty. Larger irregularities or construction defects are plastered.
Particular attention should be paid to surfaces near door jambs - this is where deep cracks most often form over time.
How to choose color, size and texture
If decorative stone is used for cladding in a hallway or corridor, it is necessary to determine not only what color scheme it will be presented in, but also its texture, size and shape. Most of us know that using decorative stone in light colors allows us to achieve a visual expansion of space. Based on this, we can say that artificial stone is perfect for rooms that are not only spacious, but also well-lit.
Light decorative stone in the hallway
If we consider the manufacturing method, we can note the following types of decorative stones:
- rubble - imitating boulders and pebbles;
Rubble decorative stone
- chipped - similar to unprocessed rock;
Chip decorative stone
- sawn - such stones are characterized by a clear geometry, but the front side does not undergo the grinding procedure;
Sawn decorative stone
- mosaic - sorting all elements in accordance with sizes, colors, and are an organic composition;
Mosaic decorative stone
- brick - imitate brick laying in various modifications;
Brick decorative stone
- tiled - imitate polished stonework;
Tiled decorative stone
- fantasy - imitation of stones that do not exist in nature.
If there is not enough free space in the corridor or hallway, then it is better to avoid using different types of decorative stones. It is better to choose one most suitable option, or combine finishing materials that are similar in shade and texture. If natural light does not enter the limited space of the hallway, then it is recommended to give preference to light tones of decorative stone, which is complemented by protrusions from the base. To diversify the color palette, you can simply combine decorative stone and another type of finish.
Combining decorative stone in decoration
When choosing the type of decorative stone, you need to take into account the color temperature of the products, as well as their role during the installation of artificial lighting. Designers recommend abandoning frontal lighting for areas trimmed with decorative stone, as this will have a bad effect on the relief of the masonry. The central chandelier can be replaced with several lamps built into the ceiling. If you have chosen a decorative stone of the same color but different in size, then you can treat yourself to creating original and attractive compositions. For active zones, fine-grained material is suitable, but with the help of large elements skirting boards, doorways, visible corners, etc. are finished.
Priming the walls
The next step is to apply 1-2 layers of primer to the surface of the walls. This must be done for a number of reasons:
- Preliminary priming of the surface allows you to get rid of dust and dirt.
- In this way, additional stickiness of the underlying layer is created.
- The primer protects the walls from the possible development of fungal colonies.
Thus, this procedure can significantly increase the service life of the decorative coating.
What material is it made from?
Artificial substitutes are created from natural ingredients. Natural minerals naturally accumulate and harden, in this case the process is regulated by man. The result is environmentally friendly products that are not harmful to health.
Gypsum blanks
Gypsum blocks are popular. The stones are light and can be painted in any shade.
Due to their low weight, the blocks can be used on any walls, regardless of the finishing material.
Gypsum tiles
Disadvantages: fragility to mechanical stress, instability to moisture. If it gets too wet, the finish may collapse.
The hallway is faced only with protective impregnation and acrylic varnish.
Elements from egg trays
Some people make stones from available household items. For work you will need measuring tools, a stationery knife, glue, paint.
Cut straight cardboard blocks. Egg trays are torn by hand, leaving a slight relief, but smoothing out strong protrusions.
Example of finishing from egg trays
Pieces of trays are gradually glued to the cardboard base. Additional gluing with thick paper napkins will help to bring the surface of the workpieces as close as possible to the stone. The napkins need to be wrinkled first; they can be glued with regular PVA glue.
Painted with one color with a transition of shades, or several. It is recommended to use acrylic paints with a water-repellent effect and varnish after completion of the work.
Laying decorative stone
To create a more natural and original pattern, it is better to lay the covering elements in different directions so that adjacent seams do not have the same course. Sequence of finishing work:
- Diluting the glue (the method will depend on the type of glue and its base). It is better to prepare the working solution strictly according to the instructions, and then the glue will hold the decorative stone more firmly.
- First row location. It is customary to start work from the corner of the wall (top or bottom - it doesn’t matter).
- A layer of glue is applied to each fragment using a notched trowel.
- The stone element is pressed against the wall surface, aligned in the direction of the seam and excess glue is removed.
For ease of work, you can use a ready-made diagram for laying decorative stone. You should also familiarize yourself with the various options for finishing the hallway with stone, which will help you understand the progress of laying the covering elements.
Design options
Several walls
The walls can be finished with the same or different species.
The photo shows a spacious hallway. The interior uses two types of stone with different textures.
One wall
For a small hallway, a good option would be to brick one wall. It will become a highlight, and can also echo the elements of other rooms into which the hallway goes.
In the photo the hallway turns into the living room. The brick wall echoes the false fireplace, decorated with the same material.
Part of the wall
Stonework can be combined with other materials or partially decorate the hallway wall.
Arches and doorways
Stone arches and openings will look harmonious in spacious houses, as visually they hide a lot of space.
Angles
Using stone cladding, you can decorate transitions in rooms or hallway corners. This solution will not burden the space, but will only give a “zest” to the interior design.
Mirror
A mirror is an integral part of the hallway; its frame should be consistent with the overall style of the room. The design can be in the same color palette as the walls or a custom-made frame.
Panel
Unusual and elegant design of any part of the apartment. A pattern made on a stone base or a panel mounted into the wall can support the overall style of the hallway.
Niches and shelves
A stone niche in the hallway not only has a decorative function, but will also become a useful space. Shelves and unusual decorative elements made of natural materials in the interior of calm colors will be the main accents.
Types of decorative stone for the hallway
On the building materials market you can find a fairly rich selection of materials: natural and artificial options.
More preference is given to artificial materials, since natural stone has a high cost and requires the help of a specialist to carry out repairs.
Features of the design of a small hallway
In houses built last century, especially in Khrushchev, as a rule, there are very small hallways. They are a small square of about 3 m2. If you want to use stone in a corridor of a small area, some tricks will help. Firstly, it is worth remembering the main rule: light shades will visually increase the area of the room. Bright colors, on the contrary, hide it.
Full cladding of all walls will look harmonious in open hallways that immediately flow into the living room. In this case, the stone can go into the living room area or be combined with other elements of the room.
In remote rooms, you can use a partial finishing option, for example one wall or corners.
Natural stone is massive; it will be replaced by decorative material, wallpaper or imitation tiles. Construction stores have a wide range of materials and often present examples of finishing in ready-made versions.
Advantages of artificial material
Before you make your choice, you should find out all the advantages of finishing with artificial stone:
- Relatively low price.
- Light weight, which reduces the load on wall supports.
- There are no special care or cleaning requirements.
- Does not fade under the influence of sunlight.
- Wide selection of models in color, texture and shape.
This type of decorative stone has earned particular popularity among apartment owners and interior decorators due to the ease of repair work.
The best modern materials for imitation brick
| Photo | Name | Rating | Price | |
| #1 | Gypsum | ⭐ 4.9 / 5 16 — votes | Find out more | |
| #2 | Clinker | ⭐ 4.85 / 5 4 - votes | Find out more | |
| #3 | Porcelain tiles | ⭐ 4.8 / 5 6 — votes | Find out more | |
| #4 | Acrylic | ⭐ 4.8 / 5 3 - votes | Find out more | |
| #5 | Flexible stone | ⭐ 4.75 / 5 5 — votes | Find out more |
What modern materials would you choose to imitate brick or would you recommend purchasing?
Take the survey
Cement-based decorative stone
This coating option is particularly durable and resistant to moisture. The surface of walls finished with cement stone is easy to clean without fear of residual contamination. For finishing the hallway, cement elements will be an excellent solution.
In addition, the stores offer the buyer a huge assortment of design ideas.
But when choosing this material, it is worth remembering the negative aspects of stone: heavy weight, difficulties when cutting and polishing building blocks. Before laying the covering, additional strengthening of the walls is required.
The use of gypsum bricks in the interior
More and more preferences in interior design are given to environmentally friendly materials or natural materials of natural origin. Natural materials are quite expensive, and repairs can require large material costs.
In such cases, you have to look for alternatives. Gypsum brick has become an excellent replacement for natural brick. It does not emit harmful substances that affect human health.
There are many bricks of various sizes and textures available for sale, thanks to which they can be used to decorate not only entire walls, but also be used to decorate windows, doorways and staircases.
Thus, gypsum brick can be used in classical design and in modern style.
You can pay attention to the following types of design using gypsum bricks:
- Romance. The use of brick in the design will not definitely make it much rougher, thereby creating the feeling of being on the street. Any material can be transformed in different ways; to do this, you need to choose the right color, texture and size of the brick; layout also plays an important role. It is necessary to select a color that matches the flooring and furniture. To create a romantic design, a brick wall is combined with openwork curtains, complementing the interior with delicate textures, colors and lighting to display the advantages of the wall.
- Pop Art. This design is suitable for fairly determined people who are not afraid of change. The interior is dominated by contrasting colors. This could be a combination of a white frame with bright furniture. You can also pair a red-orange structural wall with bright furniture in blue or green.
- Gothic. The design is not done in a gloomy style, but is skillfully complemented with elements of antiquity. It is enough to display it in a combination of black, white and beige, complementing it with wooden elements. In this style, furniture with a glossy surface goes well with the overall interior.
- Scandinavian style. A rather strict style, the main accent of which is the brick wall in natural shades. The most advantageous is the use of natural brick in gray and black colors in this style. It is important to select the color of the brick that matches the colors of individual parts of the interior, furniture and textiles. The strict Scandinavian style can be diluted with decorative elements, paintings, various vases and sophisticated chandeliers.
- Ethnics. A strict style that goes perfectly with bright shades. A gypsum brick wall is combined with ceramics; it is also possible to lay out a gypsum wall with hieroglyphs displayed. It is customary to decorate a brick wall in this style with various carpets and souvenirs, usually in the African style.
Decorative sandstone stone
This model is classified as a flexible type of stone. For finishing, you can cut a very thin layer of material, which is quite easy to lay on the wall.
With the help of sand stone, it is possible to create a pleasant interior with natural shades and beautiful patterns. The only drawback is that the layers of stone should only be glued onto the underlying textile base.
Photo examples in real apartments
Below are a few successful examples of corridor renovations by ordinary people who chose this finish for themselves.
Stone in the form of clinker tiles
Such decorative coating models are made from certain types of clay. The creation technology involves firing finishing elements in a kiln to form a natural relief pattern.
The thickness of each stone does not exceed 2.5-3.0 cm, which greatly simplifies the process of working with this model.
Selection tips depending on styles - table
| Name | Hue | Length, height, thickness, cm | For what interior? | |
| Tien Shan 30 | Gray beige golden | 48.6x9.8x4.6 29.2x9.8x4.6 19.3x9.8x4.6 | Classic, modern, Mediterranean | |
| Tien Shan 27 | Beige gray golden | 48.6x9.8x4.6 29.2x9.8x4.6 19.3x9.8x4.6 | Mediterranean, Venetian, modern classics | |
| Luxembourg 15 | Sand brown | 24x7 | Modern, country, loft | |
| Mistral 1 | Beige, very light | 19x5x1 | Modern, loft | |
| Nordic 3 | Golden beige with tan marks | 23.8x6.9x1.3 | Modern, country, loft |
Decorative stone made of gypsum
This model has a number of advantages that determine the popularity of the material:
- Low cost.
- Light weight material.
- Ease of practical application.
Unfortunately, there were some drawbacks:
- The coating does not tolerate high indoor humidity.
- After laying the stone, 2-3 layers of acrylic varnish must be applied to the surface.
The choice of artificial stone depends on the preferences of the apartment owner, his financial capabilities and the characteristics of the hallway room.
Artificial or natural stone?
Artificial
Artificial stone is cast from a special composition. There are a lot of manufacturing options; they differ in technology and solution composition. Thanks to this, the material can be of any shape, texture and will allow you to create an imitation of any breed.
Artificial stone does not tolerate constant high humidity, but in urban apartment buildings this is not required.
Wild
When decorating a hallway with natural material, it costs more effort; it is more difficult to lay out, but the finished version creates a unique interior. It is distinguished by its strength, moisture resistance and practicality.
In addition, the use of eco-friendly materials is popular today; wood, rocks, cork, and metal are often used.
Hallway finishing combinations
In practice, hallways are decorated not only with stone, but also with other materials in combination with decorative stone.
For example, decorating a hallway with stone and wallpaper is a very stylish option that allows you to combine two different design trends.
For those who have not yet decided on the choice of design style and material, there are catalogs with photos of ready-made options for finishing the hallway with stone.
Color solutions
Most often, beige, gray or brown shades are used in modern hallway design.
To visually enlarge the space, use light shades that imitate marble, granite, quartz or pebbles.
It is better to choose light wallpaper for a dark stone finish.
The best option would be if the wallpaper is two shades lighter than the stone.
Various bright colors are also relevant.
Photo of finishing the hallway with stone
Please repost

Installation rules
Installing decorative stone is similar to hanging wallpaper. The main thing is to apply glue only to the wall, and avoid applying it to stone.
The stone should be installed on the walls according to the following scheme:
- If possible, level the wall with a spatula.
- Attach a roll of stone.
- Correct defects.
If you apply a roll, then you need to start from the corner and level it from top to bottom. The strips must be glued end-to-end, then they must be ironed with a roller
Pros and cons of flexible stone
Among the positive qualities of flexible stone, experts note the following:
- Flexible stone is harmless to health and nature, because it is made from natural ingredients.
- Easy to maintain and install.
- Possibility to install on any surface, even rounded.
- Ease.
- Does not burn.
- Translucent.
Minuses:
- It is more expensive than other types of artificial stone.
- The wall must be leveled with a spatula before installation.
- Risk of buying a fake.
Fakes are installed much heavier than high-quality material. It may accidentally break, stick poorly, or even fall off. You should not save on buying this type of stone, otherwise you will have to redo all the work. Stone finishing in the hallway of an apartment should be of high quality and reliable.
How to stick
Gluing decorative stone to wallpaper, be it artificial or natural, has become quite popular. All the work can be done with your own hands, independently. On the other hand, to solve such problems, an inexperienced person needs to read, at a minimum, brief instructions, as well as read certain recommendations. First, let's say a few words about the different types of wallpaper that can be used to combine them with a stone surface:
- Light wallpaper made of paper. They can consist of either one or two layers. In a certain sense, the disadvantage of such wallpaper is that when glue gets on it, it gets wet and loses its strength.
- The so-called heavy wallpaper, which includes vinyl and non-woven fabrics. When gluing stone to vinyl and non-woven wallpaper, there is no guarantee that it will stick well and for a long time.
- Liquid wallpaper for stone. This type of wallpaper is such only nominally, by its name. In fact, in terms of the structure of the material and the method of application, they are much closer to plaster.
Thus, it becomes clear that gluing decorative stone to wallpaper is not so simple. For this reason, it is necessary to look for some other solutions. Let's see what can be done in such situations and what seems to be the most rational solution.
Ceramic tile
Ceramic tiles are suitable for both exterior and interior wall cladding. There are many types of textures and colors available in the market.
The design of the hallway, decorated with stone in the form of ceramic tiles, will look advantageous even with uneven walls.
