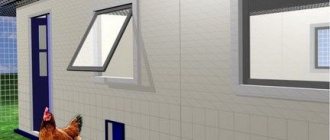
A roof with two slopes over garages is built a little less often than a single-slope analogue. Although, according to a common misconception, one slope requires less costs, a “house” structure is often cheaper to build. Water flows freely from its inclined surfaces, so there is no point in laying multi-layer waterproofing.
There is no need to install parapets that increase the consumption of materials. The simple construction process is quite accessible to the home craftsman if he knows how to construct a gable roof for a garage in strict accordance with the technological instructions.
Stages of building a hipped roof
The first stage of building a roof is determining the purpose of the roof (covers the attic floor, attic, etc.), choosing the roofing material (depending on this, the list of materials for construction will be determined), taking into account the atmospheric conditions of the place where the roof will be used (wind, rain , snow).
Choosing a hip roof will give the building greater resistance to rain and make it more durable (the rafter system is more reliable). The main difference between this type of roof and a gable roof is that instead of side gables, it has two triangular roof slopes.
When choosing the angle of inclination of the slopes, you should take into account the level of precipitation and wind characteristics of the area. For low and medium annual precipitation, it is recommended to choose an angle within 4-40 degrees. In case of heavy snowfalls and prolonged rains, the recommended optimal angle of inclination of the slopes is within 40-60 degrees.
The roofing material can be: rolled roofing, tiles or metal tiles.
Depending on all the above nuances, the thickness and other parameters of the wooden component of the hipped roof will be selected.
The end result of the first stage is the creation of a diagram of the future roof, on the basis of which construction will be carried out.
We will describe further technology on how to make a hipped roof with your own hands.
The second stage is to build the base for the roof. The base is used to evenly distribute the load from the roof to the load-bearing walls. The construction of a hipped roof requires a base that can be built on your own - a wooden mauerlat and benches. Waterproofing is required under the base to extend the service life of the roof. A mauerlat is placed on the hydraulic barrier along the outer contour of the building (the size of this beam varies, either 100x150 mm, or 50x150 mm).
Lezhni - a beam located in the plane of the base of the rafter system at the same distance from the two side mauerlats. It serves as a supporting element for struts and racks, so it is laid on load-bearing partitions (see drawings of a hipped roof). Large roof structures may include several roof decks.
The third stage involves the direct installation of the roof frame (base, rafters, sheathing).
Structurally, the construction of a roof in a house with or without existing floors differs (in this case there is no need to lay floor beams on which supports will be installed).
The installation of racks (vertical supports of the roof frame) should be approached with particular care. It is necessary to accurately maintain the installation angle (90 degrees). At the slightest deviation, further deformation of the roof is possible. The installation step of the racks is up to two meters.
The structure of a hipped roof of a house consists of four planes (slopes). Two trapezoidal and two triangular. Trapezoidal slopes will be formed by side rafters, hip (triangular slopes) - by slanted (diagonal) rafters.
The rafters at the top of the frame are supported in the ridge beam (purlin). This beam goes on top of the vertical posts (possibly a groove connection with the posts). The distance between the rafters is from 50 to 150 cm (according to the roof plan). The recommended width of the rafter board is 150 mm.
The frame is fastened using corners and steel plates with self-tapping screws (nails). To strengthen the resulting structure, diagonal supports, struts, and wind beams are used. They allow you to increase the permissible load of the system.
Waterproofing is laid on top of the rafters. Then a counter-lattice is made (bars that are attached to the rafters on top of the waterproofing). It is needed to create a ventilation channel between the roofing material, sheathing and waterproofing. This will allow moisture to be removed quickly and effectively. Next, the sheathing is performed - horizontal boards are attached from the bottom to the very top to the counter-lattice (see diagram of the hipped roof structure).
The last step is the installation of roofing material. Installation is carried out depending on the parameters of the material. Example of installation of metal tiles.
Creating a frame pediment
Before you begin decorating the gable, you need to arrange the sheathing and lay the finishing roof covering.
When forming the sheathing, the type of future roofing is taken into account. It is made from edged boards 25 millimeters thick. Lathing happens:
- Solid - boards are packed at a distance of 2–4 centimeters from one another. Used when using tiles or soft roofing.
- Sparse - the distance between the boards is 15–25 centimeters. This sheathing is installed under metal tiles, corrugated sheets, slate and other similar materials.
- Rare - the distance between the boards is from 0.6 to 1.2 meters. Used when the length of the covering sheets is equal to the length of the slope with an overhang. This coating is made only to order.
The sheathing should be brought out beyond the gable rafters to create an overhang.
A frame is mounted on the front trusses for fastening the front finishing material
Roofing installation
Before laying the sheathing, the roof is insulated and a moisture-proof layer is laid. Further:
- The roof covering is being laid. The installation sequence is from bottom to top in order. The straightness of the first row is controlled by a stretched cord.
- Roofing sheets are fastened with self-tapping screws using shock-absorbing gaskets.
When installing the final roof covering, you cannot skimp on fasteners; the protective layer must be durable and able to withstand wind and snow loads.
Sheets of metal tiles are laid from bottom to top, starting from the corner of the roof
Installation of gables
The sheathing of frame gables is done based on the characteristics of the material intended for the front finishing. The following products can be used for this:
- Lining.
- Block house.
After finishing with a block house, the house becomes like a log house made of rounded logs - Board materials such as waterproof plywood, OSB, flat slate, cement-bonded particle board, etc.
- Vinyl or metal siding, as well as other finishing materials.
After installing the sheathing, it is necessary to lay a moisture barrier made of polyethylene film 200 microns thick. It can be secured with construction staples. This work is done outside. Using the film, you can sheathe the outer surface with the selected finishing material.
The gables must be insulated with roll or tile insulation. The thickness of the protective layer must be at least 10 cm, and for areas with cold climates - at least 15 cm. An internal moisture-proof layer of film is stretched over the insulation.
A lathing for the front finishing is placed on top of it, for which bars measuring 50x50 millimeters are used. The entire building is finished at the same time, after the roof is insulated.
During the process of facing the pediment, windows are installed, if they are provided for in the project, and in some cases, doors.
The pediment of a wooden house with a gable roof is most often finished with clapboard
Garage roof: main types of garage roofs, selection of materials and design ideas (110 photos)
Many car enthusiasts value and love their cars very much, so if possible they try to hide their car in a warm and cozy garage. However, not every car enthusiast has a warm and cozy garage. But many car owners decide to build their own garage.
Of course, it’s not at all difficult to build brickwork; the difficulty lies in building a garage roof. Therefore, many initially have a reasonable question: how to make a garage roof with your own hands?
It is possible to build a garage roof on your own if you have basic builder skills and a general idea of the final result of the construction.
The simplest and best option when building a roof on a garage is a pitched roof. Assembling such a structure will not be a big problem or difficulty, and this option has its advantages:
- does not require any experience or knowledge
- does not require large financial expenses
- The construction process will not take much time, usually no more than 3-4 days
- the design of such a roof has a long service life
Slate
The main advantages of slate are affordable price and long service life.
- A roof covered with slate will last about 40 years without repair. Lay overlapping sheets on a wooden sheathing.
- For fixation, special slate nails with wide heads are used.
- Due to the relatively high weight, the requirements for the reliability of the rafter system increase, so for its installation it is necessary to use a beam of a sufficiently large cross-section - at least 8x10 cm. For waterproofing, roofing felt is usually used, mounted on the sheathing.
Determining the slope angle
In the process of designing a garage, it is very important to correctly and correctly slope the slope; this is necessary for water drainage during rains. In this case, it is necessary to install supporting walls with different levels. However, the slope of the slope depends on various nuances.
Features of climatic conditions. In this case, it is recommended to make slopes based on the characteristics of the climate, for example, in a climate where there is a large amount of precipitation in the form of rain and strong and gusty winds, it is recommended to make a slope of no more than 5-7°. But if the climate is more severe with a lot of snow, in this case it is recommended to make the slope no more than 25°.
Selection of roofing material. Of course, one of the most important questions in roof construction is how to cover the garage roof? Basically, bitumen-polymer rolls or the so-called “roofing felt” are used for roofing garages; it is also good to use slate or sheets of steel or metal tiles for such purposes.
However, they all have different slope angles. For example, “roofing felt” has an indicator of no more than 10°, for slate it is recommended to have a slope of no more than 20°, but for metal tiles a slope of about 25° is typical.
External view of the architectural panorama of the site. In this case, it is necessary to maintain almost the same slope of all roof structures; this is necessary to create a single general panorama of the site.
Ruberoid
Suitable for solid substrates only. It can be laid not only on a concrete slab, but also on a continuous sheathing of boards. Ruberoid is lightweight, protects well from precipitation and is affordable. Sold in rolls, so it is quite easy to install. You need to lay it in 2-3 layers.
Work order:
- Treatment of the rough roof surface with bitumen mastic.
- Installation of the first lining layer of roofing felt. It should be laid immediately after applying the mastic.
- Treating the base with bitumen mastic and laying 2 layers of roofing material.
- Re-treating the roof with mastic after laying the last layer.
The sheets must be overlapped, otherwise water will flow through the joints. Laying is done in the direction of inclination.
To heat up roofing felt and mastic before installation, you will need a gas burner.
Assembling a pitched roof for a garage
Before purchasing materials, it is necessary to accurately count everything again, and only after that can you purchase everything necessary for construction. In fact, building a shed roof for your garage is not that difficult.
You just need to do everything consistently and slowly. It is advisable that you have a drawing of the roof, which will serve as a clear guide to action.
Roof insulation is also important. Therefore, many do not know how and how to insulate a garage roof? The process of insulating a garage is considered almost the final stage of construction. To insulate a garage, you can use almost any insulation.
The insulation is laid between the rafter beams, and they must fit tightly together. To insulate a lean-to garage, you can use insulation with a thickness of 20 cm.
Thus, you can do the garage roof repair yourself. At the same time, there is nothing complicated in the construction process. The only difficulty is that in some moments the help of assistants will be required. This is due to the fact that the beams and rafters are long and heavy and they need to be held somewhere, so helpers are needed here.
If you have any difficulties choosing a roof design, here you can see colorful and illustrated photos of a garage roof. You may like some option.
Why gable?
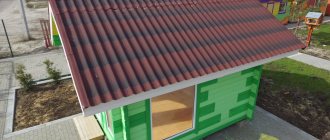
This garage will have a gable roof
. It will be easier to answer this question if you just know all the benefits:
- Great convenience and ease of installation. Having good instructions, even someone who does not have much experience in roofing can handle the construction of such a structure.
- Availability of components. All necessary elements can be purchased or ordered specifically for your project.
- Possibility to choose the best slope angle. This ensures good removal of precipitation, which means a long service life of the coating and other materials.
- If no roof space is planned, a cold attic will reduce the need for additional heating and ventilation.
- Convenient placement of various components in the under-roof space.
- The advantage of organizing an attic space.
- Choice of any type of roofing.
- Installing additional windows or skylights.
- Possibility of an individual approach.
Main types of pitched roofs
The construction of a roof over the house is a sure indicator that capital construction is moving towards a logical and long-awaited conclusion, that work on improving the rooms will soon begin, from gluing wallpaper for painting to varnishing new doors and installing the ubiquitous PVC windows. But any internal repair must be based on the absolute reliability of the roof - it must be airtight, warm, durable and visually attractive.
Of all types of roofs with a pronounced slope, a roof with four slopes is considered the most reliable due to the uniform distribution of the load - and it is also characterized by difficult installation . Therefore, a description of other roofing methods will not be superfluous; “the roof of your house” can be made according to different design schemes:
- A pitched roof between two long walls. Installation of a hip roof of this type is often relevant for auxiliary buildings (garages, workshops, sheds, etc.), it is quick and simple. Roofing work on a pitched roof can serve as a good “repair school” before erecting more complex structures over residential buildings;
- The roof is gable - it covers a classic Russian hut, with a ridge and a spacious attic. If the house plan is similar to an elongated rectangle, then a gable roof will be a budget-friendly and reliable repair solution that can be done on your own;
- A mansard roof is a variant of a gable roof, with broken elements of the roof structure instead of straight ones. The result is not a banal attic, but a completely residential attic under the roof itself - for the sake of expanding the living space, such a covering is used;
- A hip roof is a roof with one or more peaks, the “poles” of a converging roof. It usually covers complex, polygonal buildings, with numerous outbuildings and extensions. It is extremely difficult to build a hip roof yourself; you will need to hire specialists from a reputable repair company;
- A simple hipped roof is built over a house with a strictly square plan, all its sides (hips) are equal to each other. Installation of a hipped roof of this type is simpler than other options (see below);
- The roof is hipped rectangular - if the length of the load-bearing walls is unequal, two end slopes will be triangular (like a square structure), and the other two will look like identical trapezoids;
- A complex hipped roof is a variant of a rectangular design with additional bay windows, dormer openings, attic windows and other protruding elements.
As can be seen from this extensive list, there are many options for “roofing” residential and non-residential buildings - and each of them requires preliminary planning, even a basic pitched roof. The hipped roof, the calculation of which is more difficult than others, deserves special consideration.
Advantages and disadvantages
A gable garage roof is a structure that uses external fences of the structure (walls) for support. The roof planes are connected at the highest point of the roof - the ridge. Geometrically, the base and two roof slopes form an isosceles triangle .
This garage floor has several positive qualities:
- The removal of water masses and snow is simplified. The slope improves water drainage, which reduces the load on the roof, and the need to remove snow from the roof appears infrequently. In regions with heavy snowfall in winter, a gable roof is the best garage structure that can withstand snow loads.
- The saving will be the refusal to use hired construction crews - a home craftsman can independently build a gable roof on his garage.
- The shape of this roof reduces heat loss in heated garages. This is the most energy efficient design for covering outbuildings.
- A gable roof makes it easy to organize storage space for tools and other things in the attic.
- You can increase the ceiling height.
Please note! A building with a gable roof externally looks like an independent building, in contrast to structures with a single slope. It can be placed not only next to the house - a beautiful garage with a gable roof looks good anywhere.
The main disadvantage of a standard gable roof is that there are a lot of wood parts that require high-quality treatment with antiseptic compounds and fire retardants (flame retardants). In addition, the inclined design pushes the walls, so it is not suitable for garages with weak walls.
Hip roof - design calculation
The basis of any sloped roof is the rafter structure. The smaller the slope, the stricter the requirements for the load-bearing capacity of the rafters. A small roof slope angle is unfavorable; it will require powerful base beams, their frequent arrangement, mutual tying with lintels and other structural difficulties. On the other hand, too “steep” elevation angles will lead to significant costs for roofing material, and very expensive metal tiles or composite slate are used for the roofs of residential buildings.
Therefore, the angle for a sloping roof to the horizon is most often taken as 20˚-40˚. This slope value allows you to use standard beams for rafters, insulate and soundproof the roof of the house, and guarantee reliable drainage of precipitation. It is possible to facilitate the mathematical preparation stage with the help of modern network communications.
The online calculator on the website will calculate a hipped roof quickly and free of charge. Just keep in mind that the result of the software calculation directly depends on the accuracy of the input data, namely:
- Length and width of the roof opening;
- The selected angle of inclination of the roof to the horizon;
- The dimensions of the roof overhangs behind the wall line:
- The type of roofing material, the mass per unit area and the size of the overlap of one sheet on another;
- Installation costs for cutting both rafters and the metal tiles themselves, corrugated sheets, etc.
The result of the calculations can be performed in several versions - with different cross-sectional sizes of the rafters, the pitch between them and other details. In general, constructing a new truss structure with your own hands is not recommended; it is better to carry out this stage by professional craftsmen.
With the guaranteed reliability of the rafters and their high-quality installation, further work on insulating the roof, creating an acoustic barrier, vapor barrier, and constructing the roof itself is quite doable on your own. As a last resort, trust the craftsmen to lay out the “skeleton” of the rafter structure - that is, the corner beams going to the corners of the house, and decide on the spacing between the joists. Further roofing work is permissible in independent mode.
How to calculate the angle
The slope of the slope is used when calculating the elements of the rafter system. It is defined in degrees or percentages, so you need to do some math.
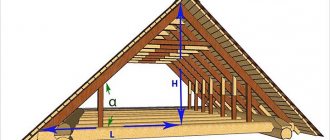
A gable roof in cross-section is an isosceles triangle (if the slopes are the same). It can be conditionally divided into 2 right triangles. One of the sides H is the height to the level of the ridge, the other L is half the span of the house. They are measured against the finished walls and gable. It is necessary to calculate the length of the rafter B, which can be found based on trigonometric formulas.
Tangent of the slope angle relative to the horizontal:
tgα= H/L
Using the Bradis table or using an engineering calculator, we find the corresponding angle value in degrees. For example, the roof height is 3 m, the width of the house is 9 m, half the span is 9/2 = 4.5 m.
tgα=3/4.5=0.6667
This tangent corresponds to an angle of 34°, that is, the roof has an average slope. You can use the cosine function and calculate the length of the rafter as B= L / cos 34° = 4.5/0.829 = 5.42 m.
Also, information about the angle of inclination is needed to navigate roofing materials.
To calculate the length of the rafters (and check), you can use the second method - the Pythagorean theorem:
B²=H²+L²= 9+20.25=29.25, from where B =√29.25=5.41 m is the length of the rafter (without overhang).
To prevent precipitation from getting on the walls, you need to add at least 40 cm for overhang. We obtain for our building a minimum rafter length of 5.81 m with a slope angle of 34°. For convenience, you can take B = 6 m, which corresponds to a standard board.
Installation methods
There are two methods of assembling a rafter system - erecting a roof with entire half-trusses and element-by-element installation.
The first method involves the purchase of finished products from specialized companies for the manufacture of rafter structures. All that remains is to bring them to the construction site and assemble the hip roof of the house according to the scheme, like a construction set.
This method of roof construction certainly ensures quick installation, but will cost the customer quite a lot.
For those construction site owners who know the tools and have significant experience in construction, it will be more profitable to assemble the rafter system element by element with their own hands. It may not be as fast, but it will save a significant amount.
Multi-level roofs
Another type of roof with two slopes. To understand what we are talking about, look at the photo below.
Multi-level gable roofs Source moscow.sk-evrodom.ru
According to its configuration, the roof is gable and covers the entire house. But individually, each slope is a single-slope structure. Usually a load-bearing wall is erected between them, on which both slopes rest.
But at the same time, the larger slope rests on the upper end of the wall, where the ridge beam or mauerlat beam is installed, and the smaller one on its vertical plane, where the load-bearing beam is usually fixed. The construction of such roofs is carried out using the technology of a single-pitched structure.
Useful tips
So, we talked about different technologies for constructing lean-to garages. I would like to give a few recommendations that will affect the quality of the final result.
The first concerns the direction of roof slope. It should immediately be noted that the slope itself can be formed both in the longitudinal direction, that is, from the facade of the building to its rear wall, and transversely, from side to side. In this case, the slope must be installed so that the wind always blows in its plane, pressing it against the building, and not on the other side, lifting it.
As for the angle of inclination, the optimal value is 25-300. There is no point in doing more, such pitched roofs simply look awkward, and the wind load increases greatly. Low-slope roofs (less than 100) must also be erected with great care. Because the snow load on them increases.
Huge snow load on the garage roof Source pikabu.ru
The cross-section and installation pitch of the rafters of a pitched garage roof are important indicators. To calculate them, you need to know a fairly large number of different indicators. For example, snow load, wind load, weight of roofing material, insulation and other elements and layers. This is actually a complex calculation that experts carry out, but it is very important. Today it is possible to carry out calculations using online calculators. It is convenient, simple and quite accurate.
And one last piece of advice. Typically, a pitched garage roof is constructed from lumber. Therefore, the entire structure must be treated with an antiseptic, which will protect the wood from insects, mold and mildew. They reduce its quality technical component. After drying, a second layer is applied - a fire retardant, which is responsible for the fire resistance of the wood.
Sequence of work
Mauerlat and rafters
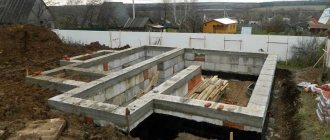
Installation of the roof begins with securing the supporting base - the Mauerlat. This is a beam with a cross section of 150x150 mm, which is laid along the perimeter of the walls. Its horizontal placement is controlled by a level. The beam should not be on the edge of the wall; you need to leave a distance of 5–7 cm. The Mauerlat is fastened to studs embedded in the masonry, which are tightened with nuts. This beam allows you to connect the rafter system and the walls of the house into a common structure.
ce7050a30d77a0a193e915e3355bf650.jpe
472a6d6d87433316ae8a10165e63d447.jpe 37c9c85fa1f8c8fad9d2a2a85851c438.jpe
To install the racks, floor beams or beams are required. These elements are made from beams measuring 100×200 mm or double boards. All supports are installed strictly vertically and attached to the bed with a metal corner or plate. For a hip roof, the racks are installed in one line, and a ridge purlin is attached to them. When erecting a hip-type roof, the supports are placed diagonally, equal distances are set aside from the corner. As a result, they form a rectangle on which the purlins are laid. Fastening is done with corners.
Description of the hip roof design
The side rafters are installed after processing according to the template. A thin board is taken as a blank, applied to the purlin and the cut is marked. The second end rests against the Mauerlat and the lower cut is outlined. The required number of rafters is prepared according to the template and installed with the selected fastening pitch, it can range from 60 cm to 1 meter. The connection to the purlin and base occurs with staples or self-tapping screws.
Washed down the rafters
Sloping rafters with a ridge purlin form the angle of inclination of the slopes. These rafters are located diagonally and carry additional load, so double boards are used for them. The cutting of the slanted rafters is carried out according to a template, their length takes into account the overhang of 50 cm. In the upper part, the slanted rafters are connected by a crossbar to give strength. When installing a hip roof, the slanted rafters are connected at the ridge unit using tie-rods. The rafters are installed at an angle of 90 degrees and are certainly connected to the walls using wire clamps.
Hip diagram
Short rafters or rafters are attached to the diagonal rafters. They are made of different lengths, but must be parallel to each other. The rafts, together with the ordinary rafters, form the side slopes. For the tent model, installing the extensions and fastening the racks, struts and trusses is also the final stage of construction.
Construction of a hip roof
To relieve the load from the diagonal rafters, trusses are installed under them. These are vertical supports that rest on the beds. The side rafters are secured with struts. One of the horses of the board rests on the leg, and the second is cut at 45 degrees and attached to the rafter leg.
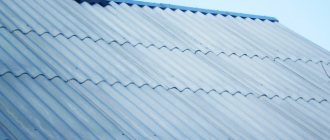
Corrugated sheet
It has gained great popularity among other materials for covering garage roofs. Its advantages include: a large selection of colors, accessibility, easy installation, and durability. If you lay it correctly, you will get not only a beautiful-looking ceiling, but also a durable one.
There are different types that differ in height, width of sheets, and what kind of galvanized steel is used. In order to purchase high-quality corrugated sheeting, you should make sure that there is a GOST mark or another standard; if it is not there, then most likely the product is of poor quality.
Average cost of turnkey construction
To give the developer an idea of how much it will cost him to erect a hip roof, many companies offer their prices in rubles per 1 sq.m. house roofs . By examining the market for offers of this nature, we can present the average prices for turnkey work in the following table.
| Type of work | Price, rub./sq.m. |
| Rafter system | 350 |
| Insulation | 150 |
| Waterproofing | 100 |
| Countergrid | 100 |
| Lathing | 150 |
| Seam roofing | 300 |
| Additional elements | 350 |
| Total | 1500 |