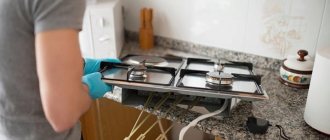
Installing a hob (gas or electric) into a kitchen countertop made of chipboard is a simple matter. Especially for a man whose hands grow from the right place.
However, if you are encountering this for the first time (that is, you have never installed a hob before), we recommend that you read the step-by-step instructions in this article.
The information will be useful to those who assemble a kitchen with their own hands, novice assemblers, as well as customers, so that they can personally monitor the progress of the work being performed.
We will consider in detail the entire process of installing a hob into a countertop with your own hands - from marking to connecting to a gas supply or electrical network in an apartment or private house.
In addition, we will tell you what to look for and share useful tips.
And we’ll give you the first advice right now. If you do not have experience in connecting household gas or electrical equipment, then entrust this work to specialists, because the cost of an error can be very high.
All other work on installing the hob into the countertop can be done independently. But again, it is advisable to have at least some experience with power tools.
In general, if you follow the step-by-step instructions, there is nothing complicated here. The main thing is to make the markings correctly. And here you need to adhere to a simple but important rule: measure seven times - cut once.
Working conditions
In an apartment, the installation location of the gas panel is determined by the location of the gas pipe. A shut-off valve must be installed on the gas pipe. It is worth noting that moving a gas pipe over any distance should only be done by gas company specialists. At the same time, no one forbids installing a gas panel at a certain distance from the pipe, using a flexible gas supply (gas hose).
bellows hose, flexible gas connection
The problem of choosing hobs
Choosing a product on the market is difficult due to the lack of suitable types. After all, the type of installation of the hob depends on the parameters of the selected model.
Hob: view after installation Source tehznatok.com
Main product classification:
- Products are gas , electric and induction . As for the electric panel, this is the best option for a house where gas is not installed. If the buyer's first priority is comfort, experts recommend purchasing a gas appliance. The induction hob is characterized by a modern set of advantages.
- Dependent panel . A dependent model is a model produced together with the oven. In this case, the oven is located inside the kitchen unit or is integral with the hob. The combination of oven and hob does not always happen, even if they are manufactured by the same company.
- Independent model . It is not connected to the oven. The main advantage of such units is the arbitrary location of the device in the kitchen. The dependent model is made so that it can be placed exclusively above the oven.
Differences by type of control:
- Mechanical mode of operation requires a rotating mechanism. Most consumers prefer this type.
- Touch models work with a light touch of your hand. This is a truly innovative method. Cleaning the panel is easy because the surface is smooth.
The main rule when choosing is security parameters. Source m.sm-shop24.ru
Measurements
Before purchasing a panel, you need to know the width of the tabletop. The dimensions of most panels are standard and do not go beyond 55-57 cm. The documentation for the panel must indicate not only the dimensions of the panel, but also the size of the hole in the countertop for installing the panel.
Panel installation diagram
Related article: What a good refrigerator should be
Step-by-step installation instructions
To install electrical built-in appliances, you will need a 220 V power socket. It is advisable to install it in advance and select the most suitable location before installing the headset. The electrical outlet must be located below the built-in equipment. By following this rule, it is prevented from splashing water and fat during cooking.
Tools
To integrate into a new furniture set, you will need a set of tools to make holes in the body and tabletop:
- drill;
- jigsaw;
- construction knife;
- roulette;
- Screwdriver Set;
- gas key;
- pliers;
- a device for measuring voltage in an electrical network.
How to install a gas panel - Carrying out the work
Tabletop markings
Mark the wooden tabletop according to the template, which should be in the documentation for the panel. If there is no template, the dimensions of the cut must be indicated in the passport.
Drilled holes in the table top
Important! You can only cut wood tabletops (chipboard, MDF) with your own hands. It is better to order cutting of countertops made of artificial stone from a company, or even better to order a countertop with a ready-made hole for the panel. Sawing stone requires special tools and complex templates.
Gasket for convenient installation of the gas panel
The tabletop is cut according to the markings made using an electric jigsaw. To start cutting, holes are drilled in the corners of the markings to insert a jigsaw saw.
The diameter of the drill is greater than the width of the jigsaw blade
To protect the surface of the tabletop from the movement of the jigsaw sole and from chipping when cutting, masking tape is glued next to the markings or along the markings.
To prevent the cut from falling and breaking the tabletop, you need to support it from below, as in the photo, with clamps.
Cut the table top with a jigsaw
Related article: Arrangement of furniture in the kitchen: arrangement options
Connecting the hose to the gas pipe
Connecting the hose to the gas pipe is done before installing the furniture; it is more convenient. The panel is connected to gas using a flexible hose specially designed for gas supply.
not to connect a flexible gas hose (bellows hose) directly to the gas valve. The connection must be made through a plumbing pipe or fitting.
The connection must be made using a fitting
- Before connecting the gas hose, flax, pre-twisted into a thread, is wound onto the thread of the hose. Rewinding is done clockwise.
- After winding, the flax is coated with a thin layer of Multipak gas paste. It will seal the connection.
Important! Do not forget to insert an O-ring into the flexible gas supply nut;
- The supply nut is tightened by hand and tightened with a gas wrench, all the way without zeal.
connecting the hose to the gas
Note: To increase safety, a thermal shut-off valve can be installed on the gas pipe. Its purpose is to shut off the gas supply in case of fire and temperature rise above 80˚C.
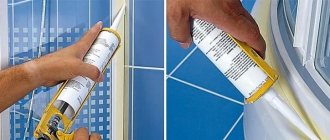
- It is better to coat the cut edge of the tabletop with plumbing silicone; it will protect the cut from moisture.
Treatment of cut ends with sealant
Preparing the panel for installation
The panel kit includes jets for the main connection. If they are not installed, they need to be installed in place. The installation diagram for the jets is glued to the bottom of the panel or indicated in the passport.
If the gas panel is connected to a gas cylinder, you need to buy different jets.
Jets
Installation of jets
Connecting the hose to the hob
To connect the gas panel, its kit must include a plumbing corner. The corner must be installed on the panel immediately. There is no need for winding for the corner, but don’t forget about the gasket.
Attach a flexible hose to the plumbing corner, not forgetting about the winding. At the same time, do not forget to pass the flexible liner through the cut in the tabletop.
The panel comes with mounting strips that need to be attached to the panel.
Related article: Difference between overhead and mortise kitchen sinks
Fastening the table top
The cut in the tabletop is ready, it’s time to secure the tabletop in place. The fastening of the tabletop must be strong and reliable.
Preparing the cut (sealing)
I repeat, coat the cut walls with sanitary sealant. Additionally, you can protect the ends of the cut with heat-reflecting tape or foil.
Installation and fastening of the hob
- Place a seal along the cut (it should be included in the kit);
- Place the hob in place.
- Align the panel borders;
- Tighten the panel fastening strips from below, hooking them onto the tabletop;
- Use a sharp knife to cut off the protruding edges of the seal without damaging the surface of the countertop.
Checking the functionality of the hob
- Open the gas valve.
- Use your sense of smell to check for gas leaks;
- After some time, turn on the panel valve, check its combustion;
- Turn off the panel valves and install a pan support on the panel.
Electrical connection
If you are not familiar with electricians, it is better to invite a specialist who will connect everything correctly.
There are several connection methods:
- using a plug and socket;
- copper cable sleeves;
- through screw terminals for connecting wires.
In the first case, we are, of course, not talking about an ordinary 220V outlet - connecting a hob to it is strictly prohibited.
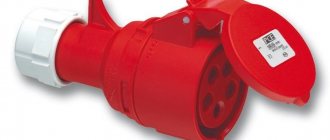
Instead, a special power socket and plug are used, designed for 32-40 Amperes.
This kit can be purchased at an electrical supply store. You should consult a professional to select the correct outlet. In addition, to connect the hob, a separate electrical wiring line with a cross-section of at least 4-6 mm2 must be laid.
In addition to a special socket and plug, you can also use screw terminals to connect wires or use copper sleeves designed to connect electrical wires.
In general, the choice of cable cross-section directly depends on the power of the built-in hob.
You also need to know that connecting the power cable through a regular circuit breaker is not allowed. You need to use a difavtomat or RCD in conjunction with an AB.
For the installation of electric hobs in apartments and private houses, the VVGng-Ls cable is most often used, which is characterized by reduced smoke and gas emissions in the event of combustion and, with proper operation, lasts at least 30 years.
The wires are connected according to the standard diagram specified in the instructions for the hob. If 4 wires come out of the stove, and your network is single-phase (3 wires come out of the wall), then the two terminals phase 1 and phase 2 on the hob must be connected using a brass jumper.
Sealing and sealing
Before installing a gas stove, you need to treat all cuts with nitro varnish or silicone sealant, which will protect the countertop from premature damage, getting wet, dirty, and swelling. You can also use a self-adhesive seal that performs the same functions. It is glued on top so that the edges of the hob rest on it.
To seal the edges, you can also use aluminum tape, which will also protect the tabletop from temperature changes. Remember that a high-quality seal can extend the life of the countertop, and it will not need repair or replacement.
Form
According to the form, the technique is divided into:
- Square. This type has 4 burners, which are located in two rows. The option will fit into a standard tabletop or cabinet.
- Rectangular. Such a hob can be quite elongated if it has more than two burners that are installed in one row (line). This configuration is appropriate if a narrow countertop is provided for built-in or conventional placement.
- Non-standard. Some equipment manufacturers present a series of original models that have unusual shapes, for example, trapezoids or rhombuses, oval, triangular, teardrop-shaped and others. But for such built-in models it is necessary to prepare complex cutouts that require precise measurements.
Square cooktops are usually larger. Rectangular - narrow, usually small-sized.
Buy with a guarantee
Elica provides a long-term official warranty on all NikolaTesla hobs. The user manual contains detailed instructions regarding the operation of the hood, so at any time you can see how to get to the carbon filter and learn the intricacies of controlling the modes of the induction zones.
To select a suitable hob model with a built-in hood, use the filter and model descriptions in the catalog. And if any details are unclear, seek an online consultation. As soon as you choose a model and make an advance payment, the managers will arrange the delivery of the hob. Delivery is made to all regions of Russia.
Safety precautions
Compliance with safety precautions will help you avoid irreparable mistakes. We offer some tips:
- It is better to choose a gas hose with a length of no more than 3 m. It is prohibited to connect the hoses with each other.
- If you want to move the gas stove to another room, this must be agreed upon with the relevant authorities.
- To check the tightness of the hose that comes from the gas main, do not use open fire. This mistake can be fatal!
So, we looked at how to integrate a gas stove into a kitchen unit yourself. Before performing work, it is advisable to evaluate your abilities and skills. If you have doubts that you can do this, it is better to turn to professionals. However, it is worth noting that the installation process itself is not at all complicated and almost anyone can cope with such a task. The most important thing is to try to carefully read the instructions and purchase all the necessary tools and materials.
But remember that in order to install gas equipment, permission must be obtained from special regulatory authorities, who, after installing the stove, must check the quality of the work performed.
