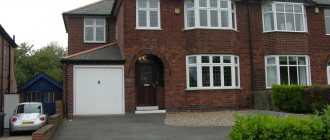
To live in a more spacious and comfortable house, you do not need to build a new one, just add an extension to the existing one. Of all construction technologies, the simplest and most accessible is frame construction. It is ideal not only for frames, but also for other buildings. It’s possible to make an extension to a frame house with your own hands if you have step-by-step instructions. To do this, it is enough to have minimal carpentry skills and the necessary tools.
What is a screw pile
Screw supports are made from metal pipes of various diameters from 50 mm and more. The lower end is equipped with a point and blades. The blades are welded to a trunk with a width of 50 mm, but not more than 300 mm. The length of the pipes ranges from 1.2 m to 12 m. The developer can order the manufacturer to manufacture piles according to individual sizes.
Use supports with an open lower end. When immersed, the pile is filled with soil, which increases its load-bearing capacity. For these purposes, the supports must be coated with high-quality anti-corrosion protection (galvanized).
Peculiarities
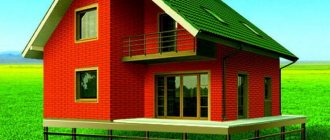
From the name it is already clear that the basis of the structure is a frame made of edged timber. Corner posts and trim are made from the same material. The process of installing a frame extension is so easy that you can do without outside help. This type is not inferior to structures made of brick or concrete in terms of quality and thermal insulation. Wooden frame extensions are especially relevant for the construction of the second floor due to their low weight.
The main advantage of a frame extension is the possibility of its high connection with the house, regardless of what material it is made of, be it brick, timber or logs.
Advantages of a frame extension:
- low costs for materials;
- ease of installation;
- possibility of building with your own hands;
- low weight of the structure;
- It doesn’t take much time to warm up a room with proper insulation.
Decide on the purpose of the extension, since, for example, a living room or hallway will need additional sound and heat insulation, where it is not recommended to skimp on waterproofing or foundation insulation.
An extension for a living room must be thought out to the smallest detail due to the fact that reliable insulation and high-quality sound and heat insulation are required. The foundation must be reliable and stable to protect the room from mold.
If additional space is needed to furnish a kitchen or bathroom, it is worth thinking in advance about the installation of communications and sewer pipes. All pipes will need to be properly insulated.
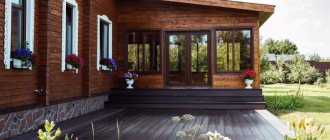
The simplest design is a veranda that does not require insulation, consisting of walls, flooring and a roof on supports. A veranda is a room where doors and windows are not always necessary. The structure looks like a frame with a deck, where posts are placed around the perimeter on which the roof is attached.
The foundation must be well waterproofed, which will help avoid dampness.
Attaching a garage to the house is also an excellent option, which does not “steal” usable space, but allows you to save on the construction of one wall of the room.
But it is also important to know that it is necessary to legalize the extension project; without this, the construction will be considered an illegal increase in area. To avoid problems in the future, obtain permission from the administration of the architectural department, where the construction plan will be checked for compliance with SNiP. If the project does not contain errors and is approved, then you will receive an instruction document that will help you in arranging the extension.
It is better to think about legalization before starting construction work, since the process of legalizing a finished extension is complex, and this will have to be done through the court. Moreover, in the end, the result may not be in favor of the plaintiff, and then everything built will have to be demolished.
Selection for different buildings
To choose the right type of foundation for an extension, you should first study the condition and dimensions of the foundation of the main building and the type of soil. You can do this yourself. To do this, next to the old house you need to dig a pit with dimensions of 100x150 cm. In a columnar foundation, the depth of the piles and their dimensions are measured, in a strip foundation - the width of the base and height.
This will ensure equal conditions for shrinkage and give greater strength to the entire bond.
For lightweight frame extensions to a wooden house, a budget option with a columnar base will be sufficient. This base is suitable for all light types of verandas, terraces, porches, dressing rooms and vestibules. The depth of the new and old foundation should be equal. On swampy soils with a high groundwater level, you should choose a pile or columnar foundation.
Brick houses most often have a strip foundation, so it is also recommended to add a strip foundation. Several types of ligaments are made between the bases.
- Rigid connection of bases with a closed loop. For such a bundle, you need to drill holes in the finished tape to a depth equal to 35 diameters of the connecting reinforcement. They are arranged in a checkerboard pattern in two layers, then rods 70-100 cm long are inserted into the holes. You can secure the reinforcement in the old foundation using the wedging method, when notches are made at the end and when driven into concrete, wedging occurs, or you can use a chemical anchor. Then the new reinforcement cage is tied with rods.
- If a new foundation is planned with an open contour, then a rigid connection is made only at the joints with the existing foundation.
- The technological seam with a closed tape contour is made from sheets of polystyrene foam 5 cm thick, which is laid between two bases and at the same time is a vertical element of permanent formwork.
- An open circuit with a technological seam is arranged according to the above scheme, only the insulation is placed at the junction of the circuits.
Foam concrete has low shrinkage rates and is light weight; you can build the walls of an extension from it on your own without the involvement of experienced builders.
If the house has a basement and several floors, the walls of the building are wider than 40 cm, the soil is complex and large loads are planned, the best option would be a slab base in which the loads are distributed over the entire area.
Open area around the pool
A terrace in a private house is often located next to or around the pool. This is especially useful for pools made from large, prefabricated fiberglass tanks. In this case, the terrace performs two functions at once - it provides a comfortable place to relax near the water and hides unaesthetic details (the side of the container, pipes for supplying and draining water, aeration, cleaning devices, and so on).
The principles of arranging the structure are the same as in previous cases: screw piles as a foundation, a cellular frame as a support for the flooring. In this case, the frame is made of metal; wooden elements near water require too serious and expensive protection from moisture
The installation process is discussed in more detail in the video below, but there are some nuances that are worth paying attention to:
- such large containers must be concreted, and the first row of piles (located closest to the side of the pool) may not be screw, but ordinary - installed in concrete;
- the metal frame is necessarily protected from corrosion, galvanized screw piles and stainless steel fasteners are used;
- the frame is positioned so that the flooring hangs over the water and at the same time it is possible to line the vertical fragments of the platform;
- For flooring, a special material is used - the so-called deck board (decking). It can be natural wood with special processing (usually larch), a composite material or pure polymer. A special feature of the board is its increased resistance to moisture and textured surface;
- Built-in lighting fixtures can be mounted flush with the sheathing in the decking.
Popular articles 40 options for implementing Russian style in the interior
It is also possible to install a deck below the edge of the pool, if this edge is properly designed.
For bowls of complex shape, the flooring is also usually made with a curved contour.
If the pool bowl is not completely buried in the ground, the terrace flooring is elevated, creating a kind of podium.
What types of extensions exist and how to choose a place for them
Two groups of such objects can be distinguished: closed and open. Most often they are adjacent to a private house. Usually this is a one-story, spacious room with panoramic windows, a canopy or a small vestibule at the entrance to the building. Sometimes there is a balcony on the roof. There are many design solutions, it all depends on the taste of the homeowner. The photo shows unusual and easy-to-execute projects in different styles.
Photo: Instagram @ekaterinanurullina
Photo: Instagram @top_landscape_krasnodar
Photo: Instagram @vista_I_stroy
Photo: Instagram @konstantinrumyantsev
The method of operating a building depends on how insulated and equipped it is. The site can become a place for family recreation, work or children's games, a full kitchen or a beautiful winter garden.
Selecting a location
There are no strict rules for planning. But most people prefer the most convenient option, when there are two doors: into the house and outside. You can focus on the location of the dacha. In the south, the room is arranged on the north side. In the north - from the south. Choose the leeward side for a comfortable rest.
Popular articles How to preserve gladioli in a vase with water
Of course, a position in which the place has enough sunlight is considered more advantageous. If there is too much of it, landscaping with trees outside will help. To provide more lighting, several windows are required, and sometimes full glazing. Sliding doors are very convenient - they can be opened using a remote control, making the space open and comfortable on hot days.
Typically, an extension is part of a building, with or without a porch. But sometimes it is built separately. In this case, a covered corridor may lead to the room.
Photo: Instagram @vladimir_arch_
Due to the porch, the veranda can look like a single room with the main house.
Advantages of a pile extension
Pile extension - reliable and durable design
An undoubted advantage among various foundations is that foundations on screw supports can be erected in a very short time. The time of year does not affect the production process of constructing a foundation on screw supports. Screw supports are used in almost all soils, except for rocky foundations and soils saturated with stones.
Installation of screw piles does not require excavation costs. Correct adherence to the technology of constructing a pile foundation on screw supports ensures the durability and reliability of house structures.
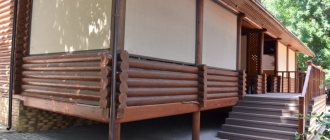
Wooden house
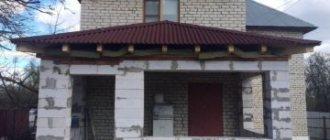
Photo of a silicate brick extension
Preparation
We will talk about extensions, the material for which is both ordinary red ceramic brick and silicate, including double silicate brick M 150.
Before starting work, you need to have an idea of how it is carried out. You need to know about a set of tools and building materials. But it all starts with an inspection of the condition of the home.
First of all, you need to make sure that the walls of your house are in good condition. This is especially true for those that will be affected by the load from the structure being built.
Pay attention to the collapsing parts of the walls, to its rotten sections. Remember that the support of a brick structure on rotten wood is unreliable
This is fraught with the fact that destruction of both the main dwelling and its extension may occur.
Next, pay attention to the foundation. A brick extension to a wooden house will have a great impact on the general foundation
Take measures to strengthen the foundation of your home.
Pay attention to such foundation parameters as:
- The depth of its occurrence.
- Height above ground level.
- Cross section.
Construction
Work is in full swing!
Working with brick is more expensive than working with foam block, which has recently become increasingly popular. The price of foam blocks and materials for working with them is less. However, brick products have some advantages in terms of quality, such as strength and moisture resistance.
Next, we will give you the answer to the question of how to make a brick extension to a wooden house. Let's start with a small thesis plan.
The work includes the following stages:
- Construction of the foundation. It must be powerful enough. The foundation of the extension is connected to the reinforced foundation of the housing.
- Construction of brickwork. It should start from the wooden wall of your home. Before you start laying, make a competent calculation.
- Connection of a brick extension with a wooden wall.
The foundation is created from concrete blocks. As already mentioned, it must be powerful, capable of withstanding the extension.
Brick laying is carried out according to standard rules.
To implement it you will need:
- Trowel.
- Lime-cement binder mortar.
- Threads and pins. Pins will be needed for sewing seams. The thread controls the vertical evenness of the masonry.
Based on the type and design of the extension, you will need additional equipment to carry out the work.
The connection of two materials (brick and wood) can be done in several ways:
- Using powerful staples.
- Using a special cement mortar.
- By means of a sealing tubular material, which is covered on the outside with the same cement mortar.
Connecting brick and wood using staples.
Disadvantages of a pile extension
An extension on stilts has some disadvantages:
- Susceptibility to the occurrence of corrosion processes in metal supports;
- The impossibility of installing them on rocky foundations and in soils with large inclusions of stones;
- The need to install an insulated base to protect the ground parts of the supports.
When purchasing piles, check the quality of the anti-corrosion coating. Reliable galvanization looks like star patterns on the metal.
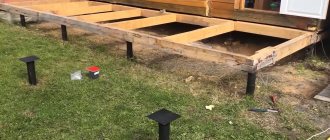
Floor construction
The paradox of building a frame extension to a wooden house is that the floor begins to be created before the walls are built.
The floor joists are placed on the strapping beam.
The floor joists are placed on the strapping beam.
This approach is explained quite simply: access to all parts of the floor is facilitated. It is easy to insulate it, and then cover it with sheets or boards, which will serve as a “clean” base.
Do-it-yourself frame floor extension is carried out according to step-by-step instructions:
- Support bars are installed.
Here you can use channels or I-beams. They are welded to the covers of the columnar foundation. A single horizontal field is created, which is little subject to deformation. The metal is covered with primer. - pre-treated with antiseptic materials
. They are connected to the horizontal field - screwed with M18...M24 bolts, and lock nuts must be installed. The places of contact between metal and wood are painted with primers in two layers. - They nail down the subfloor.
It can be built from unedged boards. Modern builders use OSB boards. The solid structure is not subject to rotting. Rodents cannot chew through it. The sheets are additionally antiseptic. - Insulation is installed between the future clean floor and the black one.
Be sure to use vapor-permeable films to facilitate the removal of steam to the outside. Basalt slabs are used as insulation material. The laying thickness is at least 100 mm. - The top is created from flooring made of boards
or a two-layer layout of OSB boards with a thickness of 12 mm is arranged. A solid base is obtained, on which you can later lay any covering or arrange water or electric heating.
Of course, you can take the path of simplification. Nail floorboards onto the joists. You will get a floor. But it will freeze in winter. In spring and autumn, dampness will cause rotting and destruction will occur. Everything will have to be rebuilt again.
Top belt and roof
A very important and crucial stage in the construction of a veranda attached to a brick house is the connection of the structure with an upper concrete belt. Only thanks to this, the possibility of the walls diverging is eliminated. To create it, you need to install formwork on top of the walls, the height of which is 0.2 meters. The next step is to install the reinforcement in the form of a rectangle, which needs to be laid in the formwork.
To reinforce the upper part of the extension, you need to select good reinforcement, wire for knitting rods, as well as wire rod to create rectangular binders. Now you can fill the belt with concrete, this must be done in one go so that the integrity of the concrete screed is not compromised. It is best to work with buckets, since calling a concrete mixer with a pump is extremely expensive.
As for the roof, for its arrangement you need:
- Wooden beams.
- Bolts and screws.
- Drill.
- Anchor.
- Hammer and nails.
- Roulette.
- Electric jigsaw.
- A good helper (required).
First you need to secure the bars by making a small angle of inclination (15-30 degrees). The pitch between the rafters should be about 0.5 meters, the beams should be bolted to the concrete base. After creating the rafter system, you need to cover it with waterproofing material, on top of which the sheathing is installed. The final stage is laying the roofing material. As a covering, you can use the same material that was used for the roof of a private house or bitumen shingles, which have excellent technical characteristics.
Construction
First of all, you need to evaluate the foundation under the house and find out what condition it is in. If a concrete strip foundation, rather than a pile foundation, is built under the house, then an expansion joint is provided. Construction begins with a design. If this is not possible, then planning and design calculations are carried out independently, periodically consulting with specialists.
Laying a new foundation
The type of existing and new foundations must completely match each other. However, we must not forget about the characteristics of the building and the soil
Having chosen a columnar base, it is important to ensure that the dimensions of the new pillars completely match the parameters of the ones already installed. To learn how to make the foundation of an extension with your own hands, watch this video:
Make sure the concrete dries - there should be no cracks in it
Perform the selected connection (rigid or expansion joint). When hard, reinforcing bars are driven into the prepared holes and the construction of the formwork begins.
Its internal surface is protected by waterproofing, which can be used as polyethylene film. Now a reinforcement frame is laid at the bottom of the trench, leaving a distance to the sand and gravel cushion, and filled with mortar.
The mixture for the solution is prepared from sand, cement and crushed stone in a ratio of 3:1:5, adding water in such an amount that the composition resembles thick sour cream in consistency. During the hardening period of the concrete, care must be taken to ensure that cracks do not appear on its surface. You can protect the built foundation from drying out or from excess moisture by covering it with a film or a layer of sawdust.
When building your new foundation for an extension on pillars, you will have to protect each of them from moisture using roofing felt or special mastic. The depth of the wells should be below the soil freezing level and a sand cushion will need to be installed at the bottom of each.
Reinforcement after the construction of the formwork in each well is carried out with fiberglass, which does not require additional waterproofing. Filling is done by hand and does not require additional force.
Why is it profitable to build an extension on screw piles?
An extension on screw supports can be erected quickly and easily
For example, you need to install an extension to a house measuring 6x6 meters. It will be enough to install 10-12 screw supports on the pile base. Usually such work takes no more than 2-3 days. The same amount of time will be spent on installing the grillage.
When installing strip and column foundations, you need to spend 1.5-2 months. The cost of materials and labor costs for excavation work, installation of formwork, production of frames from reinforcement, and pouring of formwork with concrete should be taken into account.
Concrete is cured for 4 weeks. In winter, heating of the foundation will be required. All this speaks in favor of constructing a foundation for an extension on screw piles.
Preparatory stage
Direct construction is preceded by a large amount of work. First of all, these include choosing the optimal location for the future veranda, creating drawings and calculations, preparing the necessary materials and tools. An important step in constructing an extension on the site is obtaining a building permit - without it, the veranda will be considered illegal and can bring many problems to its owner in the future.
Choosing a place for the veranda
The veranda can be located on any side of the house, but usually the choice is made in favor of the front facade, on the side of the front door. If the planned building will be erected from the end, you should first provide for the possibility of entering it from the adjacent room. In general, the design is planned based on the personal preferences of the owner, as well as aesthetics, because the veranda should not only become a natural part of the entire structure, but also its decoration. An interesting solution would be to arrange a terrace around the entire perimeter of the home.
An example of the foundation of an extension on screw piles
Before starting work on laying the pile foundation of the extension, you need to know on what foundation the house is built. What is it for? Different types of foundations behave differently during operation. A strip foundation will settle less than a pile foundation or vice versa.
Extension on screw supports
Therefore, if the house and the extension have different types of foundations, then expansion joints are installed in the places where the structures of the house and the extension adjoin. That is, a small gap is left between the pile foundation grillage of the extension and the base of the house. Expansion joints are covered with strips, both outside and inside the house and extension. Otherwise, this is fraught with the appearance of cracks and destruction in places where the extension adjoins the house.
When the house and the extension stand on screw supports, the grillages of both structures, like the rest of the structure, are connected into a single whole.
Construction process
So, a small house stands on screw supports, the developer decided to attach a veranda to it.
First, mark the centers for installing the piles. Markings are made using twine and wooden pegs. The twine is pulled so that the centers of the supports are at the places where it intersects.
The support centers are located in the corners of the extension, under load-bearing walls and in centers of load concentration (for example, under a summer stove). Piles are placed in increments of 1.5-2 meters. In a site with installed supports, the verticality of subsequent piles is controlled.
After installing the supports in the design position, the tops of the piles are marked for cutting with a grinder to one level.
The depth of soil freezing reaches 0.7 m. Groundwater is located at a depth of 2 meters. Taking into account the small load from the weight of the extension structures, screw piles with a diameter of 100 mm, a length of 1200 mm with a sharp end and blades 60 mm wide are used.
The pile is screwed in by two workers using a pipe threaded through a hole in the top of the pile. If the process of immersing the support is difficult, then pieces of pipe of larger diameter are put on the ends of the lever. During rotation of the pile, it controls the verticality of its immersion. The supports must protrude at least 150 mm above the ground.
We recommend watching a video showing in detail the entire process of installing supports.
The support pipes are filled with concrete mixture. As the pile is filled with concrete, it is compacted with a pin in the form of a piece of smooth reinforcement or other available tools.
Compact the concrete until “cement laitance” appears on the surface.
Grillage arrangement
To connect the supports with the grillage, a piece of metal pin with a thread at the end is immersed inside the pipe. After the concrete has hardened, they move on to constructing a grillage.
Often the grillage is made from wooden beams. Studs are threaded into the holes of the timber and secured with nuts. The upper structures of the extension are attached to the wooden grillage.
Watch the video on how to properly arrange a grillage with your own hands.
The supports of the support are formed depending on the structure of the grillage. If the grillage is made in the form of a frame from a channel or angle, then a metal plate is welded to the upper end of the support. The plate is positioned in such a way that there is play for centering the grillage elements.
The foundation on such supports is laid for light buildings. Stone, brickwork or precast concrete extensions require a foundation of a more powerful structure.
Video description
And the next video shows the first part of the work on the reconstruction of the same house, which talks about the preparation - laying the foundation. The interesting thing here is that the extension is larger than the main building:
There is a third way - connecting the facade and the wall of the extension with brackets. To thermally insulate the joint, tape insulation is placed in it and covered with a flashing. After the end of the active phase of shrinkage (at least a year), the stripping and staples are removed, the joint is caulked again, the staples are driven in again and again covered with the stripping.
Adviсe
Many owners of summer cottages and private houses who have encountered the process of doing a frame extension with their own hands leave their reviews, share secrets and give useful advice.
- Pay attention to the correspondence of materials with the overall structure. If the house is wooden, then it is advisable to also construct the extension from wood. If the house is brick, then when finishing it is better to make brick cladding. Thus, the building will look harmonious.
- Consult with professionals or summer residents with extensive experience in construction to calculate the future extension.
- Don't skimp on materials.
From all of the above, it is clear that the construction of a frame extension is possible with your own hands without the involvement of specialists. The main thing is to have basic carpentry skills and a great desire to build.
Terrace design
Among the 2022 terrace home design trends is to decorate your terrace like a living room, so choosing beautiful textiles is a must. Plenty of pillows for the outdoors, rugs, a blanket for cooler evenings, and a stretched canvas over the table near the brick wall for privacy. Hanging rattan chairs on the terrace are fashionable.
Absolute chic, monochrome decor that matches perfectly with the very trendy concrete terrace highlighting the pool. Mobile lanterns are beautiful and practical, they decorate the space without getting in the way, since you can move them as you wish.
For terraces in 2022, large flower pots, standing planters, terracotta flowerpots, designer planters are used: there is something for every taste, every size and, above all, plants (palm trees, succulents, cacti in irresistible containers).
Where to begin installing an extension to a brick house with your own hands.
First, you definitely need to check your foundation for strength. If it is already old, then perhaps you are better off spending all the money from the extension on strengthening and restoring it. If everything is in order, follow a simple rule - it is better to do everything as if it were part of the house in the past.
So you want to use the same pad, the same foundation, the same materials if possible. Next, you must definitely draw up a work plan on paper, and then check all your drawings on the ground. Measure how much space you need, what your extension will roughly look like on the ground, etc.
The most important thing at the very early stage of work, planning, is to think about how all the communications will be laid out, how to include this building in the residential premises of the BTI at the legislative level, etc. Perhaps you will lose the desire to create an additional room, and you will consider quickly constructing a summer kitchen, or an outbuilding.
Interior arrangement of the veranda
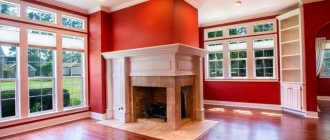
The last final stage is the interior arrangement of the room. When creating its design, the general wishes of the owners, the size of the extension, and the general style of the house are taken into account. With the right approach, this part of the house can be made as comfortable and cozy as possible. As finishing materials, preference should be given to wear-resistant materials. If the room will be heated, you can paste wallpaper on the walls, paint them or cover them with wall panels.
Laminate, linoleum, parquet boards are laid on the floor. When arranging furniture, it is not recommended to clutter up the free space. It is better to place it near blank walls. It is practical to use folding furniture in such rooms - it will help save free space.
In conclusion, I would like to note that an attached veranda can give owners additional living space. Here you can organize a wonderful recreation area. By decorating the windows with beautiful plants, you will turn the extension into a beautiful and cozy part of your home.