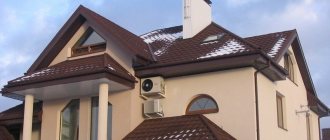
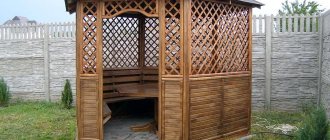
Lining roof overhangs with plastic soffits (photo No. 1)
To give the roof of a house a finished look, its overhangs are usually sewn up. To do this, you can use either a board or special soffits for lining the roof.
In almost any hardware store you can now purchase soffits - panels made of modern materials designed for lining roof overhangs. They outperform wood both in terms of aesthetics, durability, and manufacturability. By the way, among them there are panels that imitate lining - which will be relevant for some home design options.
Let's talk about what types of spotlights exist, and figure out how to install them correctly and efficiently yourself. Or, if necessary, competently supervise the work of a third-party contractor.
How to make a roof lining
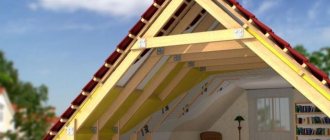
The roof, installed correctly, usually retreats from the walls by 0.5–0.7 m, protecting the façade of the building from precipitation. Such indentations are called overhangs. They perform a protective function - they protect the under-roof space from moisture during rain and snow and guarantee normal ventilation under the roof. But in order for the overhangs to fully fulfill their purpose, they also need finishing - lining, which will significantly extend the service life of the entire roof.
The effectiveness of lining roof overhangs is closely related to the quality of the finishing materials used and the degree to which technological requirements are met during the work.
Lining the roof with clapboard
Cladding with clapboard is often done with the remaining cladding material after construction. It seems like it’s no longer needed anywhere, but it’s a shame to throw it away. It can be used to finish overhangs, as long as there is enough material. But since the lining is an unperforated material, you need to provide an air gap (10–15 mm) between the wall and the lining, and also carefully treat the wood with an antiseptic, otherwise it will begin to absorb moisture, and after a while it will turn black and rot.
For outdoor use, choose moisture-resistant lining and treat it with antiseptics
Roofing with PVC siding
If the siding is not completely used up when finishing the facade, the remains can be used for filing eaves or gable overhangs. The advantages of this solution are that the finishing of the roof will be in harmony with the facade, and siding is cheaper than PVC soffits, so it is profitable to hem overhangs with them. But there is also a minus - the siding does not have perforations for ventilation, so its installation must be carried out very competently, in compliance with all standards. Only then will a good result be ensured.
Video: installation of cornices, leveling and finishing with siding
Roofing with metal siding
Metal siding also does not have perforations and requires good treatment with anti-corrosion compounds. It is necessary to make holes in it or insert ventilation grilles. In addition, metal siding must be cut correctly, otherwise rust will appear in problem areas. It is better to do this with special roofing electric shears. Therefore, working with metal siding requires skills and abilities.
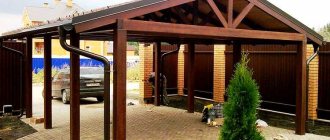
The facade of the house and the roof overhang, covered with contrasting metal siding, look very harmonious
Roofing with boards
It is better to use planed softwood boards with a thickness of 17–22 mm and a width of 50–250 mm. It should be coated with an antiseptic, covered with varnish or paint and allowed to rest for at least a month in the yard under a canopy so that it does not warp during work. When sheathing, leave a gap of 10–15 mm between rows of boards for ventilation. When hemming the overhangs with boards, the first 2 rows are reinforced on both sides, the subsequent ones are additionally fixed in the middle.
When choosing a board, special attention should be paid to its humidity - it must correspond to the humidity level of the environment
Recently, decking (a board made of wood-polymer composite) is increasingly being used to decorate overhangs due to the perfect environmental friendliness of this material, a large selection of colors and sizes, as well as a considerable 10-year warranty.
Decking is a new modern cladding material based on domestic wood species (larch and Siberian cedar) or wood-polymer composite
Roofing with plywood and OSB
When working with OSB or plywood, choose a rigid, moisture-resistant material so that it can be installed in large slabs. First, they knock down a box of wooden blocks and attach slabs to it, cutting in ventilation grilles. This kind of hem needs to be painted, otherwise it doesn’t look very nice.
Video: plywood and OSB, what to choose
Roofing with corrugated sheets
Corrugated sheets made of galvanized steel are characterized by durability, strength, low cost and the ability to choose any desired shade of the working surface. They resist corrosion well and are practically not susceptible to temperature changes and atmospheric-mechanical influences.
Ventilation of the under-roof space is carried out thanks to the gap between the wall and the sheathing, equal to the height of the corrugated sheet wave. Installing the binder is easy to do yourself, which saves time and money.
Video: filing roof overhangs with corrugated sheets
Please note that ventilation gaps are left only when finishing eaves overhangs (horizontal). With frontal (vertical) hemming, the overhangs are hemmed tightly.
Table: comparison of the cost of materials for filing overhangs
| Type of roofing material | Price 1 m² |
| Edged board | ≈ 2–2,5$ |
| Wooden lining | ≈ 6$ |
| PVC siding | ≈ 4$ |
| Sheet metal | ≈ 5$ |
| Plywood | ≈ 6–7$ |
| OSB | ≈ 4$ |
| Corrugated sheet | ≈ 9$ |
| Soffits | ≈ 10–12$ |
As you can see from the table, soffit lining is the most expensive. But, as we will see later, it is the most reliable. In addition, all the work can be done easily and quickly yourself.
Soffits for roofing
Roofing soffits are special strips for cladding gables, canopies and cornices. They come in steel, copper, aluminum, vinyl (PVC), etc. The usual equipment required for filing overhangs:
- soffit panels;
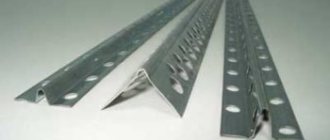
- J-profiles with grooves;
- J-Bevels and Finish Planks.
Soffits are a beautiful and durable material that is easy to install with your own hands
Advantages of spotlights
A variety of textures and a wide range of colors allow you to match them to the design of any building. Thanks to the availability of various modifications - single, double or triple, solid (pediment) and perforated (eaves) - soffits are easily installed regardless of the width of the overhangs and purpose. In addition, they:
- easy to care for;
- resistant to moisture, mechanical stress, ultraviolet radiation, temperature changes (from -50 to +50 °C), fungus and mold;
- environmentally friendly;
- beautiful in appearance;
- not only the roof space itself, but also the communications laid in it are well protected;
- are simply installed without the involvement of experienced roofers.
Disadvantages of spotlights
There are few disadvantages to spotlights:
- high cost compared to other materials for finishing overhangs;
- the need for periodic cleaning of perforated soffits and the inability to change their size without disturbing the perforation. Therefore, for non-standard angles and curves of the roof, perforated soffits are not recommended.
As for the service life, it all depends on the quality of the spotlights and the integrity of the manufacturer - original products from well-established manufacturers will last more than 30 years, otherwise they will require complete or partial replacement every 5 years.
Criterias of choice
Soffits are used in the construction of new buildings, as well as in the process of restoring and updating an already built house. If there are protruding parts of the roof, such as fronts, canopies, ridges, overhangs or cornices, you should choose perforated soffits, photos of which can be studied in construction magazines. They will transform the structure, give it a finished look and protect it from the aggressive influence of external factors.
For interior finishing work, products without perforation are selected. As for the color scheme, you can rely on your own preferences. According to experts, soffits that contrast with the color of the house look most attractive.
Types of spotlights
Soffits are divided according to design characteristics, material and manufacturing process.
Depending on the design features, there are:
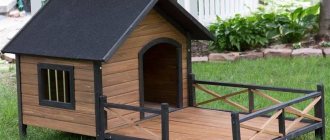
- fully perforated soffits - most often used for hemming eaves overhangs, canopies and ridges on the roof of a veranda, porch or gazebo;
- partially perforated - have perforations in the middle of the panel, which provides excellent ventilation. Such soffits are suitable for lining any areas of the roof;
- solid soffits - a smooth-looking panel that is used when cladding gable overhangs.
The appearance of soffits and additional elements differs depending on the manufacturer and material of manufacture
If ventilation of the under-roof space is provided only by soffits, then when choosing perforated panels, the total perforation area should be 1/6 of the area of the entire roof.
Depending on the material used, soffits are:
- perforated copper - the most expensive with a long service life (150 years), are thin plates that do not require careful maintenance;
- aluminum - inexpensive plates 0.3–0.6 mm thick with an applied anti-corrosion coating;
- stainless steel soffits - inexpensive and durable mid-level products;
- plastic (PVC) soffits - they are distinguished by their lightness, good performance properties, low price, but with prolonged exposure to sunlight they turn yellow over time.
The typical common size of soffit plates is 3.6 X 0.3 m. Soffits are made by extrusion or lamination. In the first case, 2 types of raw materials are mixed with various additives - stabilizers, plasticizers, dyes - and two-layer panels are obtained. Their inner layer is highly resistant to deformation, and the outer layer protects against negative atmospheric phenomena.
The application of multilayer film (lamination) gives the soffits strength, moisture resistance and a beautiful appearance, since the film can not only be colored, but even imitate the texture of various natural materials.
Plastic soffits for roofing
Soffits made of polyvinyl chloride (PVC) are lightweight, attractive plates for lining the roof. During manufacturing, some types of plastic spotlights have ultraviolet stabilizers added to protect them from fading.
Characterized by:
- good water resistance and resistance to corrosion, mildew and mold;
- resistance to damage from rodents and insects;
- long service life (more than 30 years with proper installation);
- the effectiveness of protecting the under-roof space and its ventilation;
- low price;
- lightness and flexibility. This material is easy to cut and install even in difficult places.
Plastic soffits have special perforations to ventilate the under-roof area, and the UV stabilizers contained in the raw materials increase resistance to fading and deformation.
However, it is the lightness of the material that requires thorough roofing work so that after filing the plastic soffits are not blown away by gusts of wind.
Aluminum soffits
Aluminum soffits are deservedly popular for decorating roofing elements because they:
- lightweight, and therefore easy to work with;
- when installed correctly, they do not corrode and rot;
- heat-resistant and non-flammable;
- Available in different colors;
- retain their original appearance for many years.
Aluminum soffits do not deform during sudden temperature changes.
Therefore, there is no need to leave thermal gaps during installation. They are immune to gusty winds and salty sea water, which is especially valuable for coastal regions.
Metal stainless soffits
The cost of metal soffits is higher than vinyl ones, but this is due to the composition of the material: galvanized steel, coated with a polymer protective layer, is more expensive than plastic.
Metal soffit panels are strong, reliable and considered the most durable, have a wide variety of colors and an affordable price. Often supplied complete with roofing covering, such as metal tiles.
Metal soffits excellently withstand temperature changes and humidity, so they can be used in any climatic region
Copper soffits
As we already wrote above, these are the most expensive spotlights. But their price is justified by their absolute immunity to rot, high strength even with sudden temperature fluctuations and strong winds, and, most interestingly, by the auto-extinguishing of corrosion. Copper panels can be perforated or solid and are connected to each other with a lock that covers the fastening points, which looks very impressive.
During use, copper soffits become covered with patina and acquire a malachite-green hue. Therefore, true connoisseurs of antiquity buy only copper
Copper soffits are sometimes supplied untreated, due to the natural formation of an oxide film during operation. But more often they are polished already at the manufacturing stage, applying a patina, oxidized coating or tinned tin.
Vinyl soffits
This group includes vinyl sidings - relatively new lining materials that are gaining popularity, and vinyl perforated soffits with wood texture (alder, pine, birch, cherry, oak). They, like plastic spotlights, are made of polyvinyl chloride, therefore they have the same properties. However, thanks to modern technologies, they are modified at the production stage, namely, they are added to the feedstock:
- temperature stabilizers, which allows vinyl soffits to withstand extreme temperatures;
- impact strength modifiers to increase strength under mechanical stress;
- titanium dioxide and ultraviolet stabilizers, thanks to which vinyl soffits retain their color and brightness for decades.
Vinyl soffits with a wood texture do not require replacement or annual treatment; they protect the attic well from negative environmental influences, condensation accumulation, mold and bird nesting.
Replacing lamps type GX53 (tablet)
The easiest way to change them is:
- hold the lamp body with your left hand and turn the lamp very slightly (up to 20 degrees) counterclockwise until it clicks
- then pull it out by pulling it down
- installation and fixation in place of the new one occurs by aligning the contacts and turning clockwise. At the same time, a characteristic click should also be heard.
There is no need to pull out and dismantle the lamp itself.
Preparatory stage before filing overhangs
Before any construction, an estimate is drawn up to know how much certain work will cost. Let's look at how to calculate materials for lining cornice and gable overhangs.
We calculate the amount of material
Let's take for example an ordinary house with a gable roof.
- We measure the perimeter of the overhangs along the cornice (K) and pediment (F). Suppose K = 12 m, Ф = 6 m. Determine the length (L) of all overhangs: L = 2К + 4Ф = 2 x 12 + 4 x 6 = 48 m.
- We measure the width of the overhangs (W). It is equal to the distance of the roof from the walls. Let's say that for us it is 0.5 m.
- We calculate the area (S1) for the cladding: S1 = L x W = 48 x 0.5 = 24 m².
- We choose the material we like (for us it will be a metal soffit) with dimensions of 3 x 0.325 m. Its area (S2) is 3 x 0.325 = 0.98 m².
- We calculate the amount of material: S1: S2 = 24 m²: 0.98 m² = 24.5 pcs. Round up to 25 sheets.
- The number of additional elements is obtained based on their dimensions specified by the manufacturer: J-profile metal 3 m long for installation against a wall (L: 3 = 48 m: 3 m = 16 pieces), J-chamfer (front strip) 3 m long, mounted on the end section of the overhangs simultaneously with the finishing strip that provides rigidity - L: 3 = 48 m: 3 m = 16 pieces.
- In total, we get a complete list: metal soffit - 25 pieces, metal J-profile - 16 pieces, metal J-chamfer - 16 pieces, finishing strip - 16 pieces.
By multiplying the price of these components by the data obtained, we will determine the monetary costs of lining the roof, provided that we do all the work ourselves. If not, then to the resulting cost of materials it is necessary to add payment to the roofers for cladding the overhangs.
Video: installation and covering of cornices yourself
Restrictions on the installation of roof soffits
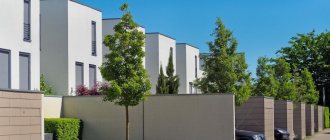
The façade of a building should not be covered with soffits. They are not intended for this. Despite all their advantages, they are still less durable than special facade finishing materials and are capable of fading.
Regulatory Requirements
The set of standards and rules does not require mandatory finishing of overhangs, and therefore does not impose conditions on their covering. We can only note the following:
- It is imperative to arrange ventilation of the attic space to avoid heat loss and dampness in the house;
- The hemming material must be firmly secured so that it does not come off during strong winds.
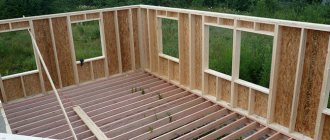
In addition, metal soffits make the roof structure heavier, which means they increase the pressure on the foundation. Therefore, for light buildings (frame houses, for example), it is better to prefer plastic finishing of overhangs.
How to properly remove a chandelier from the ceiling - step-by-step instructions
Thanks to various technologies, you can independently carry out installations of various types. Many people need to remove a lamp from the ceiling for various purposes. This may occur due to repairs or some installation work. Therefore, especially for you, we will tell you how to remove a chandelier from the ceiling, as well as how to hang a chandelier, how to attach it to a hook or a bar, without causing harm to your health.
Photo of dismantling the ceiling lamp
Instructions
In order to remove any lamp from the ceiling, you must do the following:
- Disconnect from electricity at the input panel. It is not enough that the lights in the room are turned off. Situations are different, so it is better to protect yourself from further problems and from electric shock.
The next step is a tool with which you can remove the lighting fixture from the ceiling.
An auxiliary tool will be:
- indicator screwdriver
- insulating tape
- ladder
- pads
Electricity check.
- Having turned off the light even in the panel, we check again through the switch.
- If the light does not turn on, everything is in order, you can start working.
So, lighting devices, as you know, can be completely different.
- First you need to get rid of various fragile elements that adorn the lighting fixture. That is, light bulbs, decorations, a lampshade.
- unscrew the cap that hides all the wires. One way or another, it can still be called decorative. We are talking about something that is tightly attached to the ceiling and holds the entire chandelier. This cap is often secured with a screw, which can be immediately detected. When the screw is unscrewed, the cap will “loose” and go down. Removing the decorative cap
The lamp can be held by a hook or mounted on a bar. If you have to work with a lamp that is attached to a hook, then the wiring can be immediately disconnected, moved to the side and removed from the hook. Removing the chandelier from the bar is a little more difficult. To begin with in this situation, it is necessary to loosen the bolts holding the bar. After a complete shutdown, you should carefully insulate the conductors on the ceiling in order to protect yourself from electric shock.
Slat mount
Hook to ceiling
Plate chandelier
- In lamps of this type, such as “dish”, you need to find the bolts. In this case, the hook is not a fastener.
- The lamp is attached to the ceiling using bolts. For the beauty of this type of lamp, the bolts are hidden in the lampshade, and it is sometimes difficult to find them.
- In this case, the bolts are unscrewed with a Phillips screwdriver.
Stretch ceiling
Stretch ceilings are becoming increasingly popular. It is this type of ceiling that has become in demand and fashionable. If you need to remove a lamp from a suspended ceiling, then the first thing you need to do is protect yourself.
- That is, we go to the electrical panel and turn off the voltage.
- Next, you need to analyze how this or that fastener was installed. As you know, there are only two ways - the hook and the bar.
- If the fastener held the hook, then you need to remove the hook for the chandelier and disconnect the wires.
- If you encounter a case where the fastener is installed through a strip, then you need to unscrew the strip itself, disconnect the wires and remove the strip.
- In these two cases, after the work has been done, all that remains is to remove the lamp from the ceiling. The job will be done. Also, do not forget that starting work with the electricity turned on is strictly prohibited.
Also briefly about how to hang a chandelier
There are two ways to install the lamp to the ceiling. This is done with a strap or with a hook. It is necessary to set up a mortgage in advance. This stage is mandatory, regardless of how the chandelier will be installed.
- In the first case , we need to secure the lamp with a strip using bolts or screws. Carefully, you need to make two holes in the tension fabric. The edges should be secured with tape. Then, the canvas that we glued is fixed with screws around the chandelier.
- In the second case , the chandelier will be mounted on a hanging hook. Having made the holes where the hook will be located, you should process the edges of the hole. Then, hide the holes in a cap, which will also decorate the ceiling. Hanging a lamp is not as difficult as installing it. However, working with a stretch ceiling is painstaking.
Installation of soffits on the roof eaves
There are many options for roof designs and shapes, so there are no universal instructions for filing cornices. The installation of spotlights is always individual, although the general sequence of work can be identified:
- Install a sheathing made of wooden blocks or metal profiles, leveling all the elements. Errors are unacceptable, otherwise you will have to disassemble and reassemble the overhang trim.
- Measure the required length of the J-profile by applying it to the overhang and making a mark.
After installing the sheathing, the J-profile of the required size is measured - Cut the profile to size using a grinder.
The profile of the required length is cut using a grinder - Fasten the J-profile with self-tapping screws to the wooden frame.
The J-profile is attached to the wooden frame with self-tapping screws - After fixing all the profiles, measure the distance between two adjacent profiles and determine the dimensions of the panels, after which they are cut.
The distance between two adjacent profiles determines the size of the soffit strip - The soffits are installed, placing one edge into the wall overhang, and the other into the eaves, and fix it with self-tapping screws to the wooden sheathing.
The soffit strip is inserted first into the wall overhang and then into the eaves overhang and secured with self-tapping screws to the sheathing - The frontal part of the overhang is also hemmed with soffits, if a J-chamfer was not used during cladding.
Fitting the front trim with soffits
How to attach soffits to the roof
For high-quality cladding, the reliability of fastening of all elements is of great importance. Soffits are fastened only at right angles with anti-corrosion self-tapping screws equipped with press washers, screws or nails with a leg equal to 3 mm and a head of 8 mm. Nails begin to be driven in from the middle of the panels, moving towards the edges. There should be a distance of 30–40 cm between the fasteners, and 1 mm between the soffit and the fasteners.
When attaching, you do not need to tension the soffit - too much tension will distort the shape of the panel, which will lead to an error when connecting them.
Fastening soffits under a soft roof
Installation of soffits under a soft roof is done using horizontal filing technology. They construct a box (sheathing) from the beams, attach it to the wall 10 cm above the front board and to the rafters. If there is a long overhang, an additional support rail is installed in the middle of the box. Then the soffits are attached to this sheathing according to the general scheme.
Lining roof soffits along the slope
Hemming along the slope is the easiest. It is made on roofs with a slope of no more than 30° and a protrusion of up to 50 cm. The soffits are hemmed along the sheathing attached to the rafters. Hemming strips can be placed perpendicular to the rafters or placed along the end of the rafters parallel to the wall.
Video: installation of roof soffits
https://youtube.com/watch?v=1j4vtdvIpEQ
Extension and rotation of the frontal bar
Extension of the Frontal bar can be done with a simple overlay. The overlap between the slats is 25-50 mm.
A more aesthetic option that allows you to hide the cut edge is an option with bends on the joining edges (Fig. 17).
| Fig.17 |
Prepare the planks as shown in the diagram. Bends are made 180° so that the planks fit tightly into the hook during installation. After joining, the joint can be tapped through the block with a mallet.
To create a turn, mark the fold line and make a cutout, as shown in Figure 18.
| Fig.18 |
Bend the Front Strip along the line so that the cut edge at 45° is on the outside, and fasten as described above.
Recommendations from professionals
In order for soffit panels to last a long time, it is advisable to listen to the advice of experienced roofers and take into account when installing a number of installation subtleties that are not too noticeable, but are important for the roof:
- Soffits are cut with metal scissors, a circular saw or a knife. For more precise and soft cutting with an electric saw, especially in winter, use a blade with thin teeth in the opposite direction. If they work with metal scissors, then they cut not along the full length of the blade, but at 3/4 of the length. Before cutting with a knife, the soffit is bent and unbent several times along the groove, until the panel breaks at the bend.
- You need to start cutting from the fastening part.
- The joining of spotlights in the corners can be straight or diagonal. The second one looks better, but to do this you need to cut the panels so that you can mount the central v-shaped gutters in one line.
- When installing soffits in winter, you should leave them outside for 2-3 hours immediately before installation. Work is carried out at an outdoor temperature of at least -15 °C.
- When storing panels, avoid exposing them to direct sunlight.
- Packages of material can be transported by placing them on a flat surface.
- Do not apply sealant to corners.
- All fastenings are made with special fasteners.
How to calculate the number of panels
Before installing the soffits, you need to determine the amount of material that will be required for the job:
- Ventilation holes should occupy 1/150 of the surface of the entire ventilated space. The area that needs ventilation is divided by 150.
- Next, the existing ventilation elements are subtracted from the obtained indicator. This could be tiles with holes for ventilation or dormer window openings. The obtained result must be compared with perforated soffits.
- Then the area that one panel will occupy as a result of installation is determined. After this, the required number of products is calculated.