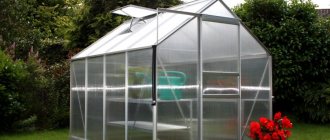
Greenhouse owners are well aware that one of the basic rules for growing plants is to organize a flow of fresh air. The task is not easy, because we must take into account that there must be a certain microclimate inside the greenhouse in order to prevent the green spaces from overcooling. It is difficult to control this process manually all the time. And in some situations it is simply impossible. Therefore, an excellent option has been proposed that solves this problem - automatic opening of the greenhouse.
Device for automatically opening windows in a greenhouse Source images.ru.prom.st
The role of automatic ventilation and automatic watering for a greenhouse
No plant can grow fully if it is not provided with adequate ventilation and watering. Air circulation allows you to normalize the temperature in the greenhouse and the fertility of plants will be much greater. If you do not provide high-quality ventilation, the plants will not only grow poorly, but will even die.
Also, an increase in temperature proportionally accelerates the growth process, therefore air circulation can influence the development of “wards” in the greenhouse.
Watering is another mandatory requirement for plants to develop fully. It is important that a “golden” mean is found in this matter. Excessive watering can ruin, and its lack will make the inhabitants of the greenhouse lethargic and jeopardize their development.
If you make all processes automatic, this will greatly simplify doing business. There is no need to worry that something will be done at the wrong time. This is especially important when there are several greenhouses, there is a large farm, and there are not enough free hands. That is why the role of automatic ventilation and automatic watering for a greenhouse is very important.
An automatic ventilation system also has the following advantages:
- resources are saved, the “smart” system knows how to normalize the process;
- if the ventilation procedure or other important parameters fail, the system itself will adjust them in a matter of minutes;
- This is a complete saving of the farmer’s effort, time and finances, because a ruined crop as a result of improper ventilation will not bring the expected profit.
Automatic watering is just as significant and important for a greenhouse. They are trying to build it not only in a closed space, but also in an open area. But it is in the greenhouse that it is especially important to water the plants correctly. This mode depends on the type of greenhouse inhabitants, optimal air temperature, humidity, etc. A huge advantage of an automatic system is that you do not need to constantly calculate what kind of watering should be taking into account all these factors.
If you purchase such systems, they will cost a decent amount. But if you develop them yourself, it will allow you to:
- It will give an even greater understanding of the arrangement of the greenhouse and how to influence the processes occurring in it.
- You can even build your own business on this.
Pneumatic cylinder assembly
- Glue the bottom plug to the cylinder.
- Place the ball chamber inside, tightly connected to the hose.
- Pass the hose through the plug. Secure the rod in the center of the piston. Insert the piston into the cylinder so that it presses the ball.
- Pass the rod through the top plug and seal it tightly to the cylinder.
Advice . If you secure the guide with tape, you can remove it and service the device in case of a malfunction.
The pneumatic cylinder, created from a hydraulic cylinder, is completely ready. When air flows through the hose, it will inflate the ball, which will lift and push the piston and rod.
Stages of work on installing the receiver
The assembled part is only half of the automatic ventilator. For it to work properly, you need to connect the hydraulic cylinder to a container with air, that is, to the receiver. The larger the receiver, the higher the air pressure inflating the ball.
Receiver from a canister
A large paint can or canister with a capacity of 20 liters is suitable as a container for air. The main thing is that they are hermetically sealed.
- At the bottom of a tightly closed canister, you need to install two pipes.
- Connect one of them tightly to the hose entering the hydraulic cylinder.
- On the second, put a piece of hose 100-150 mm long. Pump air into it and turn it off when the rod extends a little.
The receiver is ready! When the air pressure increases, it flows through the pipe into the hydraulic cylinder, and the rod opens the transom, providing automatic ventilation of the greenhouse.
How to properly install a finished mechanism
The automatic device should be connected to one window that opens along a horizontal axis. It is important to install the receiver so that it is not exposed to sunlight. It is best to hang it under the roof of the greenhouse, covering it with foil or other protective screen.
The pneumatic drive connected to the receiver should be installed next to the window. A rod attached to the window will raise the frame as soon as the greenhouse gets hot. And it will go down when it gets cold.
The invention should be calibrated by adjusting the pressure inside the system using a free hose. Calibration allows you to achieve the opening and closing of the window at a certain temperature.
Advantage of the device: the unit can be constructed independently from scrap materials.
Minus: the hydraulic cylinder is designed for light horizontal transoms.
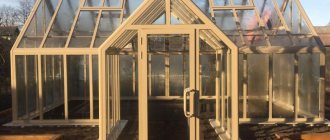
Do-it-yourself automatic window for a greenhouse, step by step
Vents play a big role in ensuring the livelihoods of greenhouse “residents”. But not every gardener has time to open and close this structure every time. This is where automatic greenhouse vents come in handy. It's easy to make them yourself. There are several methods to bring your idea to life.
hydraulic window for greenhouse
This model of automatic window has a simple device. The operating algorithm is as follows: under the influence of sunlight, a sealed metal container heats up and transfers heat to air and water. The liquid, in turn, expands and “transmits” the pressure further - to the liter jar. She pulls the bowstring and the window opens.
When the air begins to cool inside the room, the process will reverse and the window will close.
To create such a design you will need:
- empty four-liter metal container;
- plug for hermetically sealed closure (can be made of rubber or dense foam);
- tubes so that the liquid can flow freely. They can be aluminum or rubber.
The process of creating a window consists of the following stages:
- Insert the tube into the empty container.
- It is filled 40% with liquid (water or oil).
- The neck should be tightly closed with a stopper and secured to the top crossbar.
- Take a smaller container, insert a tube into it and drill a hole in the lid. The smaller its diameter, the slower the liquid will evaporate.
- Liquid is poured through the pipe.
- Connect the entire structure using a bowstring and a flexible rubber hose.
Now it is important to cope with the next stage - setting up the window. This should be done when the temperature in the greenhouse is optimal. By increasing the liquid and the mass of the load, you should adjust at what load the window will begin to move.
This option is not suitable for greenhouses that are too large. For such premises you will need a full-fledged hydraulic system, which costs a lot of money.
hydraulic cylinder based window
If the greenhouse is small, then a primitive device based on a hydraulic cylinder will allow you to develop an automatic ventilation system.
The essence of this method is as follows:
- it is necessary to pour machine oil into the hydraulic cylinder;
- place it under the greenhouse lid;
- when the temperature reaches a certain level, the piston will raise the window.
The advantage of this method is that the system can easily lift even a heavy structure.
How to ventilate a greenhouse correctly
In fact, the process of ventilating greenhouses is limited only by the required temperature and humidity inside the structure. After all, the main task is to create optimal conditions for plant growth. Therefore, we suggest that you familiarize yourself with the basic rules:
- You cannot create conditions under which drafts will occur inside the greenhouse.
- For uniform ventilation, openings with opening frames must be installed evenly along the entire length of the building.
- It is better to ventilate the greenhouse in the evening and in the morning, when the temperature outside is more favorable for plants.
- Plant inside the greenhouse only those plants for which the humidity and temperature conditions of growth will be approximately the same.
- Purchase ventilation mechanisms strictly according to the load they can withstand. The manufacturer must indicate this in the product passport. To do this, you will additionally have to determine the weight of the window.
Do-it-yourself automatic opening of greenhouse doors step by step
Automatic opening of the greenhouse doors, as well as the similar opening of the window, contributes to better ventilation of the room. This will have a positive effect on plant growth and fertility.
The principle of the automatic system for doors is very similar to the same design for windows. An important difference is that the door is heavier, so the unit must be more powerful.
In this case, the best option would be to use an electric drive. It can handle serious loads.
You can purchase ready-made systems, but they will cost much more than installing them yourself. Therefore, automatic opening of greenhouse doors with your own hands has the right to life.
A distinctive feature of such doors is that the owner of the greenhouse will have to spend money on the purchase of automation - the main element of the entire structure. All other materials will be inexpensive.
The easiest way to install sliding doors. They have rollers in their lower part, which facilitate the movement of the structure. Special guides are installed that will withstand wind, loads and help the door respond to commands.
The mechanism of action of such doors is as follows:
- One motor and one gearbox are used.
- The linear motion transmission can be transmitted to a rack with teeth or a motorcycle chain.
- The design of the sash and rollers must be rigid to withstand wind and loads, but at the same time flexible so that the structure can move easily.
- An automatic system is being installed. It is best to also install an additional emergency system. Then, in the event of a power outage, the system will continue to operate and the plants will not die in the greenhouse.
You can also make automatic doors on grooves. To do this, you need to purchase two motors and an automation system. A profile is mounted on the door - a groove, which works according to the prompt of the “brain” - the automation system. The heavier the doors in the greenhouse, the more powerful the motor and gearbox should be. But usually such rooms have light glass doors, so you can save a little on these elements.
In this case, you can also install an emergency opening to prevent emergency situations.
Formulation of the problem
In this smart greenhouse, you need to control devices for light, watering and a pump. To carry out ventilation, you need a servo drive that will start an electric fan or open the windows. To control these devices, a Relay Shield is required. Often on this board, in addition to relay connectors, servo drive connectors are used.
The parameters of the greenhouse environment are read by a temperature sensor, and a special photoresistor measures the illumination. You can use a humidity sensor, but the accuracy of measurements with one similar sensor in large greenhouses is not the best. In this case, it is necessary to use the timer available on the main board.
The total cost of the breadboard, wire, power supply, 2 Channel Relay Shield and Arduino UNO does not exceed $25. There is no cost of servo drive and pump.
Video: how to make automatic door opening in a greenhouse with your own hands
A video on how to make automatic opening of doors in a greenhouse with your own hands is not as often seen as similar material on the automation of vents. This is due to the fact that greenhouse owners are often limited to automation of the latter.
That is why such video material is very valuable. A gardener will be especially lucky if he finds a video about non-standard automation approaches, new trends and progressive ideas. This is exactly what the next video is.
Reliable automation with pneumatic drive
You can equip automatic ventilation of greenhouses with your own hands. The simplest option is a pneumatic drive from a hydraulic cylinder.
List of required materials
For installation you will need a couple of days, tools and several components:
- a piece of plastic pipe in the form of a cylinder with a length of 300-350 mm and a diameter of 200 mm;
- a piece of plexiglass with a thickness of 5 mm;
- wooden stick for making a rod;
- soccer ball camera;
- thin hose 1.5 - 2 m long.
Attention! A plastic pipe can be replaced by any cylinder made from scrap materials. For example, from polycarbonate left over after installing a greenhouse or greenhouse.
Pneumatic greenhouse ventilation
Preparing to install the cylinder
- Take a pipe and make two sealed plexiglass plugs for it. The top one will serve as a guide for the rod.
- Make a piston from plexiglass. It should be 1-2 mm smaller than the internal diameter of the cylinder.
- The rod is made of wood or a piece of plastic pipe (size 32). If you choose the wooden option, then a stick 500 mm long and 40 mm in diameter needs to be sanded and coated with an antiseptic.
- Drill holes in both plugs. On the bottom – with a diameter of 10 mm. On the top - such that the rod fits in it.
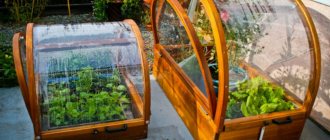
Automatic watering in a greenhouse with your own hands in detail
Timely watering will ensure a good harvest, therefore the main task of the farmer is to ensure automatic watering in the greenhouse. There are several types of it, and all of them can be made with your own hands.
subsoil automatic irrigation
This type of irrigation is very valuable due to the fact that:
- water is used sparingly;
- moisture is supplied to the roots with the bubbles necessary for plant growth;
- there is no high humidity in the greenhouse.
In order to begin the installation process, you should purchase metal or plastic pipes with a diameter of 2 - 4 cm.
The algorithm of actions will be as follows:
- It is necessary to drill holes with a diameter of 2 mm in each pipe.
- The holes should be located like this: top, bottom, right and left.
- The distance between adjacent holes must be at least 30 cm.
- In the beds you can dig trenches 30 cm deep.
- To prevent the system from clogging, you need to pour a layer of gravel onto the bottom of the trench and cover it with plastic film on top.
- The pipes are laid at an angle so that air is forced out of the pipe under the influence of water pressure.
- Cover them with another layer of polyethylene.
- Cover the pipes with soil and connect them to the water supply system.
To automate the process, it is necessary to install an electric pump, a control system and humidity sensors. The mechanism works like this: sensors record changes in humidity, call the control system, and it transmits a command to the pump, which supplies water.
When the sensors record the desired humidity level, the process ends.
rain irrigation
This type of irrigation is carried out thanks to special installations that spray water into the air. This option is suitable for large greenhouses because it can significantly save water.
To install the structure you will need:
- pipeline;
- storage capacity;
- pump, if water will be supplied from the water supply system;
- sprinkler nozzles;
- control system;
- sensors
Pipes need to be laid in the upper part of the greenhouse (near the ceiling). Connect the nozzles and install sensors in the ground. They will send a command to the control system, and water will flow through the pipes.
automated drip irrigation
This is one of the most popular and sought-after types of irrigation in a greenhouse. Thanks to it, water is saved, the sensors work in a relaxed mode, because the soil is almost always moist.
The design is based on the principle of irrigating each plant individually. Water enters the soil in small portions closer to the roots, which promotes efficient growth.
Before proceeding with installation, you need to develop a layout of the seedlings and know how much water they need per day for normal growth.
Algorithm for installing drip irrigation:
- Purchase polyethylene pipes with a diameter of 10 - 15 mm.
- Cut them into pieces 6 - 8 meters long.
- A medical drip system can act as nozzles.
- There should be as many such systems as there are plants. They must be secured in the right place.
- The fittings will allow you to fix the tubes.
- Connect the drip hose to the main pipe. To do this, drill a hole with a diameter of 14.5 mm in the latter.
- Pipes are laid across the beds and irrigation tapes are connected.
- A water tank is placed at a height of 2 - 3 meters above the ground and a valve is cut into it.
Before starting work, the system must be checked with maximum pressure. If there is a leak somewhere, it needs to be fixed.
Optimal quantity
When improving a greenhouse, a reasonable question arises - how many vents are needed for proper air exchange. Experienced specialists advise installing one transom for two m/p. The size of the transom should be 900*600 mm. If the building is three or four meters high, 2 of them are made. It is generally accepted that full ventilation of a greenhouse will be carried out if the total area of openings for air circulation is about 20–25% of the entire area of the greenhouse.
If the greenhouse design includes partitions that divide it into several parts, then for proper air circulation, vents and doors are installed in each section.
Correct location
The vents must be located at the top of the structure, since warm air rises to the top. They are mounted in the roof or openings are made, retreating 2/3 from the base of the structure in height.
If the greenhouse is installed on the sunny side in the direction along the ridge from east to west, then two or three opening transoms for a structure six meters long are sufficient. Although in regions where there is high humidity or in damp areas, it is advisable to provide a larger number of vents.
Even if you purchase a ready-made greenhouse, where all the elements are provided for in the project and calculated by specialists, you need to take into account local conditions when installing it. In case of high humidity, additional vents should be installed.
Which polycarbonate is better for greenhouses: tips for choosing
Windows on the greenhouse roof
Opening transoms located at the top reduce the likelihood of drafts. Experienced gardeners do not recommend placing opening elements in direct proximity to the front door in order to avoid drafts, as well as to prevent transoms from slamming shut when there is a gust of wind. Initially, the opening should be made in the middle of the building (lengthwise), and then the windows should be placed at an equidistant distance from it.
Advantages of an automatic opener
An automatic window opener, designed directly for greenhouses , allows for high-quality ventilation of the room without human intervention, thereby significantly facilitating the work of gardeners and freeing up valuable time for them. Even during the absence of a person, an automatic window opener allows you to protect greenhouse crops from variable weather conditions. This greatly reduces the risk of losing them, increasing the likelihood of a good harvest.
Video of automatic watering in a greenhouse with your own hands
A large selection of videos of automatic watering in a greenhouse with your own hands will allow you to decide on the most optimal and economical option. It depends on the size of the greenhouse, the type of plants growing in it, and the skills of the owner.
An automated greenhouse made by yourself will definitely bring satisfaction to its owner, a good harvest and will save a considerable amount. A large selection of automatic systems and methods of their installation allows you to choose the most suitable one in a particular case.
Thermal drive operating principle
Regardless of the design of the thermal drive, the essence of its operation is to open the window leaf when the temperature rises. When the air in the greenhouse cools down, the thermal drive automatically closes the window to its original position.
There are two main elements in the device:
- sensor;
- actuating mechanism.
Moreover, the design of the sensors and actuators themselves can be completely arbitrary. Additionally, the devices can be equipped with closers and locks that ensure tight closure of the transom.
There is also a division into volatile and non-volatile devices . Electric drives operating from the power supply network most often act as volatile drives.
Their advantages include greater power and wide possibilities for programming behavior.
The disadvantages are that if there is a loss of electricity supply, there is a risk of either chilling the plants due to the window being left open at night, or cooking them on a hot day when the ventilation is not opened.
General information about control systems
The intelligence of modern equipment is provided by microcontrollers. These are small and resource-constrained full-format computers, often located on a single board or chip. Despite their small size, their power is quite sufficient to control various equipment. Such microcomputers obtain the information necessary to perform their functions through various specialized sensors. The general location of devices in a single network is ensured through additional modules attached to the microcontroller.
Carrying out their program, intelligent devices issue control pulses to executing circuits including motors, pumps, heaters or any other devices to control which the entire system is created.
The basis of many of these complexes are controllers of the Arduino, STM, Ti MSP430, Netduino, Teensy, Particle Photon, ESP8266 series or other common boards of this type in the world. In addition, some specialists create their own versions of micro-computers that control equipment based on outdated PCs or some 8-bit processors, for example, the Z80.
Ventilation from trunk support
An automated window is not a problem if you have instructions and a little skill. The main element will be a support for the trunk, removed from the Moskvich.
Automatic window in a greenhouse
Hydraulic cylinder and hydraulic tank from car parts
Your task is to mount a solid mechanism capable of raising several transoms at the same time. It will consist of two parts. The first is a support for a car trunk, modified to meet new needs:
- It is necessary to saw off the bolt built into the stop. Drill a hole in the center and bleed air from the cylinder. Drill the hole to 9 mm.
- Push the rod in so that the piston does not reach the hole by 30-35 mm.
- Degrease the cylinder cavity. Secure it in a vice with the hole facing up. Drizzle oil onto the piston so that it does not touch the walls.
- Fill the cavity with epoxy glue. Once it is dry, you should pull on the rod to tear the piston away from the glue.
- Drill a 9 mm hole in the glue and cut a thread in it (step 1.25).
The second part of the device is the hydraulic tank. It can be built from a pipe:
- The pipe (diameter 40 mm, length - 300) must be plugged on one side with a welded metal plug. And on the other - a plug with a thread for an M10 bolt.
- The threaded plug requires a gasket made of oil-resistant material.
- Drill a 9 mm hole in the welded plug and cut an M 10 thread in it, pitch 1.25.
Door opener
Refilling and installing an automatic opener
By connecting the cylinder and hydraulic tank with a brake hose, you get a powerful opener. All that remains is to fill the hydraulic tank with cold spindle oil and install the automation:
- Having poured oil into the hydraulic tank, you need to move the rod to pump it throughout the entire mechanism. Then tighten the full tank with a threaded plug and close it with a bolt with a washer and a lock nut. Calibrate the mechanism using the adjusting bolt.
- Now the tank is under the ceiling (with a protective screen, of course), and the cylinder is under the window. When the oil expands, the rod will extend and the window will open.
Plus of the device: The mechanism is designed for heavy weight. You can connect several vents to it using homemade levers.