Today we’ll talk about how to make a viewing hole in the garage. For many car enthusiasts, this is a necessary element of a garage building, so many of us try to save money, which is why we carry out some preventive maintenance work related to the car ourselves. It should be noted right away that despite the apparent simplicity of the design of the inspection pit, it is not so easy to build it. Therefore, most garage owners prefer to invite experienced craftsmen to ensure a guaranteed high quality of the final result. But in order for the guarantee to be one hundred percent, you need to know the technology of constructing a garage pit yourself. Therefore, read the article, remember everything, and this will be a guarantee that the experts will not deceive you.
Inspection hole in the garage Source drive2.ru
Planning the construction of an inspection pit
There are two situations when building a pit in a garage:
- in a building just under construction;
- in an already exploited.
The first option is simpler, because nothing prevents you from digging up the soil to the size of the intended structure. To do this, you can even use the services of an excavator, thereby speeding up the process itself and avoiding labor-intensive excavation work.
But both situations happen often, so let's deal with them separately. But first, let’s talk about the size of the pit in the garage for a car.
Peculiarities
If you have a small plot of land next to your house, you can do a lot of interesting things with it. The main thing is to make full use of every free square meter. In a small area, you can create with your own hands a place where you will have a pleasant time both alone and in a noisy company of friends. Even a small square of land can be arranged in such a way that there will be something to do on it for both small children and experienced gardeners.
True, before you start designing a summer cottage, you need to take into account all its features. If you have never gardened and know nothing about working with the soil, then it is best to immediately seek help from professionals.
Dimensions of inspection hole
The dimensional indicators are based on the vehicle base, or more precisely, the distance between the wheels of your car, both in width and length. But there are also minimum width parameters, which are often taken as a basis. This is 80-85 cm. As for the length, 1 m is added to the length of the car. Although we must pay tribute that for the convenience of using the inspection pit, many do not stop at this size, so in garages you can find pits up to 6 m long.
Sketch showing the minimum width of the inspection hole Source windsc.ru
Now with depth. It is clear that the height of the garage owner should become this size. At the same time, he must reach with his hands any part or assembly on the machine. But experts recommend deepening the inspection hole to 2 m. And even if the person is small, you can always install a stand or flooring at the bottom. True, this is not always possible to do. Much will depend on the level of groundwater. If it is tall, for example, 1.2-1.5 m, then you can forget about the hole.
These were the overall dimensions. Now about the construction sizes. For obvious reasons, the foundation pit itself is dug larger. This is due to the fact that in order to form the structure itself, it is necessary to equip the structure. And to do this, you need to lay a cushion with waterproofing on the bottom and fill it with screed. The walls are assembled from blocks or bricks or poured into formwork as a monolithic structure. All these materials require space without taking into account the selected dimensions of the viewing structure.
Therefore, a pit is dug with a width equal to the width of the inspection hole, plus the thickness of the walls, plus 30 cm. The length is calculated in exactly the same way. Depth is the thickness of the pillow, the thickness of the screed and the waterproofing layer, plus 1.8-2.0 m.
Sketch of an inspection pit with all dimensions Source stroyfora.ru
See also: Catalog of garage projects presented at the Low-Rise Country exhibition.
What materials will be needed?
- sand and gravel - for preparing masonry mortar;
- crushed stone - to form a pillow;
- cement - for mixing the solution;
- wooden blocks 30 by 30 mm (40 by 40 are also possible);
- boards up to 2.5 cm thick or plywood up to 1.5 cm thick - to create formwork;
- boards up to 4.5 cm thick - for arranging the lid of the inspection pit;
- waterproofing agent (roofing felt, mastic, film) - to prevent the penetration of groundwater and protect the screed from dampness (see how to do waterproofing correctly);
- reinforcing rod and steel wire - to create a reinforcing lattice along the walls and floor base of the pit.
If you are doing ventilation, you will also need plastic pipes - it is optimal to use options with a diameter of up to 10 cm. Wooden boards and bars can be replaced with bricks and foam blocks, but the cost of the work will increase due to this.
Technology for constructing an inspection pit
We won’t tell you how to build a garage with a pit that is being built. It's not that difficult. Let's talk about how to make an inspection hole in an already used garage.
Digging a pit
We will assume that you have decided on the sizes. They are applied to the floor in the garage, for example, marked with chalk. The main requirement is that the pit should be located in the middle of the garage building.
Marking the pit inside the garage Source parki48.ru
Typically, the floor in a garage is a thick concrete screed, into which a reinforcing frame is laid in the form of a lattice of steel reinforcement. Therefore, according to the markings, it is necessary to gouge the concrete and cut off the reinforcement along the perimeter of the pit.
The sand and gravel cushion and soil are removed from the resulting opening with shovels. The walls and bottom of the pit are leveled to the maximum with shovels. This is labor-intensive work that can take two days. Although much will depend on the composition of the soil under the building and the activity of the craftsmen. There is one advantage when building an inspection pit in a used garage. The construction site is under a canopy, so rain is not a problem in this case.
Digging a pit (excavation) Source ok-berta.ru
Ventilation of inspection pit
The mistake is made by those who do not think about the ventilation system. But its purpose is not only to remove humid air. Musty odors from oily rags and gasoline will quickly fill a small space, gradually moving into the garage itself. So it’s better to spend a little time and money, but build ventilation.
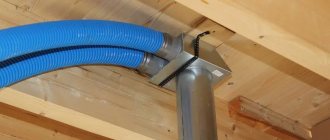
Essentially, this is a plastic pipe with a diameter of 100 mm, which is taken outside the building. To do this, dig a horizontal trench, which is brought out either under the foundation or through the wall. Sand is poured into it and a pipe is laid with an outlet above the garage roof. The lower end should be located at the bottom of the pit.
Ventilation pipe inside the inspection hole Source drive2.ru
Construction of an inspection pit
So, let's move on to the main work related to the construction of the pit itself. First of all, prepare the bottom :
- A layer of sand 15-20 cm thick is poured , which is compacted with water.
- Fill in crushed stone of medium or small fraction with a thickness of 10 cm, which is also compacted.
- The entire pit is : floor and walls.
See also: Catalog of companies that specialize in the design and construction of small architectural forms.
Waterproofing
Waterproofing the inspection pit in the garage is an important step. So understand the process.
To carry out waterproofing work, roll material is used. This can be a polyethylene film with a thickness of at least 0.2 mm, laid in a sleeve. For this, roofing felt or modern bitumen-based waterproofing materials are used.
Waterproofing strips are laid in strips from wall to wall, overlapping each other with an offset of 10-15 cm. Bitumen products in the overlap areas are secured with bitumen mastic. The polyethylene film is secured with self-adhesive tapes. The photo below just shows the option with polyethylene. Please note that the edges of the waterproofing are brought outside the hole and pressed with a weight.
Waterproofing an inspection hole in a garage using plastic film Source martand.ru
Formation of floor and walls
The prepared bottom is filled with a screed 3-7 cm thick. There is no need to put any reinforcing frame into it, because the structure is not subject to loads other than the weight of a person. Therefore, the main focus is on the construction of walls.
As mentioned above, there are two options:
- use bricks or blocks;
- build a monolithic structure.
In the first case, block wall material is laid around the perimeter of the prepared pit, laying masonry elements with a band. That is, with an offset of half a block or brick. For bonding, a regular masonry mortar with a 1:2 recipe (cement-sand) is used.
Pit made of blocks or bricks Source drive2.ru
If a monolithic structure is being built, then formwork is assembled for this. It is made from boards, slabs or sheets of smooth and durable materials. For example, from metal sheet or corrugated board, plywood or OSB boards.
The main task is to assemble the formwork so that it does not move apart under the influence of a sufficiently large weight of the poured concrete. If the soil under the garage is clayey, then the formwork is installed as one layer of fencing from the outside. The wall of the pit covered with waterproofing can easily withstand any load. If the soil is sandy, loose and fragile, then the formwork is installed in two layers, leaving space between them for pouring concrete mortar.
Concrete is poured at one time, without leaving it for the next day. There may be a break between fillings, but no more than 4 hours. Look at the photo, this is what the formwork looks like with concrete mortar poured into it.
Inspection pit as a monolithic concrete structure Source azowo.ru
Option for car repair
There are various options for inspection pits. You can find seated, standing, combined with a cellar. In the first case, work is carried out standing. In the second, they move using a seat equipped with rollers and running along guides. This saves the cost of arranging walls.
Before carrying out work, the following features must be taken into account:
Waterproofing is a mandatory design element that affects the entire room. If you refuse it, there is a possibility of turning a dry and warm garage into a damp room. In this case, the car standing above the pit will become damp and corroded. Installation of a power circuit around the perimeter of the structure. The reinforcement or table frame holds the trench walls, preventing collapse under static pressure. Additional reinforcements are installed in the wheel area. For ease of work, special niches are made in the structure
Standard dimensions are 300 x 200 x 450, respectively height, depth, length. The structure must be equipped with ventilation to eliminate the accumulation of oil and gasoline vapors. Attention should be paid to lighting. Power supply should not exceed 36 volts
If the voltage is high, there is a risk of fire. The cover for the structure is made of wood and serves to ensure safety.
Typically, such pits are slightly shifted towards one wall, leaving the other for storing auto parts and tools.
Plastic models
Today, manufacturers of products made from polymer and plastic materials offer ready-made plastic pits for the garage. We must pay tribute to this type of product, which simplified the construction of inspection pits. There are more and more offers on the market every year. There is not only a wide range of sizes, but also a variety of raw materials, and prices vary significantly.
There is no need to waterproof the finished pit. The main thing is to lay a good sand cushion and fill the space between the walls of the dug hole and the plastic product with sand.
Garage floor removal and excavation work
First, it is necessary to clear the garage space of foreign objects so as not to interfere with the construction process.
A section of the floor is marked according to predetermined dimensions, pegs are driven into the corners of the future pit and the string is stretched. When digging a pit, the soil is carried outside. The clay should not be removed too far. It will be useful for sealing the walls. After reaching the required level in depth, the walls are trimmed until the profile is completely straight and vertical.
The bottom is carefully leveled, and a cushion is poured from layers of crushed stone (up to ten centimeters) and sand (five centimeters). The sand is compacted until maximum density is achieved, with the addition of water. Then a waterproofing film is laid.
Sightseeing ditch and groundwater
Unfortunately, it is not always possible to make a viewing ditch in the garage. If groundwater (GW) is located under the garage at a depth of less than two meters, it is not worth starting construction. Life shows that in this case no amount of waterproofing of walls will help. When the hot water is below 2.5 meters, a trench can be built provided that high-quality waterproofing of the outer walls of the inspection ditch is carried out. It can be done with your own hands from several layers of adhesive material: roofing felt, TechnoNIKOL, Stekloizol, Gidrostekloizol and others. Cover the surfaces with molten bitumen. There are penetrating materials: Hydrotex, Aquatron-6, Penetron. They are convenient because they are applied to wet concrete and reduce waiting time. A good clay castle is oily, crumpled clay.
https://youtube.com/watch?v=i-d4NoKzm8M
Kitchen design 12 sq. m. with access to the balcony
Any housewife will be pleased with the additional space. The balcony is used as an extension of the kitchen. There is a dining table in it. If you can’t turn your idea into reality, you need to take care of decorating the exit using draperies and glass doors.
Kitchen design 12 sq. m. with a balcony are chosen after studying photos of projects. If you expand the useful space, then there will be more sunlight. To develop an original version, the partition is removed. This is not always feasible for technical reasons, so property owners require official permission for such redevelopment.
