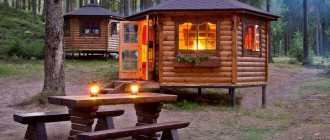
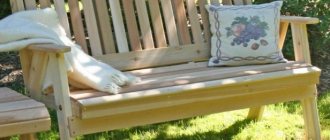
The interesting shape of the hexagonal gazebo evokes surprise and admiration. Everyone is already quite tired of the classic “squares” and “rectangles”; they want something new and aesthetic. It is the structure with six sides that in this situation is the center of attention.
Wooden hexagonal gazebo idea
You can find more photos in the publication about ideas for country hexagonal gazebos.
In this article we will focus on the intricacies of construction, and also provide detailed instructions of 13 steps
There is absolutely nothing difficult about building a hexagonal shape. Even installing the roof is not particularly difficult, although some features are present.
In this article we will show you step by step the process of building a hexagonal gazebo.
What aspects can be identified in the work?
Previously, we considered options for constructing gazebos for summer cottages. It's time to talk about specific structures in the construction of which wood is used. To be sure that you want to start the construction process, we suggest that you familiarize yourself with all aspects of the material used.
Why choose a tree:
- Weight. Wood is a lightweight material. This makes it possible to produce various designs. Installation of manufactured products will not require additional costs for organizing a concrete foundation.
- Safety. This material is environmentally friendly. Therefore, you can spend a long time in a wooden gazebo, even with children.
- Treatment. Wooden material lends itself well to processing. It is because of this that even a beginner will be able to build a gazebo.
- Price. The material has a low price, especially if it is made from coniferous trees, birch or oak.
- Combination. Buildings made from wooden gazebos, including a gazebo, go perfectly with the landscape design of the site. After all, the building has a natural appearance.
The advantages of the material are more than enough to choose this raw material and learn how to make a gazebo with your own hands from wood. But unfortunately, the material also has several significant drawbacks that will not allow making a gazebo in certain conditions.
Disadvantages of wood:
- Low fire resistance. If you are a lover of a good holiday and often barbecue, then you should not place barbecues inside the erected wooden premises. But if it has already been installed, take care of pre-treatment with a composition that will prevent the possibility of fire.
- Low level of moisture resistance. When your site is located near bodies of water or has a fountain installed on it, construction is also not a good idea. The source of moisture will negatively affect the structure of the material. The tree will constantly absorb moisture and over time the process of rotting of the material will begin. To completely protect the material from possible damage, waterproofing is used during construction. The purchase of this material will require additional costs, but do not refuse.
If you are not scared by such shortcomings, then we suggest you figure out how to make a gazebo with your own hands from wood step by step.
Where to begin
The construction of any building, even a light gazebo, must begin with the construction of the foundation. in this case, the best option would be a columnar foundation.
It is quite suitable for a lightweight wooden structure; it is easy to make yourself. You can build a pile foundation, but it is a little more complicated.
- First you need to dig 9 small holes, the depth of a shovel bayonet. This will be the base for the foundation.
- Next, it will need to be covered with crushed stone, and then covered with sand on top. Compact thoroughly and lay out the tiles without creating additional fasteners, but the tiles must be leveled so that they are in the same position.
- A brick is laid on top of the tile, which is already carefully fixed. The height of the foundation is individual, calculated depending on the requirements of the owner of the site and his preferences.
- On top of the brick structure, you need to lay waterproofing in the form of roofing felt, this will protect the foundation from moisture, which will have a positive effect on its strength and service life.
Preparatory work
If a professional builder takes on the job, then you can choose any type of wooden gazebo. But if you are new to this area, we recommend choosing and building a basic structure that includes a gable roof.
What is included in the building:
Approximate drawing of a square gazebo
- square base, sides are two meters;
- supports for support;
- middle harness, which is made at a height of seventy centimeters from the floor level;
- gable roof type.
If you decide to make a gazebo with opaque cladding up to the trim level, then it is recommended to install stationary jibs. Their length is only fifteen centimeters, but they will significantly strengthen the finished building. There should be an entrance on one side of a square or rectangular gazebo. It is designed at a distance of no more than sixty centimeters from the corner posts. The opening width should be about 81 cm.
Now let's talk a little about the roof. The rafters on such a gazebo should be two meters long. If you plan to make a protruding roof, then you need to know that the dimensions of the future structure will be two and a half square meters on each side.
These indicators will be enough for a good rest with your family. It is worth knowing that a gazebo made of wood with your own hands can be built step by step using a variety of species. The choice of a specific tree will depend on preferences and financial capabilities.
Deciding on the type of wood
The main emphasis is on the raw materials and the chosen method of constructing the gazebo. Which type of tree is better to give preference to:
- Pine. Pine material is highly resistant to rotting and mechanical stress. The disadvantages of the material include the ease of damage to wood by various fungi.
- Spruce. It has the same qualities as pine, but is more resistant to fungus.
- Larch. Unlike the breeds presented above, this one is stronger. The structure made from it will be less susceptible to moisture. The only disadvantages include more complex processing and ease of splitting.
If you are building a gazebo with your own hands from wood, then it is recommended to choose the material from these three tree species.
Now let’s select the external type of elements for construction:
- If rounded logs are chosen for construction, then they are suitable for the construction of chopped structures. This material is not processed, but that is why it has a beautiful and natural look. If you are new to the construction industry and have chosen a log gazebo for construction, then the logs will be suitable for your work. The process of assembling a gazebo from this material is easy. But unfortunately the material has drawbacks. Disadvantages include shrinkage of the material, the appearance of cracks and the appearance of fungus or mold.
- Timber with a beautiful textured look. If this method of constructing a gazebo is chosen, then 10x10 cm timber is used for the work. By the way, they are often made from the above tree species. Timber is considered one of the most convenient elements to work with. It has advantages. The material is not subject to rotting and the time required to work with it is reduced.
(Block house) - The board is ideal for making gazebos. This material includes a block house, which is convex on one side. This indicator makes it possible to imitate a solid log. Even experts use such boards. But the material itself can be recommended to those who have decided to build for the first time and there is no way to get help.
- OSB board. It can be used for lining the gazebo, as well as for the floor. It is worth taking slabs with a thickness of at least 9 mm. They will definitely need to be treated with an antiseptic or paint.
Having chosen the material, we suggest you learn how to build a gazebo with your own hands from wood step by step, but first you need to assemble the necessary tools.
What to prepare besides materials
Before you begin the main work process and building a gazebo with your own hands from wood using step-by-step instructions, you need to take care of selecting the necessary tools. You must have:
- circular saw;
- planer powered by electricity;
- parquet;
- jigsaw;
- screwdriver;
- drill and drill bits of suitable diameter;
- hammer and chisel;
- level;
- meter;
- ladder;
- self-tapping screws;
- bolts with nuts;
- corners for corner joints;
- construction stapler.
Glazing
It is imperative to include glazing in the drawing of a 3x3 gazebo so that precipitation and mosquitoes do not interfere with your rest. In addition, if the gazebo is glazed, it can be used all year round, and not just in summer.
The average cost of glazing is from 3 thousand rubles per square meter. The price can vary significantly depending on the type of glazing chosen.
The photo of the 3x3 gazebo shows that some owners solve this problem in a slightly different, more budget-friendly way. An excellent option for a summer gazebo would be a protective mesh.
It can be wrapped around the building to protect the interior from mosquitoes and midges. In addition, the mesh creates an excellent shading effect, thanks to which it becomes cool inside the gazebo even on the hottest days.
This solution is much cheaper, but does not allow the building to be used at any time of the year, because in winter snow will still get inside, as well as rain.
A universal and one of the most expensive options would be to combine glazing with a protective mesh, as on window frames in residential buildings.
This will allow you to create a pleasant, slight breeze in the summer, but at the same time protect you from insect dust. And in winter, literally completely isolate the room.
The cost of installing plastic windows must be calculated individually; given the high cost of the entire structure, it makes sense to make one wall “blank”, without windows.
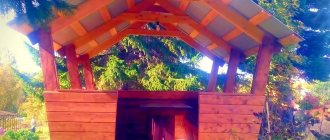
Square gazebo
We suggest starting work by erecting a simple building with a gable roof. We looked at a similar design in the article about the construction of canopies. Like any structure, a gazebo is made with your own hands step by step.
Construction procedure:
- As we said above, the buildings in question weigh very little. For this reason, there is no need to work on the foundation. Therefore, the first thing we need is to dig holes for the supports and install pillars in them.
- The installed pillars are poured to the ground with concrete. After which you need to let the solution harden normally, and this takes several days.
- Next, we attach horizontal beams to the supports, securing them with self-tapping screws. We lay the floor by pre-drilling holes for the bolts. We fix the boards with bolts. When carrying out these actions, be sure to check the level to avoid further destruction of the structure.
(Laying the floor) - We install and fix the middle logs. The fastening is done to the floor. We install intermediate beams under the floor.
- We fix the upper beams, while checking the level. We combine the edges and use special corners to fix the upper ridge. Finally, it is recommended to varnish the wood.
You learned how to make a gazebo with your own hands from wood, following the step-by-step instructions, now let's start constructing a gable roof for our cozy building.
Roof construction:
(Making roof rafters)
- Construction of a gable roof system. We cut each edge of the material at an angle of sixty degrees. We make small grooves at the bottom. We make sure that the work performed is consistent with the beams acting as a support. We measure the required size and cut off the pieces. Next we process the slices. Processing is carried out with fine-grained sandpaper.
- We install the rafters at the top of the gazebo frame. Then we check the level, drill holes and fasten them to the frame with bolts.
- Assembly of gables. You need to cut the plywood to size and sand the edges. After processing, we install plywood on the edges of the gable roof. We fix the material with nails or self-tapping screws.
- Installation of roofing material. We take sheets of plywood and lay them on the rafters. If there are no large gaps, we fix the material to the rafters. We cover the top with roofing felt, and it is important that each subsequent strip of roofing felt overlaps the previous one. We fix the roofing material with a construction stapler. Now we cut out a piece of material for the roof ridge.
- Now we attach the balusters with weights to the slats. We fix the handrails and top parts. We process the surface of the wooden material. Cover with paint or stain.
At this stage the work is completed. Knowing how to build a gazebo with your own hands, you can complete the construction of a square shape in just one day. Now let’s add a swing for the dacha, and the area will become more fun.
How to calculate material
Let's give an example of a 3x4 wooden gazebo for a summer house, but these are only preliminary approximate indicators.
First, let's look at a set of wooden beams:
- 3 pieces 10x10 (3 m).
- 3 pieces 10x10 (4 m).
- 4 pieces 10x10 (2.3 m).
- 5 pieces 10x10 (1 m).
- 8 pieces 5x10 (2 m).
- 7 pieces 5x10 (3 m).
- 2 pieces 5x10 (1 m).
- 2 pieces 5x10 (4.3 m).
Calculator of the required material for a 3x4 gazebo for a summer house.
Additional material
For work we will also need additional materials:
- Bricks.
- Bag of cement M400.
- For the roof, any material can be used, tiles can be used.
- 20 mm by 30 mm slats.
- 22 squares of lining.
- Roofing boards.
- 12 board squares.
- Self-tapping screws.
Tools for work
In order to fully complete all the work with our own hands, we will need a certain tool:
Electric planer for surface treatment
Tape measure or ruler for marking, pencil
Circular Saw
Circular saw for cutting wood
Screwdriver
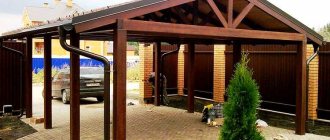
We build a rectangular structure
You have learned how to build a square gazebo with your own hands, now let’s figure out how to build a rectangular gazebo. The process of constructing such a gazebo is a little more complicated compared to the previous option.
Scheme of a rectangular gazebo
Construction of a rectangular gazebo:
- We dig holes approximately 40 cm deep. We insert supports into them, level them and fill the hole to the top with concrete. We are waiting for it to dry. The hardening process takes about 2 days.
- We install timber racks. Racks are placed in the corners in the front of the building and on both sides of the entrance. The racks must be installed strictly in a vertical position.
- We fix the installed racks with jibs. If the bottom trim underneath is opaque. Then you need to saw the edges of the beam at an angle of 45 degrees and fix it with nails. Such small triangles give the structure stability and rigidity.
- We carry out the top trim. We treat floor boards with antibacterial impregnation. We lay them on the floor and fix the material. After fixing, it is recommended to paint the floor with oil-based paint.
- We make a middle harness. We attach a cross beam to the racks. It is better to fasten to previously prepared recesses in the racks. After which it is also advisable to cover the frame with oil paint.
The work process is over, but the instructions on how to build a rectangular gazebo with your own hands are not yet finished. We will continue working on the construction of the roof.
The design process is quite simple.
Roof diagram
- Initially we make the supporting structure of the roof and supplement it all with ridges. We cut the edges of the rafters to the required size and fix them to the upper crossbars. At this stage it is important to achieve the ideal horizontal position of the ridges. If you ignore this, the roof will turn out to be asymmetrical.
- Next we need to install rafters on both sides of our roof. We carry out the work by placing the beam in the middle. We cut the edges of the rafters at an angle of forty-five degrees. The cut boards need to be installed in their place.
- Then we drill and fasten the previously obtained parts with bolts. Unlike self-tapping screws, bolts do not become loose over time.
- You also need to fix the manufactured parts to the rear and front borders of the gazebo. We place the elements that should be on the side.
- Cut plywood for gables to shape and size. Fix them on the sides of the roof. Fixation is carried out with self-tapping screws, but nails can be used.
- Sheets of plywood are laid on the roof surface. We fix them with self-tapping screws. Next, we spread the roofing material on top of the plywood. Roofing felt is often used for these purposes.
- We fix the material to the wooden base with a construction stapler. Next, we trim the protruding edges of the rafters at an angle of 45 degrees.
- Finally, you need to line the bottom of the gazebo. For this purpose, lining is often used, which is coated with transparent varnish. But you can use another material, which in your opinion is more suitable for lining the lower part. Alternatively, you can use polycarbonate.
At this stage, the construction of the rectangular gazebo can be considered complete. You can even build a barbecue in such a structure, and to make the work process easier, read the article that will tell you how to make it. Knowing how to make a gazebo with your own hands from wood using step-by-step instructions and having built a structure for relaxation at least once, you will be sure that even a beginner will be able to cope with this task. Well, if you want to improve your summer cottage, make a bench according to the instructions described in one of the articles.
Details of the rafter system
When arranging a roof, great importance is given to the construction of rafters. The rafters in it are hanging or inclined. Most often, in gazebos for summer cottages, the option with hanging rafters is chosen. The dimensions of the building allow this to be done. In addition, there is no need to erect additional supports.
To arrange the rafter system you will need the following components:
- Rafters. They can be installed one by one. An alternative method involves assembling them into a truss. After this, the frame is lifted and secured to the roof.
- The support beam is the Mauerlat. Serves as a support for the lower part of the rafters.
- Run, stand, lie down. Used for inclined rafters. They are rarely used for country gazebos. These elements usually support other components of the roofing system.
- Puff. Serves to give the system greater strength.
- Brace, headstock and crossbar. These components are used with hanging rafters. The need to use each element is determined by the size of the span of the structure.
Construction of a gazebo with barbecue measuring 3 by 4 meters
The construction of a 3x4 gazebo with a barbecue involves a number of changes in certain stages of the work. So, if the structure of the barbecue is quite massive, an additional foundation element should be built under it. As a rule, the area under the kitchen appliance is simply concreted.
In addition, in most types of gazebos (unless it is an open type structure), it is necessary to provide a hole in the roof for the chimney. The advantage of 3x4 lean-to gazebo projects is that the pipe level does not need to be raised too high - normal traction is provided by the structure itself.
A slab foundation is considered the most convenient for placing a barbecue or barbecue. It should protrude 10 cm above the floor of the future gazebo.
Small-sized gazebos can significantly increase the functionality of a personal plot and add additional aesthetic flavor to its appearance. If all the rules for the construction of such structures are observed, almost every homeowner can build such a structure.
Photos of various options
Finally, I have prepared a selection of photographs that will help you decide on the choice of a particular gazebo.
Before building any standard gazebo, it is recommended to explore as many options as possible. Perhaps among them you will find the structure that you will definitely want to build in your summer cottage.
Simple and beautiful
The gazebos presented below do not differ in any serious architectural forms. They are made in the usual style, from simple material, but they look impressive. In the first photo, notice the beautiful decorative sheathing made in a semicircle.
Projects for the garden
A couple of examples that are ideal for a summer cottage. Dimensions of 3 by 4 meters allow twelve people to comfortably fit, that is, you can relax in a big way. If the area on your site allows you to install such a structure, then it is quite possible to consider it.
Drawings and diagrams
These diagrams will help you create your own hexagonal wooden gazebo project:
Base diagram
Methods for connecting rafters
Diagram of the roof structure Dimensions of the gazebo along the perimeter Drawing of the rafters
Drawing of a hexagonal gazebo
Roof structure
Size information
Drawing of the base of a wooden gazebo
Planning
In order to understand the question of how to build a reliable and high-quality gazebo, you should first create a clear sketch of the future structure. Today, you can contact any construction and finishing company to draw up this important document, or you can complete it yourself, using the options suggested at the end of the article. Properly prepared drawings, combined with accurate measurements, will allow you to complete any work with minimal labor and time losses. At the planning stage, it is worth deciding on the dimensions of the building and the type of consumables.
It is most advisable to choose wood as the basis for the gazebo, since this material can be easily purchased and delivered to any point in the world. In addition, the pricing policy of wooden products is significantly lower than other analogues and replacement options. Timber and boards made of spruce or pine can easily cope with this task.
Site preparation and marking
The primary task is to clean the installation site from third-party debris, compact and level the site. Then it is necessary to outline a circle on the prepared area with a radius equal to the length of one of the edges of the gazebo. To successfully complete the task, it is necessary to prepare a simple device, which includes two small bars, sharpened to one side, and a connecting rope or twine.
We attach a rope to each of the bars, after which we drive one of them into the intended center of the future gazebo, unwind the rope to the required length and mark the boundaries of the structure with the second one in a circle.
To obtain a regular hexagon, you should mark 6 segments on the inside of the circle with a length equal to the radius of the named geometric figure. Ultimately, the 6 connecting points will become the corners of the building.
The aesthetics, durability and speed of installation depend on the correct marking of the prepared space, so it must be carried out strictly in accordance with the drawn up plan.
Required Tools
For quick and high-quality installation, you will need to prepare the necessary tools and consumables. Integral representatives are:
- hacksaw for woodworking;
- hammer and nails;
- rope for marking;
- plane;
- chisel;
- drill with a set of drills and bits;
- building level;
- roulette;
- shovels and bayonet shovels;
- homemade tamper.
In any construction project, the use of electric tools will significantly reduce the time for preparing materials and increase the speed of construction.
What materials will you need?
Coniferous timber 100×100 mm
Since we will be building a gazebo for a 3x3 m summer house from lumber, we will have to prepare wood, fasteners and roofing. In detail, you will need:
- coniferous timber 100×100 mm;
- board 100×50 mm;
- board 70×40 mm;
- board 20-25 mm thick (can be unedged) or sheet material such as moisture-resistant plywood, OSB-3 or OSB-4 for roofing sheathing;
- block 50×50 mm;
- roofing;
- fasteners: steel perforated corners and plates, self-tapping screws, anchors;
- ordinary or silicate (solid) brick;
- cement, sand, crushed stone.
A few words should also be said about the choice of wood, or more precisely, about its quality:
- humidity - according to GOST 8485-86, the first and second grades of wood can contain up to 22% moisture, it is also called air-dry, which is ideal in this case;
- integrity - there should be no cracks or falling knots on the profiles (boards, beams);
- color - black spots on the wood indicate fungal mold, and blue spots indicate improper storage (the raw wood was covered with polyethylene and they were steamed). In both cases, this is a defect and you should not buy such building material.
Create a drawing
Designing a structure can be done in several ways: either find ready-made drawings, calculations and specifications for a gazebo of the required size on the Internet, or carry out the planning yourself.
In the latter case, the stages of execution will occur as follows:
- A site plan with the main buildings is drawn onto paper.
- Choose the optimal location for the future gazebo. It is recommended to take into account that the entrance should be located on the leeward side.
- The diagram shows all load-bearing objects - walls and pillars. Using this information, as well as analyzing the topography of the site (taking into account the condition of the soil, the absence/presence of swampiness or differences/irregularities), the type of foundation is selected.
- Calculate the dimensions and required materials.
- Choose a rafter system and type of roofing material.