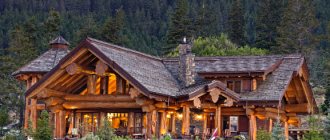
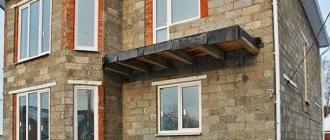
A brick gazebo is a dream for many summer residents and villagers. It is distinguished by its durability, massiveness and eliteness. And also at a high price for both material and work.
Nevertheless, this format is quite common among residents of country houses, which means that many will be interested in seeing what kind of brick gazebos are available and what the market might surprise us with.
This publication will contain photographs of various brick gazebos that can serve as a prototype for your construction idea.
If you are thinking about organizing such a structure on your site or want to make some kind of decorative addition to an already built structure, then the photographs below can help you with this.
Features of brick gazebos
A brick gazebo is a solid structure, so even its open version will require a foundation.
This structure is characterized by reliability and durability, but its cost is much higher than that of the wooden version. However, the considerable price of a brick gazebo is compensated by a large number of advantages:
- dignified, solid appearance;
- long service life;
- reliability and resistance to environmental influences;
- ensuring comfort and coziness;
- ease of care;
- fire safety, allowing you to combine a brick gazebo with a barbecue;
- multifunctionality (resting place, summer kitchen, etc.);
- the ability to combine bricks with different materials.
A glazed brick gazebo keeps you cool in the summer heat, and in winter, with the help of a small stove, it provides cozy warmth.
Flaws
But there are also significant disadvantages. They are considered to be:
- labor intensity of construction. Brick laying work requires theoretical training, accuracy and precision. A home handyman may not be able to handle it. Then you will have to turn to professionals, whose work is not so cheap;
- the need for a foundation;
- higher cost of a brick gazebo compared to a wooden one or one made on the basis of a metal frame.
Types of brick gazebos
A common feature of all capital buildings is a solid foundation. It is present in all designs of brick gazebos, as it is the basis thanks to which the structures remain strong for a long time.
The upper part of the building, depending on the preference of the owner, can have different designs: from an open type in the form of a roof on pillars to a completely closed one with windows and doors. In the photo of brick gazebos you can see interesting examples of buildings of different types.
Carrying out masonry work
After making the foundation, it is the turn of the brickwork. This work must be carried out in strict accordance with the drawings. It requires the performer to be careful and precise in all his actions.
An error in masonry can lead to a serious violation of the geometry of the entire structure, which, in turn, can lead to a deterioration in its strength characteristics and even the threat of collapse. Therefore, if the developer does not have experience in doing brickwork, it is better for him to turn to professionals for help.
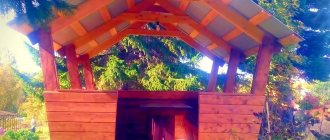
Open gazebos
A simple, lightweight design that does not require a powerful foundation. Its main parts are the roof and columns made of brick or stone.
Structures of this type are considered one of the important elements of landscape design. They can be enlivened with climbing plants, light furniture can be added, and a hearth can be organized.
Recommendations
To make a brick gazebo the most comfortable and reliable corner of your country garden, use these tips:
- Do not place the structure next to a noisy or dusty road.
- It is better to entrust roof calculations to specialists.
- To avoid mosquitoes in the evening, choose open spaces for the location of the building.
- A cone-shaped roof will avoid stagnation of water.
- To avoid problems with neighbors, follow the rules for the relative position of buildings.
- To calculate the required amount of bricks, use a special online program.
Having thought through every little detail, you will get a functional and strong gazebo, under the roof of which you can escape from rain, sun rays, gather in a large friendly company or enjoy solitude. A brick gazebo is the optimal solution for country life.
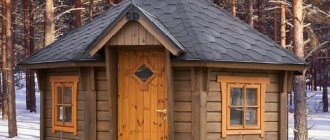
Closed gazebos
Capital structures, representing a house in miniature. They are built on a solid foundation, have solid walls, glazed windows and doors.
In closed structures, stove or electric heating is installed, and plumbing is installed. Closed gazebos are adapted for year-round operation.
Foundation structure
Digging a trench for the foundation
Then you can begin laying the foundation. Considering that our building will have considerable weight, the creation of this part of the structure must be taken seriously. The foundation must be strong enough to support the weight of the walls and roof, but it should not be made to look like a one-story house will stand in place of the gazebo. An accurate and correct calculation is required.
One of the requirements for the foundation is its resistance to precipitation. For the foundation, you can use building materials that are not afraid of moisture, corrosion, as well as various insects - stones, bricks or concrete poured into the formwork are best suited. With a wall thickness of 140 mm (thickness of brick laid flat and plaster on both sides), the width of the foundation can be assumed to be similar.
Shapes of gazebos
Brick garden buildings may vary in shape. The most commonly used projects are square gazebos made of brick. They are the easiest to build with your own hands.
Designs of more complex shapes (polygons) require the involvement of professional builders. Rectangular shapes are also popular. In such gazebos you can conveniently arrange furniture, organize a fireplace or install a stove.
Installation of utilities
Before we begin to describe the “engineer” of the stone gazebo, we remind readers that aaa3701 with his own hands erected a beautiful structure made of brick and foam concrete, on a monolithic slab foundation, measuring 7x3.5 m. The gazebo has a large glass area, a hip roof covered with flexible tiles, and well insulated. In terms of its functionality, it is actually a “summer kitchen - a mini-house”, where you can have a great time with friends, eat and relax. Also, the gazebo has become a real center of attraction for the whole family.
If you rewind time, one point is interesting. According to the user, many people ask him why he didn’t put a barbecue oven inside the gazebo, but limited himself to a standard kitchen with a gas stove.
aaa3701 FORUMHOUSE member
I will answer this question this way: my gazebo has its own philosophy. This is not just a place where you can cook food, but a space for comfortable relaxation. There is always someone in the gazebo - to eat, drink tea, or just have a good time. If you place a stove in a gazebo, it will take up a lot of space, which will lead to a narrow specialization of the room - cooking. I wouldn't want that. Therefore, I will bake, but outside the gazebo. This will be a kind of men's area with “smoky and aromatic spices”, where you can talk with friends while women cut salads.
Let us add that the user would like to make the following type of oven.
To do this, a foundation was laid in advance next to the gazebo.
Moreover, the “barbecue area” will be equipped with lighting, a sink, and a hot and cold water supply system.
Let's return to the “engineer” of the gazebo. For cooking, a stationary four-burner gas stove was installed.
A round sink was built into the countertop, and an electric storage water heater and a 3-stage water purification system were “hidden” in the cabinet under the sink.
Next, aaa3701 connected the siphon to the sewer pipe, after which the acute question arose of where to discharge the wastewater.
aaa3701
I do not have a centralized sewer system. I was wondering how to recycle “gray water”. The gazebo stands exactly in the middle of the rectangular area. There are approximately 25 meters left in front and behind. To the left and right are neighbors. I decided that the water should be drained down into the ground; fortunately, the soil allows this to be done.
When designing a septic tank, the main task is not where to drain the water (into a container), but where to then take the wastewater for further treatment. This dilemma becomes a real problem when the groundwater level is high and when it is impossible to build a standard filtration field due to insufficient absorption capacity of the soil.
This article tells you how to make a surface septic tank from Eurocubes with your own hands on an area with high groundwater level.
When making a mini-septic tank for a gazebo (draining only “gray water” containing fat and detergents), aaa3701 reasoned as follows: the groundwater level is low, and the soil on the site consists of the following layers:
- black soil;
- clay, about 1500 mm;
- sand, approximately 1500-2000 mm;
- clay again;
- sand turning into quicksand.
We managed to recognize the “cut” while digging a well.
Solution: bury one concrete ring (remaining after digging the well) so as to get into the first layer of sand, starting after the clay.
The following photographs clearly demonstrate the process of constructing a septic tank.
We decide on the place where the septic tank will be installed (in this example, from the kitchen side of the gazebo outside the perimeter of the paved area), make markings and start digging.
The clay is loaded into a wheelbarrow and immediately taken away.
We reach the top layer of sand.
We put the ring on.
Now you need to narrow the exit for installing a sewer pipe with a diameter of 110 mm. For this purpose a transition is made.
The formwork is mounted and the pipe is inserted
A concrete lid is poured, which also serves as the bottom of the grease settling tank.
A metal barrel is placed on the “slab” and the drain and overflow pipes are installed.
aaa3701
The wastewater flows through the sewer pipe and is poured into a barrel. The settled water flows into the lower ring, and the T-shaped overflow prevents fat from falling down. Therefore, all the fat and dirt floats to the top or settles to the bottom of the grease pit. If you add special products, the cleaning process goes faster. I maintain the septic tank, cleaning the grease pit once a season.
At this stage there were some annoying mistakes. The user brought the hot water and hot water pipes, from the gazebo and from the well, into one place, and mounted them on top of the septic tank sewer system. Shut-off valves were also installed inside the ring to drain water from the pipes before winter.
According to the plan, it was assumed that the pipes and taps would be located above the drains, but as a result, the pipes were covered with sediment and began to look unsightly.
We’ll talk about how aaa3701 corrected this error a little later, but now we’ll continue to describe the stages of building a septic tank.
A circular permanent formwork was made around the barrel (grease pit) from the remains of the metal profile and the gap between the walls was filled with concrete.
The result was a homemade ring, on top of which a plastic sewer manhole with a lid was “planted” on top of the tile adhesive.
After landscaping work, the entire structure, according to the user’s intention, will become “invisible” under a layer of earth. Let's get back to fixing the bugs.
So, aaa3701 decided to remove the hot water and cold water pipes mounted directly in the septic tank and put them side by side in a special distribution “box”. To do this, he purchased an ordinary plastic garbage can and drilled holes in it for the mains for inlet and drain water supply pipes.
Then I dug a hole where I placed the tank on a layer of gravel 100 mm thick.
I installed pre-cut pipes and installed the system.
aaa3701
I wrapped the outside of the tank with foil insulation, leveled it and sprinkled it with sand. The top layer of the backfill was made of clay (the so-called “clay castle”), then the final leveling was done with a fertilizer, sowed with grass, and this is what ended up happening.
Drawing up a project and choosing a location
The project is based on the purposes for which the gazebo is being built. The size of the building, the required amount of materials, the shape and type of structure will depend on them. You can immediately think about decorating the object.
The most complex in terms of design are closed gazebos, which are additionally equipped with lighting and heating devices, plumbing, entrance doors and windows.
Another important point is the choice of location. The gazebo should fit into the design of the site and be located in a picturesque location. It is better to locate the recreation area near a pond or flower garden. It is better to build buildings that serve as a kitchen or dining room close to the house.
The selected area should be cleared and leveled before starting work. After this, the construction process can begin.
Harmony in the landscape
The location of the structure will affect the entire landscape composition. A selection of photos of brick gazebos in garden plots will help you find a suitable design and location in the garden.
The appearance of the gazebo should be harmoniously combined with other buildings on the suburban area
What you should pay attention to when placing a gazebo:
- The building will not be combined with parterre flower beds, lawns, or mixed borders. The front areas will be lost against the backdrop of the massive structure.
- Maintain the general style of the buildings. A rural chalet-style house will not look good with the pompous brick architecture of the gazebo.
- Size is important. A bulky structure will take up extra meters in a small area and will overload the overall space. Be sure to consider the size of the area.
- Sudden changes bring disharmony to the garden ensemble. Small architectural forms are usually placed on elevations.
- Select plant arrangements around the gazebo to suit your taste. Consider the type of soil and type of plant: some representatives of the flora are comfortable growing in the shade, while some species need bright sunlight; clay soils are suitable for some roots, while dry sand is suitable for others.
- Additional light sources in the garden will decorate the composition. Illumination of paths and gazebos will highlight the area at night and add mystery and romance to the overall atmosphere.
To illuminate the gazebo, use lanterns and lamps suitable for the chosen style direction.
Construction of a gazebo
After creating a project, choosing a location, purchasing materials and preparing the necessary tools, you can begin to work. How to build a gazebo out of brick, a step-by-step guide will help:
- Construction must begin with pouring the foundation. This can be a columnar option for open buildings or a solid monolithic slab for solid structures. More often they use the tape version, in which a trench is dug out, filled with reinforcement and filled with mortar. The foundation must protrude above the surface by at least 20 cm.
- At the next stage, the walls are erected. For open gazebos, pillars made of brick are sufficient. In semi-open structures, a masonry wall is erected between the pillars of one or two sides. In a closed building, the walls are laid out around the perimeter, taking into account window and door openings. The stove, if provided, is built together with the walls.
- Next comes the installation of the roof. On the last row of brick walls, a timber layout is installed and secured to the base with anchors. Then a rafter system is constructed, sheathing and roofing material are installed.
- The final stage is the installation of door or window blocks, glazing, installation of floors and benches.
If a monolithic slab is used as the foundation, a wooden floor may not be used.
Floor
For the installation of floors in gazebos, materials are used that are resistant to fluctuations in humidity and temperature. In addition, caring for them should be simplified to a minimum.
This:
- ceramic and paving slabs;
- porcelain stoneware, stone.
- wooden or composite decking board.
Floor installation technology is determined by the choice of coating:
- Materials made of wood and wood materials are afraid of stagnant water, so they are laid on a ventilated base. Logs are installed at some distance from the ground. Boards, WPC, terrace or deck boards are attached to them with small - 3-4 mm - gaps. This provides the necessary ventilation and eliminates excess moisture.
- For laying ceramic tiles and porcelain stoneware, a concrete base is installed. A layer of mortar 5-7 cm thick is poured over the reinforcing mesh and leveled. You can use a semi-dry screed. The floor covering is glued using cement mortar after the concrete has hardened.
- Paving slabs and stone are laid on a layer of sand. First, the soil is compacted and drainage is arranged from crushed stone with a layer of at least 12-15 cm.
If you plan to use a stove or open fire, but prefer wooden floors, keep in mind that in the “hot” zone within a radius of 1 m, the flooring should be non-flammable, and the rest of the wood should be impregnated with fire retardants.
Decoration
The resting place should be aesthetically pleasing and fit harmoniously into the landscape of the site. The building can be decorated both outside and inside.
As exterior decor, you can use finishing bricks, artificial or natural stone, cladding panels or decorative plaster.
Forged elements go well with brick. You can complement the decoration with decorative lighting, street lamps and beautifully designed paths.
Do-it-yourself interior design of a brick gazebo can affect the walls, ceiling, fireplace or stove. In the same way, you can use decorative panels, plaster, moisture-resistant wallpaper, lining and facing tiles. In closed buildings, the arrangement of furniture is thought out.
The gazebo is a comfortable resting place. If it is made of brick, comfort and coziness will be ensured for many years.
Elite, expensive, unique
Particular awe is caused by buildings that combine all the elements of expensive construction: high-quality materials (wild stone and decorative plaster), landscape and interior design, decorative elements, etc.
Project for 750 thousand rubles
When creating such architectural masterpieces, many builders focus on a certain style or design of a particular art movement. Many elements are admirable.
When it comes to such structures, people usually don’t talk about money. Nobody knows how much it costs, but everyone understands perfectly well that it’s a lot.
The inaccessibility of such buildings is very attractive, but it’s not at all necessary to “pump up” millions into building a gazebo when the nearby dacha doesn’t cost even 500 thousand rubles? It is enough to take the general concept, replace expensive material with cheaper one, reduce the size and the budget can already be reduced several times. And if you also add work on your own, instead of craftsmen, then everything becomes even more attractive.
Photo of a brick gazebo
Roof structure
Now let's talk in more detail about the structure of the gazebo roof. To secure the rafter structure to the walls, it is most convenient to place metal rods in them during laying in those places where you plan to attach the rafters. It will be possible to weld brackets to these rods, which will subsequently secure the rafters. If you build metal pillars into the wall before starting masonry, then you can attach the rafters to them.