Home/Interior/
March 22, 2020
Everyone knows that plastering and finishing walls is very expensive. Many simply do not have the means to tidy up the walls of their apartment. One designer stated that there is no need to hide the concrete under the final finish. You can completely do without it. There is absolutely no need to spend money on plaster and then on wallpaper or tiles. See what the walls look like without any decoration.
Gypsum plaster Volma-Sloy without beacons
Hello everybody! Master finisher Alexander Tkachev is with you. I am glad to welcome you to the pages of my website: “Repair and decoration of the apartment.” Well? We received a boost of energy by mastering the plasterwork of the central plasterboard. I hope that we have mastered it and move on to working with gypsum plaster, especially since today it is preferable to use gypsum plaster for plastering in apartments, both old buildings and new buildings. With this publication I am opening a new section called: “Gypsum plasters” during renovation and finishing of an apartment. Therefore, I will begin to explain and show one of the simplest gypsum plasters, this is plaster, usually without beacons, as the most economical plaster. Economical in materials, but complex in labor costs. Such plasters are usually done during minor cosmetic renovations of an apartment. First, let’s read how to plaster beacons with this plaster on my first website HERE. (the article will open in a new window) And this time we will be plastering the kitchen in an old house during a cosmetic renovation, which means without beacons. Here we go.
Preparing the walls
1. After removing the old wallpaper and carefully inspecting it, we remove everything that is peeling and bulging. Either old paint, or putty, or maybe old plaster. If the plaster is limestone, then it is probably burnt out, then it would be better to knock it down completely and make plaster along the beacons. But in this case, the old DSP plaster does not bulge, even without cracks, and the paint on the panels cannot be removed with a spatula, and this is good news. 2. We prime the walls where they are not painted. Deep penetration primer of any brand. First of all, the primer secures the base. And what is not unimportant, the primer removes dust from the base of the future plaster, as with all plasters during renovation and finishing of the apartment. 3. They tried to clean off the paint that was painted on the panels. Nothing succeeded. Therefore, we cover the painted panels with concrete contact.
Betcontact wall
This completes the preparation of the walls for gypsum plaster. We are waiting for the primer and concrete contact to dry completely, and we begin plastering according to the rule without beacons, or, more simply, visual alignment of the walls.
Plastering walls
To begin with, we must firmly understand that we must plaster the wall in no more than two hours in order to obtain plaster for wallpaper without subsequent putty. We inspect the wall visually. We apply the rule in different places on the wall, both vertically and horizontally. We determine the most protruding parts of the wall.
Visual plane determination
Mix the solution according to the instructions and fill the deepest depressions with a spatula. Then with the same solution we do the following: 1. Working with a spatula and a rule, we form the corners.
2. We make an even connection to the ceiling.
Connection to the ceiling
3. We make an even transition to the floor. And here's how it's all done READ HERE.
The solution applied to the walls had time to set a little. And since our task is to finish the plaster with smoothing without further putty, it is necessary to work quickly. What we have to do is putty the entire wall with our plaster mixture. This will prevent the mortar that was previously applied to the wall from quickly setting. This is what we do, working with two spatulas.
Leveling walls with a spatula
Then we level the wall using the rule, cutting off all the irregularities that remain after the spatulas. After trimming, the wall became a little rough. But it turned out to be a flat plane according to the rule. And it’s time to make our plastered wall smooth, suitable for wallpapering, so as not to putty it in the future. Although putty is an integral part of repairing and finishing an apartment, it is not in this case.
Smoothing
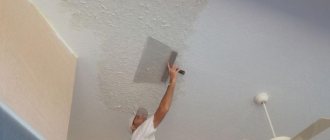
As soon as the mortar on the wall begins to set, we smooth it out. To do this, we use a garden sprayer filled with water, a sponge grater and a clean 350mm spatula. – 400mm. We start smoothing from top to bottom. We sprayed water on a wall about 1 sq.m. and rubbed the surface with a wet sponge grater.
Smoothing with a sponge grater
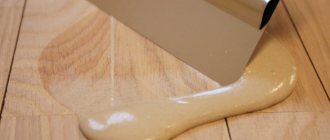
Due to this, gypsum milk formed on the surface, which we collect by holding the spatula perpendicular to the plane of the wall. We fill the remaining rice and dimples with the same milk, holding the spatula at a slight angle to the plane of the wall.
Sealing scratches and dashes with gypsum milk
And so we smooth the entire wall meter by meter. Thus we plaster all the walls of the kitchen, making cosmetic repairs. Since this type of work will be followed by other work, we stay on the line and receive News from the website Repair and decoration of the apartment by Email
a video on this topic HERE.
If the publication was necessary and useful, we thank the author. The site is developing thanks to your help.
In the meantime, thank you all for your attention, good luck to everyone and good luck to everyone
Applying panels
They allow you to transform the interior without much effort, especially since the panel is sometimes simply hung on the wall, like a large picture. You can make a large panel from boards, treat them with oil or stain, and fix them on the wall. It is advisable to choose wood for such an art object with obvious defects, ideally used boards. Similar panels can be made from plywood or cork and decorated, for example, with photographs. It is not forbidden to use panels upholstered with fabric, but dust must be removed from them frequently.
Panel covering part of the wall
Panels can fill part of the wall, zoning the space, or play the role of a headboard or an artistic accent.
It may seem to you that not all finishing materials proposed in the article belong to the budget category. But if you calculate how much time and money will be spent on high-quality leveling of the walls and their finishing, the benefits will become obvious. In addition, unusual finishing methods will help you create a modern, fashionable, individual interior.
Source
How to work with gypsum plasters correctly
Any gypsum plaster is intended for basic leveling of walls, i.e. corrects significant unevenness and surface defects for further puttying and application of decorative materials.
VOLMA Layer plaster allows you to level not only walls, but also ceilings, and you can achieve any surface quality: from simple “flat” leveling to an absolutely smooth, glossy surface, and all this without additional putty.
But before you get started, you need to understand where and how gypsum plasters are used:
1. All gypsum-based materials are used inside dry, heated rooms. As a rule, these are general purpose residential premises (living room, bedroom, children's room), as well as commercial premises. Since gypsum is a material that can absorb moisture well and lose strength if it is in excess, gypsum plasters are not recommended for use in unheated rooms and rooms with high humidity. 2. It is recommended to level the walls with a layer of 5-30 mm thick using gypsum plaster, with partial unevenness up to 60 mm. Applying thicker layers significantly slows down work and increases material costs. 3. Gypsum plaster can be used to level not only walls, but also ceilings. But you need to remember that it is allowed to apply plaster to the ceiling in a layer of no more than 10 mm. This is not due to the capabilities of the mixture, but to safety precautions. In case there was a leak, the application technology was violated, or expired products were used.
Scope of application
Scope of application of the material:
- eliminating minor defects, leveling the surface;
- minor cosmetic repairs;
- restoration work;
- major finishing of interior walls from scratch;
- finishing coat before grouting with a sponge float;
- formation of relief sculptures, arches, decorative elements.
When doing DIY repairs, it is rational to use the Volma mixture in a number of operations: plaster floors and ceilings, cover bricks, reinforced concrete slabs, wood, cellular concrete, plasterboard.
Important! Due to the property of active moisture absorption, gypsum mixtures are unsuitable for external facade finishing, covering walls in the bathroom or household premises for washing and boiling water. If you want to decorate the wall with Volma, treat the base with a primer with protective properties. Avoid contact of plaster and water.
Under dry and normal humidity conditions, Layer Volma plaster does not require priming or finishing putty.
Guidelines for proper dilution of plaster and further application
Before proceeding with direct use, you must read the instructions. Volma plaster is no different in its preparation from other types of plasters. The main thing in this matter is the exact observance of the prescribed proportions, i.e. per 1 kilogram of mass you need no more than 700 milliliters of water. If you calculate the total amount of liquid required based on its packaging, then a 30-kilogram bag will require up to 21 liters of water.
It is best to work with plaster in a plastic container. Water is first added to it in a small amount in order to evenly wet the entire container. Afterwards the mixture is poured, observing all the necessary proportions. Mixing is carried out with a trowel or trowel. If there is a lot of mixture, then it is best to use either a trill with a plaster attachment or a construction mixer. Special mixing attachments will not only save time, but will also ensure more thorough mixing.
After the first mixing, the solution must be left for 5 minutes so that all components begin to perform their functions, after which the solution must be thoroughly mixed again so that there are no lumps in the resulting mixture. The consistency of the finished plaster should be like thick sour cream, i.e. flexible enough not to drip.
Prepared gypsum plaster "Volma" can be used both for minor repair work and for complete finishing of a room. Gypsum mortar has excellent absorbent properties, so this solution is not recommended for use outdoors to avoid dampening of the material.
The mixture obtained after dilution can be processed:
- drywall;
- concrete;
- reinforced concrete slabs;
- brick walls;
- tree.
The solution can be used for a variety of purposes:
- with its help you can trim or completely remove some minor defects;
- level the walls for further work;
- treat “bare” walls for further repair work;
- as a final surface finishing option;
- for creating finishing and decorative elements;
- creation of sculptures.
If Volma Layer plaster is used during repairs, then immediately after application you can begin further work from painting to laying tiles.
To achieve the best result, the room in which finishing work is carried out should be dry, and the temperature should vary from 5°C to 30°C. It happens that it is impossible to achieve absolute dryness of the room; in this case, it is best to treat the plaster layer with a special protective compound so that the gypsum contained in the mixture does not come into contact with water in any way.
"Bare" concrete walls
Nowadays industrial style and loft are very popular. Even an ordinary concrete wall has become very fashionable. Concrete is used in the most popular establishments, including clubs and restaurants. Many people use this design in apartments and country houses. Designers believe that concrete walls are most suitable for the kitchen and living room. You can leave “bare” walls in the bedroom, but to complete the composition it is important to choose the right furniture.
Applying plaster correctly
- The mixture is thrown onto the wall, and then leveled using the rule according to the intended beacons, if any. The rules must be carried out from bottom to top, removing excess mixture, placing it in the existing recesses.
- After the mixture has hardened (this happens in about an hour), you can trim off the excess plaster. A rule is also used for this. Cutting off the excess, it fills the existing recesses with them. If in the future you plan to apply wallpaper or tiles to the wall, then the wall finishing ends at this stage. Just don’t forget about treating the surface with a soil mixture.
- Afterwards smoothing is done using a special grater with a sponge surface. It is best to reach this stage 15-20 minutes after the 2nd stage. To do this, you need to moisten the wall with water, and then start using a float. As soon as “milk” appears on the surface, more effort will have to be made to mash it. The resulting mixture will easily fill all small irregularities.
- The last stage is glossing; for this, a special grater with a metal surface is used. The stage consists of compacting and grouting the last smallest defects. It is necessary to fully comply with the surface drying time specified in the instructions, taking into account the fact that it may vary based on the temperature and humidity of the room.
Laminate
Sheathing over a metal frame is another way to finish walls without leveling them. Of course, you can use traditional drywall and then paint or wallpaper it. But it’s faster and cheaper to immediately cover the guides with a finishing material, such as laminate. You don’t have to buy an expensive one - study the ads and pick up leftovers at a reduced price. Combine panels of different colors to get a more interesting effect.
Option to finish the wall with laminate. Photo from INTERIOR channel
Important! Consider the technical characteristics of the boards - size, type of locking connection and thickness. Otherwise, you will not be able to assemble a whole canvas.
Plaster as a material for decoration
You can decorate the plaster itself, or decorate it with the plaster itself.
You can apply wallpaper, tiles, etc. on top of the coating. You can also create various patterns on top of it and on it directly:
- Using a variety of rollers you can create relief or textures. Now there are rollers with an already outlined pattern, which greatly simplifies the task;
- a certain “pattern” can also be created with a simple spatula if you press it into the mixture that has not yet completely dried;
- from the plaster itself you can create ornaments directly on the wall;
- walls can be painted, acting as a canvas for the artist.
It is very important to prime the walls before gluing wallpaper or tiles so that the materials “adhere” to each other better.
Recycled or reclaimed wood
In addition to laminate, old boards are perfect for this purpose. Worn by time, with several layers of paint, rusty nails - the material has its own history. However, they must be restored to a safe state. To prevent porous wood from collecting dust, it can be coated with matte varnish or oil.
Material characteristics
The finished composition is distinguished by its characteristic features - These are:
- good adhesion to the surface;
- has vapor permeability, which allows the air in the room to move unhindered;
- gypsum is an environmentally friendly material;
- the plaster does not shrink during use.
Volma plaster meets its characteristics and quality requirements. Its characteristic features are:
- layer thickness from 5 millimeters to 30;
- the material sets within 3 hours;
- It takes a week for the solution to completely harden.
Volma Layer plaster is applied very easily, so it is not necessary to hire specialists for this, which will ultimately save money.
Material consumption
First of all, the condition of the wall affects the amount of mortar. But the standard calculation looks like this: for 1 m2 with a standard layer thickness of 1 centimeter of plaster, from 7.5 to 9 kilograms of the mixture will be required. But this is not a final calculation, because many factors can affect it. On many forums there are reviews about Volma plaster, which talk about its consumption and properties.
But it’s better to take a small supply of material so as not to have to make a second trip to the store.
The mixture also includes “Aquaslayer” plaster, which is distinguished by its fibrous composition and natural components. It is also designed to level the surface.
This type of mixture is resistant to moisture, so it can be used in rooms with high humidity; it can be used not only for interior decoration, but also for facade decoration.
The composition contains a cement component, which is excellent as a base for tiles or decoration.
Aqualayer plaster can be used everywhere, starting with concrete floors and ending with wooden walls.
This mixture is packaged in bags weighing 25 kilograms.
Useful tips
- buy the mixture with a margin of 5-10%;
- apply plaster to the wall surface from top to bottom and from left to right;
- plaster the ceiling from the opposite side to the windows;
- hold the gun perpendicular to the plane of the wall (when machine plastering);
- apply strips of mortar 70 cm long and overlap the previous application by 10 cm;
- make connections between sections using the h-rule;
- Perform surface glossing no earlier than 4 hours after plastering.
The video in this article will allow you to visually familiarize yourself with the technology of applying Volma plaster.
Rough plastering
Adding sawdust to the plaster mixture helps strengthen the mass and eliminates the need to use a plaster mesh, which is usually attached to adobe walls using conventional long nails.
The thicker the wall, the longer the nails, but this process destroys the integrity of the wall. It is not much, but it becomes less durable, so it is better to stick to ancient methods that have not changed for many centuries, which, naturally, only proves their perfection.
Adding sawdust to the plaster mixture helps strengthen the mass and eliminates the need to use a plaster mesh.
So you don’t have to worry and get to work. If you have assistants, then use the ancient method of general work, which has been tested for centuries.
For this method, you will need to split into two teams to plaster the walls. One will forcefully throw lumps of mixture onto the walls in the right places. The second half, which must necessarily consist of men, must regulate where exactly the clay should be thrown.
And using a wooden grater board, level the uneven layer as thoroughly as possible, additionally pressing it. The layers need to be leveled immediately after application. The longer you wait, the more difficult the process itself will be, which already requires male strength. That is why this method requires the participation of at least two or three people.
With the second method, you can plaster alone, but, of course, it will take much longer than in the first option.
The layers need to be leveled immediately after application. The longer you wait, the more difficult the process will be.
The grater board (board with a handle) or spatula should be small. Several lumps of the mixture are placed onto the tool by hand in one mound, and, applying it to the wall and pressing, work it from the bottom up, spreading it as evenly as possible.
You can check the evenness with a level; naturally, you need to correct irregularities as soon as they are discovered. The layer of rough plaster for more or less even walls can be equal to 1 cm. For uneven walls, the thickness of the layer can vary from 0.5 to 2-3 cm. You can see large irregularities with the naked eye, but small ones will still have to be identified using a level
After finishing the rough plastering of the walls, you need to let them dry for about one month, perhaps a month and a half. Basically, work on finishing adobe walls, as well as on building adobe houses, should be carried out in the warm season.
In order to properly finish the walls, start work in early summer. In the cold season, it can take more than 3 months to dry the rough layer, and you still won’t be sure of the result.
Where to start renovating an adobe house
Like any repair, it all begins with an inspection of the building, drawing up a work plan, estimates and purchasing the necessary materials. If you are not sure that you can carry out all the work yourself, then it is better, of course, to turn to qualified workers. The main elements of any residential building are the foundation, walls and roof, so we will consider everything in order.
Foundation
In adobe buildings, a classic foundation was rarely used, that is, the walls of the house were built on a compacted clay pad. Or, in the version of the adobe structure, wooden pillars were driven into the ground, which were subsequently coated with clay. When inspecting the building, if you see the presence of cracks on the walls, a difference at the level of window openings, then with a 100% guarantee we can say that the house has shrunk and the foundation under the walls needs to be repaired.
Option to strengthen the foundation of an adobe house
To do this, trenches are dug along the walls, but not in a continuous strip, but in increments of approximately one meter and a depth of about 0.6 m. Waterproofing is done along the lower edge of the adobe blocks. Foundation sections are laid in problem areas (the simplest option is reinforced concrete or sand-cement blocks). After this, waterproofing is done around the entire perimeter and a blind area is constructed.
Walls and ceilings
One of the main problems of adobe walls is that over a long period of time a “belly” appears: irregularities and bulges appear on their surface. If such irregularities are up to two centimeters in size, you can try to clean them up, and when they are larger, it is better not to take risks, but to think of a way to cover them (in the case of a facade, you can use siding, and plasterboard inside).
Plastering adobe walls inside the house
When building adobe houses, all floors were mainly made of wood. Therefore, it is necessary to assess the condition of the floor beams and if they are in poor condition, they need to be completely replaced. Of course, this is a large amount of work, since this will require dismantling the roof, replacing all the piping and making new wooden floors.
Roof
The roofs of such houses were previously covered with whatever was at hand: from reeds to ceramic tiles. When restoring an old roof, the first thing to start with is an inspection of the entire wooden structure. If necessary, replace worn-out elements and treat the entire sheathing, for example, with mastic.
Before starting roof repairs, it is necessary to carefully inspect all its elements.
If the old roof is covered with tiles, it is advisable to replace it with a lighter material, since, having a large weight, it creates an undesirably large load on the entire structure of the house.
When deciding to carry out a complete reconstruction of a building, first of all, never neglect the advice of specialists. Because, unknowingly, you can cause irreparable damage to the entire building, which will ultimately affect your budget.
Surface preparation
The initial task is to remove the old layer of wallpaper or paint, plaster or whitewash. For rough cleaning, use a block of fine-grained sandpaper.
The removal process must be carried out in a circular motion until all excess layers are completely erased. After the final removal of all excess, the wall must be cleaned of dust and dirt. Next, the walls are primed; for this, a solution of soil is poured into a wide container or basin to wet the roller.
The priming process is mandatory; for better penetration and adhesion characteristics, it is recommended to apply two layers. If you miss this moment or do it poorly, then in the future this will lead to the peeling of the plaster layer from the monolith. As a result, additional financial costs.
When choosing a primer, manufacturers recommend purchasing concentrated solutions with enhanced binding characteristics, which are much cheaper than ready-made solutions. They should be diluted strictly according to the instructions in the appropriate proportions, otherwise it will not be possible to achieve the desired quality.
Decorative finishing
Now the walls need to be treated with lime; this is done in several layers, if a purely Ukrainian version is required as a result. In another option, the surface is thoroughly sanded; you can use fine-grained sandpaper.
Then, using a deep-penetrating primer, the walls are treated and putty is applied with a finishing gypsum mixture. This is done to prepare the wall for subsequent wallpapering or painting it with water-based paint.
There are many finishing options, the main thing is to choose the one that suits you. Many will say that adobe houses and clay have not been in fashion for quite some time. But we must not forget that the main requirements for building materials are reliability, safety for human health and durability.
Both adobe and clay have all these qualities; moreover, it is also a very economical option that does not require the use of special equipment. Therefore, not only European residents, but also Russians are increasingly turning to this option.
Some tips:
- Experts advise using clay that has only melted after freezing. At this moment, its qualities are ideal for use.
- French builders use cattail for adhesion and believe that the clay is a natural preservative.
Lithuanian builders do not advise building adobe houses using “eco-trash” such as polystyrene and cotton wool. Such errors can affect the entire house as a whole, which can even result in its destruction.
How to properly plaster adobe walls inside a house - stages of work
Adobe houses are a housing option made from natural and environmentally friendly materials: clay, sand, earth, straw and water are used for their construction. This method of construction was widespread in the last century, but even now there are many of its admirers. In the summer, such a house is always cool, and in winter it is quite warm. However, working with the material has certain specifics, so it is important to know how to properly plaster adobe walls inside a house.
