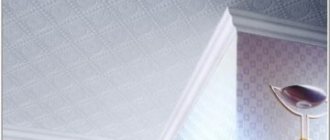
A suspended ceiling is often used to decorate the ceiling surface. This stylish interior element allows you to level the base, zone the space, and emphasize the style of the room. As a finishing touch, some use a special ceiling plinth to give the interior a finished appearance. Others consider this option outdated and strive to complete the finishing without it. We suggest you figure out what options are possible in this case, and in which case you can do without it.
Which is better: with or without baseboard?
When starting to design a suspended ceiling structure, the question involuntarily arises about the feasibility and necessity of using auxiliary linings. Craftsmen identify two main reasons why their installation should be mandatory:
- Technological. If there is a plinth, all defects that may occur during installation work become invisible. Sometimes small problems arise at the junction of the canvas with the base or the installation of a baguette. Using a plinth of sufficient width you can hide them;
- Aesthetic. Due to the uneven surface of the wall, irregularities are formed in the places where it interfaces with the baguette. Using a plastic profile, you can decorate existing problems, making them completely invisible.
With the help of a plinth it is possible not only to give a complete appearance to the ceiling structure, but also to protect the fastening mechanism. After a certain period of operation, dust and dirt enter the free space, and it is not possible to wash it away. The gray dusty streak immediately catches your eye. It will be almost impossible to disguise it in any way other than installing a decorative strip of any kind.
With the help of an applied decorative plinth, many designers create a color transition between the material of the walls and ceiling. Sometimes it is used as a basis for linear illumination of a structure.
Many refuse to place a decorative overlay, justifying their choice by the increased costs of performing the work and commitment to the latest innovations in interior design. This opinion also has a right to exist. Especially if you couldn’t find a skirting board of the right size and color.
Which option is preferable depends solely on the personal preferences of the owners and the overall stylistic design of the room. Of course, in a room in a minimalist style, a pompous plinth will look out of place.
Rounded corner
Rarely, but accurately, in old houses you come across a rounded corner at the junction of the ceiling and wall. Here a rubber spatula will come to the rescue, and the putty itself is applied from top to bottom and bottom to top, without horizontal movements . Do not listen to the advice of amateurs - do not coat the rounded corner with a brush dipped in liquid putty.
Since it is not possible to glue the plinth to such a joint, the putty is applied in 2-3 layers, it is advisable to glue the cobweb after the first layer, but no reinforcing tape is needed.
In all cases, puttying of the joint between the ceiling and walls is carried out before puttingtying the planes, that is, first put the corner in order, then proceed to puttying the ceiling and wall.
How can I close the gap between the ceiling and the wall?
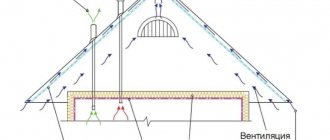
After installing the tension structure, a small gap inevitably remains between the canvas and the wall. Using the so-called “invisible” profile does not give the desired result. Covering the baguette as much as possible with film or fabric, it is still not possible to completely get rid of the small gap between the edge of the decorative material and the wall. The size of such a gap is minimal and does not attract attention. However, with this execution it is not possible to achieve a feeling of completeness of the finishing work. There is a feeling of some incompleteness that you want to get rid of.
Sometimes problems arise after a certain period of operation, when the invisible supporting profile begins to noticeably protrude from under the tension fabric, becoming visible. Before this, minimal gaps turn into real cracks. This occurs quite often due to the deflection of the baguette under the influence of tension. In this case, the ceiling looks like a stretched sail. If the plinth is not considered as a decorative element, you should pay attention to alternative options.
Putty at an even angle
If there is no baseboard, then you will have to tinker, the main problems called hemorrhoids appear in new buildings that are still shrinking. You can't do without reinforcement here. You can reinforce:
First, a layer of the starting mixture is applied, and after it dries, sickle tape or special corner tape with metal threads is glued onto the second layer. Plus serpyanka is cheap, minus it is difficult to give an angle of 90 degrees, since the tape will try with all its might to move away from the joint. The advantage of adhesive tape with metal is an even angle and a guarantee that there are no cracks on it , the disadvantage is that sometimes the putty causes it to swell and become deformed, then it must be glued to liquid nails and covered with putty on top.
PVC plug
This option for designing a stretch ceiling is worth thinking about at the stage of drawing up a design diagram. Many baguette profiles have a special mounting groove on the bottom surface. It is usually used to place an additional decorative plug.
Manufacturers offer soft inserts with different cross-section profiles. During the installation process, they are simply pressed into the groove with some force. According to the profile shape, products are divided into:
- L- or L-shaped. They are a universal option. They are often called wall corners. The plugs are quite plastic. They allow you to mask cracks well even on walls with a significant difference in height. Suitable for multi-level structures;
- T-shaped. Made from fairly rigid PVC. Oriented towards a flat base. Used when decorating a tensile structure in a room, the walls of which are decorated with tiles or porcelain stoneware;
- F-shaped. Used in conjunction with a plastic fastening profile.
The choice in favor of this design option is made due to:
- Ease of installation and dismantling work. If for some reason during subsequent operation or repair the need arises to dismantle the decorative insert, it can always be removed in a few minutes without using any tools. After completing the work, the plug can be returned to its original place;
- Installation without any auxiliary material or tools. Installation can be done on your own without any special tools. There are no traces of mechanical impact, residues of adhesive, sealing compound or putty left on the ceiling surface or on the stretched fabric;
- Wear resistance of the decorative element. The material used to make the plug allows the product to retain its shape when used in conditions of high humidity and significant temperature fluctuations;
- Flexibility and high density. The decorative insert closes the existing gap well without reducing the height of the ceiling;
- Large assortment. Manufacturers offer inserts with different cross-sectional profiles. You can choose T, L, F. Wide colors allow you to choose a color taking into account the color of the stretched fabric. Depending on the chosen stylistic design, a tone similar or contrasting to the main one is selected.
Attention! If necessary, the PVC plug can be removed in one place and reused in another.
The disadvantages of this option include its simple appearance. The product can hardly be called a full-fledged decorative element. This is rather a practical option for creating a gap that allows you to prevent dust and dirt from entering the space between the base and the canvas.
The plinth is small in width, and therefore cannot be used to decorate a ceiling surface with hidden lighting. If there are significant irregularities, this finishing option is also not the best solution. Its width will not be enough to fill the existing gap.
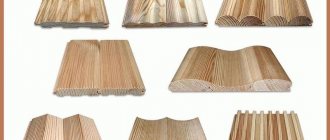
Polyurethane skirting
The overlay element can be quite difficult to fit into the design of a room with a suspended ceiling. It is usually used to design plasterboard ceiling systems. A polyurethane element becomes an ideal solution when using several bright colors that do not coordinate well with each other to decorate a ceiling system. In this case, with the help of a wide edging fixed along the perimeter of the stretched surface, it is possible to soften the chosen diverse color scheme.
Protective tape
The presence of a decorative plinth is optional. Many people refuse to add any additional element between the stretched fabric. To hide the gap, you can use a special non-woven tape placed in the space between the wall and the edge of the stretched material.
Sealing drywall joints - 3 steps for a perfect result
You also need to immediately clarify how to join plasterboard sheets at the end and cut ends of the material. Here you should maintain a gap of 2 mm and additionally prepare the connection for putty, but I’ll talk about this a little later.
- As I said above, the seams need to be puttied with tape, and if earlier it was necessary to apply the composition and embed the serpyanka into it, then nowadays everything is much simpler. The fiberglass mesh has a self-adhesive layer, so you just need to carefully open it and, gradually unscrewing it, press it at the junction of the sheets. At this point, the consideration of how to glue serpyanka can be considered complete - when the joint is glued, the material is cut off with a construction knife;
No serious work is carried out without preliminary preparation. Sealing gypsum board joints is no exception; in this case, preparation is of fundamental importance. First of all, you need to figure out how to join plasterboard sheets. Now we will figure out how to properly seal the seams, there is also nothing complicated here, the main thing is to prepare the surface well and use high-quality materials.
The workflow looks like this: Let's start by understanding the specific actions that need to be performed in order for the result of the work to be the best. It is important to do everything in the right sequence and not to rush - rushing is unacceptable, especially if you have little experience.
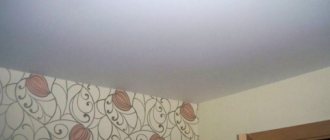
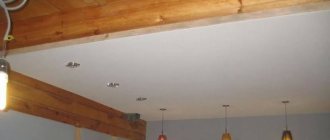
Examples in design
There are many beautiful examples of designing a stretch ceiling without using a ceiling plinth. Many of them can be safely taken as an example when developing a design project for your apartment. We offer you to get acquainted with individual examples that deserve close attention:
Preparing the surface for painting
First you need to clean the damaged area from peeling elements. If this is not corrected, the crack will not be hidden for long.
There is no need to be afraid to expose the entire problem area, even if a lot of plaster falls out. It is better to effectively hide a defect once than to carry out unplanned repairs several times. The work of sealing a crack that has appeared is very dusty, so it is better to cover furniture, equipment and other valuable items with film in advance.
Installation features
Installation of plugs usually does not cause any particular difficulties. Each decorative insert has a special comb, which, when performing installation work, is tucked into the groove of the guide that holds the tensioned fabric.
The only difficulty the user faces is the difficulty of inserting the protruding ridge into a special groove. To prevent mechanical damage, excessive mechanical force should be avoided. To achieve the desired result, you can use a synthetic lubricant.
Thus, baseboards are not the only available option for decorating the ceiling surface. You can always find an alternative option and decorate the ceiling beautifully.
How to seal a gap with reinforcing mesh
To fill holes, a reinforcing mesh is used, which must be covered with a layer of plaster. Putty is applied to the surface of the sealed crack, which is sanded to an impeccable level of smoothness with a grinder or sandpaper. The reinforced bandage can be replaced with linen or cotton tapes. Textile ties are prepared in advance: they are dipped in hot water and ironed. After the thermal procedure, the bandages are dipped into a special composition, the role of which is played by a paste solution, cellulose or wood glue, wrung out and the cracks are closed with them. The strips are straightened with a spatula and, after drying, putty is applied.
How to remove cracks in the plaster layer on the ceiling
As a rule, in such cases, the size of the crack is limited by the plaster layer, which is why eliminating such defects does not require much effort and time.
The first step is to seal the seam with a primer, after which they begin to prepare the putty. The existing recesses are filled with the mixture, and then leveled with a spatula.
Once the plaster has completely dried, the surface is rubbed with fine-grained sandpaper until the surface is perfectly smooth. If the cracks are large, it is necessary to additionally strengthen the surface with reinforcing mesh.