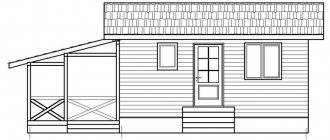
Siding is a relatively inexpensive and uncomplicated finishing operation that can be done with your own hands.
For wooden houses, this method is most convenient, since plastering wood is a complex and unreliable task.
In addition, the possibility of forming a ventilated facade, which protects wooden walls from getting wet and rotting, is very important, since it helps to increase the service life of the house.
Types of siding
The manufacture of siding began about half a century ago with wooden cladding panels similar to horizontal lining. Since then, the range has expanded significantly.
Today there are the following types of material:
- Wood.
- Metal.
- Plastic.
- Fiber cement.
At the same time, each type of material has its own varieties, composition and other manufacturing options.
In addition, siding has different design options.
Popular profile types:
- Ship's
- Under the beam.
- Under a log.
- "Herringbone."
- Under the brick.
- Under a stone.
A wide selection of profiles and colors creates ample opportunities for finishing houses in different styles and color combinations , while essentially doing the same job.
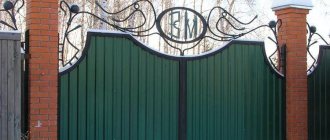
Color range of metal siding for logs
The color range of metal siding is truly wide. First of all, I would like to note the variety of wooden textures that are standard for a timber block house.
However, you have an excellent opportunity to order any color from a wide range of colors, the famous RAL construction catalogue.
In conclusion, I would like to note that the siding is supplied covered with a special film, which will protect it from damage during transportation and will allow you not to worry about the safety of the surface until installation.
Siding has become one of the most popular materials for facade finishing. There are many reasons for this: it is relatively inexpensive, unpretentious, durable and lightweight. Plus, this material looks great.
Installation of log siding has become popular. - the task is feasible and feasible. To work, you will need a minimum set of tools, strict adherence to recommendations, accuracy and attentiveness. Also, to better understand the essence of the process, you will need some general information.
Installation of Log siding has become popular.
What siding is best for a wooden house?
The most successful choice of siding for cladding a wooden house is determined by the specific characteristics of the wall material and the cladding itself.
Wood must be able to dry, protected from fire or the appearance of insects, rodents, mold or mildew. Such requirements are more fully met by metal and vinyl siding .
These types are the most common, easy to install and require virtually no maintenance.
They differ from each other in the amount of thermal expansion (it is greater for vinyl siding), the characteristics of the material (metal can bend, vinyl often breaks due to this), elasticity (metal panels retain dents, and vinyl ones return to their original shape).
Experts recommend using metal siding, but it is on average twice as expensive as vinyl, which somewhat weakens its position.
Distinctive qualities of cladding
Plastic slats can easily withstand high temperatures (up to +50 C) and are fire resistant. They are not afraid of moisture and are not infected by pathogens, are not damaged by moderate mechanical stress, do not attract insects and are environmentally friendly.
Plastic slats are fire-resistant, water-resistant, environmentally friendly, and easy to install.
This decoration on the outside of the house looks attractive and can transform even dilapidated buildings, as it allows you to hide all the imperfections of the facade. Siding is easy to install, but still, its installation requires certain skills. Siding perfectly masks pipes, curved walls and plaster errors.
Modern slats come in a variety of colors, which allow you to show your design skills and create an interesting decorative solution. You can choose drainpipes, storm drains, extensions and various related elements to match the cladding.
When choosing a decorative panel material, you should know that there are several types of it on the construction market:
Choosing lathing - which is better for a wooden house, wooden or metal?
Lathing serves to solve several problems:
- Support for siding panels.
- Providing a ventilation gap.
- Mechanical support of external insulation.
To simultaneously perform these functions, two layers of sheathing are required:
- The first - the sheathing itself - is installed directly on the wall surface coaxially with the siding panels; insulation boards are attached between the sheathing strips. The thickness of the sheathing strips should correspond to the thickness of the insulation (or be slightly larger).
- The second layer - the counter-lattice - is installed across the first. It creates a ventilation gap, while at the same time serving as a support for the siding panels.
NOTE!
If external insulation of the house is not needed, then one layer of sheathing is installed, perpendicular to the panels.
The materials used for sheathing are::
- Wooden bars.
- Metal guides for gypsum boards.
The use of wooden blocks is traditional; they are easiest to attach to wooden walls, but the characteristics of the material are largely unsatisfactory . Wood is difficult to adjust its plane, changes its dimensions when it shrinks or swells, and is susceptible to rotting and warping.
Until recently, wooden blocks were much cheaper than metal guides, but today this difference has practically disappeared.
The properties of metal planks are significantly superior to wooden ones - they are almost perfectly straight, easy to adjust the plane and do not change their properties over time.
The speed of installation and adjustment of the plane when using metal guides is much higher, and the result is much better than when installing wooden sheathing.
Finally, metal strips do not burn, which is important for wooden walls, for which the fire danger is much more real than for stone buildings.
Recommendations
When a person does any work for the first time, he will always make mistakes. In the construction industry, it is undesirable to allow them, since any mistake can cost the owner dearly - he will need to purchase new material, redo the work, and spend more time.
In this regard, experts give a small number of recommendations that will help avoid serious mistakes:
- Experts advise not to “strangle” insulation and siding panels. They should fit snugly against the wall, but at the same time have a small gap in the fasteners.
- All nails, screws and self-tapping screws must be screwed in and driven in within 1 mm of the base. This is necessary so that the material has room to expand on hot summer days.
- You cannot drive nails at an angle of 45 degrees, otherwise they will quickly become loose and the siding will “crawl.” This also applies to self-tapping screws.
- If a wooden sheathing is installed outside, then only galvanized brackets and other metal parts should come into contact with it. Otherwise, rust may begin to rot.
- Installation work is best carried out in the summer, when the weather is dry and clear. At other times of the year, there is a risk that all the applied solutions and putties for cracks will not dry completely. Therefore, there may be a risk of mold and mildew. To eliminate them, you will have to dismantle all structures and re-clean all walls.
- Not all buildings have perfectly smooth walls. Therefore, when installing wooden or metal sheathing, you need to use a plumb line and mount everything at the same level. If this is not done, then the siding will not lie smoothly and beautifully, but will only emphasize the external flaws of the house. Also, thanks to a correctly installed frame, there will be no need to level the surface of the walls; they will be leveled due to the layer of insulation and sheathing.
For insulation of a house with a facade made of siding, see the video instructions below.
Installation of the selected sheathing
First of all, you should mark the area of the walls, mark the axes of the planks in accordance with the pitch of the sheathing. Direct hangers for drywall are attached along the marked axes . The distance between them is about 60 cm; for metal siding, the number of supports can be increased.
Installation of the sheathing begins with the installation of two extreme strips . Their position is carefully adjusted according to the building level or plumb line, after which cords are pulled between them to adjust the plane during installation of the intermediate strips.
Intermediate strips are installed in previously prepared suspensions, their position is adjusted using stretched cords.
Window openings are also decorated with sheathing strips . If the windows are installed in a single plane with the wall, then you only need to frame the opening around the perimeter with slats (usually a double row); if the opening depth is more than 20 cm, it is also necessary to install slats along the slopes, controlling their plane.
IMPORTANT!
If the walls are insulated, then the plane must be ensured on the first, main layer of the lathing, so that the installation of the counter-lattice strips is carried out on a prepared system and does not require adjustment.
Peculiarities
Self-cladding a house with siding and insulation is a difficult and lengthy process. First of all, you need to decide on the material. It is necessary to choose the appropriate insulation for the siding sheets (mineral wool, polystyrene foam, etc.), and also select the sheathing material itself.
After the owner of the house has decided on this, he should calculate the amount of material that will be needed for the work based on the surface area and the consumption for errors.
It is very important to prepare the necessary tools for work in advance. Otherwise, the work will not be done at the highest level
If such a procedure is carried out for the first time, it is necessary to consult with a specialist in advance to avoid unpleasant consequences.
The most important thing when installing insulation and sheathing yourself is to take your time and strictly follow the instructions.
Insulation, vapor barrier and waterproofing
Wooden walls have good thermal insulation properties, but the joints between logs or beams are a source of penetration of cold outside air . Often, before installing siding, the walls are insulated, thereby reducing heating costs and improving the microclimate of the room.
For external insulation of a wooden house, the best option would be to use mineral wool, and of soft varieties. This choice is dictated by the surface features of wooden buildings, the walls of which have many irregularities and differences.
The soft structure of the insulation will ensure a tight fit of the material to the wall, eliminating the formation of voids or gaps . For tighter contact, it is recommended to use thin rolled mineral wool in several layers, this will make it easier to press the material against the wall and fix it to the surface.
Vapor barrier of insulation in this case is irrelevant, since the atmospheric air does not have sufficient vapor pressure, and the steam coming from inside must be effectively removed outside.
In this case, effective waterproofing will be required to prevent moisture from penetrating into the insulation from the outside. This could be rainwater seeping under the casing, fog, etc.
The best option is to install a waterproof membrane (a film with specially sized holes that allows vapor to pass in one direction, but prevents moisture from entering in the opposite direction). This coating will allow steam to escape, dry the insulation and protect it from contact with external humidity.
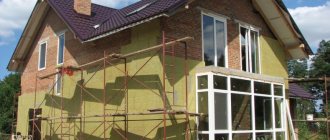
Preparation
Of course, the building needs to be prepared.
Before covering a brick house with siding, and indeed on stone facades in general, we remove everything that is peeling and tends to fall off on its own. It could be weak mortar or weather-damaged brick. We don’t plan to “level” anything specifically. We simply assess the extent of the damage - whether repairs are necessary in these places or the damage is insignificant. We repair if it is structurally necessary, using minimal but effective means. We foam deep cracks inside and cover the outside with mortar.
Before covering a wooden house with siding, we also assess the degree of wear and the need for repairs. Using a saw, an ax, and large chisels, we select outright rotten wood. At the same time, we do not strive to completely saw through the log. Quite often it does not rot through, and for repair it is enough to put a “plug” in half a tree or even a quarter.
We evaluate the condition of the interventional insulation. Often, in some places, over time it has turned into dust - it will have to be replaced: picked out and a new one knocked in its place. Why not “blow it out” with polyurethane foam? There is no particular point in this - the main part of it will still remain the same, and besides, vapor-permeable insulation is recommended for insulating wood.
It is too early to calculate the amount of material. However, it is necessary to accurately determine the specific model - the sizes of siding of the same type, but different brands may vary. And we have to install the sheathing ahead, and there is no need for surprises with the sizes.
Installation of the starting bar
The starting strip serves as the lower support of the siding sheet, ensuring the locking of the first row of panels. With its installation, the installation of siding on the prepared sheathing begins.
Procedure:
- The lowest point (edge) of the sheathing sheet is determined. This may be the top cut of the base or another height.
- 40 mm is marked upward from it and a horizontal line is drawn along the perimeter of the house. The horizontal line is checked by level, errors are not allowed .
- The starting bar is leaned against the drawn line with its upper edge and secured with self-tapping screws. The first strip is installed at a distance of the width of the corner profile flange plus 6 mm from the corner. It is recommended to keep the distance between the screws within 20-30 cm ; under no circumstances should you screw them all the way.
- The starting bar should move freely thanks to the oval mounting holes, for which the screws are screwed in exactly in the middle. This condition applies to all siding elements, since it is necessary to ensure compensation for thermal expansion of the material . This is especially important for vinyl siding, the expansion coefficient of which is higher than that of metal siding. For the same reason, the next starting strip should not be attached end-to-end; a gap of 6-12 mm is made.
The use of a J-profile as a starting strip is not recommended, since rainwater accumulates in the recess, and the shape of the profile does not provide reliable fixation of the panel lock . With a strong gust of wind, such a panel can be torn off, which creates a danger for the entire skin.
Preparatory work
Before directly installing the cladding, you must perform the following steps:
- The main material of the walls is freed from the old cladding, as well as from the dust and dirt present on it.
- Rotten or moldy areas are cut off and sanded down to “healthy” wood. The inspection should be carried out with the utmost attention: even a small colony of microorganisms hidden under the siding will have time to cause considerable damage to building structures before being discovered.
- Next, the walls must be thoroughly lubricated with antiseptic impregnation.
- After the impregnation has dried, the walls are covered with a waterproofing, vapor-permeable membrane. Be careful: this film must be installed on the correct side. At this stage, it will be enough to grab it lightly, for example, with a construction stapler. In the future, the membrane will be more firmly fixed by the frame.
Installation of waterproofing
Note! The plaster, if it is in good condition, does not need to be knocked down. During the installation of the siding frame, it may fall off in places, but this does not threaten any special building structures.
Frame installation
First of all, you need to decide on the frame material. Wood is cheaper and easier to work with, but two circumstances must be taken into account:
- The maximum permissible humidity for timber is 20%, and it must be dried in the open air. Finding such material is not so easy, since, as a rule, freshly sawn wood with a moisture content of over 50% goes on sale. A frame made from it will undergo the shrinkage already mentioned here, that is, it will dry out and become deformed.
- Even after treatment with the most effective antiseptic impregnation, the wooden frame will not be durable, since it does not have waterproofing protection.
Slats in a wooden frame have to be installed quite often - every 30 cm.
Frame installation diagram for horizontal siding
A more practical material is galvanized steel. Profiles made from it are not afraid of humidity, will not change their shape under any circumstances and can be installed in increments of 40 cm.
The frame elements are installed perpendicular to the siding panels. That is, if the cladding will be mounted horizontally (the most common option), then the slats or frame profiles should be screwed vertically to the walls. The construction of the frame begins with the installation of elements at the corners of the building, then the profiles framing the window and door openings are screwed in. After this, you can install intermediate elements.
When the profiles are positioned vertically, their installation is controlled using a plumb line, and when the profiles are positioned horizontally, using a building level.
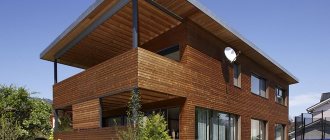
Home with vertical vinyl siding
How is siding attached?
- Fastening siding does not require any additional operations (drilling holes, using separate fasteners) except for adjusting the length or trimming the top panels for installation into the finishing strips. All connections are made with standard locks or fixed on the sheathing using holes in the nail strips of the elements . In this case, important conditions must be observed:
- Self-tapping screws are screwed strictly perpendicular to the surface and exactly in the middle of the oblong hole to allow some movement in one direction or another.
- The screw caps must be at least 1 cm in diameter and do not press the elements tightly. All siding should “dangle” slightly and be able to move with thermal expansion . Failure to comply with this condition will lead to swelling of the surface of the canvas or partial destruction of the panels.
This is most relevant for vinyl panels; their expansion (or contraction) is most pronounced. For this reason, it is not recommended to use dark-colored siding.
Installation of internal corner strips
Installation of internal corners is carried out immediately after installing the starting strips (simultaneously with external corners and the profile). The corner strip is attached 4-6 mm lower than the edge of the starting strip .
To ensure that the nail strip does not stick out from below, it is trimmed by 4-6 mm . A temperature gap of 1-3 mm is left on top between the corner strip and the soffit . If the corner strip rests on the plinth, then a gap of 4-6 mm .
The upper self-tapping screw is screwed along the upper cut of the nail bar hole, preventing the element from going down. The remaining screws are screwed in the usual order, in the middle of the holes.
Installation of external corner strips
Installation of external corner strips is carried out in the same way as internal ones; it is necessary to ensure the same clearances and tolerances.
If the height of the wall exceeds the length of the corner strip, they should be connected with an overlap of 25 mm , for which the nail strips of the upper profile should be cut to the required height, taking into account the temperature gap. The connection is made in the direction of water flow - the upper profile on the lower one.
H-profile assembly
The H-profile allows you to neatly join the panels in the longitudinal direction. Its installation is completely similar to the installation of corner profiles.
The choice of location for H-profiles is dictated by the aesthetic considerations of the owner - they can be installed symmetrically, ensuring the same length of panels, or use some entire panels, trimming another span.
Fiber cement boards
Quite a popular cladding method in Western countries.
Fiber cement boards became famous in the domestic market not so long ago. The advantages include:
- Light weight;
- Large selection of colors;
- Heat and sound insulation;
- Protection from environmental influences;
- Easy installation.
These advantages significantly increase interest in fiber cement boards, forcing them to increasingly make choices regarding house cladding in their favor.
How best to sheathe a timber house and which method to choose is up to the owner of this house to decide. The choice mainly depends on the personal preferences of the owner
However, sometimes it is still worth paying attention to the quality and price components of facing materials
Installation of row panels
Siding panels are usually installed from the bottom up (although sometimes it happens the other way around). The first panel is inserted into the sockets of the corner and H-profiles (or two corners), snaps into the lock of the starting strip from below and is secured with self-tapping screws along the upper nail strip .
CAREFULLY!
A 6mm temperature gap must be left on each side; tight installation is prohibited.
The next row of panels is installed in a similar way - from below it is snapped into the lock of the previous panel, from above - fixed with self-tapping screws . This way the entire canvas is installed to the top.
How to go around windows and doorways with siding
The order of design of window and door openings depends on the depth of their installation relative to the plane of the wall (on the width of the external slopes).
In the absence of slopes, i.e. when a window or door block is installed flush with the plane of the wall, ordinary platbands are used to form the opening around the perimeter (for doors - on three sides) .
If the installation depth does not exceed 20 cm, a J-profile is used, and for slopes greater than 20 cm, a set of cut pieces of the main panel is made, repeating the wall cladding along the slopes.
In such cases, an external corner strip is installed along the outer perimeter, and a finishing strip is installed along the window (door) frame . This type of cladding resembles finishing a narrow section of a wall.
Equipment
A set of siding panels for cladding the facade of a house should be selected depending on their width and wall area.
The complete set of wall siding includes:
- panels directly;
- internal as well as external corners;
- the starting profile located first from the base;
- J-, H-, or T-profile;
- J-chamfer;
- casing 75, 89 mm;
- solid soffit;
- window profile;
- low tide;
- finishing profile.
Additional decorative elements help make the outside of the house look complete and beautiful.
Installing the finishing strip
The finishing strip is installed before installing the top siding panel. It is usually placed close to the cornice or soffit; the top siding panel is cut along the nail strip and placed under the curl of the finishing strip profile .
From below, the top panel snaps into the lock of the previous panel in a standard manner, thus completing the installation of the section of the canvas.