From the author: Hello, dear readers. My bathroom renovation was recently completed and a new one started just as quickly. All because I didn’t immediately understand why the tiles were coming off the wall. Without attaching any importance to this, I calmly closed all the cracks that had formed near the doorway, and two and a half weeks later I woke up to the fact that all the tiles in the restroom had fallen down, breaking a mirror, a toilet bowl and part of the floor along the way.
After that, I began to figure out where the dog was buried. It’s a pity that this will never return my things. To prevent the same incident from happening to you, I decided to write this article, where I will analyze in detail the reasons for what happened, and also talk about how to avoid such a situation.
Main reasons
There can actually be a lot of reasons. In this particular case, the mistake was made by me. You see, I ignored the tiler's advice about not turning on the heating. During the renovation, I decided to install heating pipes into the walls, and the situation with them is exactly the same as with a heated floor. You can turn them on after at least three weeks, otherwise you can repeat my bitter experience and be left without a bathroom at all.
So, the first rule to follow if you don’t want to watch your bathroom crumble like grandma’s crystal vase.
Do not turn on the heating if it is built into the walls less than 21 days ago!
In general, any sudden change in temperature can cause ceramic tiles to fall off. Therefore, the decision to place a heater in the middle of the room for faster drying of the glue will only lead to the fact that this glue will have to be reapplied.
Elimination
If applesiness occurs during the application of the base, analyze the reasons and try to eliminate it by applying a “showy” layer. To do this, it is recommended to slightly reduce the pressure at the inlet to the gun (to 1-1.5 atm) and smoothly spray a semi-wet layer of base from a slightly increased distance. This technique promotes uniform decomposition of the grain.
If the “apple-colored” appearance manifests itself after applying the varnish, the only option for eliminating the defect is repainting. Dry the varnish, sand it (P400-P500 abrasive for dry sanding and P800-P1000 for wet sanding) and reapply the base and varnish using the correct technology.
Be sure to prime
Yes, ignoring this point is the most common reason that tiles begin to lag behind the wall and, in the worst case, fall on someone’s head. Before tile adhesive, which is another cause of this “breakage,” is applied to the tile and applied to the wall, this same wall must be coated with a primer.
Primer is not the most expensive thing when repairing, and many people try to save money on it. Yes, if you are gluing wallpaper, then sometimes you can choose a cheaper option, but not if the renovation is being done in the bathroom. Ten liters of high-quality primer will be enough for you to completely treat the entire room, and you won’t spend a lot of money on it.
If the surface on which the tiles are laid is too smooth, then it is better to use concrete contact instead of a primer. Why won't he be bad too? Tile adhesive is created on a concrete base, so it will adhere well to it.
Stains and stains on the ceiling after painting: what is the reason and how to fix it?
dated December 7, 2014
Probably everyone who has had to do their own repairs has at least once encountered the problem of uneven painting. It seems that he tried hard, selected paint and tools, prepared the base, and the result was stains and stains, clearly visible in bright daylight. The “saving” thought immediately comes to apply a second layer. However, this, as a rule, does not solve the problem, but, on the contrary, aggravates it. Make at least five layers - it won't do any good. Stains and stains will become even more noticeable. What is the reason for the failure? How to fix the situation? What rules for painting the ceiling will allow you to avoid streaks and stains?
Pay attention to the glue
Another reason why your tiles fold like an accordion on the wall may be that the master who laid the tiles thought a little about life and was not at all puzzled by what kind of glue they brought him. You see, each brand and model of tile adhesive has its own specific dilution ratio.
Why might this happen? You bought the material that you considered necessary, based on its price and advice from an “experienced” salesperson in a construction supermarket. You left aside the opinion of the person who will carry out the direct work, since he only named what he worked with constantly.
The product you purchased may be completely unfamiliar to him, which will lead to an incorrect proportional ratio of glue and water (you can also use a primer or cement laitance), and in the future - to its looseness after drying and your personal costs during repairs.
Does an error in proportions really lead to such a “tile nightmare?” Alas, yes. You see, an error in preparing the solution can lead to the formation of too much binder, and this leads to the fact that the tiles begin to fall off.
Poorly diluted paint
There are paints that need to be thinned by hand. If you violate the proportions, the paint may turn out to be too thick, thereby creating streaks.
There are times when, when hiring craftsmen, they show the owner of the house the most expensive and high-quality paint. You leave having paid for the work and materials, and the “masters” dilute this paint half and half with water. For them - savings, for you - damaged walls.
Solution: do the steps exactly according to the instructions and keep an eye on those who are doing your repairs.
Dirt is always bad!
By “dirt” I now mean the uncleaned surface of either a tile or a wall. Where do the remains of the old solution come from? The tile may not be new in two cases:
- you re-lay tiles in the same room because certain elements have already fallen off before,
- history knows of cases when people bought material that was not used for the first time (used), in order to save money or because there was no need for a new one.
It is necessary to clean off previously used mortar not only from the back side of the tile, on which it could remain after it fell off, but also from the surface on which it will be placed. Renovations aren't always done from scratch, which means the wall can be a mess to clean. Pay special attention to this.
Painting defects: streaks and apples-to-apples
We continue the section on paint defects and today we are looking at one of the most common defects - stripes and “apples” (or “clouds”) on metallic paints.
This defect consists of stripes and spots (resembling clouds in appearance) with alternating dark and light shades on a freshly applied metallic coating. It is especially pronounced when painting large surfaces with light silver colors.
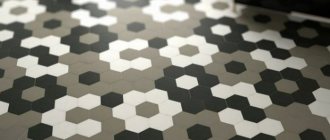
What to do with the floor
Naturally, floor tiles can also crack and swell. You can feel it just by stepping on it. But how can you determine how many tiles need replacing? An ordinary mallet and your ears will help you with this.
If you don't have a mallet handy, you can use the handle of a hammer or the back of a screwdriver. If you don't have any tools on hand at all, take something that will allow you to tap the surface of the floor without damaging the coating. By ear, you will determine where the air cavity has formed and find the required square.
If it is the floor that requires correction of defects, do not rush to call the specialist and call him again. You can lay the floor yourself by watching several video tutorials and armed with a trowel and level.
Required Tools
It would seem that there is nothing complicated here. We all have some idea of what tools are used for painting work. But, nevertheless, let's dwell on this in more detail so that you don't suddenly forget anything. Here is a short list of those same tools:
- paint container (painting tray or bucket),
- two rollers - for priming and for painting,
- brush. It is needed for working in those areas of the ceiling where a roller cannot reach,
- rubber gloves - I think everything is clear here.
Naturally, when performing painting work, the main tool is a roller. When you choose it in a store, pay attention to its quality: if even a little lint falls out of it, then this option will not suit us.
By the way, a foam or velor roller is also not suitable for painting. The foam rubber will leave bubbles, and the velor material will not be able to absorb the required amount of paint. In such cases, stripes remain on the ceiling.
Therefore, you should choose a roller with medium-length pile. And, for ease of use, it should be equipped with a long handle. We figured out the tools. Now about painting.
How to deal with this trouble
Unfortunately, there is no other option other than removing the tiles and laying them again. Therefore, prepare for the fact that you will return to the repair stage again. It is important not to miss some points:
- do not remove more surface than necessary. By going into overdrive, you can damage an area that does not require re-masonry, and this, in turn, will lead to additional, unnecessary waste. Imagine your eyes when you find out that the store has run out of such tiles, and they will no longer bring them in, since they sold poorly, and you need one small square, without which you will have to completely redo all the walls,
- the problem must be resolved as quickly as possible, since the consequences can damage not only your financial, but also your physical health. There is no need to say: “Let’s wait with this question.” If you notice that there is a problem, then first, at least eliminate the threat to health.
How to get rid of streaks after painting walls
Good day everyone. The masters have set up a guard, help save the situation. They glued wallpaper onto the leveled wall, went over it with a coat of paint (to make a completely smooth surface), then primed it (I hope), and painted it with Tikkurilov chalkboard paint (on which you can write with chalk). The paint is very dark. The result is stripes from the roller every 20-30 cm, visible not only in the light but also simply when you look straight. The stripes differ from the rest of the wall in color and texture; there is a clearly noticeable roughness. Looks like he's going to shoot himself. Question: what to do? We've already applied three layers, and it's only gotten worse. The paint is as expensive as a dog. Is it possible to somehow save the walls, with some sandpaper or something else? Or just rip off the wallpaper and do it all over again? Thanks in advance.
Why is there wallpaper in this “pie”? From the beginning the wall is plastered. If the thickness of the plaster is large, and the plaster itself is of average quality, then a cobweb is walled up in it so that the plaster does not crack when shrinking. Then the wall is puttied with finishing putty, sanded and primed with a deep penetration primer. And only then they paint it. Wallpaper has nothing to do with it.
Are the stripes from the roller straight and vertical? or chaotic?
Can. The most important thing is to send painters away without pay, and hire them with a paint sprayer
Alexey_B_1335426 wrote: Why is there wallpaper in this “pie”?
The stripes from the roller are vertical. The wallpaper just acts as a grid. How exactly can you save the situation, please tell me? Other guys suggested sanding the whole thing with fine sandpaper and rolling another layer on top. Do you really need a spray gun? The roller won't roll? Attached a photo. I took the photo at night, so it's not very visible. In daylight everything is much sadder.
robkuz wrote: Other guys suggested sanding the whole thing with fine sandpaper and rolling another layer on top.
Yes, that's how it should be done. Just prime well and a lot. And roll the paint not from top to bottom, but in all directions. In principle, if the master is experienced, he doesn’t care which way he rolls – there will be no stripes. And if you are inexperienced, then let him skate in different directions. So, at least, the painting will resemble “decorative” and ideally, of course, with an electric spray gun, only this paint is filled with emery, and this emery will ruin its (the spray gun’s) nozzles.
Alexey_B_1335426 wrote: Why is there wallpaper in this “pie”? From the beginning the wall is plastered. If the thickness of the plaster is large, and the plaster itself is of average quality, then a cobweb is walled up in it so that the plaster does not crack when shrinking. Then the wall is puttied with finishing putty, sanded and primed with a deep penetration primer. And only then they paint it. Wallpaper has nothing to do with it.
Are the stripes from the roller straight and vertical? or chaotic?
Alexey_B_1335426 , Hello, Alexey! I would like to do without a mesh; the thickness of the plaster on the walls will be from 5mm to 20mm (in some places), and on the ceiling up to 8mm. What mixture is good so that it does not crack during shrinkage? Thank you.
Kochevan, Look at Semin products - for example Super Glatt. and for finishing ETS-2
robkuz wrote: The stripes from the roller are vertical. The wallpaper just acts as a grid. How exactly can you save the situation, please tell me? Other guys suggested sanding the whole thing with fine sandpaper and rolling another layer on top. Do you really need a spray gun? The roller won't roll? Attached a photo. I took the photo at night, so it's not very visible. In daylight everything is much sadder.
robkuz, hello, did you manage to solve the problem with the streaks from the roller? the same problem arose!
maxim23, Yes, the problem can be solved by repainting - just don’t need to roll the roller from the ceiling to the floor in one stripe. Paint in a W-shape with a constant flow. On Youtube, look for videos for the query “how to paint walls with a roller quickly and professionally”
Alexey_B_1335426 wrote: Paint with W-shaped movements with a constant flow.
It turned out even worse for me. Must be spray painted. The problem IMHO is manual labor, its result is always appropriate.
Separation of a section of ceramic coating along with the solution from the base
The most likely cause of such destruction is an incorrectly selected primer mixture or no priming at all before laying the tiles. A common mistake when preparing the base is priming with concentrated latex, which forms a thin rubbery film on the surface that prevents adhesion to cement-based tile adhesives.
The separation of the laid tiles along with the mortar from the base can be caused by deformation of the base
The preserved finish is inspected and tapped to identify voids that are fraught with additional destruction of the cladding. If the area of the collapsed finish and existing voids in total exceeds 20% of the total area of the base, then the wall or floor cladding will have to be re-done in full, taking into account the mistakes made, since after partial repairs the destruction of the old tiles will most likely continue.
Features of surface preparation
If problems with paint are identified, it is necessary to prepare the surface. To remove the old layer, use a metal spatula or a wire brush. Using this tool you can easily remove the excess layer. Even the one that at first glance seemed intact.
Clean the surface completely. If this is not done, over time you will have to return to repairs again. To repair a specific area, remove the top layer and clean the surface with sandpaper or a block. This is necessary to smooth out the transition between different areas, and then apply paint.
How to glue the fallen part
To properly carry out the restoration, you need to purchase a high-quality adhesive composition.
A mixture of cement and sand
The solution can be prepared at home. PVA glue is added to the mixture of cement, sand and water to improve adhesion. The same solution can be used to pre-level the wall. The disadvantage is the possibility of violating the technology for preparing the composition. The universal mixture is compatible with all types of tiles, including floor tiles. The proportions of the components are determined by the brand of the product. Add 200 ml of PVA glue to 10 liters of the finished composition.
Mastic
Mastic is supplied in plastic buckets of different sizes. It is a ready-to-use adhesive composition. Before starting work, mix the mass thoroughly.
Laying tiles using mastic adhesive.
Adhesive compositions
Several types of glue are used to restore tile cladding. They are divided into 2 groups:
- Dry mixes. To prepare the adhesive, the powder is mixed with water, following the proportions specified in the instructions.
- Ready pastes. The products do not require adding water.
The adhesive composition is selected taking into account the type of tile:
- Cement mixtures. Used for gluing decorative elements of small and medium weight. Adhere well to concrete or brick bases.
- Dispersive for laying tiles on the floor or wall. Suitable for lightweight materials.
- Polyurethane. The elastic composition is used for installing tiles on any base.
- Epoxy. Used for decorating smooth surfaces: wood, ceramics, metal. The glue is resistant to moisture.
Polyurethane tile adhesive.
Liquid nails can be used to temporarily restore the integrity of the cladding.
The composition is applied pointwise to the underside of the tile. The edges are covered with solid lines.
Other solutions
When partially restoring ceramic cladding, it is allowed to use materials that have the properties of tile adhesive. These include:
- Silicone sealant. The product does not need to be diluted with water before use. The elastic composition protects the connections from moisture penetration. Sealant is used in cases where 2-3 tiles have fallen off.
- Dye. Used for gluing tiles onto a smooth base. To improve adhesion, it is given a thick consistency.
- Bitumen mastic. The viscosity of this substance allows it to be used for local repairs. The resin is impervious to moisture, but is sensitive to high temperatures.
The problem of falling tiles
Despite the strength of the tiled finish, there are situations when some of its elements peel off or begin to buckle. The problematic element is identified by simply tapping on its surface: the sound will not be dull and monolithic, but ringing and hollow. This type of problem can have different scales - the technology for eliminating the integrity of the coating depends on them. If we are talking about 2-3 peeled tiles, then you can simply put them in place using one of the methods below.
However, there are more serious situations when a whole row of tiles begins to fall off (usually this happens on the walls). This occurs because the individual tiles are attached to each other using grout. Therefore, as soon as at least one element peels off, it begins to loosen the parts adjacent to it. This explains the importance of promptly eliminating the problem even on one tile, otherwise the entire cladding will have to be renewed. In addition, loose tiles can fall down and break, damaging plumbing fixtures or flooring along the way.
Way out of this situation
What should you do if a tile falls off? Glue the tile back! Of course, there are many conditions under which this is not possible, for example, the poor condition of the ceramics. However, in most cases the product is suitable for further use. Therefore, to restore the interior, it is necessary to thoroughly clean the surface where the tiles were attached. Then apply the adhesive and glue the product to the appropriate place.
Cutting the required piece of tile
This method is only applicable to tiles that are in excellent condition, otherwise they will need to be replaced. Although a nuisance may occur in the form of a missing element. Then you can play with contrast or add bright colors to the overall design. To do this, you should purchase several ceramic products and replace them with outdated tiles, which will significantly refresh the bathroom.
If for some reason it is impossible to glue the tiles or pick out others, then it is best to approach the problem in an original way. Try creating a mosaic design, i.e. crumble the ceramics, and then collect it and paste it into the old place, but already thoroughly crumbled. This procedure must be done carefully to eliminate the possibility of an unpresentable appearance.
To prevent repeated peeling, it is necessary to establish the cause of the defect and then eliminate it. In practice, this is relatively easy to achieve, but you still need to try. For example, voids can be identified by ordinary sound by tapping each element separately. Various irregularities are visible to the naked eye, as is crumbling mortar. The detected defective area will have to be remade conscientiously, otherwise problems cannot be avoided.
Fixing the problem
Carrying out repair work consists of several stages.
Preparing tiles and surfaces
- If the tile moves away but does not fall, you will have to remove it yourself. Using a sharp knife, carefully remove the seams that hold the tiles together. Experienced craftsmen do this using special tools - embroiders, engravers with reinforced circles, etc.
- The entire tile can be reused. If its integrity is compromised, you will have to get a spare one.
- Remove the remaining tile adhesive from the wall using a chisel and hammer.
- A primer is applied to the wall and left for 2-3 hours.
Gluing
To attach fallen tiles, you will need compounds that provide adhesion when applied in a thin layer: Moment Installation, synthetic sealant, “liquid nails”, etc. If you are laying over a large area, you can use tile adhesive:
- The glue is applied to the tiles and the wall.
- The tile is applied to the wall and held until the glue sets.
- If several tiles come off, move on to the next one, proceeding in the same way.
- Special crosses are inserted between the finishing elements to ensure an even seam. Instead of crosses, it is quite possible to use ordinary matches.
Grouting (jointing)
When you have refilled the wall with tiles, proceed to completing the repair work - grouting or jointing.
When buying a fugue, keep in mind that you will need it to update all the seams on the wall. Otherwise, the restored area will stand out from the general background.
- Check the strength of the old fugue. If necessary, remove it in areas where it does not adhere firmly.
- Dilute a small amount of fugue. Apply it to the tiles using a rubber spatula.
- After 20–30 minutes, go over the seams with a damp sponge, rubbing the fugue.
- Wipe down the tiles for final cleaning.
If you follow these simple rules, you will be able to restore the tiled finish on the walls. Good luck!
Recommended Posts
Recently viewed by 0 users
No registered user is viewing this page.
Test: What IKEA item does your kitchen need?
10 storage ideas for a tiny kitchen that are very easy to implement
7 problems in your kitchen that need to be addressed immediately
The best articles on the IVD website
Are you a professional architect or designer?
IVD. Repair and finishing
Are you a professional architect or designer?
The IVD.ru website is a leading Internet project dedicated to the issues of reconstruction and interior design of residential premises. The main content of the site is the archive of the magazine “Ideas for Your Home” - exclusive author’s articles, high-quality illustrations, practical tips and lessons. A team of professionals is working on the project in close collaboration with famous designers, architects and leading publishing experts.
On our website you can choose comprehensive design solutions; view detailed reviews of the market for construction and finishing materials, furniture, machinery and equipment; compare your own ideas with design projects of leading architects; communicate directly with other readers and editors on the forum.
Are you a professional architect or designer?
Source
Gluing tiles without dismantling
If the tile does not fall off, but just starts to “rustle” a little, you can try gluing it without dismantling it. For this purpose, polyurethane foam, silicone sealant, epoxy or mounting adhesive are usually used.
Operating procedure:
- Equip the peeled element with corner holes. To do this you will need a diamond drill and a hammer drill. The diameter of the hole depends on what kind of composition will be used. An 8 mm drill is used for mounting foam. In other cases, 4-5 mm will be enough (according to the size of the tube spout).
- Additionally, strengthen the tiles around each of the holes made. Wooden supports are used for this. This is done so that the expanding foam does not tear off the lining. When using other formulations, this operation can be skipped.
- Inject adhesive into the hole. The difficulty is that the dosage has to be done at random, because... It is impossible to visually trace the situation under the tiles. Therefore, until the foam completely hardens, the spacers must remain in place. As for glue and sealant, these compounds do not expand: they can be poured until the excess flows out of the hole. For materials that are too liquid, it is advisable to make plugs in advance to plug the holes.
After waiting for the glue to completely harden, the holes along the edges are sealed with grout, matching the color of the overall cladding.