quote: Originally posted by YBS:
I really don’t smoke in the kitchen.
quote: Originally posted by ehpebitor:
Isn't that a beauty tile!?
quote: Originally posted by svin+:
Yesterday I smoked fish. The smokehouse stood for 45 minutes
quote: Originally posted by Yep:
it was necessary to retreat 100 millimeters
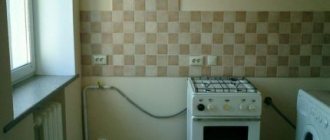
Is it convenient to use such a stove?
YBS? Can I have a couple of off-topic questions? As I understand it, you have a stove in the corner. — are there any problems with the authorities? Is the gas stove supposed to be at least 30 cm away from the window? — Is it convenient to use such a stove?
— Is it convenient to use such a stove?
Wall protection for gas stove
A protective screen, to put it simply, is the same as an apron, only larger. The main requirements for wall protection include:
Such products are made from PVC film, on which a decorative pattern has already been applied. Such stickers are inexpensive, so if damage occurs, the surface can be refreshed. This is the most budget option for using the screen. If you want to make it durable, you need to choose durable and high-quality materials.
Refrigerator and oven
Is it possible to place an oven next to a refrigerator - definitely yes. But at the same time, certain conditions must be observed. It may be necessary to protect the refrigerator from heating the side walls, hot air and steam coming from the oven.
You can place the refrigerator next to the oven. If the walls become very hot, install thermal insulation. But you should take into account the flow of hot air coming from the oven. You need to block his path and prevent him from getting on the refrigerator condenser.
Any protective screen will do for this. A small stream of hot air comes out of the oven, so strong thermal insulation is not required. The main thing is that the material used is resistant to moisture.
Screen materials
Below are the most common materials used to make slab screens. Laminated board made from MDF and chipboard materials is a budget option, but not so durable, the wear resistance of the protective film is quite low. Service life up to 5 years.
You can get out of this situation if you find a factory for the manufacture of entrance doors, where they will apply a special coating that is highly fire resistant and easy to clean even with abrasives and scrapers. It will not be as elegant, but durable. As a rule, it is just a screen of one color or a high-quality imitation of wood.
Related article: Scrapbooking paintings on the wall
Artificial stone or porcelain stoneware
The product made from these materials is highly durable: resistant to large amounts of moisture, easy to clean, and can be used for many years. The downside is that the surface is not completely smooth, so dirt can get into the seams. Each type of composite material has its own individual properties.
Metal
The metal is usually stainless steel. It perfectly protects walls from fire. However, otherwise there are more minuses than pluses. For example, such screens are thin, so they are easily deformed or pressed through. On such a surface traces of water or grease are visible. Another problem is that the metal sheets are attached to moisture-resistant plywood and secured to the wall. This substrate releases substances harmful to human health.
Tempered glass (triplex)
This is quite expensive, but a stylish and durable solution for the kitchen. If you make it as an apron, then you need to order it according to the individual dimensions of your kitchen. For the screen above the gas stove, standard versions from the store, made with fasteners, are also suitable. However, such a part will still be quite expensive in cost, but the most practical of all the materials presented above. As a rule, the standard thickness for such screens is 6-8 mm. Although these are small sizes, however, the thicker the glass, the more it begins to “green”.
If the screen does not match the planned style of the kitchen, then you can apply a beautiful design to the surface of the glass.
How to seal the distance between floor slabs?
To seal the seams between floor slabs, it is necessary to use concrete with quick-hardening Portland cement or Portland cement grade M400 or higher with fine aggregate. The grain size of the aggregate should not be more than a third of the gap between the slabs and three-quarters of the clear size between the reinforcing bars.
Interesting materials:
How to take Xefocam before or after meals? How to accustom a cat to regular food after feeding? How to accustom a kitten to a bowl of food? How to accustom a kitten to dry food if he doesn’t eat it? How to teach a child to eat vegetables? How to check if a person is wanted? How to check if there is money on the Letual card? How to check if there are drivers for sound? How to check if there is a cable underground? How to check if Miner is available on PC?
Pros and cons of stove guards
An analysis of various sources on the installation of protective screens showed that these devices are practical to use and harmoniously combine with kitchen units and household appliances. It is better to consider the pros and cons of shields based on the materials from which they are made. The advantages include the following.
Glass is resistant to liquids, has an average service life, a large number of design options, and is resistant to high temperatures.
Stone products are resistant to impacts, high and low temperatures, no special detergents are needed, they look noble and luxurious.
MDF is a budget price, can be easily attached to the wall, and is highly resistant to liquids and damage.
Plastic is inexpensive, even a person without experience can install it.
Metal – a high degree of resistance to various damages, responds well to temperature changes.
It is non-flammable, therefore it is often used with gas stoves, it is affordable and looks stylish.
The disadvantages are as follows.
For information on how to install a kitchen apron made of MDF with your own hands, see below.
Stove splash guards
As a result of searching and reading reviews on how best to protect the stove and walls from splashes when cooking, I discovered an interesting option. The idea is to isolate the splashing dishes as much as possible from the outside world. The idea is brilliant, that's what I found suitable for Ozone.
Food foil screen
Honestly, I was already planning to buy it, but I decided to read the reviews. Users write that the screen copes with its functions, but is quite soft. For less neat people like me, most likely, it will not work.
- Pros:
Budget-friendly, copes with its functions. - Cons:
Soft, which makes the screen difficult to maintain. Short-lived.
Steel splash guard
Very similar to the previous option, but more durable. The device is made of steel with a non-stick coating.
Eight-section screen for protection
For my taste, the functionality of the screen is much higher than that of previous options, because it practically hugs the dishes from all sides, protecting the epicenter of the splashes.
Theoretically, the cleaning area when using it will be minimal. But I was not able to check this, because according to Ozone, this screen serves as protection from the wind.
However, pictures on the Internet say that they can protect the wall and slabs from splashes.
Features of stove covers
Many housewives believe that a gas stove cover is an important component of a kitchen set. It can protect walls from splashes and dirt. Iron and glass lids are often used. Iron ones are distinguished by their wear resistance, can withstand high temperatures, and can be cleaned with various detergents, even harsh ones. Glass lids are less resistant to high temperatures, but you can stick interesting pictures on the glass and change them more often. You can make a glass lid yourself. To do this, you need an aluminum corner, two glass curtains, they can be bought in furniture stores. The glass must be cut to fit the size of the lid and polished. Then we temper the glass, the lid is ready.
Stages of installation of a geyser
The speaker needs to be hung at a high enough height so that children cannot reach it. However, you don’t need to “pull it up” too much, because you will need to regulate the heating temperature of the water.
You can see more details about installing a chimney here:
- Mark on the wall with a pencil the places where the device will be attached to the wall. Next, use a drill to drill holes in them and drive the dowels into them. Now, using self-tapping screws, you can securely fasten the equipment.
- The column is securely fixed. Now we take the corrugation and connect one end of it to the outlet of the unit, and the other to the chimney hole. Now combustion products will be removed outside.
- This is one of the most critical moments - gas supply. It is worth noting once again that only gas service employees should carry out the gas supply
! They will cut a tee into the gas supply pipe. After this, you need to connect the gas tap to the tee. - Now let's dance from this tap. Trace from it the entire path of “following” right up to the approach to the column. This way you will know exactly the required pipe footage, as well as the exact number of shut-off valves (fittings). Drill holes along the future path of its installation (every 1 meter) and install fixing clips there, into which you will then enclose the gas pipe. It must be connected to the water heater using a fitting and a union nut. All. From now on, the column is also connected to gas.
- Now you need to connect the water. Inspect the water pipes in the apartment and find the best place to install a tee. To do this, you will need a pipe cutter and a soldering iron for metal-plastic pipes. If the pipe is made of metal, then you will need a compression fitting.
- Install a water tap.
- Next, follow similar steps to mark the path of the water pipes. This will also help determine the length of pipes needed and the number of fittings needed. Also drill holes at a distance of a meter from each other and insert clips there to hold the pipe. Solder the pipes into a single pipeline leading to the column. Install a filter at the entrance to it.
- Install a Mayevsky tap - it will help increase the operating time of your water heater. It is also connected to the water supply using a fitting and a union nut.
- The last stage is connecting the column to the hot water supply system.
- Check all hose connections for gas leaks!
This is quite simple to do - open the gas tap and turn on the column. Apply soap solution to all gas pipe connections. If bubbles form, the connection is not tight and needs to be reworked.
Now you know all the most important nuances - from the documents that will be required to install a gas water heater to its step-by-step installation. We hope this article will help you install the equipment correctly.
Primary requirements
Since the functions are the same, it means that the requirements for the surface of the kitchen screen will not differ from the characteristics of a reliable apron. Among them:
However, some screens today are made in the form of a simple PVC film with a decorative pattern. You can buy such stickers for only 100-200 rubles, and it is assumed that as damage appears on the surface of the film, the owners will be able to immediately replace it with a new one. However, those who are used to doing everything well should choose a screen made of more serious material.
No. 2. Ceramic tiles: immortal classics
Most of us still choose ceramic tiles for our kitchen backsplashes, and for good reason. This is one of the best and most practical options, and it has a lot of advantages:
- high strength;
- heat resistance;
- ease of care;
- a huge assortment: you can choose tiles of any size, color and with any pattern;
- relatively simple installation, which with some skill you can even do yourself.
Using tiles, you can create a variety of effects, for example, highlighting a certain area using a material of a certain color: with decorative tiles, you can highlight the area near the stove or sink, and lay out the rest of the area with simpler tiles. It is worth noting that dirt can accumulate in embossed ceramic tiles and in the joints between the tiles, so it is better to choose the smoothest possible material and make the seams thin or varnish them. When combining tiles above the work area and other types of finishes in the rest of the kitchen, it is better not to settle on one color. It is better to separate the work area with color from the dining area in the kitchen, thus creating an effective zoning.
In conclusion
A kitchen apron is regularly exposed to negative influences: splashes of water, drops of fat and various products, high temperature, frequent washing. All this makes us look for the most practical and resistant material to all this. Everyone wants the kitchen to be attractive, stylish and harmonious, so another requirement is put forward for the finishing material - a pleasant appearance. In addition to ceramic tiles, there are many other ways to decorate a kitchen working wall: when choosing one option or another, it is important to compare all the pros and cons, think about how the material fits into the kitchen conditions, and only then make a decision.
No. 7. MDF panels: a budget and practical option
You can make a kitchen apron from MDF panels: it will not cost much, but will be much more practical than finishing it with film or PVC boards. The main advantages of this method of finishing a working wall:
moisture resistance and strength;
quick production, because, as a rule, such an apron is created together with the kitchen set;
ease of installation. The walls do not require careful preliminary preparation, and the panels can be fixed either to the frame or using liquid nails
If you need to replace the apron, this can be done very simply - you don’t even need to remove the furniture;
seamless coating, which is important in a kitchen work area;
beautiful appearance: such panels can imitate ceramic tiles, stone, wood, brick, and recently a bright pattern has been applied to the material so that the apron becomes a real highlight of the kitchen.
But the material, unfortunately, has disadvantages:
- Not all detergents can be used to clean the surface. Too active substances can negatively affect the material, ruining its appearance and performance;
- flammability, so it is better to use MDF panels only in kitchens where an electric or induction stove is installed.
Laminated MDF or chipboard
Related article: Thickness of interior walls in a panel house
However, an alternative option is now available: look for a workshop for the production of entrance doors, where they can apply an anti-vandal decorative coating to a regular MDF sheet. It is fire resistant, easy to clean from difficult stains and certainly will not be scratched by a kitchen scraper. Don't expect any special artistic delights, but in some kitchens a plain screen or a skillful imitation of wood looks quite decent.
Who is guilty
According to current standards, every slab manufacturer is required to ensure that its products successfully pass the thermal insulation test. In practice, this means the following: wooden surfaces located near the unit should not heat up above a critical level of 95 degrees . Within the permissible temperature range, heating is considered a completely normal phenomenon, does not complicate the use of the stove and does not lead to the release of harmful compounds from artificial wood (in particular, phenol-formaldehyde resins). “Advanced” devices with enhanced thermal protection allow the closest proximity to furniture.
If the headset is damaged, the manufacturer cannot be blamed unequivocally - much depends on the buyer himself. Before starting operation, the device must be distanced from the walls of the furniture by at least 2 centimeters on each side. If we are talking about gas stoves surrounded by wooden furniture, an additional safety net would not be superfluous - increasing the separation to 15 centimeters, as well as a slight extension forward (40-50 millimeters from the overall facade of the set). As a rule, manufacturers prescribe recommended parameters in the instructions, based on the technical aspects of a particular stove or oven.
In the future use of the stove, it is very important not to leave the burners on without a cookware - a single burner can raise the temperature of neighboring furniture to a whopping 200 degrees. Chipboard, varnished and plastic surfaces are especially vulnerable. Some materials become filled with cracks and become deformed, others become covered with stains and an “unhealthy” yellowness, others bubble and peel, and others risk melting or even catching fire. Often, heat does not spare silicone shock absorbers and PVC film.
When ordering built-in equipment, air gaps must be calculated doubly carefully. Progressive companies - such as AEG, Electrolux or, for example, Gorenje - provide high-quality insulation by default. Ovens are widely equipped with a blowing system, or tangential cooling: an internal fan draws in cold air from the external environment, drives it through the chamber along the hot walls and pushes it out through the slots above the door. Thus, excess heat is released, an air barrier is formed around the device, and the case maintains a neutral temperature. During operation, you need to be vigilant to ensure that the air holes are not covered or clogged with anything, otherwise it is unlikely that you will be able to avoid sad consequences.
Returning to the stoves, one more important aspect should be noted: they should not be in close proximity to the hood. According to experienced experts, it is advisable to maintain a distance of at least 70-80 centimeters - this norm applies to both gas and electric models.
Triplex or tempered glass
The other extreme is a stylish and expensive glass screen, which in the kitchen can last longer than the furniture itself. You will have to order its production individually according to your dimensions if you want to assemble a large, full-fledged apron. But for a compact screen, only for the section of the wall above the stove, it may be possible to buy small standard panels with eyelets for fastening. But in general, the cost remains the same - 6-7 thousand per square. But in terms of practicality, this finish has no equal.
Keep in mind that for a protective screen, the optimal panel thickness is 6-8 mm.
This seems small, but with such dimensions the glass is already beginning to have a green tint. If this shade is not suitable for the chosen style of kitchen interior, you will have to buy lightened or, on the contrary, tinted panels. But more often, customers prefer glass screens with a beautiful pattern printed on the back.
Although glass screens are among the most expensive and may well exceed the cost of some types of artificial stone, from a practicality point of view they are the best solution for the kitchen.
And their price in comparison with durability will no longer seem to you a serious drawback and an unjustified waste of money.
Wall finishing instructions
Next, we will look at several simple ways on how you can cover the wall behind a gas stove yourself. What materials and tools will be required for this.
Option No. 1 - installation of ceramic tiles
Decorating a kitchen work wall with ceramic tiles is one of the most popular and widespread options. Of course, you can entrust this work to professionals, or you can try to do everything yourself.
But, before you start finishing the walls near the gas stove, we recommend that you familiarize yourself with the progress of the upcoming work.
Typically, the height of the apron above the tabletop is 50-75 cm. It should be noted that the tiles must go behind the tabletop so that moisture and dirt do not accumulate at the joint
First you need to calculate how many tiles you will need for the backsplash. To do this, you need to measure the height and width of the apron itself, not forgetting to take into account the size and location of the hood above the gas stove.
The number of tiles will depend on their size and installation method. Considering possible errors in calculations and the possibility of spoiling the material, it is better to play it safe and take tiles 10% more than the calculated quantity.
The most economical method is considered to be the traditional one, in which the tiles are laid on top of each other without displacement, but diagonal laying will require much more skill
Having purchased the required number of tiles, you can begin preparing the tools for work.
To prepare and cover the walls you will need to use:
- Hammer . It may be needed if there is old coating on the walls.
- Screwdriver . For mixing the adhesive composition. You just need to take care of a special nozzle in advance.
- Bucket . It is better to take a spacious plastic bucket with a volume of at least 10 liters.
- Spatulas . To work, you will need a narrow one, with a serrated edge, and a rubber one.
- Building level . With its help, the correct installation of the tiles will be monitored.
- Tile cutter . For trimming the edges of tiles if necessary.
In addition, you may need: a cord, a ruler and a pencil, a rubber hammer, crosses for installing tiles, grout and, directly, the adhesive composition itself.
Having prepared all the necessary tools and materials, you can begin finishing work.
Image gallery
Photo from
Step 1 – preparing the working wall
Step 2 – estimate the tiles
Step 3 - applying adhesive composition
Step 4 – laying tiles on the wall
After all the tiles have been laid, all you have to do is wait until the adhesive has dried, then remove the crosses and grout the joints using a rubber spatula.
As you can see, the process itself is not as complicated as it might seem at first glance.
Option No. 2 - decorating a wall with a glass screen
A worthy alternative to a protective screen made of ceramic tiles would be to use special tempered glass. This material will reliably protect the walls near the stove from dirt, it is not exposed to moisture and high temperatures, and also has good wear resistance.
This is why many housewives choose a glass screen. Yes, and it looks very stylish.
Before starting work, it is necessary to measure the area of the wall on which the glass apron will be attached. It is better to double-check the accuracy of the measurements several times in order to avoid installation problems later if the product turns out to be a little larger/smaller than needed.
To save money, you can order an apron made of transparent glass, and stick your favorite photo wallpaper or film with a suitable image under it. You can order a product with a printed pattern, but it will cost a little more.
When ordering the production of glass for an apron, you should immediately specify the making of holes for fasteners. They must be at least 5 cm from the corners of the product.
The panels are quite large in size, so the wall on which they will be mounted must be perfectly flat so that the product fits tightly over the entire area.
A protective glass screen can be easily matched to a wide variety of kitchen interior designs. And the ability to apply any images you like greatly simplifies the choice
Before starting installation, you need to attach the finished apron to the wall and mark the location of the fasteners with a pencil. Next, using a hammer drill and a nozzle of the appropriate size, make holes for fasteners, insert dowels and anchors into them.
The next thing to do is to place the glass panel on the anchors and secure it with the fastening caps.
As you can see, even a novice home craftsman can handle installing a glass splashback. The main thing here is the accuracy of measurements and smooth walls.
What can be done
- a relatively inexpensive, waterproof material and can withstand heating up to 120° C. In addition, it is very durable and cannot be broken with a hammer. And the screen itself does not heat up.
The screen can be mounted on the front of the stove either perpendicular to the floor or at an angle.
The optimal thickness of polycarbonate for installation on a gas stove is from 4 mm, taking into account that the dimensions of the protective screen will be 60 cm or more in width and 30 cm in height.
You can order monolithic polycarbonate by calling: 8-029 676-38-61; 8-029 151-37-03; 8-029 873-06-40. Cutting to size for free!
Advice! If you are going to glue the protective screen to the stove, then carefully select the brand of glue. Thermal expansion must be taken into account; not every glue can fail.
We suggest you familiarize yourself with How to make PVC panels on the wall
It is better to mount monolithic polycarbonate to a stove or countertop mechanically using washers.
Please check the availability of polycarbonate in the color range and thickness you need by calling: 8-029 676-38-61; 8-029 151-37-03; 8-029 873-06-40.
Polycarbonate comes in a variety of colors, so you can choose or make your own protective screen to match the style of your kitchen.
For those who do encounter heating in their kitchen furniture, there are two options for solving the problem. The first - the simplest, but not always feasible - involves a banal rearrangement: if the stove or oven does not come into contact with the set, the unpleasant consequences will disappear by themselves.
In small-sized kitchens, it is quite difficult to “outdo” the interior, so it is more logical to resort to the second method - independent thermal insulation. There are several materials suitable for this purpose:
Any of the listed products, provided they are secured between the device and furniture, can serve as an effective protective screen. The easiest way is to purchase a roll insulator with foil: it needs to be folded in half or three, adjusted to the dimensions of the adjacent wall of the cabinet/cabinet and securely secured with foil tape around the entire perimeter.
For the oven, it is optimal to use regular foil paired with basalt cardboard: the first is attached to the side of the appliance, the second - directly behind it. Fiberglass can be used as a fireproof layer if, for example, a sheet of aluminum is laid between equipment and furniture. Some users prefer to dismantle part of the countertop and the end sides of the set (directly adjacent to the stove) - non-combustible materials such as artificial stone or tempered glass are selected to replace them.
We invite you to familiarize yourself with the use of CBPB for flooring - options
Before testing any of the above approaches, you need to carefully study the instructions - some manufacturers clearly state that thermal protection strips prevent normal cooling of the device case, and therefore are categorically not recommended for installation.
2.7.2 Requirements for installation of heating equipment
For heating and hot water supply, we provide heating boilers designed to operate on gas fuel.
According to DBN V.2.5-20-2001, in one room of residential buildings it is not allowed to install more than two capacitive water heaters or two small heating boilers or two other types of heating gas equipment.
Gas burner devices for gas heating equipment that are installed in residential buildings are equipped with automatic safety and regulation that meets the requirements of section 11 DBN V.2.5-20-2001.
The installation of gas heating equipment with a total thermal power of up to 30 kW is allowed to be provided in the kitchen (regardless of the presence of a stove and instantaneous water heater) or in a separate room; the internal volume of the kitchen when installing heating equipment with exhaust of combustion products into the chimney must be 6 m3 more, provided for in 2.7.1.
The removal of combustion products from heating boilers with a thermal power of up to 30 kW is permitted through a chimney or through the outer wall of the building.
When installing heating boilers, the following requirements must be observed:
– distances from building structures of premises to household gas stoves and heating gas equipment should be provided in accordance with the passports of manufacturers, fire safety requirements, ease of installation, operation and repair and in accordance with the requirements of DBN V.2.5-20-2001.
The installation of wall-mounted gas equipment for heating and hot water supply should include:
- on walls made of non-combustible materials at a distance of at least 2 cm from the wall (including from the side wall);
- on walls made of slow-burning and combustible materials, insulated with non-combustible materials (roofing steel on an asbestos sheet with a thickness of at least 3 mm, plaster, etc.) at a distance of at least 3 cm from the wall (including from the side wall).
The insulation should protrude beyond the dimensions of the equipment body by 10 cm and 70 cm from above.
The clear distance from protruding parts of gas equipment along the front and in passage areas must be at least 1 m.
When deciding on the possibility of connecting gas appliances with the removal of combustion products to the chimney, as well as the removal of combustion products through the outer wall of the building, one should be guided by the data given in Appendix Zh DBN V.2.5-20-2001.
In this project, we select heating equipment with a hermetic combustion chamber, in which combustion air is taken in and gas combustion products are removed through the outer wall of the building.
Porcelain tiles, artificial stone
Durable and aesthetic, porcelain stoneware has all the necessary advantages: it is resistant to moisture and cleaning agents, and durable. The only thing in which this material is a little inferior to glass is that it is impossible to achieve that ideal smoothness on its surface, which simplifies maintenance. Even on polished porcelain stoneware slabs there are very thin seams where dirt will get in every now and then. And it is quite difficult to install due to its heavy weight. But everyone can afford to buy such a finish - the cost of a square of moisture-resistant tiles can be 400 or 4000 rubles.
You should differentiate which composite material you choose for your kitchen, as each may have certain properties. For example:
If you have chosen artificial stone or porcelain stoneware for an apron or protective screen, it is advisable that the finish completely matches the design of the countertop, otherwise you may not get a harmonious picture in the interior.
Insulation options
There are many non-combustible materials that can be used in this case. The easiest way to protect all surfaces from heat is to place a protective box around a red brick heat source. It is able to protect structures from heat and easily tolerates thermal effects. However, this decoration of the wall around the stove in the house looks a little unaesthetic and you can choose other materials:
- Porcelain tiles and tiles.
- Fiber cement boards.
- Factory-made protective screens.
- Metal sheets.
- Artificial or natural stone.
The easiest way to work is with a ready-made protective screen - you just need to select it according to size and install it on site. This option is also good because such finishing of walls near the stove or fireplace is done in the shortest possible time and without “dirty” or “wet” finishing work. The remaining options are more labor-intensive and have some nuances. Therefore, they need to be considered in more detail.
No. 9. Mirror: original, but troublesome
A mirrored apron will become a real highlight of any kitchen. It can visually significantly enlarge a room , so it is a good option for the smallest kitchens. The mirror is not afraid of moisture , and high temperatures, drops of fat, and detergents cannot harm it. This is a very original way of finishing that will transform the kitchen.
There are probably more disadvantages to a mirrored apron than advantages , although the issue must be considered individually in each specific case. The ability to reflect and double the area of the room can play a cruel joke: the amount of dirty dishes will also be doubled . There is often high humidity in the kitchen, so the mirror can fog up , and its appearance deteriorates. But the mirror will look much worse when it gets splashed with water and grease. Of course, it’s not difficult to wipe it down and put it in order, but such a procedure will have to be carried out constantly during active cooking.
Liquid soap
If you don’t have the time or desire to mix different components, you can simply apply a layer of liquid soap to the work surface. All the fat that gets on the stove during the cooking process simply will not have time to burn, so the surface can be easily washed off with a regular sponge. The role of the detergent will be performed by the previously applied liquid soap; you just need to rinse everything thoroughly with water.
Of all the listed methods, any housewife will find a suitable option for herself. These little tricks will help you forget forever about a thick layer of burnt fat and long cleanup after cooking dinner. At the same time, money will remain in the budget that was previously spent on purchasing many products for cleaning the stove.
Metal
This is truly reliable protection for walls from fire, especially if you have a gas stove. However, in all other respects, the practicality of metal screens tends to zero. Firstly, they are too thin and without a perfectly flat base they are easily pressed and deformed. Secondly, if it is an absolutely smooth surface without relief, the slightest traces of water and drops of fat will be very clearly visible, just like on glass.
As a rule, the sheets are attached directly to panels made of moisture-resistant FB plywood and hung on the wall in this form. The problem is that the bakelite substrate itself is not an environmentally friendly material and releases harmful formaldehydes into the air.
Splash suppressors
The simplest and cheapest way to help protect the stove from greasy splashes is splash traps in the form of a mesh lid. This device has never satisfied me with the level of protection. I think you too.
As soon as you lift the mesh above the frying pan, everything around is covered with greasy dots. Yes, a splash suppressor reduces the degree of contamination, but not the cleaning area.
There are two types of splash guards: like a regular lid, with a handle in the center, and like a small racket, with a handle on the side. I used both. I strongly do not recommend a sprinkler with a handle in the center. It becomes greasy during cooking.
Minuses:
copes 50%.
A simple device collects fat perfectly, it’s a pity that you have to lift it from the frying pan. And then, beware.
How to insulate a wooden wall from a steel stove?
Table of contents
1. Options for wall insulation
2. Wall insulation material
3. Examples of thermal insulation of a wooden wall
Installing a stove is a complex process and requires a lot of attention to each stage, from preparing the installation site to the nuances of removing the chimney pipe from the roof. In this article we will talk about how to properly insulate a wooden wall from a steel or cast iron stove. Any wood has a predisposition to ignition, so a constantly hot stove design can easily cause a fire. Any builder understands that insulating the wooden wall behind the stove is a mandatory process. Let's look at an example of installing a Bavaria stove-fireplace on a wooden floor next to a wooden wall. The furnace does not have a separate foundation, so a light base for a metal structure is required. The base for the stove will be laid out with bricks in one layer. In this case, wall insulation can be done in two versions: asbestos cement sheets or flame sheets (non-hot composition). There are several opinions about asbestos - sometimes they say that they emit toxic fumes. But flamm has its drawbacks: they have standard sheet sizes of 600x1200 mm, which can be inconvenient when working, and also in terms of price they do not beat asbestos cement at all.
Options for wall insulation
The width of a particular oven is 720 mm. As a result, it turns out that horizontal sheets need to be installed - you will need four sheets to the ceiling, it turns out that they can cover the upper part of the room - there is a beautiful partition there. There are several other options on how to proceed: get rid of the existing partition, replace it with a fireproof one and cover it with tiles or stone. You can also place a screen and use a circular saw to remove the wood on the partition completely. Next, finish with tiles, plaster or paint. There is no doubt that the tree needs to be removed. After all, if you cover it with non-flammable materials on top, there is still a chance that the wooden surface will ignite. In this case, it is better not to take risks and remove the partition from wood. Thermal radiation from the oven will not only be from the back wall. Lateral radiation will also emit radiation onto the wall at a distance of 0.8-1 meter. You should carefully read the installation instructions - the manufacturer describes everything very clearly there, including what concerns safety. For example, when a stove with a glass door is on and there is a chair next to it, it is better to move it further away (more than 1 meter).
Initially, the base for the stove was supposed to be one brick thick, but such a thickness for a wooden floor is not very good. Regarding the non-combustible partition, you should also note the importance of the situation - where the chimney will go, at what distance from the beams, walls and rafters. In the area of this Bavaria stove, it is best to use a concrete slab as a base - lay it along the beams, flush with the floors or a little more - it will turn out like a podium, reliable and ensuring safety. However, the bottom of this stove practically does not warm up; there is an additional part for firewood, which takes on the heat. Therefore, you can make it simpler - lay mineralite or CSP on the floor, then tiles or porcelain tiles on mastic or hot melt adhesive. In places where the chimney pipe is laid, you can use basalt, non-flammable or kaolin wool. Cotton wool plays the role of additional insulation and is placed in the ceiling section. In this case, you should make an opening in the ceiling - in accordance with safety standards - from the contour of the two-layer pipe - sandwich, 250 mm in different directions. The furnace cutting should be made of non-combustible materials - superisol, mineralite, calcium silicate, vermiculite. When passing through a chimney pipe, the groove should be filled with cotton wool.
It is, of course, very difficult to get rid of a beautiful partition, because it was built for aesthetics, a lot of time was spent on it, but if it was decided to install a metal stove against this wall, then you should get rid of the additional threat of fire of wooden parts.
Wall insulation material
Facing materials are often made from cement, the complete hardening of which can take several years. As a result, even after the work has been completed, changes in size, bends and deflections may be observed. Some manufacturing companies (for example,), use an effective and efficient method of keeping facing materials in an autoclave in a high-temperature, high-pressure oven. And it turns out that shrinkage due to drying and expansion by exposure to heat can be avoided, and reliable strength is also ensured.
Those same Nitikha panels are made from fiber cement, a universal material that consists of 90% cement and 10% cellulose fibers and various mineral fillers. In this case, technology without the use of asbestos is used by pressing the ingredients.
Panels of this type are environmentally friendly; their production does not use formaldehyde resins, chlorine compounds or asbestos. Fiber cement has excellent fire-resistant properties; it fully fits into the category of non-combustible materials. Fiber cement siding has many advantages, including the fact that it can easily be used to select various design variations, and it is also easy to install. Instead of mineralite, you can also use glass magnetic sheets - this is a more budget option.
Examples of thermal insulation of a wooden wall
Here's another example of making a fire-resistant wall located behind the fireplace:
The decorative panels available are slightly flammable according to the fire classification. It turns out that only a 5 mm layer of basalt cardboard really protects the wall from fire. However, the oven is convection in nature and its outer surface does not heat up much. If you follow the manufacturer's instructions, it will not heat up more than 60 degrees. But you can't help but worry about safety. For example, even in summer, on the facade of the stove on the south side, it is worth measuring the temperature of the outer surface, and its value may greatly surprise you.
You can pay attention to the color of the first mono-pipe; the most furnace heat emanates from it. From the floor to the sandwich pipe, the wall should be reliably covered with super-insulation, especially since the stove is installed close to the wooden partition. In this case, when thermally insulating the partition, you should also pay attention to the cutting.
You also need to be careful about fiber cement boards; they come in two types: moisture-resistant for the facade and for landscaping fire-resistant partitions (the second option is gray in color, there is no paint or pattern).
Minerite panels, painted with acrylic (sometimes even in several layers, 5-6), belong to the category of low flammability and low combustion support. Because of the acrylic, the entire slab cannot be classified as “non-flammable”, and this is very bad; such panels, supposedly resistant to fire, are often used just when it is necessary to insulate wooden walls behind the stove - mineralite panels coated with acrylic look It’s beautiful, but, unfortunately, it won’t reliably save you from a fire.
If it suddenly turns out that you bought mineralite coated with acrylic, then you need to get rid of such “protection” of the wall. You should dismantle the panels - this is not difficult, in their place you glue gray classic mineralite onto a galvanized profile, and then terracotta tiles are glued onto it using heat-resistant tile adhesive. With such reliable thermal insulation you can sleep peacefully.
If the oven is operating normally, nothing should happen in any way. But the fire safety measures specified in the stove manufacturer’s passport must be observed. The distances to fireproof and combustible structures are clearly stated there. Gypsum is a good heat insulator, but its features should be taken into account. If the wall is wooden and gypsum board is attached close to it, therefore, when it is heated, dampness will form behind it, since the wall is cold. The wall itself also shakes - the tree always lives its own life at different humidity levels and temperature fluctuations in the environment. The profile is necessary not only to create an air ventilation channel behind it, but also for the durability of the entire structure. The tile adhesive needed here is one that is suitable for heated floors.
It is imperative to take into account fire safety standards when installing important distances. If you calculate the distance from the metal firebox to the wall, then it is more logical to add another 65 mm to such offsets - this is the thickness of the brick, which any metal stove does not have.
It turns out that the open setback to the unprotected wooden part is 320 mm (+65 mm), resulting in 385 mm - this is the minimum value.
To the protected wooden part 260 mm (+65 mm), and a minimum of 325 mm is obtained.
With a metal chimney things are much simpler. A sandwich with 50 mm insulation is already approaching the edge-on distance of a brick, that is, when passing the floor between the floors of such a pipe and without filling the foam with non-combustible materials and completely open for control, the following important distances must be maintained (from the outer wall of such a pipe):
To an unprotected wooden wall 320 mm (+ 15 mm), resulting in a minimum of 335 mm.
To a protected wooden wall 260 mm (+ 15 mm), resulting in a minimum of 275 mm.
If you are making an interfloor polyurethane foam completely closed and filled with any non-combustible materials (from pipes to wood), it becomes not a retreat, but a cutting, and accordingly, the minimum distances change:
- minimum 500 mm from smoke to an unprotected wooden panel;
— to a protected wooden panel 380 mm from smoke at least. That is, with a sandwich insulation thickness of 50 mm - 330 mm from the outer contour to the protected joist. As for the roof passage, the distance of 130 mm to the sheathing and rafter part is taken into account from the wall of the brick chimney of 120 mm. That is, from the smoke to the protected sheathing and rafters there should be a minimum of 250 mm.
The simplest option for protecting wood is basalt cardboard and a metal sheet.
Covering bathhouse walls with non-combustible insulating materials
To prevent the walls from overheating, you can use materials with increased thermal insulation properties and inertness to high temperatures. Two types of materials are used:
- reflective;
- fireproof with lining.
The first type includes materials for wall cladding, consisting of thermal insulation with fire-resistant properties and a metal covering in the form of a sheet.
Insulating walls with reflective sheathing
A protective cake with reflective materials is done this way. First, the thermal insulation is attached using ceramic bushings directly to the wooden walls, then it is sewn up with a stainless steel sheet.
Advice! It is better not to use galvanized metal, since heating may release heavy metals harmful to the human body.
Stainless steel with a polished surface reflects the heat flow inside the steam room, reducing heat loss. In this case, reflected heat is more useful than direct heat. For thermal insulation use:
- basalt cardboard or cotton wool, the only material with increased hygroscopicity, non-flammable, environmentally friendly;
- asbestos cardboard, which reliably protects against flames and has a long service life;
- mineralite, an artificial material made specifically for these purposes.
Protective sheathing requires ventilation gaps of 2 cm from the wall to the insulation, 2 cm from the insulation to the steel sheet. If it is necessary to install the stove as close to the wall as possible, make a double skin of non-combustible insulation, use ceramic bushings to maintain gaps of 2-3 cm and sew them up with a steel sheet.
Insulation with cladding
Measures to protect walls with cladding are necessary in order to preserve the interior decoration of the room. They are more expensive, but no one has canceled the aesthetic advantages of the bathhouse. It is based on tile cladding, which is laid on fire-resistant cladding made of gypsum plasterboard, non-deformable gypsum-based cardboard with fiberglass, mineralite, non-flammable cement-fiber material, moisture-resistant and resistant to biochemical influences, LSU, fiberglass material bound with magnesium additives, resistant to high temperatures, high humidity. Heat-resistant glue is used for installation.
Advice! Use heat-resistant reinforced Terracotta glue, made from fireclay dust bound with kaolin additives, intended for tiling stoves, fireplaces, and all heated surfaces.
The recommended facing materials are quite varied, the best of them are:
- terracotta tiles, they are made from specially fired clay, which gives increased heat resistance and durability;
- clinker, denser clay tiles with a surface of various colors, similar to facing bricks;
- tiles, also made from clay, having an original embossed surface;
- porcelain stoneware made from a mixture of clays, kaolins, quartz sand, feldspars by high-temperature firing under a pressure of 400-500 kg/cm², with imitation of stone, wood, durable artificial material;
- soap chloride, a rock mineral consisting of talc, magnesite and chlorite, an environmentally friendly natural material that does not absorb moisture at all, has an attractive appearance, does not crumble, and is not afraid of high temperatures.
Advice! Use soap chloride to finish the steam room, this mineral has a healing effect on the human body, regulates blood pressure, stimulates cerebral circulation, expels viruses and microbes due to the release of vitamin D when heated.
All of the listed tiles are an element of protection that forms a cake, the basis of which is a fire-resistant material. Just like a screen, sheet material is installed on ceramic bushings with a gap of 2-3 cm from the wall. The minimum distance to the heat source from the tile should be 20cm.
Protection with cladding decorates the room, creates a positive mood, and helps to increase the efficiency of procedures. And most importantly, properly installed insulation prevents wooden walls from overheating and catching fire. Have a nice steam!
How to make your kitchen safe? Vital rules
Everyone knows that the kitchen is a high-risk area. A large number of electrical appliances, gas and open fire of a gas stove or the risk of burns from electric, piercing and cutting objects. Cooking in the kitchen requires you to be attentive and follow some basic rules. However, work on safety begins at the moment of planning the future kitchen. Everything is important: where and how the cabinets are hung, the distances between objects, finishing materials and much more.
Related article: The warmest insulation for walls
Plastic panels on the ceiling in the kitchen
Let's mention the other advantages of using plastic to finish the ceiling in the kitchen:
- simple and quick installation
- practicality of use
- durability of the structure
- environmental Safety
- a large number of variations in length and width
- immunity to high humidity
- easy care using non-abrasive products
A common version of plastic panels is rack type. These are narrow and long panels that create a pleasant atmosphere in your room and easily fit into even the most complex interior.
Also, white plastic has one significant drawback - it is the fairly rapid appearance of yellowness as a result of prolonged and regular exposure to ultraviolet rays. Unfortunately, this color deformation cannot be corrected.
Otherwise, this is a current, inexpensive and very reliable option for the kitchen.
Kitchen finishing
Let's start from the very beginning: when there is no furniture in the kitchen yet, but the walls and floor are being decorated. The floor in the kitchen should not only be easy to clean and moisture-resistant, but also easy to move. When choosing flooring, choose flat surfaces with good grip. Textured tiles will be difficult to clean, and glossy tiles can cause you to slip and get injured.
Correctly decorating the walls is most important in the apron area. In addition to splashes from the stove and water, the walls in this area will be affected by temperature. If the wall is covered with tiles, glass or other heat-resistant material, everything is fine, but if the material is flammable (for example, PVC wall panels), you need to install additional protection. This is especially true for kitchens with a gas stove. Please note that the protective screen should not be adjacent to the wall so that the heat is not transferred to the surface behind it. Original ideas for kitchen aprons are here.
Decorating an apron in a kitchen in a wooden house: photo
If the house is made of wood, the work area should be designed in accordance with the interior. Some interesting ideas are easy to implement on your own:
- Leave the wall as is, only treat the space above the work area with a special moisture-repellent composition that will not allow oil to be absorbed and will ensure easy cleaning.
- Cover the surface with transparent glass. Use an unbreakable option, first think about how to secure it to ensure reliability.
- Attach an imitation timber or block house to the surface. Then the apron will look like a wooden wall and create a unique atmosphere of a log house. Be sure to treat the elements with a protective compound.
You can cover wooden surfaces with artificial stone slabs; they match perfectly and are ideal for use in the work area. You can only cover the areas around the stove and sink; there is no particular need to protect the rest.
You can decorate your kitchen backsplash in a modern and inexpensive way, even without using ceramic tiles. Use the recommendations from the review or come up with your own options based on ready-made examples.
Safety rules when choosing material
The most important thing in the design of a kitchen space is the correct choice of material for finishing the wall behind the stove, especially if the kitchen has gas equipment. In addition to splashes from cooking, this wall will be exposed to high temperatures.
Therefore, it is important that there is a heat-resistant material behind the stove. In this regard, ceramic tiles, glass, and metal have proven themselves well.
If the choice fell, for example, on MDF or PVC panels, then you should know that flammable materials cannot be installed in close proximity to gas burners, so that such a decision does not result in a fire.
Foam plastic, cork, chipboard, plasterboard and many others can be used as thermal insulation material. The choice will depend on your financial capabilities
Also, do not forget that it is highly undesirable to place a refrigerator next to a gas stove. If such a proximity is inevitable, then it is worth laying a heat-resistant partition between the devices.
Insulating material is placed between the refrigerator and the stove. Insulation can save refrigeration equipment from overheating, but will not provide protection from grease.
Care Tips
In houses with stove heating, maintaining the stove and fences that protect the combustible structures of the house from overheating in good condition is the key to trouble-free living for its owners. Fire is no joke, and there are no trifles in observing fire safety rules! If they say that a sheet of metal measuring 500x700 mm is needed in front of the furnace loading door, it should be there!
Every year, before the start of the heating season, you should check the condition of the heating appliances at home. It is necessary to check whether the heat-resistant plaster of the stove is damaged, whether there are cracks in the chimney, or whether the facing tiles have fallen off. All identified defects must be corrected in a timely manner.
Communications
New and well-laid pipes and good plumbing are the key to the absence of breakthroughs. In any case, make it possible to easily and quickly access the communications under the sink and install additional valves there so that in case of emergency the water can be quickly shut off in this particular area.
If the apartment uses gas, entrust the replacement of the hose and connection of the stove to a professional. If you decide to replace it yourself, lubricate the joints with soapy water to make sure there are no bubbles and no leaks.
Electrical is also very important. It is ideal to connect the entire kitchen to a separate machine, that is, isolate it from the rest of the wiring in the apartment. Many appliances, such as electric stoves and ovens, dishwashers, some microwaves and even kettles require a power cable. Be sure to consult with an electrician to understand which devices can be combined into one network, and which ones will lead to overload and the plugs will constantly be knocked out. Place external sockets away from the sink and stove.
Where to contact?
To officially change the stove to a more modern model, you will need to:
- buy a unit;
- contact a gas company that has an SRO certificate, that is, permission to install gas equipment in a residential building.
Private gas services most often offer their services at affordable prices. After installing a new stove, it will be necessary to register it with Gosgaz. Employees from licensed companies are also authorized to make entries in the passport of the new gas unit
It is most rational to call a gas specialist from the municipal gas organization, because the fewer intermediaries in this important matter, the better
There is a certain procedure for replacing slabs in private households. In megacities, there are city programs according to which all gas stoves must be modernized. Often such operations are implemented at the expense of municipal budgets (Moscow, St. Petersburg, Nizhny Novgorod).
- if the slab is on the balance sheet of municipal or state organizations;
- if the homeowner has benefits, being a hero of Russia or the Soviet Union, a participant in the Great Patriotic War;
- slabs are also changed for elderly people who do not receive any subsidies;
- poor citizens whose income is below the minimum wage;
- citizens who live in non-privatized households under a social tenancy agreement.
Before starting operation of the stove, you should draw up a document “On technical inspection”. It is also called a “defective statement”. It is usually compiled in several copies. It should contain the following entries:
- about existing faults;
- operating time of this device.
After analyzing the annual preventive inspections of the slab, a final document is drawn up. Then an application is made to the DEZ, which indicates the request for a replacement. The DEZ employee must put the homeowner in line to replace the gas appliance.
To make the replacement yourself, you need to take the following steps:
- submit an application to the REU of the city gas service, where you should indicate a request to replace the unit;
- a specialist will arrive from this organization, who will assess the amount of work to be done and issue an invoice;
- if the homeowner installed the stove himself, he is obliged to write a request for permission to connect it;
- after the invoice is received, it should be paid and an agreed time for the master to come and do his work;
- After installation, a corresponding mark must be placed in the gas stove passport.
Kitchen set
When planning a kitchen set, you need to maintain the minimum permissible distances between electrical appliances and water sources. If you are making a kitchen to order, the specialist will have to take them into account. If you are planning a purchase, for example, from IKEA and use their kitchen planner, there are text tips there. Read my personal experience of planning a kitchen at IKEA here.
Basic principles: Do not place a stove and refrigerator in close proximity, or a stove and a sink. It is also recommended to make a spacer between the oven and the dishwasher.
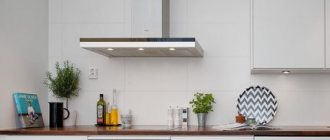
Cabinets cannot be hung above the stove unless they contain a built-in hood. For the hood to work effectively, it must be placed at a distance of 70-75 cm (electric stove) and 75-80 cm (gas stove). It is not advisable for the corners of the hood to protrude in front of the wall cabinets; there is a risk of constantly hitting your head against them.
If you are attaching wall cabinets to modern, solid walls, use fasteners recommended by the manufacturer and no problems will arise. Old walls of Stalin and Khrushchev buildings may require additional fastening. Pay due attention to the fasteners, even if you are hanging open shelves - each of them has a maximum weight that they are ready to withstand. If the shelves are overloaded or not fastened firmly enough, they can collapse, even if not on someone’s head.
The height of the wall cabinets depends on their depth and the height of the person who will cook. The optimal distance is 45-55 cm from the tabletop. A lower placement will cover part of the countertop. Deep cabinets especially need to be hung higher, but within sight, so as not to hit your head on them when bending over the work surface.
Before ordering a custom kitchen, to be on the safe side, draw out all future elements directly on the wall. When applying cardboard of the required width, see what the depth of the elements will be and whether it will be comfortable for you. Because in this case, it is comfort that ensures safety.
Mandatory conditions for transfer approval
As mentioned above, moving a gas stove requires approval, and in some cases the transfer is not possible at all.
Thus, it is forbidden to create a kitchen in any other living room. If you do not coordinate the redevelopment, then all this can threaten with fines and litigation, as a result of which, if the court decisions are not followed, you could lose the apartment altogether. Therefore, even if you are planning to move the gas supply to the household gas stove in the apartment, this step must be agreed upon.
We recommend that you familiarize yourself with the penalties for violating safety rules when using gas equipment.
A range hood is a necessary element in a kitchen where a lot of cooking is done. But when installing it, it is necessary to comply with a number of conditions: compliance with the established distances from the stove to the hood, compliance of the hood power with the kitchen area
However, there are a couple of redevelopment options that are usually approved and can be completed.
To transfer a gas stove to another non-residential room, several conditions must be met:
- the room where the gas stove will be located must be isolated from other living spaces;
- natural light is required;
- the gas pipe leading to the stove should not be routed through residential premises;
- connecting the ventilation duct from the main house exhaust ventilation.
Thus, fulfilling these requirements will guarantee that the redevelopment project will be approved.
It is worth noting that in apartments located on the first and second floors, where there are no other living quarters below, it is possible to move a gas stove to any other room, the main thing is that the conditions written above are met.