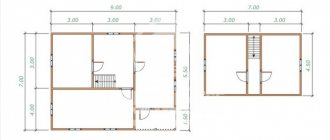
Only a true housewife and owner can preserve the warmth of the family hearth - this requires patience, experience, dexterity and love for your home. As for physical heat, it all depends on the materials chosen, a well-thought-out heating system and thermal insulation of the house.
Properly designed communications and installation of thermal insulation will provide the dacha with protection from cold winds and frosts in winter, giving a comfortable atmosphere in the rooms. In addition, good thermal insulation of the cottage will help you save on heating and electricity bills.
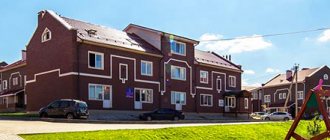
If you have seriously decided to extend your dacha season into the winter months, don’t hesitate - insulate your dacha! In order to do this as quickly as possible and with your own hands, there are several simple techniques. These secrets will help you relax in warmth and comfort at your dacha all year round.
However, we note that there are two difficulties in this matter. First, it is important to choose the right materials. Secondly, it is important to check everything before the cold weather sets in. We will talk about these and other nuances in this article.
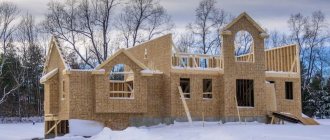
Insulation of the dacha
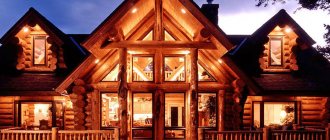
The design of a country house is usually intended to be used during the warm season. The main task is protection from precipitation, wind and dust.
During the cold season, it becomes impossible to live in a country house; it is not able to sufficiently provide a comfortable temperature. You have to constantly heat the stove or boiler, keep electric heaters on, which creates increased consumption of energy, fuel and, accordingly, money.
Let's look at how to insulate a country house for winter living and solve the problem with your own hands.
Why insulate?
Insulating a country house for year-round use automatically turns it into a full-fledged home. The fashion for country houses has been around for quite some time, and insulating a dacha makes it possible to acquire such a home relatively inexpensively and easily. The possibility of year-round living outside the city limits, in the fresh air, is attractive to most owners of country houses.
In addition to considerations of economy, insulating a country house with your own hands has another, more important reason. When people live permanently, the house develops its own atmosphere, saturated with water vapor. They appear due to cooking, using the bathroom, toilet. But the main amount of steam appears due to people's breathing. The steam that comes out of your mouth in the cold is also released when you breathe in warm rooms, it’s just not visible. In the internal atmosphere of a house, steam is under a certain pressure, which is called partial pressure. Normally, this moisture is gradually pressed through the walls and removed outside, evaporating from the outer surface of the walls.
If the structure of the house is not designed for living in winter, the surfaces of the walls are not able to retain heat. They are constantly cold, which causes steam to condense on them. The walls get wet, become saturated with water, freeze on the outside and begin to collapse. Metal elements begin to rust and fail.
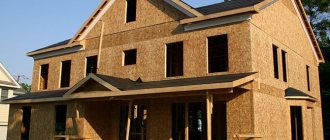
Insulating the dacha for winter living will help to avoid this, which consists of installing a heat insulator on the surface of the external walls, ceilings, floor and (if required) roof.
How to insulate a garden house for the winter
The most practical materials for thermal insulation of a summer house are basalt materials, expanded polystyrene or foam plex boards. Expanded polystyrene should be used for self-insulation of foundations and blind areas.
Penoplex boards are a dense and durable material that is not afraid of high humidity, however, these materials can emit harmful substances.
Insulation of a garden house for winter living
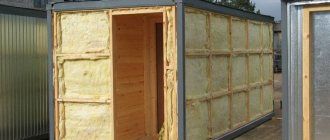
When using mineral wool, high-quality vapor barrier is required on the side of the warm room.
When laying, mineral insulation materials should be placed tightly into the frame. It is believed that mineral wool is not eaten by rodents and is environmentally safe for humans. In order for the thermal insulation layer to be optimal, you should first calculate the thickness of the wall insulation using a thermal calculator.
Materials for thermal insulation
To insulate the outside of a country house with your own hands, various materials can be used:
- hard (slab). These include polystyrene foam, penoplex, basalt mineral wool, etc.
- roll . In most cases, these are various types of mineral wool, of which there are several dozen.
- sprayed _ Polyurethane foam, ecowool
- bulk . Expanded clay, vermiculite, sawdust, polystyrene foam granules, etc.
The main indicator characterizing a heat insulator is vapor permeability . Exist:
- permeable materials - mineral wool, all loose types, ecowool, etc.
- impermeable types - polystyrene foam, penoplex, polyurethane foam, penofol and other synthetic types of insulators
In addition, important indicators for heat insulators are:
- heat permeability The lower it is, the better the material is able to retain thermal energy.
- ability to burn . Most heat insulators either do not burn at all or are subject to appropriate procedures during manufacture. At the same time, the possibility of combustion may remain. For example, polystyrene foam does not support combustion , since its granules are filled with carbon dioxide. At the same time, a puddle of molten polystyrene burns quite well
- the ability to hold its shape and not change its linear dimensions over time. If the insulator changes size or shape after several years of operation, so-called problems occur. cold bridges that contribute to wet walls and corrosion of metal parts
- high temperature resistance
- resistance to moisture , hygroscopicity. In this regard, mineral wool, which requires the installation of protective films, lags noticeably behind.
- biologically neutral . The insulator must not rot, support the growth of mold or mildew, or support insects or rodents.
The most common are mineral wool and polystyrene foam. This is due to high performance, relatively low cost and availability. Recently, materials made from polyethylene foam have been actively developed, which are absolutely resistant to moisture and biological manifestations.
The choice is usually determined by price and the user’s general ideas about a particular material, its qualities and properties. For those wishing to insulate a country house for winter living, price is of considerable importance , which often predetermines the choice of material to the detriment of the quality of work. When deciding how and with what material to insulate a country house, you need to take into account the specifics of the operation of a particular insulator and have an idea of the physical processes occurring in the structures of the house.
Penofol or penoplex
There is no point in comparing these two materials with those discussed above, since their price is superior to both foam plastic and mineral wool. Speaking about them, we note that penofol and penoplex are modern thermal insulation materials that are distinguished by excellent performance characteristics. Especially in this regard, penofol stands out, which experts call combined because it has three layers in its structure:
- waterproofing;
- thermal insulation;
- vapor barrier.
When installing penofol, they resort to the use of a special adhesive composition. But to install penoplex on the surface, special fasteners are used - fungal screws. You should know that penoplex is a panel with a smooth and even surface, which facilitates the process of laying finishing material on top of it.
How best to insulate
There are two ways:
- insulation of a country house from the inside
- insulation of a country house from the outside
External insulation is considered the most effective and preferable option. It consists of installing a heat insulator on the outside of the walls and has many advantages:
- The inner surface of the walls is kept intact , which allows you to finish it in any way, install hanging furniture or household appliances
- all conditions are maintained for the unhindered release of water vapor , the durability and safety of wall materials and structures is ensured
- walls are included in the thermal contour of the building, which contributes to more efficient operation
The disadvantages of external insulation include:
- work cannot be carried out in frost , rain or darkness
- not all types of insulation are suitable for outdoor installation
Insulation from the inside involves installing heat insulators on the inside. The room becomes as if enclosed in a cocoon of insulating material installed on all external walls. The disadvantages of this method are:
- the escape of steam through the walls becomes more difficult or even
- the surface of the walls is covered with insulation, requiring the installation of protective sheathing or another layer
- installation of hanging objects on the walls is excluded
- the volume of rooms is reduced
- external walls are excluded from the thermal contour , remaining only mechanical fences
The advantages include:
- ability to carry out work at any time or in any weather
- there is free access to any surfaces
The main difference between these methods is the steam output mode. With external insulation, it passes through the wall, enters the insulation, from where it is removed outside. It is necessary to use a vapor-permeable insulator, the most successful option of which is mineral wool. With internal insulation, steam escape becomes almost impossible. If an impermeable insulator is used, cutoff occurs. If mineral wool is installed, then the steam passing through it ends up in front of the wall. Its permeability is lower than that of the insulator, so steam accumulates in the thickness of the insulation, the material becomes wet and loses its working qualities.
Vapor permeability rule
There is a rule according to which the vapor permeability of materials should increase in the direction from inside to outside. According to him, installing an impermeable insulator on the outside will “lock” the vapors inside the wall, causing it to become wet and begin to deteriorate.
At the same time, installing permeable material on the inside will create conditions for vapor absorption by the insulator, but will prevent passage through the wall. Guided by this rule, you can avoid common mistakes when choosing and installing heat insulators.
When choosing an installation method, you should definitely prefer the outdoor option. However, sometimes you have to choose internal insulation if there is no possibility or access to the surface of the walls. For example, you cannot disturb the architecture of the house, or the walls are located too close to the neighboring building, etc. When choosing internal insulation , you should immediately take care of creating a high-quality ventilation system . The removal of internal air will remove steam, which will eliminate the problem of excessive air humidity.
Technical characteristics of insulation
All insulation materials have their own technical characteristics, which can affect the ease of installation and their heat-saving properties; to make the right choice, you should familiarize yourself with them.
Types and properties of mineral wool
The class of mineral wools includes glass wool, stone wool, and slag wool. All of them have one common characteristic - they are the finest fibers, which, due to their structure, can guarantee a high level of thermal insulation.
All mineral wools are highly hygroscopic, so it is important to use waterproofing during installation. When working with mineral wool, you must follow safety rules
Properties of polyurethane foam
In its rigid (frozen) form, polyurethane foam has the lowest thermal conductivity of all insulation materials, and it does not require such a large layer as for mineral wool or penoplex.
In addition, this type of insulation is very light, you do not need to use additional devices to attach it, it is simply sprayed onto the surface. This monolithic coating guarantees the absence of cold bridges; the material is environmentally friendly and durable.
Related article:
Insulation technology
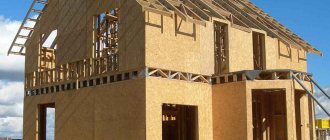
Installation methods for different materials have their own characteristics, but the general procedure remains the same. In addition to vapor permeability, it is necessary to take into account the material of the walls and ceilings in order to select the most suitable thermal insulator. In addition, insulating the walls of a country house will not completely solve the problem.
It will also be necessary to insulate the floor in the dacha from below or above, as well as insulate the ceiling and, if necessary, the roof. Typically, an insulator is installed on the roof in order to make the attic a full-fledged living space.
All work is carried out after appropriate preparation, which consists of removing hanging elements, brackets and other foreign parts from the surfaces. Contaminants are cleaned, crumbling or peeling areas are completely removed. The old coating or layer of paint is removed, if possible.
Gaps or cracks are sealed with putty or solid plaster. After this, the surface is covered with a double layer of deep penetration primer, after which you can proceed to the direct installation of the insulation.
Insulation of floors on the ground
Do-it-yourself floor insulation in a country house is done in accordance with the material or design of the floor slab. Country houses are usually built with floors laid at a low height above ground level or, as they say, on the ground. The proximity to the soil creates high humidity at the lower level of the house; the floor surface is constantly cold, which contributes to moisture condensation.
When insulating the floor in a dacha with your own hands on the ground, you must sequentially perform the following steps:
- remove boardwalk and joists
- level the base soil, compact it
- pour a layer of sand about 20 cm (thickness depends on the level of the floor, existing or desired)
- pour a layer of crushed stone, compact it well, add 305 cm of sand and also compact it tightly
- lay geotextiles and a layer of vapor barrier film on top of it
- lay a layer of insulation. Optimally - extruded polystyrene foam (penoplex), but also a good option is insulating the floor in the country house with expanded clay. It is poured in a layer of 20 cm
- pour a layer of screed 5 cm thick or more, depending on the desired floor level
After the screed has dried, either the floor covering is laid or a heated floor is installed.
Ceiling above the basement and attic
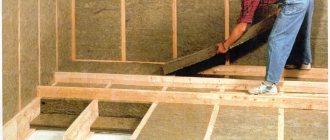
Insulation of the floor in a country house located above an unheated basement is best done from below, from the subfloor side.
A layer of vapor-permeable insulation (mineral wool) is installed on the surface of the prepared floor slab. Since the insulator will need to be protected from moisture , you will first need to install lathing with a thickness of bars no less than the thickness of the heat insulator. The sheathing pitch (the distance between adjacent planks) corresponds to the width of the insulation.
The gaps are tightly filled with insulator , all cracks are filled with polyurethane foam. Then a layer of vapor-waterproofing membrane is installed with the exit down (to the basement), after which you can begin installing the sheathing.
It is optimal to insulate the ceiling of a country house from the outside, from the attic.
The best way is to install high sheathing, fill the resulting cells with expanded clay , and lay plank flooring that allows you to move freely around the attic. It's inexpensive and fast. Alternatively, you can lay a layer of mineral wool.
The use of polystyrene foam or penoplex is allowed only if the attic is residential and heated. Otherwise, the ceiling will get wet and rot.
Wall insulation
There are two ways to insulate the walls at your dacha yourself - from the inside or the outside. We have already examined the advantages and disadvantages of these methods; now we will determine the procedure.
Preparation
Work on insulating the facade of a dacha from the outside begins with preparation - cleaning the walls of all foreign elements, removing cladding or old coating, crumbling or peeling areas. Detected cracks or potholes must be puttied or plastered; the surface is primed with a double layer of primer (deep penetration primer).
Lathing
After this, you need to install the sheathing. First, the outermost vertical strips are installed, aligned vertically and by distance from the wall surface. Then control cords are stretched between them, along which the remaining strips are installed in increments equal to the size of the insulation.
Installation of insulation
Slabs or cut pieces of insulation (mineral wool) are inserted between the sheathing strips. A layer of vapor-waterproofing membrane is installed on top of the insulator with moisture escaping to the outside (you must carefully monitor which side the film is unfolded).
Then horizontal strips for the lining are installed or siding is installed.
Internal option
Insulating a country house from the inside with your own hands is somewhat easier. Heat insulating boards (foam plastic or penoplex) are glued onto the prepared surface of the external wall . As an adhesive composition, you can use a mixture for laying ceramic tiles. The insulator is glued and additionally fixed with special dowels with a wide plastic washer.
After installing the insulation, a reinforcing mesh is attached to its surface with brackets and a layer of plaster is applied.
Mansard roof
If you need to create a full-fledged living space from the attic, you need to insulate the roof. The only available option is to insulate the attic roof from the inside. To do this, you need to install a heat insulator on the lathing layer that supports the roof covering.
A sheathing is installed, between the slats of which heat insulation mats are inserted. It is recommended to use impermeable types of material. All cracks are filled with polyurethane foam. After installing the insulator, sheathing made of clapboard, OSB, chipboard or plywood is installed on the ribs of the sheathing. The choice depends on the type of interior decoration of the attic, since sheet materials allow for more finishing options than lining.
Mineral wool
In the manufacture of this heat insulator, rocks of the basalt group are used as the main raw material.
This is precisely why this type of insulation is often called basalt wool. In addition to these raw materials, blast furnace slag is often used to produce the material. You can compare mineral wool with such a well-known material as asbestos. But unlike it, mineral wool slabs are harmless to human health. Currently, this material is one of the most popular on the market. Its demand was largely due to its high thermal insulation properties and high coefficient of moisture protection. Note that the material is characterized by excellent thermal insulation properties, but in the case of mineral wool they have dual characteristics. Firstly, this insulation is used to protect against cold penetration into the room.
Secondly, it provides thermal protection, that is, when the need arises to retain heat. For example, when performing work on insulating boilers and pipelines, where heat loss needs to be minimized, it is often used.
This use of this material was made possible due to the fact that it can withstand temperatures up to + 800 degrees Celsius. Mineral wool melts, but does not support the combustion process. This is also possible with
Types of edge profile (molding)
In addition to the laminate, the most important element of the staircase trim is the edge profile or molding. This is the name given to the overlay convex strip that is used to decorate the edge corner of the step. What is the function of molding? Everything is very simple. When finishing the stairs, two laminate strips laid on the tread and riser are joined together. An unaesthetic corner is formed, exposing the cross-section of two lamellas. To cover this joint and at the same time strengthen the strength of the laminate, edge profiles are used. They are placed on top of the joint and secured with glue or self-tapping screws.
Ordinary metal L-shaped metal thresholds are often used as an edge profile. They are also called staircases. These thresholds can be made of aluminum, steel, brass. Paintings like gold, bronze, steel or wood are popular.
Metal moldings have more than just a decorative effect. They protect the edges of the steps from wear. In addition, the surface of such a profile is often corrugated and this gives the surface of the steps an additional anti-slip effect.
Plastic thresholds - have the form of corners of different shades. You can easily match the color to your existing laminate flooring. Plastic thresholds ideally protect the edges of steps, form an even angle, and hide unevenness. They differ from other staircase thresholds at a low price
They are attached mainly with glue, so when installing plastic thresholds, special attention should be paid to choosing high-quality durable glue
Wooden sills are another option. Such thresholds go well with laminate flooring and have a long shelf life (in addition, they can be easily repaired - sanded, puttyed, painted). The disadvantage of wooden moldings is their high price. Fastening is done either with glue or with self-tapping screws (bolts).
In addition to the usual corner thresholds, there are also special laminated profiles attached to the steps using metal guides. For example, similar Incizo profiles from Quick Step (Belgium) are widely known. To install such a profile, a special L-shaped aluminum strip is used, available in several standard sizes (the height of the strip from Quick Step is 7, 8 and 9.5 cm).
To install this type of edge profile, a metal guide strip is attached to the surface of the step using screws. And then, a laminated profile is inserted into its grooves (with glue). In this way, the fixation of the profile is as strong as possible, while it is possible to do without metal fastening elements visible on the surface.
Window
After insulating the walls, we move on to the windows. They also lead to significant heat loss, so close attention should be paid to windows, especially if the design is outdated.
Cleaning and waterproofing
The frames of the house should be thoroughly cleaned of dust, cracked glass should be replaced, and the gaps between the walls and frames should be sealed.
For high-quality insulation you will need silicone sealant in a special gun. It reliably protects joints from the inside from fungi and mold.
Polyurethane foam will also work. However, it quickly deteriorates from the sun and is not entirely aesthetically pleasing. If you choose foam, you will have to take measures to protect it from ultraviolet rays.
D-profile tape
Then you need to glue the sealing tape. D-profile tape is best suited. It effectively closes gaps up to 7 mm. For a more secure fixation, you can secure the tape with nails or staples.
Film on glass and insulation of slopes
To maximize the insulation of windows, cover them with heat-saving film. This material is applied directly to the glass. When laying the film there should be no folds, swelling or bubbles. Carefully done work will help save more than 30% of heat.
Don't forget about insulating the slopes. For this, you can use various materials, for example, polyethylene foam or mineral wool. The insulation is fixed to the slopes using glue.
Assembling the remaining parts
Now you know how to make a long sofa. After installing it, proceed to installing a short sofa. It is produced in the same way, with the exception of the size of the furniture product - its length is 40 cm shorter. Everything else remains unchanged.
When making a corner for the kitchen with your own hands, the important part that unites the long and short sofas is the connecting element. It can be made in the form of a corner from pallets
According to the measurements taken, cut out all the necessary parts for the seat and back from the chipboard. Connect them together using screws or dowels. Next, cut out the bar for the stop and fasten it to the seat.
Please note that when making a kitchen corner from wood with your own hands, the side parts should be attached after the seat and back have been given the proper appearance. The first step is to secure the parts of the back and sides, and then switch to the seat and frame
It is important to note that all fastenings are made using metal corners. The next step is to secure the foam rubber and cover the product with fabric, which must be fixed using a stapler
This is how you assemble kitchen corners with your own hands. Due to the fact that the corner you make will be collapsible, all 3 elements can be moved and rearranged if necessary. If you want, you can connect all the main parts and make the structure whole. How to do it? Metal corners will come to your aid!
The next step is to secure the foam rubber and cover the product with fabric, which must be fixed with a stapler. This is how you assemble kitchen corners with your own hands. Due to the fact that the corner you make will be collapsible, all 3 elements can be moved and rearranged if necessary. If you want, you can connect all the main parts and make the structure whole. How to do it? Metal corners will come to your aid!
You also have the opportunity to improve your soft corner for the kitchen, because this softest corner for the kitchen can be equipped with a sleeping place, like in a simple folding sofa. To make a corner with a sleeping place with your own hands, there is no need to disassemble the entire structure or remake its components. You just need to slightly change the long sofa by adding 1 more sheet of chipboard, permanent hinges and lots and lots of foam rubber, and you will get a wonderful kitchen corner with a sleeping place.
Audit
So, where should an owner begin who has undertaken to turn his home into a frost-proof fortress? Of course, from the audit! To plan your future actions, you need to understand how things are at the moment.
We will move from bottom to top.
First, let's check what gender we have. If it is just a poured concrete screed or plank flooring, it cannot be warm a priori, which means it needs to be insulated.
Then look at the carpentry - these door and window openings very often serve as the main factors of heat loss, which means they can easily ruin you.
Next are the walls. If you have an ordinary brick house, then in order to satisfy SNiP requirements, the width of your wall without insulation should be around two meters. Is it really less ☺? Then the walls need to be improved.
Now we have to check the attic floor and, of course, the roof. I can tell you from experience, since you are reading this article, the attic and roof were definitely left without proper attention - if not, sorry, I could have made a mistake ☺.
Wall texture
To improve the decorative appearance of the wall, you can apply a texture to it. This can be done with a silicone or fleecy roller. This tool will help you save on expensive plaster solutions, which often only increases the cost of the project!
After the plaster has dried over the mesh, it is worth applying a small layer of mortar to the surface, about 2 mm, and rolling it with a roller. You can create a drawing yourself!
Between the layers of mortar, the wall must be primed!
Roof
If installed incorrectly, a roof can “steal” more than 10% of the heat spent on heating the house.
When choosing thermal insulation for a roof, pay attention to its service life, which depends on many external factors: temperature fluctuations, amount of precipitation (especially snow), wind strength and direction. Pay special attention to the water resistance of the material. Isolation must also be safe for health. The first sign of safe insulation is the absence of a sharp, pungent odor.
Insulating the roof with polymer materials is not the best solution. They ignite very easily and quickly, so increased fire safety measures will have to be taken.
The best insulation for roofing can be considered stone wool, which is intended for thermal protection of structures that do not bear heavy loads.
Let's summarize the comparison
Both materials are characterized by high thermal insulation characteristics.
Therefore, they are most often used to insulate walls in apartments. Their common advantage is that there are no problems with the installation of these insulation materials. Even a person who is far from thermal insulation work can cope with this task on his own. However, there are certain nuances when using them. Laying foam can be done using a frameless method. An adhesive composition is used to secure the insulation to the wall. When thermal insulation is carried out using mineral wool, the creation of a frame is a prerequisite. On the wall, vertically installed slats will act as fastening elements. In terms of installation costs, the use of polystyrene foam is beneficial. In terms of cost, this particular material is also beneficial. Its price is three times lower than mineral wool. However, when deciding to opt for polystyrene foam, you must keep the following in mind. If rodents appear in your home, they will use foam sheets to build their house. They can destroy insulation sheets, which will lead to increased heat loss.
When thinking about which thermal insulation material to choose, you should first consult with a specialist who, taking into account the room, will recommend you a suitable insulation.
Carpentry
And it’s a no-brainer that if you still have old Soviet windows in your house, then you heat not only the room, but also your yard. The thermal conductivity of glass is 0.81 W/ (m*K), exactly the same as that of brickwork, although the thickness is only 3-4 mm.
The glass unit is another matter. Properly manufactured, it significantly increases the heat transfer resistance of a window unit, and therefore people, without hesitation, take two, three, and if they sell even five chamber glass products.
The trap is that the optimal chamber width is 16 mm, and the width of the produced window profile is 32 mm.
It would seem that a two-chamber product can still be “fitted” tightly, but let’s add the thickness of the glass, and there will be as many as 3 of them and we’ll get an extra 1.2 cm.
It is important not to chase the chambers, but to understand that it is not the glass that retains heat, but the air sandwiched between them, and if the amount of this air is reduced by the same volume, heat loss will only increase. Conclusion: not everything is good because it’s expensive!
Conclusion: not everything is good because it’s expensive!
Alternative – fibreboards
This is an excellent option for insulating yourself, since all the work is very easy to do. The main thing is that the walls must be clean and dry. The task is made easier by the fact that the slabs can be mounted directly on the old coating, on the plaster. For installation, buy special nails that are equipped with a recessed head. When the insulation is complete, you can glue wallpaper directly onto the fiberboard or perform other finishing work as desired.
Also used for insulation:
- Expanded clay;
- Penoizol;
- Polyurethane foam.
A new trend is ecowool insulation.
This is a very environmentally friendly material that is obtained from cellulose. It can be installed either dry or wet. True, the latter requires special equipment. And the dry method can be implemented independently. Plus ecowool is environmentally friendly, the walls “breathe”, the work quickly pays off.
If you are faced with the task of insulating your country house, you should not think that this will require fabulous financial investments and the involvement of specialists. You can choose an option to suit your taste and budget if you carefully study the theory, and almost everyone can do the work themselves.
Relaxing in a wooden dacha is the dream of every resident of our country. Strive for your dream and one day it will definitely come true.
https://youtube.com/watch?v=grjHO6Y4qFU
Floor
There are plenty of floor insulation methods today, but are they all rational?
For example, dry expanded clay screed from Knauf is widely popular. By the way, it costs a lot of money. Not breathing? Honestly, the floor is not the place where excess steam escapes; there are usually plenty of holes for this in a country house.
Well, now the advantages:
The thermal conductivity coefficient of load-bearing expanded clay with a density of 800 kg/m3 is equal to 0.18 W/ (m*K), while for foam plastic this value is 0.038 W/(m*K). In human terms, for equal indicators, the volume of foam will be needed 5 times less.
That is, if for tolerable thermal insulation of the floor you need a layer of polystyrene foam of at least 150 mm, then you will have to pour more than half a meter of expanded clay!
Of course, there is always room for savings. So, it is not necessary to drive a fifteen-centimeter ball of polystyrene foam throughout the house. It is enough to go around the perimeter of the building with this thickness to a width equal to the depth of soil freezing, and in other places use the budget 5 cm.
Even with this approach, the cold cannot penetrate.