Tiles are considered popular materials that are used in the decoration of various rooms. Products differ in production technologies, materials, thickness, and length. Further operation and reliability are directly related to properly selected glue, but other nuances should not be cast aside either. One of them is the thickness of the tiles with adhesive on the wall.
Characteristics of porcelain stoneware
Initially, porcelain stoneware was produced as a particularly durable tile for technical use in public and industrial buildings.
Surprisingly, in Europe such material is considered an ordinary tile, only in the CIS countries it was given a separate name. It is produced by semi-dry pressing under a pressure of 400-500 kg/cm2 and then fired at a temperature of 1200-1300 degrees.
Press powder is made from slip - a homogenized mixture of white-burning clay, kaolin, quartz sand, feldspars, pegmatites and water. Coloring oxides are often added to the composition, which allow the material to be given the desired shade.
Table of technical characteristics of floor coverings
Technical characteristics of porcelain stoneware floor tiles:
- Water absorption: 0.05-0.01%.
- The bending strength of imported collections is 500-600 kg/cm2, while domestic analogues have indicators of 470-550 kg/cm2.
- Hardness on the Mohs scale: 6-8 (domestic analogues 5-8).
- Degree of wear resistance: 3-5 (for ceramic tiles this indicator is 1-5).
- The number of frost resistance cycles is 3-4 times higher than that of conventional tiles: from 100 to 300 cycles at temperatures from -5 to +5 degrees.
Factors affecting thickness
The smaller the tile size, the smaller the layer of adhesive required. There is no specific standard, since floor covering is not a standard job. The thickness of the adhesive applied can vary from a few millimeters to a centimeter or more.
Reference! The type of cladding is taken into account. Porcelain tiles require less adhesive.
The type and quality of the floor surface matter. Concrete and plaster require a completely different amount of adhesive. The thickness of the glue should be calculated taking into account the height of the floor in other rooms, so that no thresholds are formed.
The amount of the mixture will also depend on the incoming substances. For example, cement is applied in a thicker layer. Not much epoxy is required.
Type and size of tiles
The thickness of the tile adhesive layer is calculated taking into account the dimensions of the facing material. For small-format tiles (up to 10×10 cm) it should not exceed 2 mm. The thickness of the solution for small square elements with sides from 5 to 7 cm after pressing is 1.1-1.3 mm.
When laying medium-format and large-sized materials, a thicker layer of glue will be required. When facing with square tiles with sides from 20 to 30 cm, after pressing it will be 2.5-3.5 mm. The consumption of the solution will depend on the angle of inclination of the spatula. Large-format facing material with sides from 30 to 50 cm is laid on a layer of 3.5-4 mm. When using rectangular tiles, the thickness of the mortar is calculated based on the area of the element. Tiles with sides of 20 and 25 cm (most often used for finishing walls in the bathroom) are laid on a layer of 3 mm.
The type of facing material must also be taken into account. Tile has high porosity, which leads to strong water absorption. Therefore, when laying it, more solution may be required. The structure of porcelain stoneware is different. This material almost does not absorb liquid, which leads to less glue consumption.
It is also worth taking into account such a parameter of the tile as thickness, since its weight depends on this value. For heavy facing materials, more mortar is needed to ensure they adhere more firmly. It is recommended to lay porcelain tiles on a layer of glue, which is 40-60% of its thickness.
What base is used
Each type of tile adhesive is designed for different types of substrates. The scope of application of the composition and its consumption are indicated by the manufacturer on the packaging.
In the case of plasterboard cladding, the thickness of the mortar for good adhesion should not exceed 5 mm. When laying medium-format tiles on such a base, it is recommended to apply a layer of 3-4 mm. Then it is leveled with a comb with 6 mm teeth. The solution can be applied in a thicker layer to concrete, plastered base or screed.
Before tiling, you should examine the walls and floor. The thickness of the glue also largely depends on the quality of the base. In the absence of differences and unevenness, the solution consumption will be minimal. To cover an imperfect surface, you should choose a leveling adhesive. There are compositions that can be applied in a layer of 1.5 cm. However, it is better not to use such a solution for novice craftsmen.
Without experience in tiling, it will be difficult to lay tiles on a thick layer due to shrinkage. If the differences exceed 3 cm, then leveling with glue should be abandoned. In this case, the quality of the surface can be improved by plastering or screeding.
Laying wall and floor tiles requires different volumes of mortar. In the second case, the layer should be thinner so that the tile does not fall off from the base.
Humidity and moisture absorption of the adhesive
When carrying out repair work, you need to monitor the moisture content of the tile adhesive. Dry mortar cannot be applied to walls, because there will be no good adhesion to the facing material. It is also necessary to take into account such an important characteristic of the base as moisture absorption. It directly affects the consumption of tile adhesive. Porous substrates have high moisture absorption. These include sand-lime brick and some types of concrete.
High moisture absorption increases the thickness of tile adhesive when laying tiles. The situation can be corrected using a primer.
Composition of adhesive
The tiles are laid using various types of adhesive mixtures. They are divided into thick-layer and thin-layer. For plasterboard substrates, you can choose a resin-based adhesive. Its thickness when applied should be 3-5 mm.
Two-component mixtures are also available on sale. They consist of a catalyst, as well as a resin-based paste, quartz filler and additives. Such a solution does not shrink when dried. This means that the thickness of the adhesive when laying the tiles will remain unchanged. The two-component mixture is applied in a layer of 2-5 mm.
Curvature and differences can be dealt with using a cement mixture, which is classified as thick-layer. It is sold dry and consists of sand, cement, and plasticizers. Its thickness can be up to 14 mm. This mixture is applied to floor tiles, which weigh a lot. For wall cladding, 5-7 mm is enough.
Comb tooth size
You can get the correct layer thickness using a special tool for applying glue - a notched trowel. It must be selected based on the size of the material that will be required for cladding. Spreading small tile adhesive with a large-notched trowel results in excess adhesive in the joints. A small comb is not suitable for dimensional facing material, because... When applied to the base, projections are formed that are too low.
The height of the spatula teeth of 5-6 mm is optimal for wall cladding. For working with mosaics, it can be 2-3 mm. The adhesive mixture is applied to large-format tiles with a larger notched trowel (with a comb of 1-2 cm). Similar combs are also used for floor tiles. For small square tiles, it is recommended to choose a trowel with 4 mm teeth. For medium format tiles 20x20 cm, a size of 6 mm is suitable.
Application rules
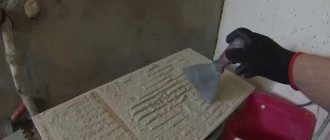
When working with cement, in order for the glue to obtain all its necessary characteristics, it is mixed with water. The liquid should be added gradually. After mixing, the solution should be left for a couple of minutes, then mixed again until a thick mass is formed.
Reference! To distribute the adhesive mixture of the required thickness, use a spatula with teeth of the required size. The solution is applied directly to the floor, and if there are uneven areas, to the tiles.
To distribute the adhesive composition on the floor, you need to start work from the far corner, moving to the exit, so as not to step on the composition. Floor tiles are usually large in size, so a trowel with large teeth is used.
When laying tiles on the floor, you need to make a thick layer. This is due to the fact that afterwards you will need to drive out the voids by tapping with a mallet. The glue will be partially distributed and its volume will decrease. Excess solution can then be removed with a rubber spatula.
Laying porcelain stoneware requires preparation:
- Checking the quality of the base. Porcelain tiles can only be laid on load-bearing concrete foundations. Use a level to check horizontality. If there are significant differences, you will need to use more glue.
- Base primer. Can be done up to two times if the base quickly absorbs liquid. It is best to prime with a roller; the floor must first be cleaned.
Priming the surface before facing is of great importance. This increases the strength of the cement-sand base, preventing the coating from crumbling. This is also important for better adhesion. Adhesion after priming increases by approximately 20%.
The priming procedure also reduces the level of moisture absorption. Cement adhesive must remain wet for a certain time to gain strength. Before laying tiles, you need to wait until the floor is dry.
When laying porcelain tiles, you need to make sure that the glue does not protrude along its edges. This problem can be avoided if, before laying the next tile, remove a little mortar from the edge of the previous one with a spatula. The strip removed should not exceed a centimeter. If glue gets on porcelain tiles, you can remove it with a damp cloth. It is especially important to clean structured tiles before the adhesive hardens, which will simplify finishing work.
If you have little experience in laying tiles, you should lay no more than 2 layers at a time. Do not allow the glue to thicken. If this happens, you need to prepare a new portion. Do not dilute the finished thickened composition with liquid; the glue will lose its properties.
Considering all these factors, determining the thickness of the substance will not be as difficult as choosing the appropriate glue. To work with porcelain stoneware, it is better to use cement mixtures that are prepared immediately before the start of cladding.
Reference! You should pay attention to well-known companies that have already earned the trust of professional craftsmen. These are adhesive compositions from Ceresit, Knauf, Rusean, Yunis.
Manufacturers always indicate on the packaging information about the composition, consumption and nuances of use. You can also always call consultants to get answers to your questions. It is necessary to distinguish the original from the fake. Signs of the latter will be uneven, small letters on the packaging, and a careless appearance.
Correctly determining the thickness of the adhesive will allow you to calculate the required amount of glue, as well as securely fix the tiles for long-term use. You should always be prepared for the fact that some areas will require more glue and others less. You should buy adhesive with a small supply.
Calculation of adhesive thickness for porcelain tiles (2 videos)
Laying porcelain tiles on the floor (15 photos)
Equipment for laying tiles
Features of cladding
To calculate the thickness of tile adhesive when laying tiles, it is important to consider its dimensions:
- Small-format (10x10 cm) requires a thickness of no more than 2 mm; for very small squares (up to 7 cm), a layer up to 1.3 mm in size is suitable.
- For medium-sized and large squares, you need to apply a thicker layer. For sizes from 20x30 cm, approximately 3 mm of glue should be applied. When the cladding size exceeds 30x50, up to 4 mm is required.
- Cladding with dimensions of 20x25 cm, which is more often used for the bathroom, is glued with a layer of about 3 mm.
The type of cladding also affects the thickness of the adhesive. The tiles have strong porosity, which affects water absorption. For this reason, more glue is required. Porcelain tiles practically do not absorb moisture, so less mixture will be required.
The thickness of the porcelain stoneware is also taken into account. Heavy tiles require more adhesive. The thickness for light cladding is insignificant.
Minimum and maximum values for wall and floor
The types of glue and thickness differ in practical application. But a number of ranges have been developed, beyond which it is not recommended. Under such conditions, they take into account the size of each part and what types of tiles are used.
A 2 mm layer will be enough for reliable fixation if the tile itself is small in size. With increased thickness and massiveness, the numbers increase to 4-5 mm. An example is the processing of porcelain stoneware. Even if it's a bathroom.
Only if necessary to level the terrain is it permissible to go beyond the average values. Then they first inspect all the irregularities, then calculate the point with the maximum height. Here the adhesive layer is the smallest.
The maximum indicator for the layers of the composition will be as follows:
- For porcelain stoneware no more than 20 mm;
- 15 millimeters – floor tiles;
- 10 millimeters - regular floor tiles.
A 2 mm layer will be enough for reliable fixation if the tile itself is small in size.
Practical tips for choosing the thickness of porcelain tiles
You should not immediately buy thick porcelain stoneware slabs; the strength of the floor depends not only on this indicator, but also on compliance with masonry technology. If the master does not use a special comb to apply an even and uniform layer of glue, but “sculpts” it with a staple only in a few places on the tile, then even thick material in the gaps can crack from relatively small efforts.
Working with adhesive for porcelain tiles
It is recommended to check the integrity of the performers. This can be done in two ways: watch their work or check the already installed tiles. The first option is not always possible, but it’s never too late to check the floor. The tiled floor needs to be tapped, the sound over the entire surface of the tiles should be the same and dull. If there are places with a loud knock, then the work was done by an unscrupulous or unskilled performer; between the tiles and the base there are large air chambers not filled with glue.
Diagram of the stages of laying porcelain stoneware
When purchasing material, be sure to pay attention to the linear dimensions. The thicker the tile, the more complex the annealing technology, the higher the risk of getting defective. Take two tiles from different packages and place them facing each other. Wobbling or gaps between them are strictly unacceptable; the edges must be smooth and match perfectly. Porcelain tiles are much more difficult to level than ordinary ceramic tiles; because of this, the requirements for linearity and flatness are more stringent.
The thickness of the tile has a significant impact on the price, with all other indicators being the same. Practitioners know that properly laid porcelain tiles 7 mm thick can withstand the same forces as tiles 12 mm thick, but made with defects. And in price these materials differ significantly. Conclusion - a professional tiler can save significant money, and the strength of the flooring will meet the required parameters.
General dependencies
It is worth considering that the characteristic varies depending on many factors; when laying tiles, the layer is smaller, when laying porcelain stoneware the layer is thicker. There are also differences between the location of the work: a wall or a floor. So, when gluing facing material to a wall, the glue should not be too thick, but when gluing floor tiles, it is quite possible to increase the thickness of the adhesive mortar.
Of course, the base of the surface to which the tile is glued has a special influence on the thickness of the layer. The best option is when the base is in perfect condition. Clearly level, without pits or bulges, even small ones, completely free of dust and mortar residues, high-quality coated with a special deep-penetrating primer (which one can find out and buy at any hardware store). Only in this case can we talk about truly high-quality laying of tiles or porcelain stoneware.
An important rule for high-quality work with ceramics is a perfectly level, measured and prepared base!
When tiling a floor, a situation often arises when porcelain tiles have a fairly large distortion; it turns out that it is either convex or concave. In such a situation, the layer under the lowest points of porcelain stoneware should not be more than 10 mm.
The surface of the back side of the tile must be covered with a continuous layer of adhesive at least 80%
Forms of porcelain stoneware cladding
Two types of floor coverings are used - ceramic tiles and porcelain stoneware. In the manufacture of the latter, pressing and subsequent very strong heating are used, or, to be more precise, baking. This allows you to create elements that can withstand significant loads.
The standard for the production of porcelain stoneware slabs is provided not only for the process itself, but also for their shape and size. They can have a square shape, be produced in the form of a pentahedron, hexagon, or octahedron. In addition, modules may differ in parameters (side length).
Briefly about the main thing
Before purchasing ceramic tiles, you need to calculate the required amount of material so that it is enough for the entire area of the room. This can be done in two ways: manually and using an online calculator.
The amount of ceramics required for renovation is influenced by the area of the room, the dimensions of the doors, windows and bathroom, the type of installation, the number of colors of the finishing material and other factors.
To calculate floor tiles, 5 methods are used: methods based on the area of the room and the number of rows, counting when laying diagonally and the piece method, combined calculation.
If you do not want to carry out the calculations yourself, when purchasing material, you can contact the store manager. It will help you calculate the required amount of materials for the room. To do this, you will need to first take measurements of the room.
How to choose porcelain tiles for the floor by thickness
Porcelain stoneware with a thickness of 8–10 mm is suitable for residential premises. For the bathroom and toilet, choose 8 mm thick slabs, because they contain little heavy furniture and a low risk of falling solid heavy objects. For the kitchen, corridor, hallways and living rooms, choose porcelain tiles with a thickness of 10 mm. It will withstand the fall of a frying pan and static pressure from furniture on legs.
For shops and places with high traffic, choose porcelain stoneware slabs with a thickness of 10–12 mm. For shopping centers, business centers and office buildings, 10 mm slabs will be sufficient. They will withstand even if several thousand people a day pass through them and the pressure of not too heavy racks of goods or office furniture. For construction stores, car showrooms and hypermarkets with a large number of goods on shelves, choose 12 mm thick porcelain tiles.
For industrial and warehouse premises, choose porcelain tiles for the floor with a thickness of 10–14 mm. Such tiles are suitable for warehouses with high and heavy shelving, car showrooms, carpentry workshops, and service stations.
Scale for selecting porcelain tiles by thickness
The cost of porcelain stoneware per square meter depends on its thickness, so we do not recommend choosing excessively thick slabs for rooms with a small load on the coating. Since the thinner the porcelain tile, the less its weight, you will save not only on the purchase of material, but also on its delivery.
Seam width
Seams can be from 1 to 10 millimeters wide. It depends on the type, geometry and size of the tile used. As a rule, the seam width is 2 millimeters.
Grouting processSource otlichnyjremont.ru
When performing the correct layout, the width and length of the seams can be ignored.
For example, there is a wall 1.5 meters long and a tile 0.4 meters long. Algorithm of actions:
- Measure the length of the wall - 1.5 meters.
- Calculate how many meters you can cover with whole uncut tiles: 0.4 * 3 = 1.2 meters.
- Subtract one tile: 1.2 – 0.4 = 0.8.
- Subtract this size from the length of the wall: 1.5 – 0.8 = 0.7 meters.
- Divide into two parts because the tiles will be cut twice equally at the edges: 0.7 / 2 = 0.35 meters.
- Laying should begin from the center.
- Lay two 0.8 meter tiles and two cut tiles at the edge - 0.35 meters. The result will be 1.5 m. Even if the seams reach one centimeter, this will not change anything. The trimmings will probably become a little smaller.
Tile adhesive, what it should be
But the question about what layer to lay the adhesive base sometimes does not arise at all, and this is completely wrong. This parameter is quite easy to find out; you just need to carefully read the instructions, which necessarily come with the glue or are written directly on the packaging.
For floor tiles, the approximate thickness is as follows:
- In the case of a perfectly flat floor, the layer will be four millimeters;
- If the tile size is 300 by 300 mm, then the layer must be at least 7 mm;
- If there are minor defects in the floor base, then the thickness should reach nine millimeters;
- The maximum permissible layer of glue is two centimeters; if the surface unevenness is large, then leveling should be done using self-leveling mixtures.
Thick and thin layer adhesives
Cladding tiles can be laid using different types of adhesive solutions.
They are divided into forming
- Thick layer;
- Thin layer.
Glue made using resinous substances is applied to the plasterboard base planes. The layer of such a reagent should have a thickness ranging from 3 to 5 mm.
Calculation of material quantity
To determine the required amount of mixture, you need to have all the data on the material, glue and area of the working area. The calculation is carried out in several steps.
How to determine the required amount of funds:
- Determine the dimensions of the tiles, based on which, calculate the required thickness.
- Look on the packaging to see the mixture consumption per meter with a layer of 1 mm.
- Multiply these values to obtain the required amount of glue.
- Calculate the area for cladding.
- Multiply the first value by meters.
- Multiply the result by 1.1 for the margin.
Types of adhesive solutions by composition
The composition of tile adhesive intended for tiling heated floors varies depending on the components it contains, structure and ingredients.
- One-component - a homogeneous mass, similar to a paste, which is ready for use. This substance hardens slowly, but even in this case you can find its advantages - there is enough time to lay the tiles. In addition, the paste has increased elasticity and tenacity.
- Two-component - includes two ingredients that must be mixed thoroughly before use.
By structure:
- Mastic is a paste-like adhesive mixture in finished form. Recommended for use in finishing new buildings.
- Dry mixture - diluted with water before use. The dry mixture is considered the most reliable and durable.
According to the composition of ingredients:
- Epoxy adhesive is noted for its high strength and reliability, resistance to temperature changes and high humidity, but it is quite expensive.
- Dispersive - not suitable for ceramic tiles, but widely used for fixing drywall, plastic, wood and metal.
- Cement - affordable, provides excellent adhesion to concrete and brick, and is quite waterproof.
When choosing a suitable solution, you must take into account the fact where it will be used: bathroom, living space or outdoors. Based on this parameter, it is worth selecting the glue taking into account its components
Possible sizes
If you try to classify all available tile sizes, you will get the following:
The thing is that with its help you can create a single canvas on which the seams will be almost invisible. It seems that the wall and floor are finished with a single piece of marble or granite.
The choice of a particular tile size can also be based on such an important parameter as price. On average, mosaics and large slabs cost 20-30% more
For walls
The classic size of tiled or ceramic wall tiles is 20x30 cm. Until recently, these were the dimensions that could be seen in most apartments. But interest in new forms and the opportunity to implement unique projects are increasingly prompting people to take a closer look at tiles in other formats.
There are the following sizes of wall tiles:
- 120x240 mm;
- 150x150 mm;
- 150x200 mm.
It makes no sense to list all the dimensions available on the market. You can see all the variety at your local hardware store. And if none of the options meets your exacting requirements, then you can contact the manufacturers and discuss the possibility of producing tiles according to your individual sizes. Some companies actually provide this service.
As for the thickness, it is usually less than that of floor tiles. This is due to the fact that it is not required to have such wear resistance. Standard parameters vary from 0.4 cm to 1 cm. These are the dimensions that allow it to remain durable
An important feature here is the weight of an individual tile: the smaller it is, the easier it is to mount it on a vertical surface.
For floor
The most popular floor shape remains square. Its standard sizes are presented in three variations:
- 10x10 cm;
- 30x30 cm;
- 60x60 cm.
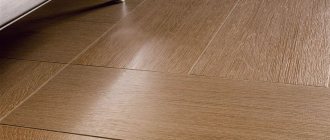
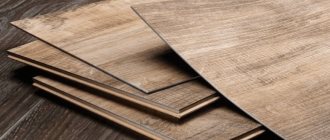
Manufacturers also offer other parameters (5x5 cm, 20x20 cm, 33x33 cm, etc.), but consumers still prefer tiles with standard dimensions. Rectangular-shaped products very often imitate natural materials, in particular wood. In this case, the following sizes are popular: 15x45 cm, 12x60 cm, 15x60 cm, 19x60 cm, 14x66 cm, 15x66 cm. This option is great for a bath where it is impossible to use parquet or laminate, but you want to see the texture of the wood.
The thickness of floor tiles is slightly greater than that of wall tiles. This is due to the fact that it requires high strength and wear resistance. The minimum thickness is considered to be 9 mm, but there are slabs of 20 mm and 23 mm.
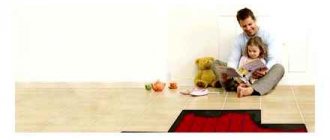
Principles of tiling a kitchen, bathroom, corridor
Typically, floors in kitchens are covered with porcelain tiles. With the right choice of parameters, you can visually increase or decrease the space.
Most often, square slabs with a side of 200 or 350 mm are used. With such dimensions it is easier to carry out work. In addition, they give the visual effect of increasing the area.
When tiling bathrooms, the rule is: if it is small, large tile elements are used. In spacious rooms it is preferable to use small modules.
The best effect is provided by square or rectangular tiles. Depending on the size of the bathroom, choose cladding sizes with sides ranging from 150 to 500 millimeters.
When laying tiles in the corridor, it is preferable to choose a rectangular shape. Visual effect – the corridor lengthens. It is optimal to cover the corridor floor with porcelain tiles, rather than ceramic, due to increased loads on the surface.
Product parameters
The first samples of porcelain tiles were produced small - with sides of 5x10 cm, but gradually the range expanded significantly. Today, tile sizes such as 30x30 and 40x40, 30 x 60 are constantly present on the market and are in demand. They are used mainly to decorate walls and work areas in bathrooms, corridors and kitchen areas.
Recently, floor coverings are often made from elongated plates - 15 x 60 and 20 x 60 cm formats, imitating parquet from various types of wood. The greater the load on the floor, the smaller the tiles used for finishing.
Large-format samples that came into the interior from industrial systems are also offered to buyers - 1200 x 300 and 1200 x 600 mm. Initially, during the construction of houses, they were used to decorate facades with ventilation gaps.
For small kitchens and bathrooms, an increase in the linear dimensions of the slabs means a visual expansion of the space. This factor is taken into account by designers in modern projects for small-sized housing.
The most modern sheet finishing material is produced in especially large sizes - up to 3000 x 1000 mm. This allows you to completely cover with one sheet the counter in the bar, the shower area in the bathroom, and in the dining room and kitchen the sink, apron and any furniture or countertop. Cladding with such a laminate has revolutionized the field of repair and decoration.
It is obvious that porcelain stoneware, which is thicker than other types, is the most durable. However, not all thick tiles are suitable for residential use. It is necessary to adjust the sufficient strength and density of the material when facing. Moreover, the cost often depends on the thickness of the sheet.
Standard varieties of industrial production demonstrate excellent performance during long-term use in houses and apartments.
The thickness of porcelain stoneware sheets or slabs can be different - from 3-5 mm to the densest, reaching 30 mm in cross-section. Material from 10-11 mm is usually placed on the floor.
If the thickness of the porcelain stoneware slabs is at least 18-20 mm, the use of the material gives excellent results also in the external environment, for roofing and terraces, while porcelain stoneware can be laid on the ground and grass, stones and other surfaces.
How to install
The process of installing porcelain stoneware tiles is not difficult if you follow the entire procedure.
Before laying tiles, you need to carefully prepare them. To do this, it is necessary to determine how the installation will be carried out, the thickness of the glue, and the method of its application. The process of laying porcelain tiles occurs without a seam, end-to-end. The disadvantage of the presented method is the use of tiles of the same size, since certain of them cannot be used. In addition, it is impossible to guarantee the equal length of the seams and the uniformity of their filling.
The advantage of this installation method is the possibility of obtaining a monolithic surface and saving materials. But the most optimal method remains the classic installation method, which involves the presence of seams.
Before you begin installing the product, you need to prepare its surface. To do this, remove dust and debris from it. There is a protective wax on the surface of the tile. It should be removed with warm water using cleaning products. Paraffin can be easily removed with a spatula.
If the base on which the tiles will be installed has uneven surfaces, it should first be leveled. For these purposes, a screed is made on the surface. The surface must be clean, dry and level. If there are glossy surfaces, remove them using sandpaper. The material can be laid at a temperature of 5 degrees.
When choosing an adhesive composition, you need to pay attention to its adhesive properties. Thus, it is undesirable to use cement mortar; it is best to pay attention to glue with polymer additives. In addition, it is important to take into account the type of base and the loads at the places where the material is installed. If the load is large, then it is worth using glue that is designed for such operating conditions.
All preparatory activities are over. You need to take the glue and apply it with a spatula to the surface of the tile. Place it on the floor, press down and tap with the handle of a spatula. Finish the entire floor surface in the same way. Seal the resulting seams with finishing putty to prevent dust and dirt from forming in them.
Useful nuances
Below is a small list of nuances, taking into account which you will simplify the repair process in general by several orders of magnitude:
When purchasing tiles, be sure to purchase the required amount of material from one batch. This is due to the fact that even with equal indicators, it would seem that the same tile, but from different batches, will necessarily have different dimensions. And this difference can reach four millimeters
This fact is due to the fact that the raw materials from which the tiles are made are of natural origin and do not behave the same when fired. The thickness of the tiles may also vary, but this fact can be ignored, since it can easily be leveled with tile adhesive. When purchasing, pay attention to the dimensions of the tiles and the required supply, remember the ratio: the smaller the tile, the less waste you will have. For tile sizes of 30 centimeters, the seams should be three millimeters wide, and for sizes 50 by 50 cm, it is better to increase the seams to five millimeters. The larger the dimensions of the tiles, the greater the difference in size and the seam can compensate for this.
After reading this material, you learned about such a parameter as the thickness of the tiles with adhesive on the floor and why it is important. With this information, you will make the right choice of tiles.
https://youtube.com/watch?v=5PRG3LkSYFs