What should the garage floor be like?
Not every flooring material can be used in a garage. The coating must meet the following requirements:
- withstand regular loads from the weight of the vehicle. In addition, heavy tools are often stored in garages, which also exert pressure on the floor;
- strength . The floor will bear not only loads from the car, but also from the fall of a heavy tool;
- moisture resistance . When it rains or snows outside (and in some regions there is snow for more than six months), the car on wheels and on the body will bring moisture into the garage, so the floor should not be susceptible to rotting and mold;
- resistance to aggressive substances . Car maintenance involves the use of gasoline, cleaner, antifreeze, oil and other substances that, if they come into contact with certain materials, can damage them. For a garage, you should choose a coating that is not afraid of such exposure and can be easily cleaned from stains;
- resistance to fire , since there will always be flammable liquids in the garage;
- resistance to temperature changes . Most garages do not have heating, and the air warms up there only when the car owner decides to tinker with the car. This means that the flooring will regularly suffer from temperature changes, and it is important that it does not become cracked or deformed.
You can also add cost-effectiveness , because, to be honest, everyone wants to get the maximum by spending the minimum.
The requirements are strict, but car owners have a choice of suitable materials. Let's try to figure out which garage floor is better, and what are the main pros and cons of popular materials.
Main advantages and disadvantages
The design of a wooden floor has certain disadvantages and advantages, which you should familiarize yourself with in advance. Having dealt with them, you will be able to decide whether it is necessary to make wood flooring in the garage.
The main advantages include:
- Long service life. Wood coverings treated with anti-rotting compounds do not deteriorate for several decades.
- Easy to restore. Repairing a wood floor is quite simple, and therefore even a person without experience can restore it on their own. In 1-2 days you can completely dismantle the coating and replace it with a new one.
- Easy installation. Installing a wooden floor is not as difficult as self-leveling cement.
- Strength. Some people think that a wooden structure will not support the weight of the machine, but this is not the case. A square meter can easily support a weight of about two hundred kilograms.
- Good absorbency. Wood material is often used in conditions with high humidity levels because it absorbs moisture.
- Doesn't get dusty. It's no secret that self-leveling concrete surfaces are a source of dust. Wooden coverings reduce the amount of dust in the garage by several times.
Despite all the listed advantages, wood structures have certain disadvantages, which include:
- Fire hazard. All structures made of wood are highly flammable. Therefore, the material will have to be treated with special means.
- Susceptibility to attacks by parasites. Often wood is damaged by woodworms or rats.
Option #1. Dirt floor
This option for arranging the floor can be described as “cheap and cheerful.” It is unlikely to be suitable for those who intend to build a major garage that will ensure complete safety for the car and comfort for its owner. This is a solution for cases of extremely limited budget.
Advantages of an earthen floor in a garage:
- relative cheapness of arrangement;
- minimal time investment;
- Only minimal construction skills are required.
disadvantages :
- an earthen floor is a source of dust and dirt, and all this will settle on the car and things stored in the garage. If the ground is dry, then when cars and people move, dust will rise. If water gets into the garage (for example, when it’s raining outside), then there will immediately be a lot of dirt in the garage;
- in winter the garage will be very cold;
- there is no possibility of insulation;
- You will constantly have to add soil and compact it, since noticeable depressions will form along the trajectory of the car.
Installing a dirt floor in a garage is quite simple. Work begins when the walls have already been erected. First, the fertile layer of soil is removed, this is approximately 15-40 cm depending on the region, then the base is covered with plastic film or geotextile - this is protection against grass germination. Now all that remains is to fill the hole with soil. First, a layer of no more than 5 cm is poured, it must be thoroughly compacted, then more soil is added, compacted again, and so on until the required level is reached. Please note that it is necessary to make a slight slope towards the gate.
Heating and insulation
It is very important to create an optimal temperature regime in the garage, not only for its storage, but also for its maintenance. Many car enthusiasts believe that it is enough to insulate the walls and ceiling. In such cases, during severe frosts, condensation may form on the floor.
SNiP 02/21/99 states that the optimal temperature in a car storage room should be about 15 degrees.
Therefore, it is very important to insulate the floor in the garage; this will create favorable conditions for its storage.
During the construction of a garage floor, depending on the coating used, it is advisable to insulate it. Materials that can be used for floor insulation:
- Expanded clay. It has good heat and sound insulation. Durable, non-toxic. Resistant to temperature changes.
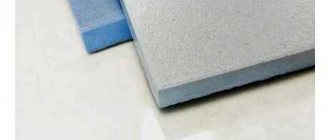
- Styrofoam. Not very heavy, moisture resistant, not expensive.
- Expanded polystyrene. High heat and sound insulation characteristics. Resistant to deformation, temperature changes, waterproof.
- Mineral wool. Fireproof, resistant to mold and mildew.
Option #2. Concrete floor
Concrete garage floors are a classic . Concrete can be the basis for further finishing, or it can be used on its own. Most garage owners prefer concrete floors, and for good reason.
Advantages:
- high strength and durability, the ability to withstand severe loads, however, the magnitude of these loads greatly depends on the grade of concrete;
- Smooth surface;
- resistance to moisture, fire, temperature changes and most aggressive substances;
- absence of harmful fumes;
- low cost;
- the opportunity to carry out the work independently.
A concrete floor is an almost ideal solution for arranging a floor in a garage, but this option also has some disadvantages :
- the floor surface is very cold, so if you spend time there often and for a long time in winter, you will have to think about a heating system;
- if you do not treat the concrete with anything, it will wear off and become dusty over time;
- the complexity of organizing a concrete floor;
- To make the work go faster, you will need special equipment.
The garage floor can be constructed using prefabricated concrete blocks or by pouring concrete directly on site. The use of ready-made blocks will significantly speed up the process of organizing the floor covering; moreover, the characteristics of factory blocks are stable and are tested by the factory. On the other hand, transporting heavy finished blocks will require special equipment, and there will be seams between the individual slabs, which is why the technology of pouring a monolithic slab is usually used.
To equip a concrete floor , first remove the soil to a depth of 20-30 cm, fill it with about 10 cm of crushed stone, compact it, arrange a sand cushion of about 10 cm, which is also thoroughly compacted. A cement screed with a thickness of about 2 cm is laid on the sand, then a waterproofing material (for example, roofing felt) is laid, and only after that it is the turn to carry out the main pouring of the concrete floor (5-7 cm thick), and it must be reinforced with steel reinforcement. As the concrete screed dries, it is periodically moistened with water. This will prevent the formation of cracks and ensure proper strength to the concrete. Naturally, the floor is made with a slope towards the gate.
When the concrete has gained strength, the garage can be safely used, i.e. use the screed as an independent floor covering. Some people prefer not to dwell on this and use concrete only as a basis for further finishing of the floor, for example, with porcelain stoneware, tiles, or for pouring a self-leveling floor.
The simplest option for finishing a concrete floor is painting , and it becomes mandatory if, after drying, you rub the screed with the sole of your shoe and sand appears. Such a floor will not last long, therefore it needs not so much decorative finishing as protection.
Concrete floor
Let's consider two options for installing a concrete floor:
- on top of rubble,
- on top of the sand.
On top of rubble
- The site is covered with a layer of crushed stone.
- A reinforcing mesh is fixed on top of the crushed stone layer.
- Concrete is poured on top. The solution is made from construction sand, cement and crushed stone or gravel in a ratio of 2:1:3.5.
On top of the sand
The site is covered with a ten centimeter layer of sand. The sand is carefully compacted.
- Cover the sand layer with roofing felt or glassine.
- Fill the area with concrete (layer thickness about 10 cm).
When the concrete hardens, the finished coating must be “hardened”. To do this, apply a thin layer (2 mm - 3 mm) of cement mixed with water. This procedure is performed in order to prevent the appearance of concrete dust.
Option #3. Self-leveling floors
The use of self-leveling floors allows you to quickly obtain a perfectly flat surface. Mixtures for self-leveling floors differ in composition and purpose. For example, cement and gypsum mixtures are usually used to level the floor. They do not allow you to create a decorative finishing coating, but with their help you can very quickly and easily get rid of minor irregularities. Such compositions are inexpensive and quite easy to use. To level the floor in the garage before finishing, it is better to use a cement self-leveling floor, since gypsum is sensitive to high humidity.
Another thing is polymer self-leveling floors , which are considered the finishing coating. The basis for them will be a concrete screed, on top of which a cement self-leveling floor can be used, since the base must be perfectly level.
The advantages of polymer self-leveling flooring include the following qualities:
- durability of the coating, which is measured in decades;
- resistance to temperature changes and frost, which is not uncommon in a garage;
- resistance to aggressive chemicals;
- fire resistance;
- moisture resistance;
- hygiene and ease of cleaning.
Minuses:
- high cost of coverage;
- difficulties during the repair process. If any area of the coating is suddenly damaged, it will be problematic to repair it due to difficulties in selecting the right shade.
The properties of the coating will depend on the composition of the material used . Polymer self-leveling floors are:
- polyurethane floors are the most expensive, require very careful preparation of the base, but at the same time they are characterized by the greatest resistance to shock loads and vibrations. The coating perfectly withstands the effects of aggressive substances, moisture, and it is not afraid of falling heavy objects. In addition, the coating is resistant to temperature changes, it is easy to care for, and cracks and scratches are relatively easy to restore - even if you manage to damage the floor, the area of deformation will need to be sanded and varnish applied on top. It turns out to be an ideal flooring option for a garage, but distribution is hampered by the high price;
- Methyl methacrylate flooring is great for garages. The coating is durable, wear-resistant, moisture-resistant, and can withstand the effects of chemically active substances. In addition, the floor hardens very quickly, and within a few hours after installation is completed you can walk and drive on it. The disadvantage is a strong odor during drying, but with proper ventilation it quickly dissipates. During operation of the coating, no foreign odors will appear;
- Epoxy floors also withstand abrasion, moisture, aggressive substances, and temperature changes well. The coating is hard and durable, but it has a significant drawback - it is afraid of impacts. Therefore, if you often make something in the garage and use a lot of heavy tools, then it is better to look towards other materials. If there are no particularly heavy objects that could fall in the garage, then an epoxy self-leveling floor is suitable for you;
- cement acrylic floor - this is the same cement self-leveling floor, but its characteristics are improved due to the presence of a polyacrylate copolymer in the composition. The coating is moisture-resistant, resistant to aggressive substances, non-slip, and can withstand mechanical loads well, but due to its low elasticity, cracks may occur on the surface.
The garage is not a place for intricate decor, but still some car owners will appreciate the opportunity to slightly transform the room where they spend a lot of time. Polyurethane and epoxy self-leveling floors can be painted in any shade , and if desired, even decorative chips (paint particles of different shapes and sizes) can be added to the composition to imitate the surface of granite, marble, etc. You can, of course, apply a design, use a 3D image, and put coins, sand or other decorative elements under a layer of transparent flooring, but this is hardly appropriate in a garage.
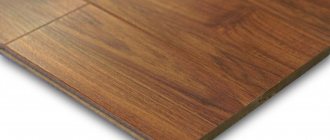
Choosing wood for a garage floor
When creating a wooden base in a garage, it is the choice of wood as the main finishing material that plays a decisive role. It is important to approach the purchase of boards responsibly. The material should not be damaged, there should be no chips, cracks, or knots that may fall out over time. You should not buy damp or old wood or darkened boards. Fresh boards have a pleasant yellow color and a rich aroma of fresh wood.
It is important to pay attention to the dimensions of the board: its thickness should not be less than 2.5-3 cm, and its length should not be less than 2 m. Moreover, the stronger the pressure exerted on the coating by vehicles standing on it, the more securely you need to select or lay boards them in such a way that they do not bend. And the thicker the board, the greater the distance can remain between the lags.
Logs for plank floors
For laying the flooring, wooden logs are usually used, which must also be quite durable and of high quality. Usually this is a thick beam 10x10 cm thick. Also, concrete pillars can be used to install a wooden floor, or boards can be laid directly on a concrete base.
Attention! Before making a purchase, it is important to make all the calculations and calculate the required number of boards, so that later you do not have to buy them additionally and again spend money on transportation. Calculations are made based on the area of the room. The quantity of fasteners – nails, metal corners, etc. – is also calculated.
The owner of this garage decided to save money and made the flooring from boards and “slots”
Here the boards are laid tightly, which creates a much stronger and more reliable surface.
Option number 4. Rubber floor
Another option that meets all your garage flooring needs is rubber flooring. The material is based on crumb rubber, which is mixed with adhesives, various modifiers and dyes. This mixture is used to produce rolls, tiles, mats, and liquid rubber.
Advantages:
- good resistance to shock loads, so the material does not care about the fall of heavy objects, and it can easily withstand the weight of the car;
- resistance to aggressive substances, moisture, temperature changes;
- good thermal and sound insulation performance;
- non-slip surface;
- high elasticity, therefore it is comfortable to walk on the rubber floor;
- durability;
- ease of care.
The material is not recommended for use near open fire sources - this limitation is the main disadvantage of the coating.
rolls is best suited for the garage . The thickness ranges from 2 to 12 mm; there is cord reinforcement, which gives the material additional strength. You can find rolls of different shades on sale; the coating is relatively easy to install, but over time it can peel off in the corners. Modular tiles also performed well, from which you can lay out a pattern on the floor. Installing such a covering is relatively simple, and in case of damage, individual tiles can be easily replaced - you just need to take extra material in advance. Another option is to create a seamless coating by spraying liquid rubber. The main disadvantage of this option is the fear of shock loads.
Cement floor
- The soil is mixed with gravel or crushed stone, and the surface is leveled.
- Prepare a solution of sand and cement in a ratio of 5:1. The solution is laid in a layer of 3 cm - 4 cm.
- The cementing procedure is repeated after 3-4 days. However, in this case a more liquid solution is used (1 part of cement is taken for 2-3 parts of sand). The thickness of this layer should be 1 cm - 2 cm.
- The finished layer is rubbed.
In order to increase the strength of the cement floor, its surface must be watered during the first few days (about 2-3 times a day).
Option #5. Paving slabs
An original solution for arranging flooring in a garage is to use paving slabs. Not only will the garage have an aesthetic appearance, but the material itself meets all the requirements for garage finishing.
Advantages:
- high strength - such a floor can easily withstand regular loads from a moving car;
- moisture resistance;
- fire resistance;
- excellent appearance, the ability to lay out a pattern;
- ease of care;
- relative ease of installation.
as a disadvantage , but if you search, you can find more or less affordable options, but you shouldn’t go to extremes - tiles that are too cheap are unlikely to be of high quality. Often such products are made in small factories with poor equipment and without adherence to technology, so the quality will be appropriate. As for installation, it is better to entrust it to professionals, but if you have some skills in the field of construction, you can try to do everything yourself.
Give preference to tiles with a rough surface - they will not slip. You should not take tiles that are too textured, as it will be more difficult to clean them from dirt.
The process of laying tiles in general is as follows. A layer of soil 20-30 cm thick is removed, a layer of gravel about 10 cm thick is poured in, thoroughly compacted, a layer of sand about 5 cm thick is poured on top of it, and also compacted. After this, a layer of sand is poured onto which the tiles will be laid. Each element is carefully deepened into the sand cushion, the cracks are filled with sand or a mixture of sand and cement.
Laying technology
When building a wood floor in a garage with your own hands, the appropriate solution is to construct a structure using joists, thanks to which during operation the load will be evenly distributed over the entire floor and transferred to the ground. In addition, if you install insulation between the beams, you will be able to further protect the room from the cold. With the help of a structure on the logs, it is possible to hide the defects present at the base, as well as various passing communications.
Important! For low garages, floor coverings equipped with joists are not suitable, since during their construction the structure raises the floor by 6-10 cm. In such a situation, a concrete base is poured instead.
Installing a wood floor on a concrete screed
The concrete base does not require special preparations, so you can start laying the wooden flooring at any time, but following the following sequence of actions:
- Initially, before installing the flooring, it is necessary to install a frame of 5x5 cm wooden beams, placing them in increments of 40-50 cm.
- It is necessary to attach lighthouse logs to the concrete screed at intervals of about 2 m using dowels. Fasteners must be installed at least every 50 cm.
- Next, you should fix the intermediate joists in the same way as the lighthouse joists, after which you can begin laying the floor covering.
- The floorboards must be laid perpendicular to the frame beams, and then secured to them using nails or self-tapping screws.
Note! Laying floorboards must have a moisture content of no more than 10%.
If the concrete base does not have significant defects and its evenness is satisfactory, then it is possible to install the boards without constructing a frame of wooden beams. In this case, it is enough to resort to using thicker floorboards. Before laying, they must be opened with drying oil to ensure protection from moisture and painted. After the compounds have completely dried, you can begin installing the floor, placing the boards along the entire length of the garage and fixing them to the screed using screws or nails.
Installation of boards on a ground base
Laying wood flooring on the ground is a little more difficult. The process itself is carried out in the following sequence:
- First of all, it is necessary to prepare the soil base by leveling it using a rake.
- The next step is to add sand and gravel. First, you need to lay a sand layer 15 cm thick. Next, you need to fill in a covering of the same height made of expanded clay or gravel.
- After laying the sand and gravel cushion, it should be moistened with water and compacted properly. It is best to carry out this work using special electrical equipment.
- Then you need to lay waterproofing over the entire surface and extend it 10 cm onto the walls. To glue the joints, you need to use tape or mastic.
- Next, it is necessary to install a beam with a section of 10x10 cm along the perimeter of the garage, which will subsequently distribute the load of the vehicle and the weight of the entire floor covering. At the corners, they should be fixed to each other using iron corners, while checking the evenness of the installation using a building level. If necessary, pieces of boards or plywood must be placed under the bars.
- A 10x10 cm log should be installed with the ends facing the entrance to the room. The distance between them should not exceed 0.5 m. Fastening to the beacon beams along the perimeter of the garage must be done using self-tapping screws or L-shaped metal elements.
- It is advisable to fill the free space between the joists with expanded clay or sand, so that the floor can be insulated.
- Next, you can begin laying the floorboards, which need to be placed across the joists and fixed to each of them using 2 screws or nails. Giving preference to the former, in order to increase the tightness of the fit, before screwing in the fasteners, it is necessary to make holes with a drill, which has a diameter of 1 mm less.
Note! Before installing the boards on each edge, it is necessary to attach a strip of roofing felt using a stapler, which will increase the level of insulation in the room and reduce the gaps.
In addition, when creating wood flooring, columns of concrete or bricks can be erected on the ground base.
This solution is suitable for garages where the soil is located significantly below ground level. The construction of columns avoids the need for filling a layer of sand and gravel, as well as laying waterproofing material. A distance of 80 cm should be maintained between their rows. The gap between columns in one row should be 30 cm.
Option number 6. Porcelain tiles
This is not an option for those whose budget is limited. Although the material is ideal for a garage, it is expensive, which is why it is used quite rarely. Porcelain stoneware is made by mixing clay, sand, feldspar, pegmatite and water. The mixture is subjected to high pressure and then high temperature. The result is a material that is not inferior in strength to natural stone.
Advantages:
- wear resistance and ability to withstand heavy loads;
- resistance to moisture and fire;
- resistance to temperature changes;
- durability up to 50 years;
- ease of care;
- great appearance.
The disadvantages , in addition to the price, include low thermal insulation qualities, as well as fragility, therefore it is necessary to transport porcelain stoneware with extreme caution. Lay the material on top of the concrete screed.
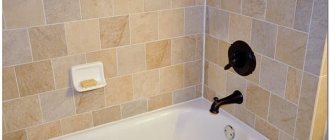
Ceramic tile covering
This option is quite expensive, since high-quality floor tiles are expensive. But this floor looks great, is easy to clean, and produces very little dust. Tiles must be purchased with a wear resistance class of at least 5, and if there is no heating in the garage, then frost-resistant. It is recommended that installation be carried out no earlier than 2 years after the construction of the garage, otherwise the coating will deform during shrinkage.
Ceramic tiles in the garage
pros
- aesthetics;
- ease of installation and further maintenance;
- practicality and reliability;
- high performance;
- acceptable cost.
Minuses
When water or other liquid substances come into contact with the surface, the surface becomes slippery. For this reason, it is better to choose a product that contains special substances that provide an anti-slip effect. Also, the material is not very impact-resistant, which creates inconvenience, especially when you have to work with various tools that sometimes fall on the floor.
Ceramic tiles for garage
To work you will need:
- primer;
- tile adhesive;
- ceramic tile;
- notched spatula;
- level;
- plastic crosses for seams;
- grout.
Prices for grout for Ceresit tiles
ceresit tile grout
Stage No. 1. Preparing the base
The tiles are laid on a concrete base. If the rough screed has been damaged during use, you need to repair all the irregularities with cement mortar, clean it of dust and cover it with two layers of primer. It is enough to simply prime a high-quality screed.
Primer screed - photo
Stage No. 2. Floor covering
The adhesive composition is diluted according to the instructions and allowed to brew for 10 minutes. Apply part of the adhesive to the back side of the tile, and apply the rest to the floor with a notched trowel. Place the tiles on the floor, level them and press them gently. Plastic spacers are inserted between adjacent fragments to ensure uniform seams. After leveling, the tiles are checked with a level to ensure the floor is perfectly level. Glue should not get on the front side of the ceramic; all accidental splashes and smears should be wiped off immediately with a rag.
Start laying tiles on the floor
Trimmed tiles near the garage wall
Stage No. 3. Grouting joints
After installation, you need to wait 3 days and rub the seams. For this, a special cement-based composition is used. The seams are moistened, and then the working mixture is applied with a narrow rubber spatula. After filling the seam, remove the excess with a gentle, sharp movement. When the process is completed, allow the grout to set for half an hour, after which the seams are washed with a damp sponge. You can drive your car into the garage after 2 weeks, when the glue has completely dried and the floor has acquired the required strength.
Grouting joints
Option No. 7. Acid resistant tiles
Naturally, we are not talking about the tiles that lie in the bathrooms and decorate the walls in the kitchen - such tiles will not withstand the loads typical of a garage. Special acid-resistant tiles, which are usually used in workshops of industrial enterprises, are suitable. The material is produced on the basis of refractory clay, to which substances are added that provide resistance to negative environmental factors.
Pros:
- high strength and ability to withstand heavy loads. The material can easily withstand the weight of heavy factory machines, so it will certainly withstand garage loads;
- moisture resistance;
- resistance to aggressive substances;
- resistance to temperature changes and frost;
- the tiles do not absorb grease and dirt, therefore they are easy to clean;
- The non-slip surface will make moving around the garage safe in any weather.
Among the minuses, one can note, perhaps, a small assortment of tile shades, but when we are talking about arranging a garage and not an apartment, then this nuance can hardly be considered a serious minus.
Briefly about the main thing
The modern market is able to provide the developer with any materials. Moreover, the garage owner can decide what he will focus on when arranging the floor. Will he choose only practicality and try to save as much as possible, or will he spare no expense to add beautiful decor to the interior. Everyone only has their own capabilities.
But most garage owners follow the classic path and choose pouring concrete. Moreover, screed is necessary for many coatings. Without it, you cannot lay porcelain stoneware and acid-resistant tiles. It is also needed for self-leveling coating. Rubber, steel and even wooden floors cannot do without it.
But in the case where simple concreting is chosen, you can always modify and embellish the surface. The easiest way is painting. But, if you try, you can even make a good imitation using improvised means.
Option No. 8. Wooden floor
It is difficult to think of a more unsuitable material for a garage floor, but, nevertheless, many car owners still prefer this option. Why? Yes, because wood has its advantages:
- low price;
- ease of installation. All work can be done independently;
- ease of repair. If any part of the floor is damaged, you can easily replace several boards;
- good thermal insulation properties of wood make staying in the garage more comfortable;
- environmental friendliness.
many disadvantages:
- wood is afraid of moisture, can rot, or be affected by fungus;
- wood is flammable;
- spilled fuels and lubricants are easily absorbed into the wood structure;
- wood wears out quite quickly from constant contact with car tires.
To minimize the negative properties of wood, it must be coated with protective compounds that will increase the material’s resistance to moisture and fire, and protect it from attacks by insects and mold. Paint will provide additional protection. It is better to choose the most moisture-resistant species for the garage, for example, larch.
The wooden floor is laid out from boards with a thickness of at least 40 mm, and it is better to take boards with a thickness of 50 mm or more. The wooden floor is laid on logs, which are used as wooden blocks.
Video description
The video shows the technology for assembling a plank floor:
Wooden floors on the ground
This means that there is no solid foundation inside the garage. The structure was simply built on a strip foundation, between the elements of which there was earth from dug trenches.
First, the soil is leveled. Then the entire plane is covered with a 5 cm layer of sand, which is leveled and compacted. After that, a crushed stone layer 10 cm thick is poured, which is also leveled and compacted.
In principle, this is not necessary, since the screed will not be poured over the prepared sand-crushed stone bed. This is simply how a filter layer is formed that will quickly absorb liquids spilled on the floors and passing through it.
Brick stands for logs built on the ground Source santorpack.ru
Option number 9. Steel floor
Corrugated steel panels can be used as garage flooring. This option is not very common, but has many advantages :
- high strength and wear resistance, the ability to withstand significant loads;
- resistance to shock loads - even a fall of a heavy object will not leave cracks on the floor;
- non-slip surface;
- the material does not generate dust, therefore it is easy to clean;
- durability.
The downside is the high price. Installation of steel plates is simple, but it is impossible to cut them yourself, so you need to take the correct measurements and order products with the necessary parameters.
Construction of an inspection pit
It is better to first calculate the dimensions on the drawing; you should consider that the hole is located conveniently and does not interfere with the entrance. How to calculate the dimensions of the inspection hole:
- width is 20 cm less than the distance between the wheels. Comfortable width – 80 cm;
- length – minimum length of the car plus 1 meter. There is no point in making an inspection hole less than two meters. You should also consider the place to put the ladder;
- depth - take into account your height when calculating - in the hole you should stand straight, without bending. Therefore, the depth is plus 20 cm to the height of the garage owner.
The pit will need to be concreted or the walls made of brick, so we add an allowance for the width of the walls on all sides to the dimensions. For brickwork - 12 cm, for concreting - 20 cm. The thickness of the floor covering is at least 20 cm. We take into account the waterproofing and insulation layer - this is another plus five centimeters on each side.
Important. Check the groundwater level before digging a hole. If the water is higher than two meters, then you cannot dig a hole in an already built garage. And in a garage under construction, you should immediately drain groundwater so that the pit does not flood.
Preparatory work
Stages of preparatory work for the construction of an inspection pit:
- We mark where we will dig the pit for the hole.
Important. You cannot dig a hole closer than 1 meter from the walls of the garage, this can lead to deformation of the foundation and destruction of the walls.
- digging a pit. We start from the far edge, moving towards the gate. To prevent the soil from crumbling, we install wooden supports;
- from the inside in the dug hole we ram the walls and floors with a hand tamper;
- pour a layer of crushed stone (10 cm) onto the floor, tamp it, add 5 cm of sand (on wet soils, sand can be replaced with clay and covered with another 5 cm layer of gravel). Compact;
- we install a layer of waterproofing (roofing felt, dense polyethylene);
- lay a metal mesh.
When all the preparatory work is completed, you can cement the floor and build the walls of the pit.
Concreting floors and concrete walls
First you need to concrete the floor:
- pour a layer of concrete (10 cm) over a metal mesh, it hardens for a long time - about five days, depending on the weather;
- when the concrete on the floor has hardened, you can begin installing the formwork;
- we install vertical formwork if we fill the walls with concrete;
- It is convenient to make the formwork from a sheet of OSB (1 cm), then it will be useful for building shelves in the garage;
- We display the sheets in tiers 40 cm high, connecting them with spacers;
- Simultaneously with the installation of the formwork, we lay a metal mesh (cell 15, thickness 4 cm) in two layers to reinforce the walls.
Advice. When pouring concrete into the walls, install glasses made of metal-plastic pipes at a slight angle; it will be convenient to mount lamps in them.
- It is better to line the niches with metal corners so that the concrete in these places does not crack;
- pour concrete into the formwork. The proportions of the solution per cube are cement M400 (370 kg) + crushed stone fraction up to 2 cm (1100 kg) + water (200 l) + sand (650 kg). The weight indicated is approximate, the quantity depends on the quality of cement and sand. The solution should have a thick plastic consistency. For concreting a floor, you can use less cement in the solution in proportion.
- On top of the perimeter of the pit, it is necessary to install a metal corner in the concrete, which will protrude 10 cm above the floor. Then it is convenient to lay boards on the corner to cover the hole.
The formwork should be removed after the concrete has set - this is two weeks. Then the concrete still needs to completely harden for at least a month.
All that remains is to backfill the soil into the gaps that remain. We fill it in layers and compact it thoroughly. All that remains is to complete the insulation, waterproofing and finishing.
Brick inspection pit walls
We fill the floor of the pit in the same way as when concreting the walls. If you take concrete grades M150 and 200, with a layer thickness of 10 cm, then you don’t have to reinforce the bottom. Now the sequence of laying brick walls:
- we lay the walls in one brick under jointing, the masonry rests on a concrete floor;
- Having laid out four rows, we immediately plaster the walls;
- after the bricklaying is completed, it is necessary to make bitumen waterproofing of the walls in two layers;
- After drying, we backfill the soil with compaction of all cracks.
Advice. For bricks, it is good to backfill with clay; it will additionally protect the walls from moisture.
Don't forget about the ramp to enter the garage.