It always seemed to me that water supply in the modern world is where people live. But recently I got a job as a driver at the post office.
That is, I distribute all sorts of newspapers, letters and other things throughout the villages and urban-type settlements of our region. Some of these settlements, to my surprise, live without electricity, or only some owners live without it, but in general the village has it.
In this regard, I was surprised by how people get water. They, of course, have wells and wells, but they raise this water in a variety of ways without the use of electric pumps.
These are the devices that caught my eye.
A story from our regular subscriber Dmitry.
How to raise water to a height without an electric pump
In ancient times and the Middle Ages, people often faced the task of raising water to a height.
It was implemented in various ways, which any homeowner who was left on a plot of land for a long time without electricity can remember.
In the case of a large depth of the source of water intake and an urgent need for water, the use of ancient methods will bring certain benefits in broadening one’s horizons, improving health and acquiring additional engineering and construction skills.
Archimedes screw (Archimedes screw)
The invention of a screw device for supplying water to heights to fill irrigation canals was made by Archimedes around 250 BC.
The Archimedes screw consists of a hollow cylinder within which the screw rotates. Those. The device is an analogue of modern screw pumps.
During operation, the cylinder is lowered into the water intake source at an angle. As the propeller blades rotate, they capture water and the propeller lifts it up the pipe. At the top point the pipe ends and the water is poured into a container or irrigation channel. The contact surface between the propeller and the pipe does not need to be perfectly watertight because a relatively large amount of water is scooped up per rotation relative to the angular velocity of the propeller. In addition, water leaking from the upper section of the propeller flows into the previous section and so on, thus achieving dynamic equilibrium in the machine, which prevents a decrease in mechanical efficiency.
In ancient times, the impeller was turned by slaves or animals. Nowadays, there may be problems with this and you will have to additionally build a wind wheel to drive the propeller into rotation or strengthen your muscles yourself.
Also, the Archimedes screw can have various modifications: the screw rotates with the cylinder or has the shape of a hollow tube wound on a rod.
Montgolfier hydroram (hydraulic ram pump)
Mechanic Joseph-Michel Montgolfier in 1797 invented a device called a hydraulic ram. It uses the kinetic energy of water flowing under the influence of gravity from the so-called. a “feeding” reservoir (for example, from a dam on a river) through a “feeding” pipe into some downstream drain. By passing most of the water through itself from a small height h (the height difference between the drain and the water level in the supply tank), the pump lifts a smaller part of the water to a greater height H (the height difference between the top point of the outlet pipe and the water level in the supply tank). The efficiency of a hydraulic ram pump depends on the ratio H/h, where h is the height of water entering reservoir A, and H is the required lift height. Initial state: breaker valve B is open and held in this position by a spring or weight, etc. The force of this spring exceeds the force of the pressure of the static column of water in the supply pipe on the closed breaker valve. Check valve B is closed. The air cap is filled with air. Water flows through supply pipe A, accelerating to a certain speed, at which break valve B, carried away by the flow of water, overcomes the force of its spring and closes, blocking the drain. The inertia of water abruptly stopped in the supply pipe creates a hydraulic shock - a sharp jump in pressure, the magnitude of which is determined by the length of the supply pipe and the flow rate. The pressure of the water hammer overcomes the pressure of the water column in the outlet pipe D, the return valve B opens and part of the water from the supply pipe A passes through it and enters the outlet pipe but, mainly, into the air cap D, since the inertia of the mass of water in the outlet pipe D prevents this fast, impulse entry. The water in the supply pipe is stopped, the pressure drops and reaches a static value, the return valve closes, and the pressure relief valve opens. The water in the supply pipe begins to move, gradually accelerating, and at this time, under the pressure of the air pressed in the air cap, the portion of water entering it is forced into the outlet pipe. Thus, the system returns to its original state and begins a new cycle of operation.
When using the Mognalfier hydraulic ram, the following must be taken into account:
- To obtain the minimum response time, the accelerating valve must be installed at an angle of 45 degrees to the flow. Its working cross-section must be equal to the cross-section of the accelerating pipe.
- The pump performance largely depends on the length of the accelerating pipe.
- the accumulator working valve (in the diagram above it is “B”) should have the largest possible flow area with a minimum stroke. This condition is satisfied by valves resembling fish gills.
- The air in the battery dissolves in water and therefore measures must be taken to replenish it.
- A well-made pump practically does not knock. Measures must be taken to mitigate the impact of the valves on the restrictors.
- The inlet open cyclone almost completely prevents fish from entering the pipe. When not in working order, crayfish like to settle in pipes and then fly out of the pipe. This happens.
- The deflector on the accelerating valve increases the efficiency of the ram even on small slopes.
The shut-off valve of the device operates automatically.
Therefore, human presence is required only during its installation and configuration. You don’t have to make such devices, but just buy them, because they are produced industrially in small quantities.
Aerolift (air lift, air elevator)
Aerolift (airlift) is a type of jet pump that uses air to lift water. The founder of the method is the German mining engineer Karl Loscher, who invented the method in 1797.
An airlift is a hollow vertical pipe lowered into water, to the lower part (i.e. lowered into the liquid) a hose is connected. When air under pressure is supplied through a hose into the pipe, its bubbles mix with water, and the resulting foam rises upward due to its light specific gravity.
Air can be supplied using a conventional hand pump through a nipple that prevents it from escaping back.
It is quite easy to make such a device for supplying water in the absence of a pump with your own hands and automate the process if there is a compressor supplying air.
Lifting water with a piston pump
To lift the water, a suction method using a piston is used. Piston models work well if the water is relatively close to the surface (up to 10 meters).
Piston hand water pump consisting of several main parts. Externally visible are the cylindrical body, handle and spout. The body can be steel, cast iron or polymer. The handle is usually made of the same materials, mounted on a bracket and connected to a rod located vertically. Inside there is a piston with a valve and a check valve. During the return movement, water is sucked into the cylinder body; when the piston moves forward, the check valves close and the water is pushed out.
| The principle of using a piston pump to lift water |
The pump is mounted on a pipe leading to the water supply. The operating process of the device is quite simple. When the piston rises, it simultaneously pushes out a portion of the water that is above it and pulls up the next one. When it lowers, the holes in it open and water enters the space above it. Important components are the seals between the chamber wall and the piston.
Lifting water with a rod pump
Piston models work well if the water is relatively close to the surface. If it lies deeper than ten meters, then you will need a different type of hand pump - a rod pump. Its operating principle is the same. The difference is the location of the worker node. The chamber with the piston is lowered directly into the water. This arrangement requires a sufficient casing diameter. It must be at least ten centimeters. The chamber is lowered to such a depth that the intake hole is at least one meter below the surface of the water. Water is pumped due to the movements of the piston, but it is not drawn in from the depths, but is consistently pushed into the pipe. In this way, you can pump out water from a depth of up to thirty meters.
The importance of protecting the source of water intake and the design of the head
On your own plot of land, first of all you need to take care of providing it with water for irrigation, drinking and other needs. To do this, it is enough that a well is built, and from it it will always be possible to extract the required amount of necessary moisture at any time of the year. But to lift liquid, as you know, you need a pump that runs on electricity. But what if the site is located far from civilization and there is no electricity? In this case, you can do without a pump by using other methods. These methods will now be discussed.
Option #1 - American river pump
This pump model, which does not require electricity to operate, can be used by craftsmen who are lucky enough to purchase a plot of land on the banks of a small but very stormy river.
The hose is laid in the barrel in even turns without creases or kinks. And the entire structure as a whole looks rather simple, but with its help water is regularly supplied to the shore
To create a pump you will need:
- a barrel with a diameter of 52 cm, a length of 85 cm and a weight of approximately 17 kg;
- hose wound in a barrel with a diameter of 12mm;
- outlet (supply) hose 16mm in diameter;
There are also restrictions for the immersion environment: the working depth of the flow should not be less than 30 cm, the speed of water movement (current) should be 1.5 m/sec. Such a pump ensures that water rises to a height of no more than 25 meters vertically.
Components: 1 - outlet hose, 2 - sleeve coupling, 3 - blades, 4 - polystyrene foam floats, 5 - spiral winding of the hose, 6 - inlet, 7 - bottom of the structure. The barrel floats perfectly
Details of using this pump can be seen in the video.
Option #2 - homemade wave pump
This pump also takes advantage of the river nearby. In a reservoir without a current, such a pump is unlikely to be effective. To make it you will need:
- accordion-type corrugated pipe;
- bracket;
- 2 bushings with valves;
- log.
The pipe can be made of either plastic or brass. Depending on the material of the accordion, the weight of the log must be adjusted. A log weighing more than 60 kg will fit a brass pipe, but a not so heavy load will be suitable for a plastic pipe. As a rule, the weight of the log is selected practically.
This version of the pump is suitable for a river and not with the most turbulent current, it is important that it is simple, then the “accordion” will contract and the water will be pumped
Both ends of the pipe are closed with bushings having valves. On one side, the pipe is attached to a bracket, on the other, to a log placed in water. The operation of the device directly depends on the movement of water in the river.
It is its oscillatory movements that should force the “accordion” to act. The expected effect at a wind speed of 2 m/sec and with an increased pressure of up to 4 atmospheres can be approximately 25 thousand.
liters of water per day.
As you understand, the pump is presented in a simplified version. It can be improved by eliminating unwanted torque on the log.
To do this, fix it in a horizontal plane by installing a ring stop on the lift using a bolt. The pump will now last longer.
Another improvement option: soldered tips at the ends of the pipe. The bushings can simply be screwed onto them.
Particular attention should be paid to the preliminary preparation of the log. Don't forget that it will be placed in water. We prepare a mixture of natural drying oil and kerosene at a ratio of one to one.
We impregnate the log itself with the mixture 3-4 times, and the cuts and ends, as the most hygroscopic, six times. The mixture may begin to harden during operation.
When heated in a water bath, it will return fluidity without losing other properties.
Aerolift (air lift, air elevator)
Air can be supplied using a conventional hand pump through a nipple that prevents it from escaping back.
| The principle of operation of an airlift pump and its varieties |
It is quite easy to make such a device for supplying water in the absence of a pump with your own hands and automate the process if there is a compressor supplying air.
| Aerolift using a compressor |
Main stages of work
For this homemade product, you will need two check valves with ½-inch threads (but you can take valves with a different thread - for a specific pipe diameter).
Then you will need to cut the plastic pipes into pieces of suitable length and thread the edges so that you can “seat” the check valves.
In principle, you can use ready-made adapters for plastic pipes. But if you have a lathe, it will be cheaper to cut the threads (using a lathe you won’t be able to cut straight, since the plastic is soft).
At the next stage of work, we assemble the entire structure. In addition to the pieces of plastic pipe, you will also need two tees and one corner. Please note that the check valve on the center pipe is installed with the arrow up, and the second one with the arrow down.
The operating principle of this homemade device can be seen in the video on the website. Write in the comments what you think about this homemade product.
How to pump out a hole without a pump
The use of the so-called mechanical “old-fashioned” method is justified only in conditions of complete absence of electrical energy.
Standard technology using improvised means makes the work process rather unpleasant, but quite effective:
- If necessary, homogenize the liquid inside the pit with special substances.
- Change into suitable work clothes that provide good protection from accidental water.
- Securely attach a strong, but not too thick rope to the handle of the bucket.
- Scoop the water out of the hole with a bucket and lift it up with a rope.
- Pour the raised liquid into a special container for subsequent disposal.
After emptying, the pit should be washed with water under pressure to prevent the formation of deposits on the tank walls, which significantly reduce the total volume.
Methods for pumping water without an electric pump are labor-intensive and require a lot of time to build an easy-to-use and practical device.
Sunday, April 19, 2022
How to raise water to a height without an electric pump
Methods for lifting water without an electric pump are ineffective and require serious costs and effort to produce an efficient and convenient device, which are incomparable not only with the cost of the cheapest electric pump, but also with expensive models. Their use is justified when living in areas with a complete lack of electricity (which can be attributed to survival), to broaden your horizons, improve your health, and gain additional engineering and construction skills.
Below are just a few options that, in my opinion, are better and simpler. If you wish, you can search the Internet for other options for such pumps.
How to raise water to a height without a pump
On your own plot of land, first of all you need to take care of providing it with water for irrigation, drinking and other needs. To do this, it is enough that a well is built, and from it it will always be possible to extract the required amount of necessary moisture at any time of the year.
But to lift liquid, as you know, you need a pump that runs on electricity. But what if the site is located far from civilization and there is no electricity? In this case, you can do without a pump by using other methods.
These methods will now be discussed.
Types of wells
Bore wells can be of two types: sand and artesian. The first type has another name - filter well. It is drilled to the nearest aquifer in sandy soil. The depth can reach 30 meters, and the casing width can be about 13 cm.
The peculiarity of the structure of such a source is that a mesh filter is made on the walls of the pipe. To extract water from it, a deep or surface unit is required. It can last about 15 years.
But the service life primarily depends on the depth of the aquifer and how intensively it is used.
The second type is an artesian well. The water in it is extracted from great depths; it can reach 200 meters. It has increased productivity and high-quality water.
It lasts much longer than the first type - more than 50 years. Accordingly, a more powerful apparatus must be used to lift moisture to the surface.
To drill such a hole, permission is required from local government authorities.
Is it possible to get water from these wells without using an electric pump? Yes, it is quite possible, and from both types of mines. But it is important to take into account several nuances. Much depends on the hand-held devices that will be used.
They usually do not provide sufficient pressure at depths greater than 30 meters. Therefore, such a system is relevant mainly for a sand well.
But first, let's figure out how it is possible to lift liquid from such a structure without a pump, and what is needed for this.
Drilling
Drilling wells - you should provide your home with water from this stage. It is the finished mine that is subsequently equipped with all the necessary equipment and a stable water supply system is created .
Drilling wells under water can be done in two ways: on sand and on clay. Let's look at their features.
Arrangement
When arranging a mine, you should first understand what the water surface in a well is. Since you will come across this term more than once when communicating with drillers or plumbing equipment sellers. But everything is actually simple, this is the surface of groundwater. This is where we will lower the submersible pump.
Caisson
Concrete caisson
This object is designed to house and protect equipment associated with the operation of the well and its entrance.
May be from the following materials:
- concrete;
- stainless steel;
- aluminum;
- plastic.
To install it, a pit one and a half meters deep and wide is dug according to the dimensions of the container around the shaft. It is immersed inside and buried to the exit hole.
Tip: if you have a heated basement, you can place all the necessary equipment in it. This will save the family budget.
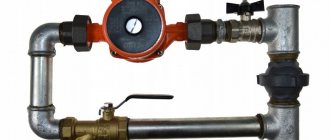
Hydraulic accumulator
Hydraulic accumulator sample
This tank allows you to control the pressure level throughout the water supply system, protects against water hammer and guarantees the availability of a minimum amount of water in the event of a water supply shutdown. Located in a caisson.
Heading
Metal head
This simple element seals the shaft and protects it from precipitation and all kinds of debris. Also attached to it is the upper end of the steel cable that holds the pump.
Aquifers
Groundwater location diagram
- Shallow depth, about 10-20 m.
Sand well diagram
- Poor performance.
- Sewage pollution due to lack of reliable protection.
Advice: to prevent sewage from entering the well, it is recommended at the initial stage to choose a place for its creation that is furthest away from possible sources of pollution.
- When the well is idle for a long time, silting occurs.
Advice: you should not drill a mine down to sandstone in a dacha where you only visit during the season. Because over the winter it will fall into a deplorable state and will require major repairs.
- Short service life, about ten years.
- Low selling price.
- Possibility of drilling with your own hands. Which allows you to save even more.
Carrying out the process in-house
- An artesian well has many positive characteristics:
- Great depth, reaching 300 m in some regions.
Well diagram for limestone
- Reliable protection from the clay layer from external contamination.
- Low water temperature in the well.
- High performance, sufficient to provide multiple water intake points.
- No silting process.
- Long service life, reaching fifty years.
- High complexity and labor intensity of the drilling process.
Advice: to drill an artesian mine, it is recommended to invite specialists with the appropriate equipment. Because not only is this activity very labor-intensive, but also making the slightest mistake can weaken all its advantages.
- High cost of implementation. You will need a lot of pipes and powerful equipment.
Extraction of water by air pressure
This unusual method is perfect for extracting water from a mine without a pump. That is, you can use any manual hose pump that operates without electricity. Making such a system is quite simple.
First you need to completely seal the top of the well. Two holes are made in it: the hose from the pump is inserted into one, and the water supply pipe is inserted into the second.
When working with such a device, pressure is created in the shaft, which pushes the liquid out.
If the air pressure entering the shaft is powerful, then it is quite possible to do without an electric pump.
But it must be taken into account that such pressure will push water not only up, but also down into the aquifer. The consequences of this will be described below.
This method can be used in conjunction with standard approaches. It is especially relevant if the pressure in the pit is not strong enough, even for an electric pump.
Water extraction by hydraulic ram method
This is another non-standard way of extracting water without a pump: in this case, a hydraulic ram is used - a device designed to mechanically lift liquid from any well, even an artesian one.
This device operates on energy obtained from the flow of water. By raising water to a greater height and lowering it down, the liquid is pushed upward. This design consists of the following components:
- baffle valve;
- return valve;
- supply pipe;
- outlet pipe;
- air cap.
Due to the opening and closing of valves in a certain sequence, fluid circulates. It accelerates through the supply pipe and a hydraulic shock is created, displacing the liquid out into the outlet pipe. Such a device is difficult to make on your own, but it is easy to purchase. And this will be the best solution for areas where there is no electricity.
Important points
When extracting water by increasing pressure inside the mine, several important factors must be taken into account. Firstly, the geological structure of the area where the well is located is taken into account.
Also important is the flow rate of the mine for extracting liquid from the ground and the productivity of the aquifer.
And, of course, the depth of the aquifer is taken into account.
If all this is not taken into account, the well may fail due to excess pressure. Simply put, liquid from the aquifer will stop flowing into the mine. This is due to the fact that the air formed inside will push almost all the water down, pressing it into the ground. Therefore, the air supply must be optimal. It should only be enough to push the water out and not create excess pressure.
Alternative devices and methods for pumping water from the basement
If a one-time pumping of water is necessary and there is no possibility of purchasing an additional drainage pump, then you can use alternative methods.
- For example, an inexpensive submersible vibration pump of the “Springhead” type. If the depth is shallow and there is not a lot of water, then such a pump will cope with removing liquid. The main thing is to make sure that there is no debris in the water or to first remove the most dangerous foreign matter from the liquid.
When using an external drainage pump, so that it pumps out the water completely, you can resort to modifying the design of the system. When the water level in the basement decreases so much that the use of an external pump becomes difficult due to air getting into the mechanism, then use a 15-20 liter capacity. You can take a bucket. Place the hose for supplying water to the pump into a bucket and add water there with a scoop or shovel. Then all that remains is to remove the remaining puddles with a rag and dry the basement. This method can also be applied to some designs of submersible pumps, as well as when there is a large amount of debris and dirt in the water.
If there is a slope from the basement in the area, you can pump out the water by gravity. To do this, do the following:
- prepare a rigid plastic pipe, similar to an intake pipe for a surface pump;
- make an exit from the basement to the outside towards the slope;
- Immerse one end of the pipe, through the passage into the basement, into the water there;
- Place the second end of the pipe at the bottom of the area;
- if possible, suck the air out of the pipe (this can be done, for example, with a vacuum cleaner), and the water will flow out by gravity.
What to do if pumping takes too long?
Some wells take almost months to pump. If the work goes on, but the result is not noticeable, it makes sense to remember the main mistakes that novice craftsmen often make when performing this type of work.
Here are the most common:
- The pump is suspended too high , so the bottom layers of water are not cleaned.
- The pump is hung too low , it often clogs and may soon break or be sucked into muddy deposits.
- Dirty water flows back into the well shaft , which leads to re-contamination of the well.
Simply checking each of these points will allow you to identify and fix the problem before the situation becomes truly difficult. If the work takes longer, it makes sense to spend money on the services of specialists or simply consult with more experienced craftsmen.
Features of unpowered water pumps
You never know where knowledge of school subjects will come in handy. Especially in physics. This device, which is built on knowledge of physics, will be discussed. This pump is solely a consequence of the development of both human progress and innovative thinking. To operate, it does not require electricity or fuel, it does not even need to do anything additional. But the pump is capable of producing good pressure and raising high columns of water, which many, without understanding it, call cheating. But this is far from true.
We make a pump that pumps water by itself
In order to make a water pump with your own hands, you will need the following materials:
- Two check valves.
- Plastic pipe for soldering.
- Tee.
- Knee.
- Threaded ends.
- Various containers.
- Soldering iron or torch.
- Lathe or threaded ends.
Design with description
This is what he looks like. Everything is made from PVC pipes.
In this case, the design looks like a straight pipe with various valves and taps, with a branch in the center of the thicker diameter pipe. The thickest part is a buffer or receiver for accumulating and stabilizing pressure. Inlet and outlet ball valves are installed on the left and right. I will be looking at the pump from right to left. Since the right side is the entrance for water, and the left is the exit. In general, we realized that water is supplied to the ball valve on the right. Next comes the tee. Tee, separates the flows. It flows up to the valve, which closes when there is sufficient pressure. And the direct flow is supplied to the valve, which opens when the desired pressure is reached. Then, the tee goes again to the receiver and to the output. Oh, and a pressure gauge, but it may not be there, it’s not that important.
Step 1
First of all, you need to purchase two check valves with any thread.
Step 2
In order not to buy threads, you need to take a plastic pipe for soldering, which will be processed on a lathe.
Step 3
Let's start cutting threads on a lathe.
The finished threaded pipe should fit perfectly into the check valve.
We screw the second pipe to another check valve.
You can also use threaded ends to avoid having to machine the pipes. But they are quite expensive.
Step 4
This is what the finished design looks like. The water flows up. Then they go to the supply hose, where the faucet will be installed. An expansion tank will be installed in the center.
Step 5
This is what the finished structure looks like, pumping water into the tank.
How it works?
This design is capable of pumping water into a tank located at a height of up to three meters. Water enters the pipe, one of the valves allows water to flow up, but not back. The second valve is the opposite and provides pulsation.
We unscrew one of the valves so that the structure starts working.
For correct operation of the valve, a continuous supply of water is required. The diameter of pipes and hoses can be any. The wider, the more water flow you will get. In this simple way you can arrange regular watering of your beds
in the garden, if there is a body of water near the site.
Details
All parts are laid out before assembly. I use PVC pipes, they are glued with glue, but polypropylene can also be used.
Valve.
Assembly
I'm collecting. The second valve is in the middle and looks a little different. The difference between these two valves is that the brass valve will initially always be open, while the PVC valve will initially always be closed.
Assembling the buffer-receiver.
The end part of the pump.
Almost finished sample.
Let's add a pressure gauge to measure pressure during operation.
The water pump with pressure gauge is ready for testing.
Archimedes screw
And I saw this method from one village resident, whose plot was located near a river. He used this water to water the garden. But the problem is that the water level in the river, of course, is lower than the site.
A local resident used an Archimedes screw for this.
The operating principle of the device is similar to a conventional meat grinder. That is, a hollow pipe is taken, and a screw with curved cavities is installed in it. When rotating, these screws scoop up water and gradually feed it upward.
True, to do this, one edge of the device must be lowered into the water at an angle.
Operating principle of the Archimedes screw.
The guy showed me how it all works in practice. Then he twisted the device with his hands, but said that he wanted to buy a generator and automate this process.
In the place where the water pours out, he simply puts a makeshift channel that leads straight into the garden. Then he watered the potatoes like this. If you make one yourself, you can spend 20,000 rubles.
Here, only one drill costs 15,000 (for drilling ice). Plus a piece of pipe for this drill and a board for the body.
Important! The Archimedes screw was created by the inventor of the same name back in the 2nd century BC. e.
I liked the last option the most. Just by its appearance and idea. I'm wondering if anyone else has seen something like this. I think this is a rare occurrence. It would be interesting to see photos or videos of how this works for watering.
Source of the article: https://moydomovoy.com/4-sposoba-podnyat-vodu-na-vysotu-dlya-vodosnabzheniya-uchastka-esli-u-vas-net-elektrichestva-do-0401/
Pump tests
It's time to install and test the pump. I would like to make a reservation and say that the pump does not pump water, but rather increases its pressure. What I mean is that the pump needs an initial pressure to operate. To do this, install a pump in a small stream. Let's connect a long pipe several meters long (this is a mandatory condition) and draw water from a small hill. As a result, water will flow to the pump itself.
We place the receiver vertically, the brass valve should be in the open air.
And the pump, clicking the valves, begins to supply water above the intake level. Much higher than the level of water intake at the beginning of the pipe.
Real benefits
In fact, it is not exactly a pump, but rather a pressure amplifier. This is due to the fact that it requires a certain pressure to work. This type of product is also called “hydrofor”, because both have a water seal that opens and closes the valve when a certain pressure is reached. The receiver must always be in an upright position.
According to some tests, the pump calmly draws water from streams and lakes, but not at great speed. For those who often have to go to the river for water, creating such a pump is quite a good and thorough task.
But it is better to use such a pump not on its own, but in conjunction with several such pumps: they will not interfere with each other, but the amount of water will be much greater.
Plus, you can combine them at the outlet into one water supply pipe, but the main thing to remember: the pipe must be twice as wide in diameter if there are two of these products. This is due to the fact that the basic operating principle of such a design may be disrupted and the pumps will cease to function normally.
What tools will you need?
Due to the pressure on the handle, the mechanical valve creates a suction effect, which, in turn, draws in liquid from the bottom of the source.
The pumping procedure is greatly simplified if there is a pump, but even in its absence it is possible to independently remove water quickly and efficiently. For this purpose, you should prepare a piston device or improvised means, such as a metal bucket, a strong rope and a special container for collecting the lifted liquid.
The option with improvised means is publicly available, but relatively complex, and a piston device for supplying water to a height can be made with your own hands. Inside the pipe with check valves, a piston moves, actively pushing water out.
Working principle of a water pump
All this seems truly amazing and incredible, but there is no secret here. Such water pumps are also called hydraulic shock pumps and they work like this: When water is supplied, it immediately rushes into the open valve.
As soon as the water gains a slight run-up, this valve will close sharply. And since the column of water in the pipe has inertia, like any physical mass, a water hammer will occur, which will create excess pressure that can open the second valve. And the water will rush into the receiver, where it will compress the air.
As soon as the excess pressure is extinguished and becomes less than the outgoing one, the middle valve will close and the upper one will open. As a result, water will again flow through the top valve.
Then the cycle repeats.
Sources
- https://comfortdo.ru/kak-podnyat-vodu-na-vysotu-bez-nasosa.html
- https://lik-o-dil-es.blogspot.com/2020/04/kak-podnyat-vodu-na-vysotu-bez-ehlektricheskogo-nasosa.html
- https://novostroikbr.ru/poleznye-stati/kak-podnyat-vodu-na-vysotu-bez-nasosa.html
- https://sdelairukami.ru/prisposoblenie-dlya-perekachki-vody-bez-ispolzovaniya-elektronasosa/
- https://septik.guru/kanalizaciya/yama/kak-otkachat-vodu-iz-yamy-bez-nasosa.html
- https://stroi-s-ka.ru/vodostok/kak-vykachat-vodu-iz-bochki-bez-nasosa.html
- https://SdelaySam-SvoimiRukami.ru/4253-vodyanoy-nasos-bez-pitaniya.html
- https://delovvode.ru/skvazhina/bez-nasosa/