You can cope with many everyday troubles on your own, with the most modest amount of theoretical knowledge and a few ordinary tools.
Repairing a faucet is one of these simple tasks.
From this article you will learn what needs to be done if water is dripping from the tap: how to fix it, what tools are needed and what will help extend the life of the device?
Repair of a single lever mixer with a ball block
Single lever ball valve problems are usually caused by a broken valve mechanism. The lever, fixed with a screw, is removed in the same way as in the case of a mixer with a cartridge. The dome-shaped metal cap, which is located below, secures the entire valve mechanism in the body. Under the cap is a plastic cam that limits the movement of the control lever. At the bottom of the cam there is a dome-shaped washer for a tight fit to the mixer ball. We have already described the structure of the ball and the principle of mixing above.
Disassembly procedure
- Remove the plastic red and blue covers and unscrew the lever according to the diagram described above. The difference will be that the pin from which you need to twist the lever is not polymer and rectangular, but metal, with a thread for the screw securing the lever.
- Unscrew the dome cap. It can be equipped with slots for easy grip. But if there is no slot, use a screwdriver: press it into the groove and gently push it up and clockwise, tearing the part out of place. You can also use pliers, inserting them into the grooves from the inside of the cap.
- After removing the cap, remove the cam with the shaped washer. Clean them from dirt with a rag.
- Remove the mixing ball and examine its valve part.
- Remove the valve seats. They are easily removed using a thin screwdriver. You can use tweezers or a screwdriver to remove the pressure springs under the seats.
Typical problems with the valve mechanism of a ball mixer
Leaks or excessive noise can be caused by the following problems:
- The inside of the dome washer or the socket in the housing where the lower part of the ball rests is worn or heavily soiled. These spherical cavities must be thoroughly cleaned.
- Ball wear. It may show cracks and grooves. All this is caused by dirty and hard water mixed with solid particles. The only way to fix this is by replacing the ball.
- Worn valve seats. If they begin to fit poorly to the ball, they let water through. They also need to be replaced.
- Poor seat fit can be caused not only by wear, but also by weakening springs. The issue is resolved by replacing the springs with new ones.
Assembly of a single lever mixer with a ball mechanism
It is performed in the reverse order, with cleaning and lubricating the old parts and replacing new ones:
Clean the faucet cavity. Insert new springs into the saddles, place the assembly in its designated slots. The cleaned ball is lubricated with silicone grease. The ball is inserted into the mixer body. The washer with the cam is installed. For proper assembly, there is a groove in the housing that should be aligned with the protrusion on the cam. Place a clean metal top cap and screw it on
It is important to avoid distortions. Place it on the metal rod and screw the lever to adjust the water.
Problems with the swivel spout block
If water from a single lever faucet flows above and below the swivel spout block, this is caused by worn seals. Rubber rings and, less commonly, cuffs are used as seals. To replace the rings, you need to disassemble the mixer as follows:
- After removing the cartridge, you need to remove the rotating side of the spout from the body. How to do this will become clear during disassembly. In some models this unit can be removed upwards. It is locked on the body with a special coupling. But more often the spout block is removed downwards, where a corrugated flexible hose is attached. To remove the unit, you need to disassemble it, including removing the faucet from the sink or sink.
- On the bottom side of the dismantled mixer, you need to unscrew the ring-shaped nut and remove the fluoroplastic ring located under it.
- Now you can remove the spout block from the body by pulling it down. Worn rubber seals will be found at the joints with the body. You should purchase the same new ones, and at the same time replace the fluoroplastic rings on top and bottom before installing the mixer.
Crack in the body
This malfunction is immediately noticeable and requires replacing the entire mixer. Some DIYers resort to silicone sealant to “repair” the case. But this is a temporary measure. Soon you will still have to go to the store for a new faucet.
The aerator is clogged
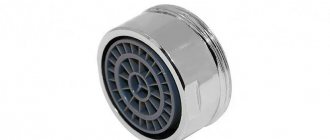
If, with the taps fully open, you observe insufficient pressure, then there may be several reasons. This is a blockage in pipes and inlet hoses, and simply poor pressure in the water supply network. But it could also be a clogged aerator on the spout pipe. To repair, unscrew the aerator. If your hands are not strong enough, use an adjustable wrench. The aerator has slots for unscrewing. On the mesh inside you will find a lot of solid particles and deposits that prevent water from flowing and reduce pressure. The mesh can be cleaned under running water.
Difficulties
The above actions will be meaningless or ineffective when:
- Significant wear of parts due to corrosion (rust-covered plumbing needs to be completely replaced);
- Lack of gaskets and seals of the appropriate size or failure to lubricate them during assembly.
The work becomes more complicated when it is necessary to repair combination faucets that simultaneously supply drinking and tap water or models with two valves that supply regular and mineralized water from filters. Such models have two or more valve heads; to determine the problem, owners must sequentially shut off the supply tubes or completely rebuild the tap.
Problems that arise when operating a single-lever mixer
Although single-lever faucets are considered very reliable, they can also cause problems. Most often, repairs are required for leaks, cracks, decreased pressure, unsatisfactory adjustment (sharp transition from cold to hot water).
Problems under the sink
You notice constant dampness and notice water accumulating under the sink. What to do? The first thing suspicion falls on is the siphon or corrugated stainless steel hoses. If everything is fine with them and the sink is well sealed, then check the faucet itself.
Problems from above - troubleshooting faucets
- A typical problem with ball mixers is the rapid wear of the rubber or Teflon seats on which the ball rests. This causes water to leak. To prevent this malfunction of the mixer, you can change the seals every two to three years.
- Disc faucets break due to hard, clogged water. Chips and scratches occur on ceramic surfaces that fit tightly together. All this leads to leaks and reduced mixing accuracy. In this case, the cartridge needs to be changed.
- Another common problem with disc mixers is poor adjustment. This is a common problem with inexpensive models that have too low a setting angle. Choose cartridges and mixers from trusted brands and manufacturers, with a long service life, with an adjustment angle of up to 15°.
General problems - water leaking through the faucet
- An incorrectly installed lever can cause constant leaks in the kitchen. If this is the reason for unsatisfactory operation, then the tap must be rebuilt and the lever must be tightly adjusted during installation.
- Some faults require the installation of a new faucet. These are cracks in the mixing ball or in the housing. If there are cracks, then there is always a puddle of water near the faucet. The same can happen if the sealing rings in the spout block wear out.
- Also, the problem may not be related to the mixing chamber. A decrease in pressure usually occurs due to clogging of the aerator at the outlet of the tap.
Let's look at the reasons why it may drip from a kitchen faucet.
There can be several reasons for the formation of leaks:
- Incorrect use. Any equipment has certain operational characteristics. When providing a guarantee for their products, each manufacturer stipulates a number of restrictions, the violation of which leads to accelerated wear and tear. And often it is almost impossible to carry them out or control these parameters.
- Poor workmanship or poor quality materials. Often, when making a certain purchase, a person tries to choose an inexpensive product, trying to use financial resources economically. But often this turns into not just inconvenience, but a direct loss of money when forced to replace a defective product. Particularly unpleasant are cases when a breakdown occurs in the absence of people. When purchasing a faucet for your apartment, it is better to pay for the brand, because this concept also includes such an indicator as product quality. However, the low cost of a popular brand should alert you - most likely, this is a low-quality fake.
- Natural wear and tear associated with long-term use. The taps open and close many times during the day; its locking parts (gaskets, axle boxes, cartridges) work intensively and wear out quickly. Therefore, the best way to avoid leaks is timely forced replacement of quickly wearing components.
- One of the reasons for the breakdown may be poor build quality. The most common errors are misalignment of parts, destruction of seals due to too much tightening. Manufacturing defects cannot be ruled out, so a thorough inspection upon purchase is required.
Repair of a single-lever mixer with a cartridge
Repair of a faucet with a cartridge must begin with dismantling. Before disassembling the single-lever mixer, turn off the water and drain the remaining water from the taps. It is recommended to cover the sink or at least the drain hole with something.
- Unscrew the nut with the aerator from the faucet spout. This can usually be done by hand.
- Remove the decorative plugs and unscrew the screws that secure the lever. To do this, you need a hex wrench or a screwdriver with a suitable blade. As a last resort, you can use a drill with a thin drill bit. To find out which head the screw has, shine a flashlight into the hole. You need to act carefully: if you tear off the slot, dismantling the mixer will become a much more difficult task. If the screw does not budge, treat it with WD-40, wait a little and try again.
- Remove the lever: pull it up. This must be done carefully: for a number of models, removing the lever requires some effort.
- After removing the lever you will see a decorative cap. Take it out: it is made of plastic or weak metal and can be unscrewed by hand. If it doesn't work, try gently turning it with pliers or a gas wrench.
- After removing the cap, you need to remove the fixing nut under which the cartridge is located. To do this, you will need a Swedish adjustable wrench or open-end wrench.
How to buy a replacement ceramic cartridge
Cartridges have different hole diameters
Therefore, it is important to have a defective cartridge in hand when you go to buy a new one. In addition to different diameters, there are various types of clamps on the side of the bottom plate
Give preference to discs with silicone gaskets from well-known European companies. Then you won't have to repair your faucet for the next few years.
Installing a new cartridge and assembling the mixer
Reassembling the faucet after replacing the cartridge is performed in the reverse order:
- Use a soft cloth to clean the cylindrical cavity of the housing. Make sure the case is intact inside. Remove limescale.
- Insert the cartridge. It has centering lugs for proper installation. All that remains is to combine them with the recesses in the body.
- Tighten the locking nut, but do not over-tighten. Otherwise, the cartridge itself or the seals located below may be deformed. And this will cause new leaks. So tighten it halfway and turn on the water. If it protrudes from the sides of the housing holes, then turn off the water and tighten it a little more. Continue tightening the nut a little at a time until the housing remains dry after turning on the water.
- Next, proceed in the reverse order of disassembly: install the cap, install the lever and secure it with a screw, install plugs with cold and hot water indicators.
Communities › Do It Yourself › Blog › Repair of ceramic faucet housing for drinking water.
I got tired of periodically looking at the dripping drinking water tap from a three-stage filter and decided to stop this matter. There are several ways to solve the problem, for example: 1. Buy a new faucet. In terms of money, it’s 1600 rubles and you have to go to the store, and then still bother with a replacement. 2. Buy a new ceramic axlebox, in this case 3/8. In terms of money, it ranges from 100 rubles to 3500 rubles (an axle box from a famous company), and not every store has axle boxes of this size. 3. Repair the old axle box. There are no costs in terms of money, disassembly is minimal and you don’t have to leave the house - this is an option just for lazy people like me.
So, turn off the water supply to the filter and unscrew the axle box from the tap. Next, we disassemble the axle box into parts by pressing the rod with a finger. The result is something like the following:
Having disassembled it, the reason for the faucet’s leakage immediately becomes clear. The polypropylene spacer sleeve was worn out and torn, and as a result, sufficient clamping force in the ceramic pair was lost.
To fix it, you need to find a similar ring somewhere. I decided to make it from a 3 ml disposable syringe.
If necessary, sand the ring planes and put the axlebox back together.
I don’t claim to be the author of this method; similar methods have already been described on the Internet, where the spacer sleeve is made from copper wire, but it was easier for me to do it as described above.
Replacing the gasket
Having found out the main cause of the leak, you can resort to replacing the worn gasket. When the valve stem is tightly closed, the valve will allow water to pass through. The situation is aggravated by the excessive application of force when closing the mixer, which is unacceptable. Such phenomena can be observed when using taps from Soviet manufacturers, the seats of which were poorly milled, as a result of which the valve had to be tightened very tightly.
First, you should shut off the water that drives the flow to the faulty plumbing facility. Before carrying out work, you should still check that the shutdown has been completed completely. The old gasket is removed and a new one is installed. If a situation arises in which this spare part is not in the house, you should not start work with a complete replacement of the entire faucet. This small and important element can be made by yourself from any materials. A piece of leather or rubber is suitable as such a raw material.
First, take the old gasket and cut out a similar base on it, with a slightly larger diameter. After cutting, it is inserted into the socket. It is worth noting that the rubber element is unable to fit closely, so good density will be difficult to achieve. A leather gasket is necessary when the saddle edge is damaged. The new part must have a thickness of more than 3.5 mm.
The new part is placed so that it is most closely connected to the saddle. Then the plumbing device will work without noise.
The best rubber to use would be sheet rubber; if you don’t have one, you can use a regular shoe heel. In this case, overly flexible plastics or porous rubbers should be avoided.
All the described methods for changing the gasket are associated with repairing a cold faucet.
With the constant movement of hot water, such parts gradually deteriorate and fail. So, for hot taps you can use car tires, their surface is the strongest.
Main Factors
The main reason that caused a plumbing fixture to leak would be:
- gasket wear;
- abrasion of the rod thread, as a result of which the gasket is not tightly connected to the saddle;
- loss of the initial qualities of the cushioning base, complete decay and other reasons.
Tools for changing the gasket in the faucet.
The faulty faucet must be disassembled, after which the indications for leakage should be determined. Whatever the consequences of a malfunctioning plumbing product, the water should first be shut off, and after that you can begin repair work.
If a completely new faucet leaks, we can talk about the presence of a manufacturing defect.
To solve this problem, you can consult a specialist and, if the diagnosis is confirmed, return the mixer to the store.
If similar troubles occur with a ball valve, then a number of problems arise here. Their main reason is associated with the entry of debris into the product body.
Crane installation
The majority of property owners resort to replacing plumbing equipment on their own. Often such actions need to be carried out during renovation work or when moving to another place of residence. Here you can see water leaking from under the stem. The basis for such phenomena will be the stuffing box, which does not fit tightly to the surface. It requires replacement or a stronger foundation.
To achieve maximum sealing, it is worth tightening the stuffing box. It is not recommended to use excessively sharp and rigid tools in the form of pliers or pliers. They can ruin the boundaries of the sleeve. To achieve better fixation, use a wrench or adjustable wrench. When tightening the stuffing box, do not apply too much pressure, otherwise the thread will be damaged, and then the valve will need to be completely replaced.
After tightening the bushing completely, it is important to ensure that there are no more water leaks. If this phenomenon is still present, it is necessary to turn off the water and change the tap or sleeve, you can add an oil seal
When carrying out repair work related to replacing a tap, it is necessary to ensure that the water is completely shut off, which will prevent flooding of neighbors.
Then you should pull out the sleeve and union nut, after that, using a convenient device in the form of a sharp knife or a small screwdriver, you need to remove the old oil seal and screw on the new packing material.
For such purposes you should use:
- linen thread or thin twine;
- burlap fibers;
- a rubber tube of a certain cross-section and dimensions.
Thin threads are wound in the direction of clockwise movement, carefully winding the turns. In order to improve the stuffing, the threads used are treated with a natural base drying oil
You should show interest in the height of the recorded layer. Separate 2-3 turns should be free from packing, thereby avoiding the faucet being torn off when it is tightened. Water leakage can be eliminated by sealing the oil seal. Here you need to tighten the valve, then unscrew the cap nut and wrap the base with any suitable material. Once the union nut is secured, the faucet will no longer drip. Such actions do not guarantee long-term results, but as a temporary measure this option is not bad at all.
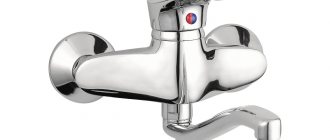
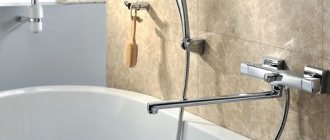
The single-lever or joystick faucet has virtually replaced two-handle or wall-mounted faucets in bathrooms and kitchens. Single lever taps are easy to use and repair, and have a long service life. The main advantage of their design is that there are no metal parts rubbing against each other.
Tool kit
To carry out high-quality repair work, you need to take care of the following equipment:
- additional crane axle boxes;
- a set of keys;
- glue;
- screwdrivers of different diameters and types;
- several gaskets;
- fum tape or rags for plumbing work;
- electric drill;
- silicone seals.
Almost any person has most of the listed tools. If you don't have them, you can buy them in the store.
Types of lever faucets
The joystick mixer is a compact body with a lever handle. According to their internal structure, single-lever mixers come in ball and cartridge types.
Sectional view of the ball-type mixer mechanism
The design of a mixer with a ball mechanism means that water is mixed in a small ball located in the body and resting on sealing gaskets (seats). Three holes in the ball are designed for hot, cold and already mixed water. The space inside the ball is called the mixing chamber. When you turn the adjusting rod (mixer switch), the pressure of the incoming water, both cold and hot, changes, and its temperature and pressure at the outlet also change. It all depends on how much the hole in the ball and the corresponding incoming hole overlap each other.
To mix water, a cartridge-type faucet uses a cartridge made of a pair of ceramic plates (disks) with holes. In this design, discs replace a ball: the pressure and temperature of the water flowing from the tap depends on the degree to which the holes in the upper and lower discs overlap each other. If you have cartridge-type taps, then repairing a faucet in the kitchen or bathroom usually comes down to replacing the cartridge.
Tips and tricks
The water supply system in an apartment or private house is a source of increased danger. Therefore, when operating it, it is necessary to adhere to certain rules to avoid problems. Let's list them:
- Have the ability to quickly turn off water from the riser.
- A set of tools for performing repair work should always be at hand.
- It is necessary to keep in the house a set of replaceable components for faucets and mixers that are in use.
- Be prepared to urgently call emergency water services in the event of a serious accident.
- And, of course, you need to know the rules and procedures for independently eliminating an emergency situation.
Prevention of breakdowns of a mixer with a cartridge or ball
If your plumbing requires constant repairs, it means that the quality of water in the water supply pipes in your region is unsatisfactory. It is worth thinking about installing filters. Conventional mechanical filters connected to corrugated hoses will significantly extend the life of any plumbing fixtures in the house. Suspension and sediment from the water will not wear away silicone and rubber parts as quickly, as well as the ball and ceramic valve mechanism of the faucet.
The main feature of the design of a single-lever mixer is the presence of a lever for regulating the pressure and temperature of the water, in contrast to a simple mixer, which has two regulating tap axle boxes. By turning the handle, you can easily set the required water pressure and simultaneously select the desired temperature mode. But the pressure of the supplied water you can change while maintaining the temperature, since the different functioning of a single-lever mixer is controlled by turning the handle. So for the pressure - down and up, and for the temperature - right and left.
The long service life of single-lever faucets can be explained by the absence in their design of rubbing metal parts, as well as various rubber seals between moving parts. Instead of metal parts, similar ones made of durable ceramics are used. But at the same time, the internal ceramic elements of such faucets are subject to wear due to mechanical impurities contained in abundance in tap water. To avoid failure of the ceramic mixer, it is recommended to install a water purification filter in front of it.
Single lever mixer repair.
If the mixer does not close and allows water to pass through, then most likely the fact is that the ceramic discs are worn out, so they need to be replaced. Before you begin repairing a single-lever mixer, you must first shut off the water supply through the pipes, because if you do not perform this action, you may end up in an unpleasant situation - for example.
First of all, you need to remove the plastic plug. To remove it, it is best to use a sharp object, since the plastic plug fits very tightly into the groove. After removing the plug, you will find a groove with a locking screw, with which the handle is firmly fixed to the base of the mixer. Unscrew the locking screw a little and remove the lever. The locking screw is usually made for a flat screwdriver, less often for a Phillips or hexagonal slotted hole.
After removing the mixer lever, carefully unscrew the decorative nut, then the union nut, which tightly presses the cartridge to the mixer seat. An adjustable wrench works well for removal; if one is not available, then an ordinary gas wrench will do. The faulty cartridge is removed. A new cartridge is installed in its place. The installation should be done so that all the holes in the cartridge coincide with the holes on the mixer seat. To prevent the cartridge from moving, there are small protrusions in its design that are located on the bottom. When installed, they should align with the recesses on the mixer.
After installing the new cartridge, tighten the nuts in the reverse order - first the clamping one, then the decorative one. Install the lever handle and secure it with a locking screw, after which the plug is put in place. In this way, you can quickly and easily repair a single-lever mixer.
After making repairs, turn on the water supply, then check the mixer with the installed cartridge. If everything is done correctly, the mixer will not let water through, which means that everything was done efficiently. Good luck to you and may your mixer function for a long time without any repairs!
see also
Comments 73
I make them from fiberglass, it works better for friction and doesn’t get crushed
They also leaked. For fun and exercise, I changed the rubber bands and replaced the plastic ring with an iron washer. It works fine for several months.
everyone had syringes lying around SUDDENLY at home))) I couldn’t unscrew the axle box from the old faucet at all, the edges are thin, they sit on a convex base and it’s all stuck nah
Eh, young people) There should be syringes on the farm
I’m not an addict or an insulin addict and I haven’t been sick yet, so keep syringes on hand at home


