Let's look at how to install a drainage system in this article. What elements does it consist of, and what must be taken into account when assembling it. After reading the information, you can easily talk with the contractor, plus optimize the costs of purchasing a drainage system from the roof of your own home.
House drainage system Source grandline.ru
What does the drainage system consist of?
It includes two main elements:
- gutters, also known as trays, that are installed on the roof eaves, and their main task is to collect rain or melt water from the slopes;
- the pipes into which water flows from the trays are located vertically, and their task is to discharge water into the surface drainage system or onto the ground.
There are additional elements:
- funnels through which water flows from the trays into the pipes:
- elbows for installing pipes, for draining from the eaves to the wall of the building, for fastening pipes;
- brackets for fastening trays;
- clamps for attaching pipes to walls;
- plugs for closing the ends of the trays.
Elements of the drainage system Source donstroyservis.ru
We install gutters
The next point in the instructions for installing a metal drain is the installation of gutters. Start with the lowest level (the one with the funnel). Install them one after another with a slight overlap of 2-3 cm. Fix them with holders - for this they have a special petal that bends inside the gutter.
We fasten the gutters to each other, as well as to the corner elements, using a connector with a rubber seal. We hook the short flange of the connector to the inner edge of the gutter and press the part against it. Place the front hook on the outer edge of the gutter and close the lock.
The ends of the gutters, if they do not connect into a closed perimeter, close with plugs. This can be done using a regular mallet, without additional fasteners.
Important: For additional insulation, coat all connections with roofing sealant. Please note: not silicone, but roofing - on a rubber or bitumen basis.
Sequence of installation of the drainage system
The first step is to install the gutters. They are attached to brackets, which are attached either to the first two boards of the sheathing, or to the rafters, or to the front board. The best option is the first one. But it can only be carried out if the roofing material has not yet been installed on the rafter system. If the roof is already covered, then the brackets use short hooks with fastening to the front board.
Installing brackets on the frontal board Source krovelson.ru
Attaching brackets to sheathing
For this purpose, brackets with a long leg are used. It is simply bent back to the required length, applied to the sheathing and secured to it with self-tapping screws through the holes made.
Bracket with a long leg Source www.braersnab.ru
It is important to strictly adhere to two parameters during installation:
- distances between fasteners;
- distance from the middle of the hook to the edge of the roof overhang.
The last parameter should vary in the range of 30-40 mm. This is done so that the water coming off the roof gets into the middle of the gutter. To avoid overflowing over the edges of the trays and splashing water.
Important! When installing gutter fasteners, it is important to use anodized “yellow” rather than “black” screws (Pz 5*40 yellow zinc screw), because The “yellows” have more resistance to breakaway.
The calculation of these self-tapping screws is as follows:
- long hook – 3 pcs/mount
- short hook – 4 pcs/mount
Installation and fastening of brackets to the sheathing Source grandline.ru
Attaching to rafter legs
If the roofing material has already been laid, then one of the options for attaching the brackets is to the rafters. For this, the same fasteners with a long leg are used, only they have it rotated 90°. This way it is simply more convenient to carry out the fastening.
Bracket with leg rotated 90° Source profiroof.com
Fastening to the front board
One of the top photos already shows how to attach the gutter brackets to the front board. For this, short hooks are used, but with a platform in which mounting holes are made.
It should be noted that today manufacturers offer various models, which mainly differ from each other in the method of fastening. The photo below shows an option where the fastening element is a bar with a full-length groove. It is attached to the front board, and the brackets themselves are inserted into the grooves.
Mounting plate with brackets for gutters Source oookifa.com
Other options
If it is not possible to install the brackets according to the options described above, then you can attach them to the roof overhang. For this purpose, brackets with a long leg are used, which bends to the required angle and length. The photo below shows this installation option.
Attachment to roof eaves sheathing Source ms.decorexpro.com
See also: Catalog of companies that specialize in roof repair and design.
The most reliable method of fastening
The most reliable way to attach a drain to the roof is using a hanging frame made of metal. To make such a frame you will need a 10 x 2 mm steel strip, as well as a welding machine. This installation method is the most complex, time-consuming and expensive, but it has many advantages:
- The design of the roof gutter system will be supported by a main steel frame, which provides sufficient rigidity for even the weakest plastic gutters. For gutters and pipes, structural rigidity will never be superfluous. Homeowners often encounter problems with plastic structures breaking or collapsing as a result of high water pressure during a rainstorm.
- The number and location of mounting points can be positioned in the most optimal way, which will allow you to fix the drainage system in the most suitable places on top of the house. But it is necessary to fasten standard brackets, maintaining a certain distance between them; often they do not coincide with the installation pitch of the rafters.
- By using a frame in the design, you can always adjust the design of the drain and set a suitable angle of inclination. This is especially true when a lot of time has passed since the installation of the drainage system.
- Such a reliable frame is able to maintain the integrity of the plastic gutter in the event of a snow or ice block falling off the top of the roof. If the fastening brackets are positioned correctly, the ice floe and snowball will break up into small pieces that will be safe for people located below the house. Sometimes a metal frame can stop the snow crust from falling off.
There are two types of gutter frames in construction. One of them is formed under the water collector in the form of two guides parallel to each other with several jumpers. The fasteners should be bent under the gutter profile so that the gutter itself rests on the jumpers, and its edges touch the two fastening strips.
To attach the gutter to a slate roof, it is possible to use both standard brackets and independent equipment in the form of hooks and loops.
The second type of frame for securing the gutter involves the installation of three strips of metal that run under the bottom of the profile. The rigidity of this design is much higher than that of the previous version, but it is also much heavier, and it also spoils the aesthetic appearance of the drainage system. Therefore, it is recommended to use such a mount only in places where it will not be noticeable, but additional reliability is necessary.
Rules and sequence for assembling gutters
The main task of the work manufacturer is to fasten the gutters of the drainage system at a slight slope equal to 2-3 mm per 1 linear meter of the gutter, since the drainage system is a gravity flow system. Therefore, on one side of the slope, the bracket is installed closer to the roof eaves, and on the opposite side of the slope lower, so that a slope is formed. Then a thread is pulled between the two fasteners, along which other brackets are installed in increments of 50-60 cm.
All that remains is to lay and secure the gutters to the fasteners. The main thing is that the installation is done end-to-end with a gap of about 3 mm. At the junction, a gutter connector with a sealing gasket made of porous rubber is snapped into place. To reduce the possibility of leaks, the joints are treated with a special sealant for roofing work.
If the house is located in the same area with trees with dense foliage, a “spider” for the funnel and a mesh for the gutter can save you from it.
An example of a mesh for a gutter and funnel Source grandline.ru
At the same time, it is worth remembering that the mesh does not need to be maintained, because the foliage stuck to it is simply blown away by the wind, but sometimes the spider will have to be cleaned.
Installation of gutters Source ko.decorexpro.com
Pipe installation
The second stage of drainage installation is the installation of vertical pipes. For a drain with a pipe with a diameter of 90 mm, there is a rule: 1 funnel per 10 linear meters of gutter. For example, if the length of the building’s cornice is 10, then one standing one is mounted on its surface. If the length is greater than this value, but less than 20 m, then two risers are installed.
Although it is possible to install one pipe for a gutter length of up to 10 meters, we do not recommend making a long drain in one direction, since, visually, this slope will be visible and not everyone will like this aesthetic feature. The optimal gutter length for one drain pipe is no more than XXX meters.
This is both beautiful and will protect the system from overfilling during heavy rainfalls
If the length of the eaves is up to 10 meters, but the roof slope is large (more than 70 m2), then installing a rectangular drainage system, for example Vortex, will help, since the throughput of this system is 60% greater.
Grand Line technical specialist
Semyon Grafov
Pipes are fastened to the walls of the house with clamps in increments of 1.5 m. If the height of the house exceeds 10 m, then the installation spacing is reduced to 1.5 m. The clamps themselves are fastened with self-tapping screws through plastic dowels. The main requirement is strict vertical installation. Therefore, at the installation site, first determine the vertical along the wall using a plumb line. Then, measuring the installation step, they make notes in which they drill holes for the dowels.
Installation of a drain pipe riser Source krovlyakryshi.ru
The assembly of pipes, the standard length of which is 3 m, is carried out using the socket connection method. This is when one side of the pipe has a larger diameter than the opposite. That is, the pipes are inserted into one another. In this case, pipes with a large diameter are installed upward. To completely seal the joint, they are treated with a special sealant for roofing work.
Special sealants for roofing works Source grandline.ru
Pipes and trays are connected to each other by funnels. A drain is mounted at the bottom of the pipe riser - this is a branch at an angle of 60°. Here it is necessary to take into account that the lower edge of the drain should be at a distance of 20 cm from the surface of the soil or blind area.
Important! For efficient drainage of water from the house, so that the foundation is protected from destruction, a drainage system should be installed under each drainage elbow of the drainage system.
Also, an important point is that the funnel is attached to the gutter in which a hole is made for draining. In order to make a branch from the funnel to the pipe, which is mounted on the wall at a distance of 30 -80 cm, two pipe bends and a connecting pipe are used. The pipe extends the outlet and has a length of 1 m. The inclination of the outlet is 60°.
Connection of a funnel and a pipe riser with two bends Source obustroeno.com
Installing the outlet funnel
After the installation of hooks for the Metal Profile drain is completed, you can install gutters on them. However, before you install all the trays in place, some of them will need to cut holes for the outlet funnel in advance. The width of this cutout, as a rule, is not less than 10 cm. At the same time, at least 15 cm must remain to the edge of the gutter.
Important: When cutting drainage elements, do not use a grinder! It will burn the polymer coating on the drain, and corrosion can quickly begin in damaged areas. Stock up on a hacksaw and metal scissors.
Now we attach the funnels themselves. We hook the front solid part under the outer bend of the gutter. Then we press the funnel against the tray and bend the teeth on the opposite side of the gutter.
To prevent small debris and leaves from falling into the drainpipe, spiders can be installed on the funnels - special retention nets. But do not forget to clean them periodically, at least once a season, otherwise the throughput of the drain will drop sharply.
How to choose the right drainage system
Just going to the store and buying a drainage system without deciding on its parameters is wasted money. There are certain standards regarding the size of the roof, or more precisely, the area of the slope from which water will be collected into the drainage system. And the larger the area, the larger the dimensions of the trays and pipes should be in terms of their diameter. Therefore, before proceeding with the installation of the drainage system, it is necessary to accurately select its dimensions in accordance with the area of the roof slope.
- If the area of the roof slope does not exceed 70 m², then gutters with a width of 125 mm and pipes with a diameter of 90 mm are installed in the drainage system.
- The slope area is more than 100 m², gutters 150-200 mm, pipes 100-150 mm. Also, with a slope size of 70-110 m², you can install rectangular drainage systems.
- For industrial and civil buildings with slopes of a larger area, systems with gutters with a width of 200 mm or more and pipes with a width of 150 mm or more are used.
Quality, guarantee and price
It is important to note that not all drainage systems are the same in quality.
As in any other case, saving on a gutter system may lead to the need to replace it. Which is almost always more expensive than buying a good quality gutter outright.
One of the important parameters when choosing is a written guarantee for the gutter.
If, for some reason, the manufacturer refuses to provide it to you, you should think about it.
For high-quality drainage systems, the written guarantee has an impressive period of 25-30 years.
The issue of price is now important. Of course, different systems have different prices.
To check current prices, you can use online stores, where prices are updated in real time. For example, in the Grand Line online store.
Our works
Gutter installation in Lianozovo
Installation of snow retention in the Provence CP
Installation of drainage on Volgogradsky Prospekt
Heating cable in a drainage system
Ice and snow inside the drainage system create a blockage (plugs) that prevent melted water from draining. As a result, it overflows over the edges of the trays, forming icicles. Everyone knows how dangerous they are. In addition, a large amount of ice and snow inside the trays means there is a high probability of collapse of the entire structure or deformation of its elements. To prevent this from happening, a heating cable is installed in the drain. It is a conductor of electric current that releases thermal energy.
Heating cable inside the gutter of the drainage system Source rooms-styling.com
The heating cable is installed after installing the roof drain. It is simply laid inside the gutters (along) and lowered inside the pipe risers. It is secured in trays with special clamps made either of stainless steel, or galvanized, or plastic.
In addition to the cable itself, the kit includes a power supply and a thermostat. The first supplies the current of the required voltage and strength, the second regulates the temperature of the cable depending on weather conditions. For example, if the temperature outside is -5C, then the cable does not heat up much. If the temperature drops below, the current inside the conductor increases, which increases heat transfer. This is what the thermostat controls.
It should be added that the thermostat itself does not determine the temperature. To do this, sensors are added to the system: either temperature or humidity.
Most often, the heating cable is installed not only inside trays and pipes. They cover part of the roof, or rather the overhang area. Here the conductor is laid in a snake pattern and secured to the roofing material with special clamps. This is clearly visible in the photo below. It should be noted that the heating cable both inside the drain and on the overhang is a single system with one power supply and thermostat.
Heating cable on the roof overhang Source tiu.ru
Device options
There are four possible solutions for installing a hidden drain, when the overhang protrudes a minimum distance beyond the frontal strip, which is located on the edge of the outer wall:
- Uninsulated curtain façade. The masking strip covers the gutters and the panels cover the drainpipe. Here you can use traditional pitched roof systems, in which the elbow from the gutter to the pipe is small or absent altogether. A necessary condition is that the height of the brackets or sheathing elements of the hanging system must be 20 mm greater than the diameter of the pipe in order to provide a ventilation gap between the cladding and the wall of the drain to evaporate condensate from it.
- Insulated curtain façade.
- "Wet facade" system.
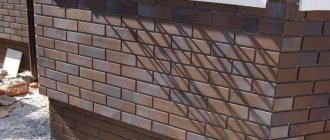
- Insulated facade finished with facing bricks.
A prerequisite for the last three options is that the drainpipe is located in a niche made of slabs of extruded polystyrene foam. The recommended thickness of the thermal insulation layer is 20 cm. This provides high thermal protection of the building and allows drainpipes to be freely placed in the niche.
This type of insulation has water absorption of a fraction of a percent, it is not susceptible to getting wet and does not lose its properties. But even in these cases, it is necessary to leave a ventilated gap between the pipe, insulation and cladding. The rest of the facade can be insulated with mineral wool materials.
Advantages and disadvantages
The only advantage of a hidden drainage system is that the silhouette of the house changes. Decoratively, a roof without cornices recedes into the background and the main emphasis shifts to the facade.
But the façade also does not have unnecessary parts in the form of brackets and pipes, and the blind area does not have external elements of storm drainage - storm drain gratings and gutters.
With the help of a hidden installation drainage system, a modern, minimalistic image of the house is created.
There are several disadvantages of hidden drainage systems compared to open ones:
- the system can be installed only at the stage of construction or complex reconstruction of the house;
- gutter installation is more difficult;
- It is necessary to have heating cables in gutters and pipes;
- the cost of the system including the work is higher;
- the niche and the metal drain itself inside the insulation worsen the thermal insulation of the house;
- the consequences of an installation error are higher - any leak will lead to the wall becoming wet, and it is difficult to identify it at an early stage;
- gutter repair is more difficult - partial dismantling of the facade cladding is required.
Another feature of a hidden drain is its “connection” to the storm drain. The drainpipe should go under the basement sheathing into the blind area and end in the well.
It is technically difficult to combine two systems from different manufacturers into one design. But there is a hidden gutter on the market from GALECO - HIDDEN GUTTER.
It includes its own storm drainage well with an extension in the form of a rain inlet and a basket for collecting large debris.
Varieties of modern drainage systems by material of manufacture
Traditionally, gutter systems were made of galvanized steel. And today this material has not left the market. They simply began to coat the galvanized drain with paint, thereby matching it to the color of the roofing material, creating a unified design for the house. In addition, the paint layer has protective properties, which increases the service life of the system. Mostly. Durability is ensured by double-sided polyurethane coating applied to galvanized steel with a galvanizing class of 275 g/m².
Today, manufacturers offer galvanized gutters and polymer coating. For economy class systems, steel with one-sided coating and a galvanizing class of 140 g/m² can be used. This means better protection and a huge variety of colors, unlimited in any way.
Plastic drainage structure Source grandline.ru
Plastic gutters are the most popular today. They are made from polyvinyl chloride (PVC). But this material is not used in its pure form, because it itself becomes brittle at low temperatures. Additives are added to it, which increase the strength of the polymer, so PVC gutters are not afraid of temperature changes and sunlight. And the biggest plus is that plastic is the cheapest material.
The modern market today offers drainage systems made of copper or stainless steel.
Copper drain Source pinterest.com
Useful tips
Little tricks will allow you to organize the drainage of rainwater and melted snow more efficiently.
- The location of the vertical riser in buildings with a wall length of more than 15 m is more appropriate in the center. This will allow you to slope from the corner of the house to the middle.
- Special paint with protective properties in cylinders will extend the life of the metal in places where the protective coating is damaged and chipped.
- The use of mesh installed around the perimeter of the trays or in the funnel will prevent clogging of the drain.
- It is necessary to organize the drainage of water from the house using a stormwater system or a water collection tank.
- For areas with aggressive climatic conditions, it is important to use anti-icing devices.
Such subtleties will prevent the need to replace the drain earlier than the deadlines stated by the manufacturers.


