assets/from_origin/upload/resize_cache/iblock/620/600_450_2/620deb3cc2ac7c6c79004b1228f084ea.jpg From this article you will learn:
- Why painting walls in a modern interior is a winning solution
- How to properly prepare walls for painting
- Why is it easier to work with walls to be painted after puttying?
- What are the advantages of painting walls made of different materials?
Comfort in the home is achieved mainly through high-quality repairs. In many rooms, painting is the only way to cover the walls. Today there is a wide range of different paints on the market with which you will achieve excellent results. Below you can read the information and understand why walls are good for painting.
What are the benefits of painting walls in a modern interior?
So, with the help of modern paints, you can get a surface that is similar in appearance to various facing materials, such as marble, wood, stone and even silk. This paint imitates the texture of natural materials, which is why it is called textured.
The main properties of painting are:
- Influence on the indoor microclimate. With proper preparation of walls for painting (priming and treatment with special antiseptic agents), fungus, mold and pathogenic bacteria will not appear on the surface. It is necessary to carefully remove all irregularities from the surface so that there are no cracks left in which harmful microbes can grow.
- Speed and low cost of the procedure. If you only need to repaint previously painted and leveled walls, then you can easily do this without spending a lot of effort, time and money.
- Ease of use. You can quickly and easily clean the painted surface and get rid of grease stains, street dust, children's drawings and other contaminants.
- Safety. Painted walls are very practical, especially if you have a pet in the house. An animal will not be able to damage or stain the surface (unlike wallpaper, for example), and the coating will retain its original appearance for a long time.
- Variability. Today there is a huge selection of different paints, so you can easily implement any design idea by applying different colors and textures to the surface.
The walls of almost any room are suitable for painting. The main thing is to know what type of paint is suitable for a particular room. You need to pay special attention to choosing the right material for high-quality finishing.
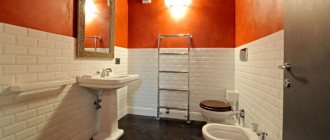
Most often, paint is used to cover walls in the bathroom and toilet. You can also partially paint the surfaces in the kitchen. In the hall, it is recommended to combine different colors, patterns or textures to give a beautiful appearance to the room.
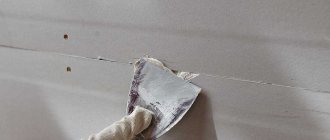
In order to obtain a high-quality finishing coating, it is necessary to carefully prepare the walls for painting. You need to achieve a perfectly smooth surface without flaws or irregularities, then the final coating will lie evenly. Therefore, along with impregnation, it is recommended to level the walls before painting.
Take the test
After the main construction work and plastering, you need to sand the walls several times. By sanding, the surface is smooth and the finishing coat will lie on it in an even layer.
There are two ways to apply plaster: manually and mechanically. Mechanized application technology is used for exterior work and when finishing large areas. After mechanized plastering, the surface needs additional leveling.
Whitewashing tool
- Mixer attachment. Used for stirring the solution. Inserted into a construction mixer, drill or screwdriver.
- Paint brush. Choose a special natural brush for whitewashing (width 150-200 mm).
- Paint roller with tray.
- Vacuum cleaner with whitening attachment. Use a vacuum cleaner with the function of blowing air through a special hole, equipped with a polyethylene lid with straws. This lid is the sprayer that is used for whitewashing. The spray cap is placed on a regular half-liter glass jar and connected with a hose to the outlet in the vacuum cleaner. When the vacuum cleaner is running, air under pressure enters the sprayer through the hose, draws the diluted whitewash mixture from the can through a special tube lowered into the can, and then sprays it out along with the air through the nozzle. There is also another hole on the sprayer; by closing and opening it (with your finger), you regulate the flow of whitewash solution.
- Glass jar. If the volume of a half-liter jar is not enough for you, you can use a liter jar, but for this you need to take a longer tube that is lowered into the whitewash solution. The tube should reach the bottom of the jar.
- Spray.
Preparing walls for painting in accordance with GOST
Before starting surface finishing work, it is recommended to thoroughly study the sanitary norms and rules.
Preparatory work before painting must be carried out in accordance with paragraph SNiP 3.04.01-87 “Insulating and finishing coatings”, which contains the following requirements:
- Before plastering, you need to thoroughly clean the surface of dust, grease and other contaminants.
- Before painting, the surface must be smooth, without roughness.
- It is necessary to grind and putty all defects deeper than 2 millimeters.
- The surface needs to be primed and leveled.
- It is necessary to get rid of all drips, peelings and traces of grout.
- There may be one small unevenness of 1 millimeter for every two square meters.
- Paint is applied to the surface only after the primer has completely dried.
The thickness of the plaster application layer depends on the type of mortar. The allowed thickness of single-layer plaster (these are any materials except gypsum) is 20 millimeters. For gypsum mortar, it is good to maintain a thickness of up to 15 millimeters.
For non-polymer solutions requiring several application steps:
- spray on stone, concrete, brick surfaces - no more than 5 millimeters;
- spray on wood - up to 9 millimeters;
- cement primer - up to 5 millimeters;
- gypsum and/or limestone primer - up to 7 millimeters;
- final plaster - up to 2 millimeters;
- the final finishing layer is 7 millimeters.
There is a simple, improved and high quality primer.
After plastering, the surface to be painted should be smooth without visible defects or untreated areas.
Calculate the amount of paint
In order not to run to the store for the missing can, it is important to immediately estimate the required amount of material. To do this, you need to divide the area of the walls by the paint consumption, multiply by the number of layers and add 10–15% in reserve. As an example, let's calculate how much paint will be needed for a room (4.5 × 3 m) with one window (1.4 × 1.6 m) and a door (2.1 × 0.7 m). Ceiling height - 3 m.
First we find the total surface area. To do this, calculate the perimeter of the room and multiply it by the height of the ceilings.
(4.5 + 4.5 + 3 + 3) × 3 = 45 m²
Now let's determine the net paint area. To do this, calculate the area of window and door openings, and then subtract it from the total area of the walls.
45 − (1.4 × 1.6 + 2.1 × 0.7) = 41.29 m²
And finally, we will find out how much paint will be needed. To do this, divide the net area to be painted by the paint consumption per square meter (indicated on the label), multiply by the number of layers (usually two) and add 15% in reserve.
(41.29 ÷ 10) × 2 + 15% = 9.5 l
How to choose a good putty for walls for painting
To determine which putty is best to putty on walls for painting, you need to know what types of mixture exist. The price of the mixture may vary, but materials are not selected according to this criterion. Putties are intended for:
- interior works;
- facade works.
Based on its composition and properties, you can roughly understand which putty is best for painting walls of a certain type. Types of putty can be divided into three groups:
- Starting putty. This is a thick solution that contains large particles to better fill large irregularities on the surface. The thickness of the starting layer of putty reaches 2 centimeters.
- Finishing putty. This putty is good for leveling and achieving a smooth finish. It contains fine sand, which facilitates leveling without creating a rough surface. The finishing putty can be applied directly to the untreated surface. It provides excellent coverage for subsequent painting with any type of paint material.
- Universal putty. This is a ready-made polymer mixture in the form of a thick, finely dispersed solution. This putty replaces all types of leveling solutions and can be applied as both the first and final layers. Perhaps a universal solution is the best one you can use to putty on walls before painting.
There are several types of putty mixtures for leveling.
- Dry
You need to prepare a solution from this mixture yourself. This is done immediately before application, as it dries quickly. The mixture is sold in a bag or package.
For accurate mixing, you need to strictly follow the preparation technology (you should study the information on how to dilute putty when doing your own repairs). Positive characteristics of dry putty:
- low cost;
- high-quality composition.
To avoid loss of the properties of the solution, it is good to use it immediately after mixing.
- Ready to use
This is the easiest leveling solution to use. This mixture is sold in a special container already diluted and is good for use immediately without wasting time on preparation.
The solution is already mixed taking into account all the necessary proportions and is ready for application. The finished mixture can be stored for a long time without losing its properties.
If you need to take a break while working with putty, you just need to cover the solution with a lid.
Recommended articles on this topic:
- Types of wall decoration in an apartment
- Stages of renovation in an apartment
- Turnkey cosmetic repairs
Based on the content of materials included in the solutions, putties are also divided into several groups.
- Plaster
Positive characteristics:
- good alignment;
- are applied without subsequent shrinkage.
Negative qualities:
- They are not resistant to moisture, so they cannot be used in all rooms.
Gypsum putty can be applied to the surface inside a dry room. Should not be used for outdoor use. A distinctive feature of gypsum is its white color after drying. This mixture is the best putty for walls to be painted in the bedroom or living room.
- Cement
The main positive characteristic of this material is good moisture resistance.
Minuses:
- subject to shrinkage;
- a gray coating after applying the solution, which will be visible through thin wallpaper or a layer of white paint.
- Polymer
Thanks to its modern high-tech composition, the polymer mixture is good for high-quality finishing of premises. Its high price is justified by excellent quality. The polymer solution can be used for final coating.
When choosing putty for walls for painting, you need to focus not on which mixture is better, but on your financial capabilities and level of professionalism.
Cases
Let's consider several typical situations. Depending on the circumstances, different decisions will be more correct.
Large family with a dog and a cat
In such an apartment the walls are under heavy load. They get dirty, try to bite and scratch, etc. Children grow up, their tastes and needs change.
Wallpaper is not very resistant to claws and special tearing. In such a situation, it is better to paint the walls. For some of them, you can choose slate or marker paint.
Already prepared walls can be easily repainted. That is, cosmetic repairs, if necessary or if you want to change the mood of the nursery, will take place quickly and without special costs.
Housing for a bachelor or childless couple
All options are suitable according to technical requirements. You can focus on personal taste and budget.
The option looks interesting when one wall is covered with wallpaper with a pattern, and the other
- plain. Moreover, the chosen color is present in the pattern, but not the main one. Paintable wallpaper is also suitable; it will make repairs easier.
Apartment for rent
The main requirement for repairs is to do it on a budget and quickly (so that the property begins to generate income faster). The optimal choice is textured non-woven wallpaper. They do not require long and careful leveling of the walls, and such walls will last a long time (if you do not rent out the apartment to the family from the first case).
It is advisable to choose neutral wallpaper: plain or with a discreet pattern. Light colors expand the space and create a pleasant impression of the apartment (which promotes renting).
As you can see, both wallpapering and painting the walls are worthy options. It is impossible to say strictly which one is better: it depends on the situation and the needs of the apartment owners.
Which primer is best for walls to be painted?
Before painting, you need to increase the adhesion of the surface to the paint. Primer works well for these purposes. With its help, the paint will retain its attractive and original appearance longer. After applying the primer, you need to wait until the surface is completely dry. Carefully read the information on the paint packaging to determine which type of impregnation is suitable for it.
For bathroom work, it is good to use an acrylic-based primer for any paint other than oil paint. The gypsum composition is suitable for water-soluble paint.
It is important to remember that painting begins only after the primer layer has completely dried.
Styles
Designer decoration of apartments offers dozens of different styles. Among them there are those who will help turn existing disadvantages into advantages.
Loft
Rough industrial style does not imply that the walls of the room will be perfectly smooth. Deliberate carelessness of finishing is what is inherent in this direction. The rough structure of concrete or uneven brickwork will look appropriate in such an interior.
Dyeing in dark colors
Attention
The shades of black and dark gray are quite gloomy, but they perfectly hide existing height differences and minor defects.
For small rooms it is better not to use this technique, but in large rooms such a trick will be a real salvation. In such a room it will be important to provide many light sources. Proper lighting will expand the boundaries of the room.
Ombre technique
This type of coloring has long crossed the threshold of beauty salons. It is even used in clothing design, creating spectacular interiors. Gradation of shades of the same color with a transition from saturated to blurry will help decorate surfaces with flaws.
Painting problem walls without prior leveling is a difficult and exciting task at the same time. After studying the advice of professionals, you need to choose the type of wall covering - wallpaper or special paint. Don’t be afraid to experiment: sometimes a non-trivial approach leads to amazing results , because you can create an attractive and original home interior.
How to level walls for painting
Leveling is carried out using different methods: using sanding, plastering along the beacons, and in case of large unevenness they resort to finishing with gypsum fiber or plasterboard.
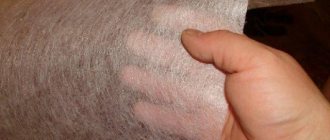
You can carry out grinding yourself if the surface has been previously well leveled and plastered. If there are large defects with a depth of 3 millimeters or more, then without sanding they will stand out on the painted surface. Before sanding a solid wall, you need to thoroughly clean it of previous coating and plaster.
Sanding is carried out using sandpaper. During grinding work, a vacuum cleaner is used to avoid the formation of large amounts of dust.
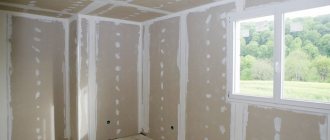
If it is not possible to properly level, then you can use gypsum fiber. In this case, the surface will look smooth and painting will not be difficult. After installing the gypsum fiber sheets, you need to thoroughly putty the joints. This leveling method is applicable for bathrooms.
Completion of work
Upon completion of painting, all tools used in the work are thoroughly cleaned. The soft roller is squeezed out strongly and placed under running water. Liquid waste is washed down the drain. This cleaning method is only suitable for water-based paints.
Brushes and grooved tray can be easily cleaned in warm water.
Advice. Before painting, it is better to put the brushes you used last time in warm water for a couple of hours. If you do not want to wash the tray, then before filling it should be placed in a plastic bag.
What are the benefits of painting walls after puttying?
In order to carry out good preparation for painting, when working with gypsum fiber sheathing, you need to carefully putty all joints, and also smooth out small flaws on the plastered surface with putty. For these purposes, starting and finishing putty is used. Starter putty with large inclusions will help cover up cracks, crevices and uneven surfaces. And thanks to the fine sand in the finishing solution, you can achieve a perfectly flat surface. Ready-made leveling mixtures can be purchased at the store.
If you are doing the repairs yourself, then you should open and dilute the putty solution immediately before starting work. For greater strength, it is good to reinforce the surface with a special painting mesh. Another layer of solution is applied on top of the mesh. Complete drying occurs within 6 hours.
Next, proceed to sanding using sandpaper or paint sandpaper. The appearance after painting depends on the quality of sanding. This is not an easy job, you need to achieve a perfectly smooth surface before applying the topcoat.
The next layer of primer is applied if there are still defects and flaws left after puttying. After applying the primer, the surface is sanded again. To better find irregularities, lamp light is used, directed at the coating at a slight angle.
The final stage is cleaning the room after the processing, sanding and plastering work has been completed. To do this, you need to arm yourself with a vacuum cleaner and remove all small particles and dust, and wipe off the dirt with a rag. After cleaning the surface, a layer of impregnation is applied to it.
Prepare the paint
Illustration: Artem Kozoriz / Lifehacker
Mix the paint thoroughly with a wooden spatula for a few minutes. You can use a mixer, but at the lowest speed to prevent the formation of bubbles.
Fill the tray with paint about a third: if you pour more, dipping the roller will be inconvenient. Immediately close the jar tightly to prevent the paint from drying out.
If you wrap the tray in a layer of foil, then after work it will be enough to remove it and throw it away. The bath itself will remain clean.
Do not submerge the roller completely. Roll it several times over the surface of the paint and then over the top of the tray to evenly distribute the material. Pre-moisten the roller in water and squeeze it out: this way the paint will better saturate the coat and will be applied well to the wall from the very beginning.