Today, decorative corners on the corners of walls are an important decorative element. They help protect problem areas from mechanical damage. Their installation prevents damage to expensive finishes and gives the interior frame a finished appearance. We will tell you where such elements can be used, what materials they are made from, and how they are attached to the surface.
Corner protected from metal damage Source static.tildacdn.com
When is the best time to trim wallpaper?
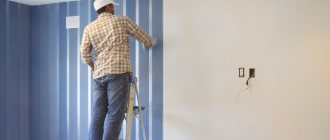
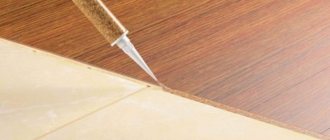
We glue the wallpaper; most wallpapers are better trimmed after drying. We bend the excess (reserve), place the spatula to the bend line and then make a trim along the spatula with a wallpaper knife. Instead of a façade spatula, you can use a meter-long metal ruler.
Interesting materials:
What should you take with you to your appointment with a genetic counselor? What does it take to create glass? What do you need to pick up a car from a parking lot? What does it take to get a ladybug? What do you need to fly to Bulgaria? What do you need to get to Kaliningrad? What do you need to pick up a parcel from Ali at the post office? What do you need to do horse riding? What do you need to do to speak competently? What needs to be done for a child to learn to speak?
Types of corners
The appearance of the products and their technical characteristics depend on the material from which the profiles are made. It also determines the scope of use.
Decorative metal profile Source i.ebayimg.com
Metal
Aluminum, brass or steel are used to make such corners. Angles made of brass and steel have a smooth, well-polished surface. The aluminum profile is available in three varieties. Polished samples, anodized products, and corners with decorative coating are available for sale.
Brass-look profile for decorating external corners lined with tiles Source kantiere.ru
Most often, such products are used in the furniture industry, but designers also like to use them when walls are decorated with furniture panels, MDF sheets or chipboard. In this case, a metal profile is selected, painted to match the base material. Unpainted metal corners are suitable for framing mirrors, pictures or posters placed under glass.
Metal profile for external corners Source www.bradjenkinsinc.com
Craftsmen use metal corners to create the basis for installing lightweight Armstrong-type suspended ceiling structures. Using them you can install lightweight plastic panels. They can act as anti-slip pads or protect the edge of the structure from chips and cracks.
Armstrong ceiling with metal inserts Source i.pinimg.com
See also: Catalog of companies that specialize in decorative forms
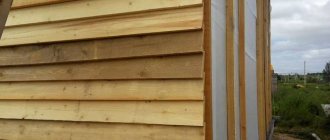
Finishing wooden
Their main area of use is finishing the external or internal ends of walls covered with block house, plank or clapboard. They are made from expensive or cheap types of wood, so they have different prices. They can be additionally painted and varnished, and various patterns can be created on the surface using a milling machine.
Wooden corners for decoration Source static.tildacdn.com
Recently, designers like to use a technique that allows them to cover the ends of walls covered with wallpaper or painted. This is only permissible if there are strictly straight surfaces.
Decorative element made of wood Source avatars.mds.yandex.net
When choosing this finishing option, it is important to consider that a wooden corner is a fragile product; with the slightest effort it can break or crack. Excessive moisture or prolonged overheating can ruin its attractive appearance. Therefore, they cannot be used to decorate walls and window openings in a bathroom or bathhouse.
Wooden corners are a fragile product Source pilomaterial-stroi.ru
The wooden elements are attached using wood glue or PVA glue. Liquid nails are suitable for the indicated purposes. If the walls are not concrete, you can also attach wooden corners with finishing nails. In this case, the gap between the edge of the profile and the head of the nail must be at least 10 diameters of the fastener.
Wooden corners to match the main finish Source pilomaterial-stroi.ru
Silicone transparent corners
Such products are ideal for framing corners covered with wallpaper. They feel very soft to the touch. If they cover corners in a children's room, children will be less injured. The silicone profile has only one drawback: its transparent texture is unable to hide finishing defects from prying eyes. This must be taken into account when choosing and purchasing products of this type.
Silicone profile is an excellent tool for ensuring the safety of children Source d.allegroimg.com
See also: Catalog of companies that specialize in facade materials
Polyurethane
With the advent of polymer materials, the possibilities for decorating residential premises have expanded significantly. On sale there are corners with smooth surfaces, with complex relief, skillfully imitating the texture of gypsum stucco. Unlike a plastic profile, their shelf thickness is greater. This complicates the installation process, but the appearance of the finish benefits from it. The polyurethane corner creates a solid effect. In addition, it can be additionally painted with paints used in finishing, but the plastic profile cannot.
External polyurethane profile Source lative-oboi.ru
Pressing technology is used in the manufacture of products. It allows you to create decorative profiles of various shapes. They are not afraid of moisture, temperature changes, and last a long time.
A decorative corner made of polyurethane can replace gypsum stucco. Source 1decor.ru
Manufacturers offer universal white polyurethane corners; they are best suited for painting. There are profiles whose texture skillfully imitates wood. Products in which the smooth part is painted and the upper ornament is decorated in gold look beautiful. Such corners are ideal for classic interiors. They are attached with a special adhesive composition. Liquid nails can also be used for these purposes.
Universal white polyurethane profile Source cap40.ru
Colored plastic
Such products have a smooth, even surface. They are made from polyvinyl chloride. Manufacturers produce collections that feature products in thirty shades. Among them there are profiles that imitate the surface of wood and metal. Their scope of application is not limited by physical parameters, so the plastic profile is used quite widely. To decorate arches, flexible corners and arched products are produced.
Plastic corner in the bathroom Source kitchenremont.ru
Installing a plastic profile on a plastered wall is simple:
- Glue is applied to the surface of the inner part of the profile in dotted lines at a distance of 30 cm.
- The profile is then applied to the surface of the arch or straight end.
- The corner is secured at the top with masking tape.
Multi-colored plastic corners Source sumyplast.com
Classification by degree of light fastness
Lightfastness
- this is the ability of wallpaper to retain its original color under the influence of UV radiation over time.
Determination of the resistance of wallpaper to light is carried out using a special device (Xenotest 220+, etc.). By analogy with the wet abrasion resistance test, 6 wallpaper samples are taken. Five subjects, and the sixth is a control. Samples are exposed to ultraviolet light for up to 170 hours and are then compared with a control sample, resulting in a light fastness rating.
Choosing a corner design option
To ensure that the decoration of the room is in harmony with its contents, it is important to take into account various factors when choosing a profile. It is important to pay attention:
- On surface materials. If the walls are covered with clapboard, the ends covered with a white plastic profile will look ridiculous.
- For the color of the finish. A red profile will ruin the overall impression if the room is made in pastel colors.
- On the design style. The metal profile is not suitable for interiors in a classic style, but it can emphasize the concept of hi-tech.
- On the function of the room. A plastic profile is ideal for kitchens and baths; for children's rooms it is better to choose silicone corners. Wooden with chamfers will be appropriate for decorating cabinets.
Design options may vary. The easiest way is to match the color of the profile to the color of the walls. He will merge with him and will not attract attention to himself. This decision is justified when the surface often catches the eye, this could be, for example, the corner between the hallway and the room.
The color of the corner profile matches the color of the walls. Source www.grandecor.ru
If the choice falls on wooden corners, designers advise choosing the colors and textures of the doors or floor finishes to match. Then it will look organic. If you want to save money, you can purchase plastic corners that look like wood.
Corner profile made of plastic to look like wood Source imageserver.ibud.ua
When creating laconic interiors with a minimalist style, the choice of metal corners becomes justified. They look good in high-tech, in a loft. The width of the shelf must be chosen so that it completely covers the end of the corner. You need to pay attention to this if the walls are covered with panels, plasterboard, if insulation and sound insulation are additionally performed. Such designs always have uneven edges; the decorative angle covers all defects well.
Metal corner in tile finishing Source krovati-i-divany.ru
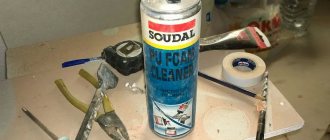
Usually the angle between the slope and the wall is more than 90 degrees. In order for the selected profile to fit well on it, it must be slightly bent. This can be done with both a metal and plastic corner. To do this, experts advise placing the product on a flat surface with one edge, and then lightly pressing on top with your hands and using a brush to push along the entire length of the corner. In the cold season, this procedure should be done after the product has been in the room for a day and has reached room temperature.
Traditional cutting method
To cut material for wall cladding, you can use a knife with special blades divided into segments. This tool allows you to easily cut material in different directions.
Attention
To ensure cutting with maximum accuracy, a special level is required. The latter is produced on the basis of alcohol. It is used as a ruler. But it’s easier to use the usual rule.
To trim the edges of unused material, you can use a sharp, medium-length scissor blade.
- To start cutting the material, the surface is first prepared.
You need to stick a special film of a given thickness (from 80 microns) onto it. This will be the ideal surface for coating the material with adhesive elements. Initially, the number of stripes is calculated, which is important to maintain. If the width of the material is 500 mm, then before cutting the perimeter of the room is measured (read how to calculate the required wallpaper along the perimeter and area of the room here). Let's say it's 10 m. - Now this value is divided by the width of the material: 10:0.5=20. This means that for work you will need to use twenty solid strips of material. Then it is important to pay attention to the length of the bundle. Its indicator is divided by the height of the ceilings (in this case, it is two and a half meters).
Rapport is taken into account for combining the canvases. This way we can calculate the number of whole stripes in the convolution. The required number of strips is then divided by the number of whole sheets in the roll. The result will be an indicator equal to the number of rolls.The classic roll length is ten meters. This way you can get up to four strips per package. To calculate the number of rolls, the number of solid layers needed for one room is divided by the number of sheets in the roll. In the example under consideration it looks like this: 20:4=5.
- From this indicator you need to subtract the area that will not be used. This is the opening for the window and door. According to general rules, they take up half a roll. Accordingly, you will need to buy four bundles of material. You can buy a few extra rolls as a supply.
- After the calculations, you need to find out the height of the upper internal covering of the room.
The height is measured from the floor surface to the top point. It is important to take such measurements in all corners of the room. Suppose there is a traditional number of corners in a room that have different heights. For example, the minimum indicator is 220, and the maximum is 260. Here cutting is carried out according to the maximum indicator (260).
The material must be cut depending on its label:
- no ornament;
- with a selected pattern that does not move;
- with a selected pattern that moves;
- cutting without additional ornament or design.
This is the easiest and most traditional cutting method. At the maximum height of the upper interior covering of the room (in our example - 260 cm), the material can be cut 10 mm less, i.e. 259 cm. This is explained by the fact that the top is shortened by 10 mm, and the bottom by 50 mm, because the floor is supplemented with special wooden planks for decoration (plinths).
Important
Rolls without additional ornamentation are simply rolled out on the specified side and glued to prevent movement.
Where are they used?
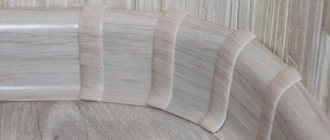
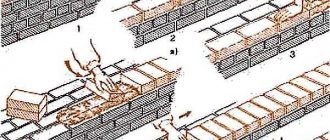
There are many options for using corners in the interior. They can be used to decorate both external and internal corners of walls. Some difficulties arise when finishing corners other than 90°; this requires special, so-called. folding, corners. To finish the curved surface of the corner, flexible, “arched” corner profiles are used.
The most common ways to use decorative corners:
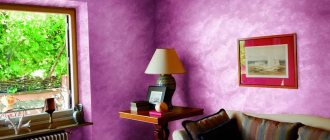
- The connection of the window slope to the wall. It is extremely rare to see a slope whose near edge is not covered by a corner. Their use in this case protects the end of the slope from damage and prevents the wallpaper from peeling off, which quite often happens on external corners. In addition to technical, the corner profile also carries an aesthetic load. The use of a white corner completes the window opening. A profile that contrasts with the slope and wall decoration can create the desired color accent or become an independent original interior detail.
- Doorway design. Corners can also be used when decorating a doorway when the wall thickness is greater than the width of the door frame. In this case, additional trim strips are installed on the door, the junction of the end of which with the wall is covered with a corner element matched to the color of the door.
- Protection of external corners of walls, columns, ledges. In this case, the corner protects the wall decoration from mechanical damage, for example, an accidental blow from a heavy oversized object. It helps preserve the finish and layers of putty and plaster. Also, the use of a corner profile simplifies room cleaning. Often, hand marks remain on the outer corners, which are easier to remove from plastic than from wallpaper. Properly selected contrasting corners help avoid boring and monotonous interiors.
- Design of openings. In interior design, instead of doors, a simple opening is often left, for example, between the kitchen and the living room. Corners serve to decorate and protect corners.
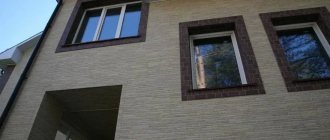
- External corners of walls covered with tiles or wall panels. The corner profile covers the ends of the tiles, because they differ in color from the front surface of the tile. If the tile is cut to size and the edge of the cut is not polished, it is easy to cut yourself on such a corner. When installing a corner on a panel, they cover the corner joint. Using a special corner profile for these purposes is not always convenient, so decorative corners are used.
- Decorating and protecting the corners of gypsum plasterboard structures, for example, racks or shelves.
- Furniture decoration, mirror framing. In addition to decorative functions, it protects edges from chipping.
Cross cutting wallpaper
Cross cutting
At first glance, the whole cutting process is incredibly simple - measure the distance in height, mark it and cut off a piece of wallpaper. But it was not there! If the first cut is made crooked, then the remaining cuts will be crooked!
Note!
In addition to the length of the blade, it is very important to observe the cutting angle. The ideal angle is 90°, otherwise there will be great difficulties when wallpapering.
In view of this, a protractor is needed to cut the canvas. It does not necessarily have to be a school protractor. Here you can get by with any object that has an angle of 90°. For example, this could be a CD case. Alternatively, you can use a drawing square. Each time you should align the edge of the blade with the edge of the workpiece. This way you will have 2 angles, each 90°.
Work on external joint areas
External corners are also often found indoors. They are usually slopes, door and window openings. If you need to cover smooth slopes with material, there will be no problems.
- Glue the strip on one side so that the edge of the layer touches the adjacent wall by approximately 40 mm.
- Next, the sheet of material is leveled and smoothed. If unevenness and bubbles have formed, then a minimum of cuts are made on the layer (read more about why bubbles appear when gluing and how to remove them).
We hope you take advantage of this information and find it really helpful. Gluing wallpaper is not a difficult task, the main thing is to follow the described rules , strictly carry out the calculations and think twice before cutting off the next picture. For a clear example of what you have read, you can watch several videos that are freely available on the Internet.
Selection of drawing
With ornament without offset
In this case, everything is a little more difficult. Take, for example, the height of the upper interior covering of the room - 260 cm. Then the step of the ornament is determined - for example, 55. All lines should start the same. Three stripe pitches will be: 4×55=165 cm - this is not enough for a single sheet. This means we take 5 steps: 5×55 = 275 cm. Thus, before starting the repair, strips 275 cm long are cut.
Learn more about how to customize wallpaper according to a pattern.
With offset ornament
Let's look at how to correctly cut the material by selecting an offset pattern. This is a rather complicated process. The stripes will be repeated after one. But initially the pattern of stripes or ornament is selected. The number of strips that will be needed is calculated. For example, first wallpapering is done with some stripes, then with others, and so on in order .
Advice
In order not to get lost in the sequence of strips with a pattern offset, it is advisable to number the cut strips.
Presumably, twenty sheets are used for the room, where ten stripes of one design and ten of another (how to hang two types of wallpaper?). Then the repeat of stripes or ornament is determined. For example, 640 and 320 mm, respectively.
You need to find the smallest multiple equal to 320 mm and greater than 2600 mm (ceiling height from the example above). The result will be 9×32=288 cm - this number is greater than the prescribed ceiling height (260 cm), which means this cut is ideal.
Find out more about how to customize wallpaper according to a pattern in another publication.
Required Tools
In addition to the wallpaper itself, you will need many more tools and other little things:
- Bucket . It will be needed first. It is most convenient to mix the glue in a bucket. Please note that if you do not plan to use the glue today, you should purchase a bucket with a tight-fitting lid. This is the only way to preserve the properties of the glue.
- Glue tray . Choose a bath that matches the size of the roller. The bath should be a little wider.
- Paint roller. With its help, the glue is distributed on the back side of the wallpaper that you plan to glue, or applied to the wall.
- Wallpaper roller . Don't confuse it with the aforementioned roller, they are completely different. A wallpaper roller is needed to smooth the surface of the wallpaper after gluing. This will help get rid of unwanted bubbles and excess glue protruding between the seams.
- Wallpaper roller for corners . Thanks to its convenient shape, it will easily help you apply the necessary pressure on the corner areas of the canvas.
- Special wallpaper scissors . If you have regular household scissors at home, but sharp ones, you can use them.
- Sharp knife . It is needed so that you can cut the corner joints. A regular stationery knife is best suited for these purposes.
- Rubber spatula . It is needed to level the wallpaper.
- Clean rags . They are needed to wipe off glue from wallpaper. You can also use a regular sponge, but only the soft side. Never rub the wallpaper with the hard side, as you may damage it.
- Large table with a flat surface . If you do not have such a table, then the floor can easily replace it. True, it is not so convenient.
- Ruler . It is advisable to have a construction ruler, but if you don’t have one, then a regular one will do.
- Construction tape . It is needed to measure the height and width of the walls. It will also help to cut the wallpaper correctly.
- Painting spatula . It is very convenient to use when you need to trim wallpaper near the ceiling or floor. In this case, simply place a spatula there and cut the line with a knife.
This is a list of just the basic tools that you will definitely need for wallpapering.
Correcting seam gaps
Most often, this problem occurs with paper wallpaper. Paper materials, after contact with glue, can increase in width by 6 mm, and after drying, a gap appears on the walls. To prevent such defects it is necessary:
- Control the layer of adhesive composition, which should not soak the material too much.
- After applying the glue, you should wait a little until the material becomes moisturized and immediately glue the canvas to the wall before it begins to swell.
As a rule, seams come apart if too much glue has been applied. In this case, the canvas cannot properly stick to the wall and you will have to glue the wallpaper again.
Features of pasting
Secrets for beginners
When using thick or heavy products, it is enough to purchase a transparent special glue that is highly durable.
For durability of the material, apply a primer completely over the surface. It’s a good idea to buy an antifungal substance if there is high humidity in the room or there is a risk of mold development.
It is important not to let the strips dry out, especially at wall joints: it will become difficult to level them.
Features of gluing material with patterns
Rolls with images of geometric shapes, clearly defined patterns and stripes require proper gluing without distorting the patterns. To do this, glue the products, allowing a small overlap so that the images fit together. The second edge is carefully trimmed along the edge. A slight shift in the pattern is possible, but this will not be noticeable if the canvases fit strictly vertically.
How to glue corners with non-woven wallpaper
Gluing non-woven wallpaper is done in the same way as cladding with other materials. The nuance is that it is necessary to apply glue not to the canvas, but to the surface of the joints. Then the stripes are aligned.
Features of choosing a finish for joints with defects
You should not purchase heavy rolls that will be difficult to adjust to the desired line. Lightweight paper or non-woven rolls will work instead. The latter are easy to apply to a surface pre-treated with glue. Although without patterns the design of the room becomes strict, it will be easier for a novice master to cope with than with products with a complex image . It is easier to work with narrow canvases: they are easier to hold and level.
Beginner mistakes
Inexperienced craftsmen often make the following mistakes:
- Poor surface preparation. This is especially true for joints. If it is impossible to achieve 90 degrees, try to get the result as close to the best as possible. You need to use plaster or putty, as well as profiles that are inexpensive.
- Sloppy cutting. The edges will diverge or fit unevenly against each other, so be mindful of the desired overlap width.
- Excessive fold width. If the spare part is large, it will cause the following sheets to deviate from the vertical line, resulting in crooked gluing.
- Incomplete adhesion. According to the rules, the products are carefully pressed against the wall, so that sections of the products will not sag in the air. This will help avoid peeling and tearing.
- Poor application of glue. Often such a mistake occurs when facing products on non-woven fabric, which requires gluing the surface on which the trellises are then placed. You should apply the substance with a brush rather than a roller, as it coats hard-to-reach places.
Thus, it is not difficult for beginners to hang wallpaper in the corners, if they are aware of the considered features of the work. It is important to focus on the situation in a particular room and select a finish that will not only be attractive, but also durable. Do you think all the nuances are covered in the article? What can you offer? What do you agree with and what do you disagree with? Share your thoughts in the comments!
How to cut an edge correctly
Trimming edges
Thin wallpaper is glued overlapping. This means that the edge should be cut on one side. Scissors or a construction knife can be used for this. Thick wallpaper is glued end to end. In this case, the edge is cut on both sides. It is important to do this carefully, using a knife and a ruler (construction spirit level).
After cutting, the finished canvases are laid on a flat, dry surface free of dust and dirt. Now you need to inspect the edges of the wallpaper for possible defects that may form if the edges are removed incorrectly. Now you can start cutting the wallpaper.