The choice of wallpaper is huge in terms of colors and colors; they are easy to glue on prepared walls. Wallpapering is one of the final stages of interior decoration. But sometimes the wallpaper wrinkles, air bubbles and other troubles appear that confuse even experienced craftsmen. The problem is completely solvable and you just need to show calm and restraint. There are several ways to troubleshoot problems.
What to do if the wallpaper is already dry
Often bubbles do not appear during gluing, but become noticeable only after drying.
To fix the problem, you can use a syringe, a utility knife and a rag to smooth the surface. Instead of fabric, it is better to take a wallpaper spatula, as it allows you to more accurately smooth the surface. The procedure depends on certain circumstances:
- If the bubbles are small, you just need to fill the space with glue and press the wallpaper to the wall. This is done using a syringe. To remove air, just make a puncture and smooth the material. If, after introducing the glue, it begins to crawl out of the created hole, you need to remove it with a damp cloth.
- If large bubbles and folds appear, you can try cutting the wallpaper. But this should be done only in cases where the material has a pattern that will help hide the cut line. Often in such cases it is impossible to smooth out the wallpaper without wrinkles appearing. Therefore, you have to make cuts in such a way that the wallpaper partially overlaps each other at the joints.
It is worth remembering that after creating the cuts, you need to introduce a small amount of glue under the wallpaper and carefully smooth the material with a rag, watching for the appearance of wrinkles. If the wallpaper does not have a pattern with lines, you should try using only a syringe. If you carefully introduce wallpaper glue and smooth the surface, no defects will be noticeable on the wallpaper.
Important! All excess wallpaper glue must be immediately removed from the surface of the wallpaper, as it can ruin the appearance of the coating.
Where, how much and how much
In general, for some reason our stores neglect such a thing as liquid wallpaper. It often happened like this: there are samples lying around, but the material itself is not there, and is not in sight. We found a selection of wallpapers on the market from the Chinese, made in China, and there – Russian liquid wallpaper “That’s So”.
We bought both because the color scheme was very similar, except that the Chinese ones had shiny, golden shavings that promised our walls a beautiful shimmer in the sun.
The plan was simple. Apply one in one room, and another in another. The price of wallpaper is about 450 rubles. per kilogram package, which is enough for 5 square meters of surface, despite the fact that the wallpaper is laid with a thickness of 1 - 2 mm.
The conclusion is this: if you are interested in such material, then you should look for it not only in large stores, but also in construction markets or on the Internet.
How to avoid the formation of blisters?
If you strictly follow the recommendations on the packaging and strictly follow the installation technology, you can avoid swelling of the wallpaper. Do not neglect the preliminary preparation of the wall, which includes leveling and priming the surface. This will avoid the formation of voids and prevent loose material adhesion.
Particular attention should be paid to the corners. Strongly protruding irregularities must be removed using a grinder, and potholes, dips and raised folds must be plastered
You should also pay special attention to the choice of glue. You need to select the composition taking into account the thickness, texture and material from which the wallpaper is made
When using dry mixtures, you need to be very careful when diluting the composition and strictly adhere to the required dosage of water. A solution that is too thin will not provide reliable and uniform fixation of the canvases and will lead to the formation of blisters.
When diluting the glue, you should not allow air bubbles to appear, which can subsequently lead to bubbling of the wallpaper. This is facilitated by stirring too quickly and intensely.
When gluing corners and removing blisters, it is not recommended to use PVA glue. Even if there is no wallpaper glue left, it is better to purchase a new package. PVA leaves yellow spots after drying and does not allow the glued sheets to be removed during the next repair. With its help, you can only prime the wall, after mixing it with water in equal quantities. This will ensure very good adhesion of the canvas to the wall and prevent the appearance of bubbles in the future.
How to remove bubbles under wallpaper: recommendations for installing wallpaper
To prevent bubbles from appearing on the walls after wallpapering them, use these recommendations:
1. Prepare the surface thoroughly for wallpaper installation. Try to level the walls as efficiently as possible; be sure to apply a primer to them. The soil will not only protect the wall from the development of mold and mildew on it, but will also increase the adhesion between the wallpaper and the wall.
2. Choose glue in relation to the type and density of wallpaper.
3. When installing wallpaper, observe certain temperature conditions: room humidity no more than 50%, temperature 18-23 degrees.
4. If the temperature in the room is higher than normal, place a bucket of water in it; it is recommended to cover the windows with thick cloth. This will prevent the wallpaper from drying out too quickly.
5. Within two days after the start of installation work, do not create drafts in the room and do not turn on the air conditioning.
6. In the process of diluting glue, strictly follow the instructions, measure the water with special devices, and not by eye. There is no need to mix the glue too much; the presence of oxygen in its composition leads to the formation of bubbles.
7. Depending on the type of wallpaper, apply glue to the wall or canvas using a tool recommended by the manufacturer.
8. Watch the force of pressing on the wallpaper, try not to damage it during the alignment process. Do the work with at least two people. One person glues the wallpaper on top, and the second on the bottom.
How to glue wallpaper correctly?
To avoid having to fix defects for a long time, you need to immediately take the process of wallpapering walls seriously. If you have never done this, study the issue in theory, watch the work of professionals, listen to our advice.
Pay special attention to surface preparation. Even thick non-woven fabrics will not be able to hide all its flaws
Poorly prepared base is one of the reasons for the appearance of bubbles. Choose an adhesive composition that matches the density of your wallpaper. Observe the temperature regime in the room where repairs are being carried out (no more than +23° C). In hot weather, place a container filled with water indoors and cover the window with a thick cloth. In this case, the wallpaper will not dry out too quickly. In cold weather there is no need to humidify the room. Do not open windows, doors, or turn on the air conditioner on the day of work and for another day after completion. When diluting the adhesive composition, strictly follow the instructions on the package. Do not stir the prepared adhesive solution too intensively: it will become saturated with oxygen and this will cause bubbles to form. Apply the glue evenly to the canvas or to the wall (depending on the type of wallpaper) using the tool recommended by the coating manufacturer. Do not use PVA glue for gluing: it is not water-soluble, so during subsequent repairs it will be very difficult to remove the wallpaper; it will cause yellow spots to appear on the surface. Smooth the material from top to bottom, from the center to the edges. Do not rub the canvas, but blot it.
Removing bubbles from wallpaper is not that difficult, but in any case you can’t expect a perfect result. Therefore, it is better to avoid defects if you approach the issue of wall covering responsibly.
Preventing blisters
Preventing blisters
To avoid the appearance of bubbles when wallpapering, you need to follow simple rules:
- When preparing the adhesive solution, follow the manufacturer's instructions. The solution should not be stirred too intensively, otherwise there will be many oxygen bubbles in it;
- the density of the glue must correspond to the selected type of wallpaper;
- the glue should be applied evenly, without gaps - for this you can use a special foam roller;
- after applying the glue, a piece of wallpaper should be folded in half (with the glue facing in) and left in this position for several minutes;
- The wallpaper is applied first to the top of the wall, carefully monitoring the even position of the strip. To do this, you will need an assistant who will hold the lower part of the segment and ensure its strictly vertical placement;
- all actions should be performed quickly but carefully.
If after all the manipulations the wallpaper continues to bubble, you should move on to more radical methods.
Master's recommendations
Bubbles appeared on the wallpaper
If after the wallpaper has dried, bubbles still appear on it, do not panic - they can be eliminated without consequences.
To remove the bubble that appears, you will need a 10 cc injection syringe and a thin blade or scalpel. To begin, the air pocket (bubble) should be pierced with a needle or sharp blade to allow excess air to escape. You should not make a cut that is too large, because there is a high risk of ruining the wallpaper - you will not be able to seamlessly close the edges, since the material has changed its structure after applying the glue and drying.
Fill the syringe with wallpaper glue and squeeze it through the needle, filling the resulting cavity.
Then this area should be leveled, carefully ironing with a dry soft cloth, removing excess glue that may come to the surface. After removing the bubbles, even if there were only a small amount of them, the room should be closed for some time (ideally several days). Avoid exposure to drafts. To glue wallpaper you should use special wallpaper glue.
The problem of swelling and deformation of wallpaper can be easily eliminated if you strictly follow the pasting technology and be careful.
Liquid wallpaper - DIY application technology
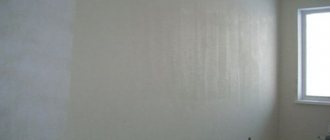
The description of the application process according to the instructions was the same for both Chinese and Russian wallpaper. Previously, we found an inexpensive Korean who puttyed the walls for us so that they were smoother and evenly white, because we chose very light wallpaper, a delicate pastel color, and were afraid that the gray-brick spots of the “bare” walls might stand out through it.
Next, we primed the walls ourselves (applied a primer) and after the primer had dried, we proceeded to the wallpaper.
What is needed for this:
- Plastic kneading containers (basins, buckets).
- Trowel (a triangular thing with a handle that is used to lay bricks).
- Hot water.
- Time to wait for the material to soak (5-8 hours, i.e. you can soak it overnight).
- Spray bottle (moisten dry areas).
- And be sure to buy a couple of extra bags in case of local repairs in the future.
I read online that you can add regular glue for gluing roll wallpaper to the dry wallpaper mixture for greater viscosity when soaking. With Russian wallpaper, this is probably what should have been done (read why below).
I poured the mixture into a bowl, filled it with hot water and left it overnight. In the morning, mix the whole mixture thoroughly,
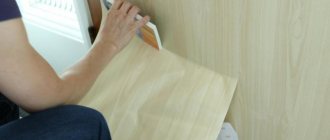
Next, take a lump of the resulting mixture and smear it on the wall with a trowel, leveling and smoothing it out. We don’t throw the wall halfway, because the completed fragment will dry out overnight and it will be more difficult to stick the second half to it unnoticed.
Please note that the room will be very humid for some time, since all this moisture from the applied wallpaper will have to evaporate somewhere. If you have a damp room and have a dehumidifier, then it will come in handy.
In general, that's all. No wisdom. Start taking small portions, they are easier to even out. This is what happened in the end.
Result after 3 years, comparison of quality. Three years have passed in the operation of rooms decorated with liquid wallpaper. I can praise the Chinese-made wallpaper. It’s a pity that not a single package was preserved to show you a photo of the packaging. This wallpaper lay down in a thin, even layer, dried beautifully and is still pleasing to the eye, shimmering with golden reflections. By the way, gold and silver shavings and powder (glider) for such wallpaper can be purchased separately in stores that sell all sorts of devices for creating decorative coatings.
Over the course of three years, the Chinese wallpaper only imperceptibly cracked in several places due to the very dry air in the room, but overall everything is fine and so far the walls covered with this material do not need any modifications.
Russian wallpaper was laid down in a thicker layer. The “steamed porridge” of this wallpaper initially had a coarser composition. We regret that we did not immediately cover the final result with some kind of stable, odorless varnish, since under strong mechanical stress during use, this wallpaper in some places fell off the wall in pieces (perhaps these wall fragments were poorly primed).
In our case, by mechanical influence I mean the claws of the parent cat who was temporarily staying with us.
How to remove bubbles
There are many ways to properly remove bubbles from wallpaper. But if there are too many of them, the only way is to re-glue the covering.
If blisters have formed after pasting with vinyl wallpaper, you will need to use a spatula or brush to remove them. By pressing these tools on the finish, you will be able to remove any remaining air and get rid of defects.
If the blisters have formed after the coating has dried, it will be a little more difficult to remove them. First you need to determine the reasons for their appearance. If the wallpaper is swollen due to air accumulation, you will need to pierce the damaged area with a small needle. Then, using a spatula, the finish is leveled.
Another way to get rid of bubbles is a syringe through which glue is injected under the wallpaper. It will help ensure a tight fit of the finish to the surface and get rid of blisters. To remove excess glue, use a slightly moistened sponge.
What to do if the bubbles are large? To remove them, you need to make a cut in any direction. You will need to use a sharp construction knife, glue is introduced under the finishing, and the canvas is securely fixed.
To avoid glue getting on the front of the canvas during work, you will need to wrap it with tape or tape around the perimeter. After the procedure is completed, they are removed from the wall.
To avoid problems with bubbles in the future, you must carefully follow the instructions while working. You also need to prepare the surface for processing. It must be leveled, clean and primed. Only if all factors are observed will it be possible to avoid the formation of bubbles under the wallpaper. Using the following video, you can see in practice how to properly remove blisters from wallpaper.
Removing bubbles using pressure with a brush
Removing bubbles from paper wallpaper
Bubbles should be removed immediately after they form. For paper sheets, a dry, clean cloth is often used to avoid damaging the material. With its help, the air is gently squeezed out, and the swelling disappears.
If bubbles appear immediately after gluing, you need to wait until it dries; sometimes the wallpaper shrinks over time. This is especially true for paper-based coatings.
Standard syringe methods can also be used for this finishing. With its help, the bubble is pierced and the glue is released. After which the finish is smoothed out and the bubbles should disappear.
Removing bubbles from non-woven coverings
Bubbles on non-woven wallpaper appear less frequently than on other wallpapers. This is due to the fact that this finish is of higher quality and more durable. For their production, non-woven components are used, and cellulose serves as the base. Polymer substances are added to connect materials.
The advantage of this finish is that it is applied to the surface already treated with glue. Why does non-woven wallpaper bubble? There may be several reasons for this:
- Air between the canvas and the wall. To avoid this, gluing must be done using a roller. It will be used to level the material and thereby expel any remaining air from inside.
- Poorly leveled surface. If glued wallpaper on non-woven steel bubbles, the best solution is to remove it, level the surface and re-glue it. Otherwise, gaps may form where mold and other harmful bacteria can spread.
Scheme for eliminating bloating
You can get rid of bubbles on already dried wallpaper using a syringe and a sharp construction knife. A cut is made with a knife and a small amount of glue is put in there. After that, the area to be treated is glued so that the visibility of the seam is minimal. This procedure can be seen in the following diagram.
Since non-woven fabrics are multi-layered, bubbles may appear due to poor absorption of glue by the material. In this case, we get rid of them using a spatula by smoothing them out. If the swelling does not disappear, you will need to peel off the canvas and re-glue it.
Bubbles on the wallpaper. Why do they appear after gluing? Main reasons
It is quite possible that the glue you received is of poor quality, or it does not suit your type of wallpaper. For example, the density of the glue may not match the wallpaper. It also happens that you bought the glue you need, but prepared it incorrectly, that is, not according to the instructions. If bubbles appear on your non-woven wallpaper, then it is quite possible that the pasting was done incorrectly. When gluing this type of wallpaper, you should not apply the glue too intensively, both on the wallpaper itself and on the walls.
Glue for any type of wallpaper, you just need to apply it evenly. If you smeared the wallpaper with glue, you need to have time to glue it before it dries. If you keep them with glue on them for a long time and do not glue them, then often the wallpaper simply swells greatly. Later, of course, they still dry out on the wall. But, in this case, the paper dries out greatly, displacing the air, and as a result, we again get bubbles.
Elementary drafts in the room, during the wallpapering procedure, can also “inflate” your wallpaper on the wall.
How to remove such bubbles?
The problem can be solved in different ways, that is, different tools will be needed. This can be a plastic spatula or other tools. So, if bubbles appear on vinyl wallpaper, then they need to be removed with a brush. If on non-woven ones, then with a rubber roller. And, if on simple paper ones, then use a soft cloth. You need to do this on the same day that you hung the wallpaper. To do this, take a tool that is suitable for your type of wallpaper, and with its help we remove all excess glue from under it. Next, the surface is simply wiped with a dry (necessarily clean!) cloth.
Fixing a leaking shower hose
If the wallpaper has already dried, but the bubbles on it have not disappeared, then you will need a medical syringe. It will need to be filled with wallpaper glue. Where a bubble has formed, carefully cut the wallpaper (the cut should be very small), release the air, and insert a needle there. Then, little by little, glue is poured there with a syringe, and then this area is smoothed with a soft cloth.
This should be done only from the very edges of the bubble to its center. This way you can remove all the excess glue from it, which will come out through the small hole you made.
Even a low-heat iron can be used to remove bubbles. True, you can’t use an iron for all types of wallpaper. Again, you need to slightly cut the bubble, take an iron (don’t heat it too much!), put several layers of fabric on top of the wallpaper, and iron this area through the fabric. This can be done if the wallpaper was hung quite recently, and it has not yet had time to dry completely.
This video will also help you remove such bubbles from the wallpaper. Look.
Preventing bloating
If you apply wallpaper in accordance with the instructions and follow the technology, there will be no swelling or they will be insignificant. To do this, you need to properly prepare the wall, level it and prime it.
It is very important to choose the right glue. It is selected depending on the wallpaper material
When diluting glue, the dosage must be strictly observed. If the solution is very liquid, this can also lead to swelling.
To glue corners and eliminate blisters on a flat surface, do not use PVA. It leaves yellow spots, and during the next renovation it will be very difficult to tear the wallpaper off the wall. But this product is very suitable as a primer. It can be diluted equally with water.
Why liquid wallpaper?
I got experience using liquid wallpaper to repair walls when I moved into an apartment given to me by my mother. It became clear that it needed cosmetic repairs.
The walls in the house are brick, crooked and slanting. According to the legend of the neighbors, this house was built in the terry year by a brigade of construction battalions. Having tried to hang ordinary roll wallpaper in the kitchen ourselves, we came to the conclusion that to do this, we first need to level these walls, and this is already a very, very significant increase in costs. We wanted to do everything cheap and cheerful... and beautiful.
I wasn't happy with the painting of the walls. Before painting, it is again necessary to perfectly level the walls. More or less interesting “speckled” paint at that time was again unaffordable for us, as was decorative plaster. And then I remembered that there is such a thing as liquid wallpaper. They shouldn't care about our crooked walls. There is no need to level anything, the application technology is simple, and they are inexpensive. What else do we need? Let's go choose.
Correct work with wallpaper
Before we talk about exactly how to deal with air bubbles, we will tell you exactly how to glue wallpaper, because everything follows from this. If you violate the technology, you end up with air bubbles.
First of all, the walls are prepared
We will not describe general aspects, but let us pay attention to the last point in preparing the walls - primer. The primer is very important, because it is thanks to it that good adhesion is created
In order for the wallpaper to adhere well to the walls, it is necessary to apply glue to the walls. If your wallpaper is thick and heavy, it won’t hurt to apply glue to the wallpaper too. This will help avoid air bubbles.
After you have glued the wallpaper, give the walls a rest. Close all windows and doors and give the wallpaper a day to dry. Avoid drafts!
How to remove bubbles under wallpaper: recommendations for installing wallpaper
To prevent bubbles from appearing on the walls after wallpapering them, use these recommendations:
1. Prepare the surface thoroughly for wallpaper installation. Try to level the walls as efficiently as possible; be sure to apply a primer to them. The soil will not only protect the wall from the development of mold and mildew on it, but will also increase the adhesion between the wallpaper and the wall.
2. Choose glue in relation to the type and density of wallpaper.
3. When installing wallpaper, observe certain temperature conditions: room humidity no more than 50%, temperature 18-23 degrees.
4. If the temperature in the room is higher than normal, place a bucket of water in it; it is recommended to cover the windows with thick cloth. This will prevent the wallpaper from drying out too quickly.
5. Within two days after the start of installation work, do not create drafts in the room and do not turn on the air conditioning.
6. In the process of diluting glue, strictly follow the instructions, measure the water with special devices, and not by eye. There is no need to mix the glue too much; the presence of oxygen in its composition leads to the formation of bubbles.
7. Depending on the type of wallpaper, apply glue to the wall or canvas using a tool recommended by the manufacturer.
8. Watch the force of pressing on the wallpaper, try not to damage it during the alignment process. Do the work with at least two people. One person glues the wallpaper on top, and the second on the bottom.
Preparation for restoration
Repairing damaged areas begins with preparing the restoration site. The procedure is as follows:
- Moisten the area to be restored with warm water from a spray bottle, roller or sponge.
- After 15 minutes, remove the old wallpaper with a spatula. The removal area should exceed the damaged area by 5-7 cm.
- When stripping, do not act too aggressively: you may damage the base.
- Assess the surface of the wall. If there are chips or grooves, cover them with white primer.
The main problem when restoring liquid wallpaper is selecting a material that matches the color. Purchasing the composition with a small margin will help prevent this situation. You can store dry filler or leftover finished mixture.
Ready-made wallpaper is prepared for storage as follows:
- Spread the wallpaper onto the plastic film with a spatula in a thin layer.
- Dry for 30-40 hours.
- Then roll the film and crease it so that the fibers regain their original appearance.
- Pour the resulting powder into a plastic bag and release the air. Bandage tightly.
If there is no liquid wallpaper left in stock and you cannot find the same in stores, buy white material and the desired dye. You will have to tint the mixture in parts to achieve a color close to that previously applied to the wall. Once the desired result is obtained, restoration can begin.
Restoration of small damaged areas
- Lightly sand the edges of the repaired area with sandpaper so that its edges do not stand out after applying the repair mixture.
- Lightly dampen the wall with a sponge or spray bottle.
- Apply the swollen mixture of liquid wallpaper to the area to be repaired with a special spatula.
Why does this happen when gluing?
Most often, the reason for the appearance of air bubbles or wrinkles on wallpaper occurs due to inappropriate quality of the material. Nonwoven fabric tends to expand when wet. On good canvases it is almost imperceptible, but low-grade wallpaper strips can go “accordion-like” not only in the corners, but also along the even plane of the walls.
Advice: Non-woven wallpaper expands upon contact with the adhesive. This must be taken into account and appropriate adjustments must be made when gluing.
When sticking to the wall
There is only one way to check what quality of material you have found - by gluing a test strip. If it lays down perfectly, and no visible defects appear within 24 hours (while the glue has completely dried), then feel free to use the remaining rolls. If the canvas is swollen or very noticeable wrinkles appear, then it is better to exchange the remainder in the store for others, but of the same quality.
The only drawback of this method is that it takes a lot of time. But it is possible to get by with existing rolls if you glue the sheets using a special technique that reduces the likelihood of defects and prevents their occurrence.
In the corner
On the inside and very rarely due to tension on the outside corners, the appearance of wrinkles is possible due to poorly sealed joints between panel slabs or due to hidden cracks. Air passes through them, the temperature of which differs significantly from the microclimate established in the room.
As a result, part of the adhesive composition dries a little faster and peels off from the wall, and part of it holds on more tightly. This uneven distribution of sizing areas results in the formation of wrinkles.
Poor quality wallpaper results in uneven gluing due to stretching of parts of the canvas even at the moment of joining the strips, which can be corrected during gluing. But the wrinkles that appear on the glued wallpaper require a different approach to eliminating them.
In what cases is it necessary to correct liquid wallpaper?
Restoration of liquid wallpaper may be necessary in places that are heavily used:
- near sockets and switches;
- in places where furniture touches;
- on external corners;
- on protruding or design elements of the wall.
The finishing loses the top layer and a depression appears in this place, and if the damage is severe, the wall can be completely exposed. Such damage can be repaired to restore the finish without completely replacing the coating.
Causes of bubbles
If the wall with new wallpaper is not even and smooth, you need to find out the reason for the swelling of the canvas. Most often it appears due to the following reasons:
- incorrect gluing procedure;
- deformed building geometry.
Bubbles not only spoil the appearance of the interior, but also provoke the appearance of mold and mildew. They have a detrimental effect on the health of residents, causing allergies. Various insects can live in bubbles under the wallpaper.
First, you need to find out the cause of the problem in order to prevent it in the future. Perhaps air got under the wallpaper or the master applied too much adhesive to the material. There is no need to redo everything again, unless there are too many bubbles. Small irregularities can be removed quickly and without leaving any traces. It is best to do this immediately after gluing the canvases. The less time has passed, the easier it will be to hide unaesthetic marks.
Before gluing wallpaper, you need to carefully study the manufacturer’s instructions, since each type of material has its own requirements for installation.
When gluing paper wallpaper, you need to apply the sticky liquid directly to the material. If the fabric is non-woven, the glue is distributed over the wall.
Surfaces must be well prepared for work - clean them of fungus, old wallpaper, paint, mold. You should not hope for a satisfactory result if the wall is uneven. It is best to glue the coating to plasterboard, plastered, putty surfaces. Even small cracks, chips, holes can ruin the appearance of the surface
Particular attention should be paid to the corners. If there are large irregularities, they can be removed using a grinder, and folds and dips can be corrected with plaster
The walls need to be treated with a deep penetration primer and wait until it dries. This will reduce the likelihood of mold and mildew and also ensure good adhesion between the wall and the material.
It is necessary to stock up on high quality glue that sets quickly. It must match the type and density of the fabric. For thick wallpaper, it is ineffective to apply a weak adhesive, and vice versa. It is not recommended to use PVA glue. It leaves yellow marks on the walls and does not dissolve in water, which will complicate the removal of the coating in the future.
Stores sell special pink glue that, when dried, becomes invisible. It helps not to make mistakes in the process and remove excess in time, especially if you first illuminate the work area with side light.
When choosing glue, craftsmen prefer foreign products that dissolve well and hold materials firmly on the walls. You should not buy regular glue with starch, as it leaves bubbles, yellow spots and folds.
Each type of wallpaper requires a special glue. For paper coverings, universal compounds are suitable, for vinyl – special glue for vinyl materials. The non-woven covering can be installed using non-woven wallpaper adhesive. When gluing borders, you can choose either a universal composition or one designed for vinyl materials. Some self-adhesive borders can be attached without the use of additional substances.
Painting
Applying paint is one way to update damaged liquid wallpaper. The advantage of this restoration method is that the restored area of wallpaper becomes hard and very durable. After painting, it can be washed if dirt appears on it in the future.
Liquid wallpaper can be painted with the following paint:
| View | Characteristics and recommendations for selection |
| Water-based | The most affordable. Sold in the form of ready-made emulsions, which need to be tinted before painting. When thickened, dilute with water. But you need to choose high-quality paint from well-known manufacturers. Cheap compounds burn out quickly. |
| Water-dispersible acrylic | Forms a more durable coating compared to water-based emulsion. Dries quickly and does not crack due to temperature changes. |
| Latex | The advantages of this type are increased resistance to abrasion and moisture, and cost-effectiveness. The disadvantage is the tendency to crack at low temperatures. |
| Silicone | The best choice for painting liquid wallpaper, as it preserves the ability of walls to “breathe”. Has a service life of up to 25 years, high moisture resistance. fades, fills small cracks and levels out minor unevenness. The only drawback is the high price. |
- Before painting, repair damaged areas with gypsum putty. To maintain roughness and visually bring it closer to the texture of liquid wallpaper, it is not leveled. If there are oil stains on the wall, they are treated with alcohol or acetone. Deeply ingrained stains will have to be removed along with the wallpaper and the restored area will need to be repaired.
- After drying, a deep penetration primer is applied to the walls. This will bind dust absorbed into the wallpaper, increase paint adhesion and reduce its consumption.
- Painting begins after the primer has completely dried. It is better to apply the paint with a spray gun, so the composition will lie most evenly. You can work with a roller. Paint in 2-3 layers, allowing each layer to dry for at least 2 hours.
If drips appear during painting, remove them immediately. If this is not done, they will appear after drying.
Methods for eliminating an unpleasant problem
It must be said right away that it is not at all necessary to remove such a finish and re-glue it, although if there are too many bubbles and they are large, it is better to do just that. In other cases, the problem can be easily dealt with without resorting to such a drastic solution. You just need to act quickly, otherwise the material for finishing the walls will delaminate even more, and dangerous places will increase in size. If you are working with vinyl wallpaper, take a spatula or brush and smoothly push excess glue or air towards the edge of the canvas. In the case of non-woven wallpaper, it is better to replace the spatula with a rubber roller, and when working with paper, arm yourself with an ordinary dry rag.
However, there is no need to worry if the accumulation of air under the canvas is insignificant. After all, drying wallpaper is characterized by “shrinkage”, that is, over time it will stretch spontaneously and the canvas will level out.
Step-by-step guide to eliminating air under wallpaper
If the previous advice did not solve the problem, you can do this: pierce the bubble with a needle and iron the problem area with a spatula or other improvised means so that all the air comes out of it and the fabric is stretched.
Video tutorial on removing bubbles from wallpaper
To use the following advice, you need to arm yourself with a regular syringe. Pour liquid glue into it, carefully pierce the problem area and squeeze the contents of the syringe inside. Go over the wallpaper again with a rag or spatula, evenly distributing the glue inside the hollow space. If its remains come to the surface through the hole made, they can be easily removed with a damp sponge.
Many take a more drastic route and cut the canvas across or along the bubble. If you are not sure how the wallpaper will behave after such an intervention, then it is better not to do this. The fact is that there is a danger of not connecting the ends of the cuts to each other due to the characteristics of the material. And even if the base soaked in glue lies on the wall as if its integrity had not been violated, the dried ends of the cuts will stretch and separate, forming a gap.
How to get rid of bubbles on wallpaper using special glue, such as PVA? This adhesive composition is less demanding on surface preparation, so you can be sure that it will firmly connect the materials, but won’t it ruin the appearance of the canvas? Quite possibly.
PVA glue will help get rid of bubbles on wallpaper
To prevent such a nuisance, before making a puncture in the wallpaper, the area around the future hole should be covered with tape. The tape will protect the canvas from glue residue. This method is worth adopting for those who glue paper or very light wallpaper. After filling the syringe with PVA glue, squeeze it under the wallpaper and spread it with a roller or rag, moving from bottom to top and to the sides.
Now you know how to eliminate bubbles on wallpaper and enjoy a fresh renovation.
How to level liquid wallpaper if mistakes were made during application
Liquid wallpaper is a rapidly gaining popularity material for wall decoration. One of its advantages is maintainability. If unevenness has formed on the liquid wallpaper, it can be corrected in several ways.
- In what cases is it necessary to correct liquid wallpaper?
- Preparation for restoration
- Restoration of small damaged areas
- Painting
- Complete replacement
- What to do if there is a lot of water in liquid wallpaper
- Errors when applying liquid wallpaper
How to avoid problems
How to hang wallpaper without bubbles the first time? What needs to be done for this?
Practical advice from professionals:
- Choose glue according to the density and type of wallpaper.
- The room temperature should not exceed 22°C. In hot weather, close windows to prevent sunlight from entering. They contribute to uneven drying, which subsequently leads to the formation of pimples.
- Do not open windows and doors until the wallpaper is completely dry. The latter do not tolerate changes in temperature and humidity.
- Do not keep the glue on for more than 6 hours. It loses its properties, which negatively affects its main purpose.
- After applying the paste to the canvas, it should lie down and not immediately stick it to the wall.
- Using a roller or a piece of soft cloth, you can remove the bulges immediately, rather than waiting for the walls to dry completely.
- Remove excess glue, if any. To glue canvases, professionals advise using an adhesive with a color indicator. After drying, this composition becomes transparent. This way you can identify places that are not painted with glue.
Wallpapering
The appearance of bubbles leads to sad consequences. Fungus appears in them, which negatively affects the health of household members, and insects multiply. And the aesthetic appearance generally leaves much to be desired. The pimply, crumpled canvases on the walls are not at all pleasing to the eye.
Briefly about liquid wallpaper
Today, this type of finishing material is classified as a type of decorative plaster, since the application method is almost the same. The composition includes cellulose and silk fibers, as well as special dye granules that give the solution a certain shade. The consistency is reminiscent of decorative plaster, so it is applied using a spatula. The advantages of liquid wallpaper include the following factors: durability, reliability, ability to be restored, high quality, allows you to create unusual combinations, and a wide range of products. But there is one significant disadvantage - the high cost of the material; high-quality leveling of the base is required.
How to remove voids if they still form?
If voids have formed during the process of gluing the paper sheets, then while they are damp, you can try to drive them out with a rubber roller or a dry soft cloth. This is often possible. Small bubbles - no more than 5 cm in diameter - disappear on their own after drying, as the paper shrinks. If a bubble has formed under non-woven wallpaper, then before the glue has dried, you can lift the sheet by the bottom edge and re-glue it, expelling air and excess glue with a dry cloth or roller. In a situation where air remains under the already dried wallpaper, you have to act differently. A small portion of liquid glue is injected under the small bubble with a syringe, then the sheet is smoothed out. If the bubbles are more than 5 cm, then you have to cut it with a wallpaper knife or razor blade, carefully push the cut apart and moisten the canvas and the wall underneath with glue
The bubble is carefully smoothed with a roller. The stretched part of the fabric usually bubbles
The edges of the cuts do not always coincide perfectly after ironing. Attention. The edges of the cut after ironing are additionally adjusted to each other.
You need to remove bubbles with the same composition that was used for gluing. Then the color of the bubble will not change. If you use a different glue, then the shade of the wallpaper under the stain will differ from the main sheet. After gluing such problem areas, regardless of their size, you need to follow the drying regime - avoid drafts for at least 24 hours, but preferably longer.
Eliminating a dried bubble on non-woven coverings differs little from the same process, but on ordinary paper ones. The only convenience is that due to the high embossing of the pattern on non-woven fabrics, it is easier to mask the cut.
We invite you to watch a video about eliminating large bubbles:
It is possible to avoid the appearance of any defects on freshly pasted wallpaper. But for this you need to follow the process technology, carefully read the instructions and take the matter seriously. The instructions usually state what kind of glue should be used for the selected type of material, what consistency it should be, how long the paper should be soaked and how long it takes to dry completely.
After pasting the walls, the room cannot be used for habitation for 2 days - during this period it is better to spend the night in another place. By observing all these conditions, you can achieve high-quality wallpapering at any time of the year.
Why do they arise?
It is worth immediately reassuring readers - bubbles on wallpaper after gluing almost always form for everyone.
Another question is how large their number and size are, and how to quickly eliminate defects.
- The first reason is the expansion of the paper from the moisture contained in the glue. The wet fabric changes unevenly, hence the swelling in the most stretched places. Thin, inexpensive paper wallpapers suffer most from this “disease.” Heavy multi-layer strips swell less often and to a much lesser extent.
Immediately expel the air from under the wallpaper.
- The second most common reason why wallpaper bubbles after hanging is the haste of the owners. They ignore the need to carefully remove the air from under the canvases. Therefore, in order not to get a lumpy room the next day, you should immediately thoroughly smooth out the walls, even if it takes more time.
Choose the right glue.
- Another common mistake is a mismatch between the glue and the material. For example, you have glue for thin wallpaper lying around from a previous renovation, and you purchased a multi-layer or solid vinyl finish. Or vice versa - you are trying to glue a wall with inexpensive paper with a strong composition that is completely unsuitable for these purposes. Hence the bubbles when wallpapering.
- We often carry out repairs during the holidays, that is, mainly in the summer, in the heat. It’s clear that you want to work in comfort, so open windows and a draft make the process easier. But what helps us, to the detriment of wallpaper, is that they categorically do not accept changes in temperature and humidity.
Note! If you intend to do the pasting yourself, be patient and work only indoors. Even more important is to leave the room closed for a day or two, until the material on the walls has completely dried.
Otherwise, you will experience not only bubbles, but also partially fallen off stripes.
- Blisters can also appear from excess glue, as well as from keeping the canvas smeared with it for a long time. The longer the wallpaper lies wet on the floor, the more it gets wet and stretched. Therefore, do not cover the canvas with glue in reserve. Apply it only to each strip one at a time, immediately applying it to the wall.
Walls should be carefully prepared for wallpapering.
- An improperly prepared base often causes the finish to swell. Uneven dents on the walls, loose putty. cracks will definitely have a negative effect.
- When spreading the strip that is still lying, be careful to ensure that there are no dry gaps. A very convenient category of adhesives that change color upon application. In this case, you will see the missed areas and correct the situation in time.
- There are times when the instructions included with the material recommend gluing both the wallpaper and the wall. Carefully read the text on the packaging and follow this kind of advice, then you will reduce the risk of panels falling behind.
Why did they appear?
There are several reasons why wall coverings sometimes come off the wall and form bubbles:
The most common of them is the deformed surface of supporting structures. Even minor depressions, cracks, chips and height differences can cause installation defects. In such cases, the risk of bubbles is highest when gluing heavy vinyl wallpaper and thick non-woven fabrics, which cannot be pressed tightly enough to eliminate the presence of air residues. Installing wallpaper on undried plaster, putty and primer causes both the appearance of bubbles and the peeling of the entire canvas completely.
- Unevenly applied glue also causes individual areas to peel off. This is due to poor absorption of the glue in some places, which leads to small accumulations of air in these areas with subsequent swelling.
- Improper drying conditions for canvases often cause air pockets to appear. For complete loss of moisture, wallpaper glue requires about two days, during which a stable temperature regime must be maintained without sudden changes and drafts. Direct exposure to ultraviolet rays should also be avoided.
- Incorrectly selected adhesive and its uneven application often lead to air accumulation under the wallpaper.
- Failure to follow the manufacturer's recommendations is also the cause of defects: you need to follow the instructions exactly and apply glue either only to the canvas, as in the case of light paper wallpaper, or also to the wall, as when installing heavy canvases on a non-woven basis.
- Another reason for the appearance of air cavities is non-compliance with the installation technology, in which measures were not taken to tightly press the wall coverings and remove accumulated air.
Liquid wallpaper - selection, application, restoration
In this article I will talk about why liquid wallpaper was chosen for wall decoration. I'll show you how I applied them to the walls and how (after three years) I will restore them. Everything is very simple and accessible to everyone.
- Why liquid wallpaper?
- Where, how much and how much
- Liquid wallpaper - DIY application technology
- Restoration of liquid wallpaper coating
General gluing rules
It is possible to avoid the appearance of air bubbles on the wallpaper by following standard gluing rules. Each stage of work has a number of features that are best familiarized with before directly finishing the room.
Preparing the wall
The foundation preparation process consists of several steps that must be performed in a certain sequence. These stages include:
- Primer. Coating the wall with a primer binds the surface layer, deprives the base of its ability to intensively absorb moisture and prevents dust from adhering. The primer is applied with a large brush or brush, rubbing the composition until a white foam forms.
- Repairing potholes and cracks. The defects must be specially expanded to a centimeter width, then opened with a primer and treated with cement mortar. As an alternative to cement, you can use tile adhesive as it has the required characteristics.
- Putty. At this stage, the roughness of the base decreases and the gluing area expands. When preparing walls, it is impossible to do without putty and you need to apply at least a thin layer.
- Re-priming. To complete the preparation of the base, apply another layer of primer, which will serve as the finishing surface for gluing the wallpaper.
Selection of materials
It is better to select the adhesive composition taking into account the technical parameters of the wallpaper. The best option is to use instant adhesive with a high adhesion rate to the wall covering.
Padding
Applying a primer is an important part of the wall preparation process. Without a primer layer, the base is susceptible to destruction even with the slightest external influence
Pasting
Initially, the prepared adhesive composition is applied to the base or the inside of the wallpaper. The recommended amount of glue and the optimal location for application are usually indicated in the manufacturer's instructions
It is important to distribute the composition evenly and make sure there are no lumps, after which you can proceed to fixing the wallpaper. The canvas is applied in a vertical position, trying to ensure the most accurate placement
Alignment
In order for the surface to be smooth and without blisters, you need to properly smooth the wallpaper. Having fixed the canvas, first remove the remaining glue and accumulated air, starting from the top and moving down. You can level the surface with a spatula or roller. The movements of the instruments are carried out from the middle in different directions. As the alignment progresses, you can adjust the position of the canvas if it is displaced.
Preparation of the solution
It is worth noting that modern finishing of this type is sold dry, so you need to prepare it. Usually all components are sold in one package, but there are also products where all the components are in different packages. Preparation of the composition can take 6-12 hours. That is why experts recommend starting to manufacture it at the stage of ground work. In order to properly make the mixture for work, it is worth remembering the following sequence of actions:
- The amount of water for mixing must be selected based on the instructions;
- Water is drawn into the prepared container, and only then the mixture is added;
- The solution must be created from only one package. You should not prepare the mixture from several packages at once;
- It is also strictly forbidden to use only half a package to create a composition. This is due to the fact that the quantity of all components will be uneven.
If the solution is prepared incorrectly, the layers will be uneven, and the shade may also be affected.
What to do?
In order for non-woven or vinyl wallpaper to stick without problems, you must follow the following operating rules:
- Buy finishing material only in construction stores that work directly with the supplier or even the wallpaper manufacturer. It is best to verify the quality of the material from the seller by asking to see documents for the finishing products.
- Select an adhesive of the brand and manufacturer recommended by the company that produced the wallpaper. If the brand of glue is not specified exactly, take mixtures with the recommended composition and properties.
- Carefully prepare the surface to be pasted: there should be no obvious differences in plane level, defects, foreign debris and similar troubles. Prime the base and wait for the recommended time (usually from 6 to 12 hours).
- Follow all instructions on roll labels exactly. Any deviations from them may result in the appearance of blisters or wrinkles.
- Select tools that are suitable for a specific type of wallpaper. If the manufacturer specifies a rubber roller, a soft wallpaper spatula, or thick terry cloth without texture as a smoothing device, then you need to choose these items.
- Avoid drafts or temperature changes in the room while the glue is drying.
Non-woven base
Non-woven fabric is distinguished by its plasticity and strength, but as a result of contact with wet glue it can expand, losing its hardness. It is necessary to carefully apply the adhesive composition to the canvas so as not to damage the strip.
If, when hanging wallpaper on a non-woven basis, wrinkles begin to appear, they can be removed by straightening the canvas. It’s better to peel it off right away and redirect it in a new way than to deal with defects after the glue has dried.
On the other hand, you can continue gluing, but changing the size of the strip, cutting off the “unruly” parts along the entire length with a stationery or wallpaper knife. This method is rarely used, but it allows you to save material without throwing away the canvas completely, especially if the wallpaper has wrinkled in a corner or in an area no wider than 5-7 cm. On a meter-wide roll without a large pattern, this will not be noticeable. If wrinkles appear only in the corner, then gluing can be done so that the rolled material joins exactly in this area. To do this you need:
- Glue the first strip directly to the corner on the left or right side (depending on the movement from the starting point) so that about 2-3 cm protrudes.
- Using a 30cm metal spatula and an upholstery knife, trim off excess material. To do this, you need to attach the tool tightly with the metal part to the glued wallpaper, pressing it as much as possible against the wall with the decoration. Then, without lifting the knife and smoothly moving the spatula in 25 cm increments, move the blade along the material. From the bottom, in order not to lift the wallpaper, you need to cut it towards the top.
- Glue the second strip on the wall adjacent to the corner so that approximately 2-3 cm extends onto the glued wallpaper, carefully smoothing it out with a rubber or plastic soft spatula.
- In a similar way, cut off the protruding material, wipe the joint from the protruding glue with a damp sponge.
Attention
Attention! Non-woven wallpaper soaked in glue can be torn very easily, so you should only select a knife with a very sharp blade and cut using a metal spatula.
Vinyl
This type of roll material is heavier and is most often produced in meter rolls. Therefore, working with it is less convenient than with a 50-centimeter non-woven counterpart. Heavy vinyl is not so easy to lift to a height of up to 3 meters, taking into account the treatment with an adhesive composition. Careful preparation for gluing and the help of one more person are required (if workers are not hired).
If wrinkles appear when applying vinyl wallpaper, it is more difficult to eliminate them than with non-woven wallpaper. After joining and forming an even sheet on the wall, it is necessary to correct defects with smoothing devices.
If such unevenness appears after a day or more, you can try to correct it using a steam generator or a regular iron with a vertical steam function. After this procedure, very carefully smooth out the desired area with a rubber or plastic spatula, simply pressing it against the wall.
If steaming does not give an effect or the wallpaper is damaged due to strong impact on it, then you can seal it with an appropriate piece of rolled material. Therefore, you should try this method only with full awareness of the possible negative consequences.
Useful tips and how to fix errors
Before gluing the canvas, it is necessary to prepare the surface.
If the wall has undergone repairs and the application of gypsum putty, it is necessary to apply a primer, it is best to take ST17 or its equivalent. This will significantly reduce adhesion - reduce the absorption of the surface. The glue will not dry instantly or unevenly. If the walls have been cleaned of previous wallpaper, you also need to apply a primer only after thoroughly removing the previous material. Important: It is best to choose a glue with a composition that allows you to adjust the canvas when gluing. These data are indicated by the manufacturer on the packaging of the roll or the information can be provided by the salesperson in the store. If it is recommended to dilute the glue for glass wallpaper in a smaller proportion than for non-woven or vinyl, it is better to stick to this consistency
Thicker glue is always easier to adjust when gluing
If it is recommended to dilute glue for glass wallpaper in a smaller proportion than for non-woven or vinyl, it is better to stick to this consistency. Thicker glue is always easier to adjust when gluing.
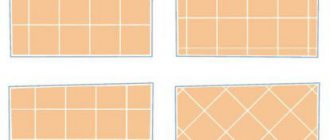
The first strip must be aligned in accordance with the marked landmark and in an area without corners or other openings. Leveling should be done using rubber or plastic spatulas, rollers or a soft cloth. In this case, movements should be from the center up and to the sides, and then from the center down. But not horizontally, but as a “herringbone” is drawn - this will more effectively expel the air and connect the canvas to the surface.
Do not allow the canvas to bend sharply, as this will make the problem area vulnerable to tearing and with a visible defect. If the bubble cannot be removed, then you need to peel off the strips to the required height and re-glue it, starting from the problem area.
Due to the slight expansion of non-woven fabric as a result of contact with liquid, it is best to glue the fabric with a slight overlap. It will then separate as the glue dries, and no gaps will be visible. The excess is cut off with a wallpaper knife using dry material.
It is very difficult for one person to paste wallpaper while noticing all the nuances in a timely manner. Therefore, if you have no experience in this matter, it is better to enlist help. If two people level the canvas (one on top and glues the first 20-30 cm, and the second simply does not allow the rest of the strip to stick to the wall), then the process is greatly simplified and the number of bubbles is reduced to a minimum.
If, as a result of gluing, several small bubbles still form, they can smooth out on their own after a couple of days. If this does not happen, then you can release the air without damaging the decorative layer by puncturing it with a needle or medical syringe. Excess air is simply sucked out of the defect cavity.
When gluing non-woven or vinyl wallpaper, bubbles or wrinkles may appear. To eliminate them, you don’t need to panic or immediately change the material. It is enough to peel off the canvas and try to adjust it so that the defects are eliminated.
High-quality material, following gluing technology and selecting the right adhesive composition will reduce the problem to a minimum. If, after gluing, the wallpaper wrinkles, the creases can be eliminated by trimming or puncturing and re-gluing the problem area.
How to prepare material for work
When the walls are dealt with, it’s time to start mixing the dry mixture. This process should take approximately 10-12 hours. It is not recommended to leave the composition for a long time, as it can harden and applying it to a vertical surface will be problematic.
- Prepare a deep container in which it will be convenient to mix the composition of liquid wallpaper for walls. Try to choose exclusively a plastic product for this purpose, so that oxidation does not occur, for example, when mixing the composition in metal basins.
- Pour all the ingredients from one package into it (more often they are already sold mixed in one large bag, which eliminates the need for mixing).
- After pouring the mixture into a container, thoroughly fluff it up so that it is enriched with oxygen, then add water in small portions and begin mixing the composition with your hands, wearing rubber gloves.
- Add warm water (30-35 degrees) as needed. The result should be a medium-thick consistency that is easy to apply. Stir the material for at least 15 minutes.
- Then make sure that all components are completely wetted with water. After this, just leave the product for 10-12 hours to swell.
Mixing liquid wallpaper in a bucket manually Source stucco-club.ru
How long will it take for the bubbles to expand?
Whether many or few bubbles have formed, most should expand the next day. I have had cases when the blisters stretched for up to 3 days.
If after 3 days some bubbles remain, they need to be glued. This can be done using PVA glue, or at worst, the same wallpaper glue. The bubble is slightly cut with a sharp knife; you need literally a couple of millimeters to insert a syringe with glue. The syringe is naturally used without a needle; the glue will not get into the needle. After gluing, the area of the bubble should be blotted with a damp sponge to remove any remaining glue.
This concludes the publication, easy wallpaper for you!
When renovating a house, every person faces the problem of bubbles appearing on the wallpaper. Despite the fact that the glue is selected carefully, high-quality canvases are purchased, and all gluing technology is followed, they can still appear.
The wallpaper does not swell, and when applied, the bubbles are vertical, like wrinkles.
The wallpaper does not swell, and when pasted, the bubbles are vertical, like wrinkles. It is impossible to smooth it out, the non-woven wallpaper is 106 cm. The walls are prepared, primer, volma layer, sanding, primer. My work experience of 10 years has never encountered such a mess, colleagues, advise what can be.
If everything else was done correctly, then check the glue - most likely you need to add water to it, it is too thick. Or the wallpaper is defective.
the second time the wallpaper no longer wrinkles. Just reapply the glue
Although the wallpaper is oilcloth, it also tends to expand when wet from the glue. You need gluing speed (at the moment), which is achieved through experience. Or work with someone first who has entered into this topic. I learned from the 3rd sheet, but sometimes it’s tempting to apply glue the old way - on the wallpaper.
Try to apply glue to the wall first, then let the wallpaper sit for a couple of minutes, and then apply glue to the wall. Everything will be OK.
Why does wallpaper wrinkle when applied to walls and corners? Best ways to fix defects
The choice of wallpaper is huge in terms of colors and colors; they are easy to glue on prepared walls. Wallpapering is one of the final stages of interior decoration. But sometimes the wallpaper wrinkles, air bubbles and other troubles appear that confuse even experienced craftsmen. The problem is completely solvable and you just need to show calm and restraint. There are several ways to troubleshoot problems.
Properties of liquid wallpaper
Any building material has individual properties, which are also taken into account when choosing. The physical characteristics of liquid wallpaper are as follows:
- vapor permeability - 120 m3/ms*Pa (this indicates that this mixture can be safely used for walls made of aerated concrete);
- noise absorption - no more than 30% when sounds of no more than 5 kHz appear;
- thermal conductivity - 0.04 W/mS.
From these characteristics it can be understood that liquid wallpaper plays a purely decorative role and, accordingly, cannot become even the slightest part of thermal insulation.
On a note! Experts do not recommend applying liquid wallpaper to uninsulated walls. Fungus or mold can grow on them in unventilated spaces.
How to eliminate defects?
Even if you notice bubbles and folds on the wallpaper after finishing work, then you have every chance to save the situation.
Method 1 – Squeezing out the glue
If the repair is fresh and the glue has not yet dried, try squeezing it out. Take a dry, clean rag and, using smooth, gentle movements, “drive” the excess glue to the edge of the wallpaper strip. If the wallpaper is vinyl, use a plastic spatula, and for non-woven wallpaper, a rubber roller is suitable.
Method 2 – Removal with a syringe
If the canvas has already dried, but the bubbles and folds have not been smoothed out, then try this method. Make a thin cut with a sharp blade on the defect, release the air from there and carefully coat this area with glue. It is best to use a medical syringe; it will not damage the canvas, and you can control the amount of glue. After this, press the wallpaper against the wall using smooth movements from the edge to the center.
Method 3 – Use an iron
This solution to the problem is only suitable if the glue has not yet dried completely. At the site of the defect, make a small incision so that the fabric straightens inward, and walk over it with a slightly heated iron. In order not to risk the wallpaper, it is better to iron the problem area through a cloth or an additional layer of paper.
Knowing the “enemy” by sight, you can prevent the problem. And if it’s too late, then the methods described above will help eliminate it. Try it and see for yourself.
New publications are published daily on our Yandex.Zen channel