Sooner or later, every person is faced with the need to repair their home. There can be many reasons for this. Some want to make their home more cozy and comfortable to live in, while others purchased an apartment without finishing. And here a very important question arises: what to do first - glue the wallpaper or install the door? If you do not follow the correct sequence of work, the end result may be sad. Therefore, let's look at this in more detail and find out what professionals think about this.
Preparatory stage
So, what comes first: doors or wallpaper? The answer to this question will be revealed in detail below. For now, let's talk about where to start repairing. First of all, you must draw up a detailed project that will allow you to determine the scope of work, as well as calculate the required amount of materials and funds. As soon as a detailed drawing with the layout of the rooms and the future location of the furniture is ready, you can proceed directly to the main work. Remove old coverings from the walls and remove all objects that may bother you. If this is not possible, then you should place them in the center of the room and cover them with film.
Many people are interested in the question of what is done first - doors or wallpaper, when redecorating. It all depends on what exactly you want. But first of all, you should worry about the safety of old materials. The floor should be covered with newspapers, and additionally with film on top, which is fixed with tape. You also need to remove all switches and sockets.
If a major renovation is planned, then the old coatings are completely removed, and the working surfaces are cleaned, leveled and primed. If there are large cracks on the walls, they should be repaired in several layers. If there are large defects for plastering, it is better to use building mixtures made on the basis of sand and cement.
Joint design
An important point that you need to pay special attention to when laying the floor is the design of the joining of the two coverings. Most often it occurs on the threshold, although this is not necessary. There are different options for how this work is done:
- Joint to joint.
In this case, it is necessary that the junction of the two materials be at the same level. It can be easily treated with a special putty. This type of work is most often carried out between living rooms and a corridor or a living room and a hallway. When performing this operation, the source material must have a rigid structure. This type of design work is possible by combining different types of laminate or parquet or parquet and tiles. - Podium.
This option helps if the difference between the levels of two coatings is impressive. It allows you to elegantly process the joint, zoning the room. Before you begin processing the screed with tiles or other materials, you need to develop a design project that takes into account all the necessary measurements. - Thresholds.
A wide variety of models of these products are used in processing both the simplest joints and connections of fancy shapes. In the first case, straight thresholds made of plastic or metal of the required width are used. They can always be cut or filed with a hacksaw. There are also bendable aluminum and plastic thresholds with rubber lining. They are more widely used.
Laminate flooring is an inexpensive and convenient means of decorating a residential building. It lasts a long time and looks beautiful. At the same time, you can choose colors and textures to suit any design and purpose of the room.
The question of whether to install the floor or the door first is decided individually.
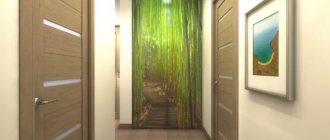
If we are talking about interior doors and the difference in levels between them is small or absent, nothing prevents you from laying the floor first. This will make it easier to take the measurements necessary to hang the door. It will be possible to avoid inaccuracies and errors.
However, there is a high risk of damaging the floors during installation. As a last resort, it is possible to cover the laminate with several layers of thick cardboard, but you need to make sure that the protective coating does not move anywhere. Therefore, complete surface safety cannot be guaranteed.
Some people prefer to install the door frame right away.
This is especially convenient if there is a high threshold or if there is linoleum on one side of the door.
When installing interior doors, you always need to ensure that the joint between the floor coverings of different rooms is aesthetically and reliably processed. There are various techniques, among which the most common are joint-to-joint and the use of special thresholds. It is also possible to organize a podium in an apartment or house, but this method requires an individual approach and a specially designed construction project. It is only applicable if the difference in levels is greater than 50 mm.
During a major renovation, the question often arises: what is done first - doors or laminate? There is no clear answer to this. Both options have their advantages and disadvantages. The choice in favor of one or the other can only be made taking into account the characteristics of each specific room. Therefore, before laying laminate flooring in a doorway, it is necessary to study all the intricacies of installing this material.
During a major renovation or finishing of a new room, when installing doors and laying floors, four problems arise that need to be solved:
- The need to adjust the height of the door leaves to the height of the floor.
- Possibility of damage to new doors or laminate in the doorway during installation.
- The need to carefully arrange the junction of the flooring and jambs.
- A method for creating joints between different flooring materials.
General information about repairs
What comes first - doors or wallpaper? It is very difficult to answer this question unambiguously, since everything here depends on several nuances. To do everything efficiently, you must adhere to the following rules:
- Wall repair. Before wallpapering, the work surface must be plastered. This work should begin before installing the flooring and installing the cornices.
- Door installation. Everything is ambiguous here. Installation can be done both before and after finishing the walls. But what's the right way? Professionals recommend: first wallpaper, then doors. This will minimize the likelihood of damage, as well as hide some visual defects and irregularities.
- Wiring. Recently, more and more often, cables are laid in a hidden way, which involves gating walls. Therefore, this work should be done at the very beginning of the repair.
- Ceiling finishing. It is best to do this immediately after installing the electrical wiring. If you stick wallpaper on first, you can damage it later, resulting in everything having to be redone.
To avoid the question of what comes first - interior doors or wallpaper, during the renovation process simply follow the above recommendations. Thanks to them, no problems should arise.
Features of flooring
First, you should consider the features of some floor coverings. In most cases, when installing a new floor, its level changes. The difference in height between the draft and the final version can be several centimeters, this is especially noticeable when laying tiles; parquet and most carpets take about a centimeter.
The most popular material today is laminate. Naturally, when laying it, the height of the floor changes upward due to the thickness of the substrate and the fragment itself. Despite the ease of installation, if the door is already installed, problems may arise with the fit of the outer units.
Read How to update wooden interior doors
When installing the door, it is necessary to take into account the thickness of the floor covering
The question of what to install first: doors or linoleum is not as pressing as in the case of other coatings. This is due to the small thickness and ease of installation of linoleum. All joints and hems can be easily hidden using plinths and platbands, and excess can be trimmed with a simple knife.
Door installation
They are one of the main decorative elements of any living space, regardless of its purpose. That is why the question of what comes first - the doors are installed or the wallpaper is glued is very important. As noted above, installation can be done at any time, but it is best to adhere to the following sequence:
- Ceiling finishing.
- Wallpaper sticker.
- Laying flooring.
- Installation of interior doors.
This algorithm of actions is good for its simplicity and speed of work. However, you must be extremely careful, since carelessness or an absurd accident can damage the floor covering. When installing door structures, before laying the laminate, you need to very accurately calculate the amount of space for the threshold. It will be quite difficult to do this without special skills, so it is better to stick to the scheme described above.
Wallpaper first
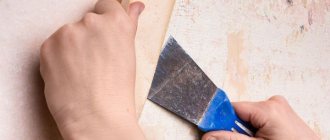
Anyone who has glued wallpaper at least once in their life knows how difficult it is to do it around the door. Pasting the corners will look like flowers. A free opening from the door frame is a definite plus when doing the work yourself.
Wallpapering should be done after all the “dirty” work has been carried out, while the installed doors should be gradually covered with plastic film Source Rerate.ru
Trimming wallpaper immediately after gluing is not an easy task. When installing a cheap door, there is a risk of delamination of the materials of the door frame and leaf when wet wallpaper comes into contact with its surface.
Wall decoration
So, you already know what comes first: doors or wallpaper. Once you've finished the ceiling and laid the flooring, you can start working on the walls. This should be taken very seriously, because the comfort and coziness of the room largely depend on them. It is the walls that are responsible for heat retention and sound insulation. Today there are the following finishing options:
- ordinary paper wallpaper;
- photo wallpaper;
- fabric coverings;
- acrylic;
- metallic wallpaper;
- cork wallpaper;
- glass wallpaper.
Which option to choose is up to you. Each of them has certain advantages and disadvantages, as well as different costs. You must be guided by your own goals and financial capabilities.
What to do if the interior door is larger or smaller than the doorway
The proportionality of the doorway and the door block largely determines how correctly they are installed and how long they will last. But if the sizes do not match, they are larger or smaller, how to correct this situation?
Widening the door opening - just from the side
How can you increase the doorway? The first thing you should pay attention to is the type of walls. If it's a wall, there won't be any problems.
- If the wall is load-bearing, it is important to prevent the ceiling from collapsing from above, creating an emergency situation and causing casualties.
- If there is a wall, the solution to the problem is described below. Which one to choose is chosen individually in each specific case.
How can I widen the opening? Just complete a series of activities.
- Strengthen the top of the opening. This point can be skipped if the expansion is wide, and then by no more than 100 mm, 50 mm on each side.
- Next is the marking. Having calculated exactly the width of the new door opening, markings are applied to the wall using a pencil or marker.
- Next comes the removal of unnecessary material in the opening - a hammer and sledgehammer, an angle grinder, and so on. Exceptional physical strength.
Everything is quite simple, but only in appearance - it is important to entrust all the work to the masters.
Reducing the doorway - possible variations
For some, work such as reducing a doorway may seem simple, but on the other hand, this, for the most part, leads to many problems if done incorrectly. And, first of all, these are cracks in the wall itself, and then – loosening of the door block.
- How can you reduce the door opening by no more than 100 mm? Such gaps are simply distributed on both sides of the doorway - regardless of the material of the walls, you can insert a batten or board of appropriate thickness into the free space. Alternatively, you can reduce it using plaster or drywall - reducing such volumes will not be difficult.
- If the opening is more than 100 mm? And for the most part, many craftsmen today use drywall. This is a technologically simple solution and a fairly clean technique, but it does have one drawback - the doors slam and can damage the structure by causing cracks to appear on its surface. And therefore a more reliable solution is to lay bricks.
Ceiling finishing
You have already become familiar with the fact that doors or wallpaper come first. But this knowledge is not enough to carry out quality repairs. You will also need to select materials. As for the ceiling, suspended structures are the most popular. Among their main advantages are:
- a light weight;
- ease of installation;
- long service life;
- environmental friendliness;
- ease of care.
But the main advantage is the speed of installation. The main rule when working with such ceilings is fastening after wallpapering.
Possibility of wallpapering ceiling tiles
This article will describe the possibility of gluing wallpaper onto ceiling tiles with minimal work on preparing the surface.
Wallpapering technology
It is possible to stick several types of wallpaper on the ceiling. This can be either specialized wallpaper for the ceiling or non-woven type wallpaper. One of the significant advantages of such materials is their ability to hide the smallest flaws in the structure of the ceiling.
As an alternative to specialized ceiling wallpaper, you can choose non-woven or paintable wallpaper. Similar building elements are often used for wallpaper gluing in Western countries. Their obvious advantage is that they can be painted in absolutely any color up to 10 times.
Wallpapering tools
During all construction work described below, be sure to use the following tools:
- plastic pressing spatula (applicable both to coatings with a wear-resistant surface and to smooth non-woven wallpaper; can also be used as a ruler for cutting during the gluing process);
- wallpaper brushes (used in particular for pressing paper wallpaper);
- wallpaper knife (makes it possible to quickly cut strips of wallpaper around the perimeter of the tire);
- stationery construction knife (it is advisable to have this tool on hand);
- meter (will help in the process of measuring strips of wallpaper or walls);
- plumb line (thanks to the plumb line, you can stick the first strip on the wall; accordingly, by applying a plumb line, check the evenness of the sticker of this strip);
- tire (combining this tool with a wallpaper knife, it is used as a ruler for cutting on the table);
- joint rollers (made of soft plastic, these tools are used for wallpaper with a fairly sensitive surface);
- cutting tire (used for cutting wallpaper at the bottom);
- metal spatula (for removing firmly glued elements of old paint).
Tile sticker
Scheme for gluing ceiling tiles
Before thinking about the possibility of sticking wallpaper on the ceiling tiles, you need to equip the surface with tiles. To do this, you need to prepare the ceiling surface, following all the rules.
You need to focus on the following steps:
Remember! The list of materials for gluing must necessarily include polystyrene foam. Otherwise, there is a high risk of encountering solvent-based adhesive, which can corrode or warp the slab.
Basically, there is an opportunity to simplify your work many times over. Ceiling tiles made using expanded polystyrene have a relatively small mass. Accordingly, it can be glued even to a completely unprepared plane.
Benefits of ceiling tiles
Cut out the corners of 4 tiles in advance if there will be a chandelier in the center of the ceiling.
At the same time, you will save yourself from the need to remove furniture from the rooms. Despite the fact that construction work involves a large amount of dust that will fall from the ceiling, furniture and all objects can still be covered with a protective film for a certain time.
General tips and tricks
Scheme for gluing wallpaper on the ceiling.
If the rooms are spacious enough, then it is necessary to glue the ceiling tiles from the center of the room. In particular, it is better to start with the chandelier area. If the walls in the room are smooth or it has a non-standard shape, it is best to glue the tiles in such a way that the seams are located diagonally. Small rectangular rooms require gluing tiles parallel to the walls.
If there are noticeable spaces between the slabs, they can be sealed with acrylic putty. The type of tiles used can be of contrasting colors. In this case, the ceiling tile itself can be arranged in the form of a spiral, in a checkerboard pattern, or in a snake pattern. Accordingly, the ceiling will have a more non-standard appearance.
Synthetic type adhesives are applied as follows: the tile surface is spread and torn off. After the glue dries (usually 30-60 seconds), the tile is again pressed against the plane of the ceiling, this time completely.
The process of gluing wallpaper on ceiling tiles
First things first, you need to determine the type of wallpaper you have. If it is paper wallpaper, then it is impregnated with a primer (penetrating primer). Areas that have already begun to come off are removed. After the primer has dried, the wallpaper is glued to a relatively flat surface.
Washable wallpaper can stay on the ceiling plane only if it fits securely enough to the ceiling. If the wallpaper begins to peel off, then remove it without delay.
Actually, the gluing process itself implies compliance with the following recommendations:
- Preparing the ceiling for wallpapering. In this case, the ceiling must be clean and dry. If there are traces of old wallpaper on the ceiling, remove them. A whitewashed ceiling does not necessarily mean washing off the lime; here it will be sufficient to remove the hanging layers. Afterwards a primer is applied to the ceiling. It provides high-quality adhesion between the tile plane and wallpaper.
- The location of the canvas from light sources. If wallpaper is glued around the entire perimeter of the room, then the joints between the canvases will not be so noticeable.
- If the wallpaper has a pattern, it must be adjusted to the tiles in advance. After joining, the web is cut and marked, indicating the roll number and the direction of the pattern.
- There should be no drafts in the room where you want to wallpaper the ceiling tiles. The air flow in the room determines whether the wallpaper will come off in the future.
It is worth noting that absolutely all building materials used to create a high-quality ceiling covering can be purchased in a variety of stores. The most rational way would be to use the services of the global network to look at photos of the material you are interested in in advance.
Floor
Regardless of what coating you use, it is important to ensure that the work surface is perfectly flat. Therefore, the first thing you need to do is fill the screed. To prevent the material from deforming during the rest of the work, first fix the ceiling, and only then start laying the laminate. However, you should not take on several rooms at once. Finish one first and then move on to the next. Otherwise, the pattern may not match, which will negatively affect the appearance of the premises.
Return to contents
Wallpaper for the ceiling can be paper - domestically produced. They are glued together from two layers of paper, one of which has a fairly deep relief embossing.
The undoubted advantage of such wallpaper is that it conceals quite serious unevenness in the ceiling. They can be used to cover an unputtyed ceiling; the relief and thickness of the wallpaper will hide the flaws. A significant disadvantage of this material is that it is quite heavy and becomes even heavier when it is soaked in glue before gluing.
And the only way to hang wallpaper is to first apply glue. The next drawback is that such wallpaper cannot be painted, and it is only available in white. And to complete the list of shortcomings, there is one more fact: the service life of such wallpaper is no more than five years.
Non-woven wallpaper is completely free of such shortcomings. They are made from long cellulose textile fibers and special additives that combine it all into a non-woven, smooth fabric. Thanks to this production method, this product has acquired very useful properties:
- they are non-toxic and hygienic;
- have sufficient thickness to hide some unevenness in the ceilings;
- they are convenient to glue, since you need to apply glue to the ceiling, and this makes the work much easier;
- when glued they do not stretch;
- With this well-fitting and durable wallpaper, it is easy to glue surfaces made of any materials;
- they do not fade in the sun;
- such wallpaper can be painted, but you can also buy ones that match the color or pattern;
- their service life is limited only by your desire to change the type of ceiling finish again.
You can glue the ceiling with non-woven wallpaper using any wallpaper glue, but it would be wise to choose a special one, since they are available for sale.
https://youtu.be/GHKO4QiD1QY
Return to contents
Preparing the ceiling surface for tiles is the same as for wallpaper.
All ceiling tiles are divided into three main groups:
- pressed;
- injection;
- extruded.
Pressed tiles are usually white.
It is pressed from foam blocks and usually ranges from 5.5 to 8.5 mm thick. An absolute drawback is fragility. An undeniable advantage is the low price.
The injection one has a more significant thickness from 8.5 to 14.5 mm and perfectly smooth edges, which allows you to achieve the illusion of a continuous sheet with careful joining on the ceiling. It is made using the technology of sintering polystyrene foam raw materials, which makes it durable. The thickness and deep textured pattern allows you to hide almost any ceiling imperfections.
Extruded tiles are pressed from polystyrene strip to a thickness of 3 mm. Despite the visual fragility, the tiles are very strong and durable. As a rule, it is covered with a film, which later allows for wet cleaning of the ceiling.
You can glue the tiles with “Installation Moment” panel adhesive. It really glues instantly, but you need a special gun to work with it.
You don’t need a gun for “Titan” or “Master” glue, but in order to properly glue the tiles, you need to apply it and wait about 10 minutes. Then you will need to press the tile to the ceiling and hold it for 10-15 seconds.
Ventilation device
Installation of utilities is perhaps one of the most important stages of repairs. But, as practice shows, not many people pay due attention to it. For a comfortable stay, the cooking area and bathroom must be equipped with a ventilation system and air exhaust, and the main room must be equipped with air conditioning. It is recommended to carry out installation work in the following sequence:
- The layout of the apartment is determined.
- Openings are made in the interior partitions.
- Installation of the external and external air conditioner unit is in progress.
- Ventilation is being installed.
- Electrical wiring is supplied to the devices.
Once you are done with this, you can start decorating the interior of the premises.
Technology for gluing wallpaper and ceiling plinths
Vinyl wallpaper and paintable wallpaper are usually used for gluing to the ceiling.
In order to decide what to do in this situation, it is necessary to consider the advantages and disadvantages of the options.
If you glue the fillets before the wallpaper, it will be easier to putty the joints of the baseboard and paint it, and you won’t be afraid to stain the wallpaper. But then it becomes difficult to fit the top edge of the wallpaper to the ceiling plinth. This must be done very carefully so that there are no gaps left.
On the other hand, if the wallpaper is already pasted, difficulties will arise with installing the baseboard. At least a day should pass after the wallpaper glue dries. Then the wallpaper will need to be covered with masking tape and glued, and then the baseboard will need to be painted.
First, the ceiling plinth is glued
The cut angles on both plinths, right and left, must be the same, i.e. their profiles must be identical.
The width of the skirting boards varies, so the choice should depend on the area of the room. If the room is small, then you need to take narrow ones, since wide ones will look bulky.
Tools and materials for installation:
- ceiling plinth;
- liquid Nails;
- putty or sealant for filling seams;
- pencil;
- roulette;
- rubber spatula;
- miter box and stationery knife for trimming;
- glue gun.
The ceiling plinth is glued to the wall using putty or liquid nails. If you glue it on putty, it will fill the existing cracks and you will only need to remove its remnants.
Before gluing the fillets, it is necessary to carry out preparatory work, namely, level the ceiling and walls in the place where the baseboard will be glued, then putty it.
For gluing, a special glue is used, which is applied in a strip to the sides of the plinth adjacent to the wall and ceiling.
Nowadays there is a wide variety of ceiling plinths; you can buy narrow ones, they are more flexible and follow the topography of the walls. In the finished version, this will not be very noticeable, of course, if the wall defects are small.
Theoretically, the corners of the rooms should be 90 degrees, but in practice this is not always the case. Therefore, we first cut the corners of the plinth at 45 degrees using a miter box, and then adjust it on site. Ceiling plinth made of foam plastic can be cut very well with a stationery knife. You can join one plinth to another on the spot and cut it off.
After cutting, you need to adjust the ceiling plinth, and then just glue it.
The joints need to be sanded with fine-grained sandpaper. The glued plinth can be left as is, or it can be painted with water-based paint in the same shade as the ceiling.
How to wallpaper
Wallpapering tools:
For gluing, you can use two stepladders, which will be connected by a board at least 40-50 cm wide, or tables lined up in a row of the same height.
- pencil;
- scissors;
- roulette;
- painting spatula and knife;
- roller for joints and fleecy;
- glue tray;
- a bucket for diluting glue;
- soft cloth;
- plumb line with thread;
- table, stool or stepladder.
Before starting work, you must carefully study the instructions, since different types of wallpaper have their own rules.
A sponge or soft cloth will help smooth the wallpaper and remove air bubbles.
If necessary, the walls are leveled with putty, then a primer is applied. It is needed so that the glue is not absorbed by the walls and it is possible to easily combine the pattern on the canvases by moving the stripes. Instead of a special primer, wallpaper glue diluted to a more liquid consistency can be used.
When cutting wallpaper, make a small reserve; they are carefully cut with a stationery knife on the floor. If adjustment of the drawing is required, then you need to look at the instructions, where the offset step is indicated, but it happens when this step does not correspond. So you need to test it on the floor first.
Wallpaper glue is selected according to the type of wallpaper. For areas near windows and doors, you can use a PVA-based composition. Dilute the glue in a bucket of cold water according to the instructions, stirring quickly with a brush or stick. Let the glue sit.
Excess wallpaper is pressed with a spatula and trimmed with a sharp knife.
When wallpapering, the windows should be closed and the sockets should be de-energized. You can start gluing wallpaper pasted at the joint from any wall. For training, it is better to start with the one that will be covered with furniture.
The vertical is marked when gluing the first strip with a rope and a weight. This strip is glued from the corner with a 1.5-2 centimeter approach to the other wall. After the strip is coated with glue, it must be folded in half for impregnation. At this time, the wall is coated with glue and the strip is attached to it. The collected air is dispersed with a clean cloth or rubber roller.
Ceiling plinths should not be glued directly onto pasted wallpaper, as they need time to dry and are easily damaged. The fillets are glued using the technology described above.
Builders' recommendations
Many people are interested in what professionals think about whether it is better to glue wallpaper or install doors first. Qualified builders give the following recommendations on this issue:
- You can install door structures at any stage of repair. In order for everything to work out properly, you need to plan the entire process well.
- If you bought an apartment in a new building without finishing, then you should not buy expensive materials. Over time, the building will shrink, so the renovation will have to be redone.
- When making calculations, be guided not by the dimensions indicated in the technical passport for the housing, but by personally taken from each room.
- Follow the correct order of work. This will not only allow you to do everything better, but also save on the purchase of materials.
These tips will help you in such a difficult task as repairs. But if you are encountering it for the first time and do not even know how to hold tools in your hands, then it is better to hire professionals. Of course, you will have to spend money on paying for their services, but the work will be done to a higher quality, and you will not have to think about repairs for many years.
Preparation of work
If the product is purchased assembled, then installation problems will be much less than with self-assembly. Because installers will have to assemble the door frame, install hinges, a lock, and only then replace the doors and install trims. This complex of work results in additional costs for the customer. The door leaf is aligned vertically.
To avoid deviations, a level or plumb line is used. Sometimes a leveled box protrudes beyond the doorway. This defect must be eliminated using plaster or putty. It is not recommended to adjust the door leaf to the wall, so as not to hold the door constantly opening.
At the renovation stage, when interior doors are installed, do not forget about the presence of side and top gaps. It is desirable that there be at least 1–2 cm on each side. Gaps are needed for possible correction of the canvas and subsequent foaming of the void. It is also necessary to take into account the gaps at the bottom of the canvas so that after spreading the linoleum it does not rub against the floor.
If the door is factory-made, then manufacturers take this factor into account. But sometimes you have to install doors during manual repairs. In this case, the gap is made at least 8 mm. In other words, when assembled, the door frame (side posts) should protrude beyond the door leaf.
In addition, when assembling it yourself, you need to make a gap between the canvas and the shell on the inside. To do this, lay the prepared frame on a flat floor the day before screwing the box together with screws and insert 3–5 mm thick fasteners around the entire perimeter. To insert hinges, you need to make indents of 250 mm at the bottom and top. If the customer wishes to install three hinges, then it must be fixed at a distance of 500 mm from the top. The lock must be inserted at a distance of 850 mm from the bottom of the door leaf.
A profitable alternative has been found
There is a rare but effective method that guarantees a high-quality result and minimizes the disadvantages of previous methods. It's called stage-by-stage installation of ceilings. Infrequently used because it increases downtime and financial costs.
Subsequence
- The side surfaces are leveled.
- Install a baguette under the ceilings.
- Cover the fences on 4 sides.
- Mount the panel.
What disadvantages are avoided in this case compared to traditional technologies? Read below:
- The frame is placed exactly on the designed wall. There are no gaps or cracks.
- The baguette is strengthened in such a way that dust does not harm the trellises.
- Wallpaper is easy to glue and paint, eliminating clogging of fabric or vinyl. They are easier to adjust to the baguette, small gaps are covered with decorative elements.
- When the side surfaces are completely dry, a protective film is applied to all sides, reducing temperature effects. Then the canvas is mounted without threatening the trellises.
- When the fabric material is stretched, the room is not heated, which is optimal for covering the top and sides. By choosing this method, they accumulate a budget while achieving productive results.
Today this is the most professional option, which has one feature - the effect of temperature. But when the fences dry out for 5-7 days, the risks are negligible.
Useful tips
Recommendations to help simplify the gluing process:
- It is better to paste wallpaper behind radiators and vertical heating pipes right away, while you have fresh energy, so as not to suffer later.
- Before work, you need to turn off the power to the apartment, remove the covers from the sockets in order to glue the canvas directly onto them. After the wallpaper has dried, the holes are carefully cut out and the socket housings are put back in place.
- You can seal uneven joints near the ceiling using borders.
- When working with external corners, it is good to use a special plastic corner that matches the color of the trim.
Choosing the right “reference point” and strictly vertical orientation of the stripes are the key conditions for an accurate and high-quality finish.
To calculate the cost of work, fill out the form below. It's fast, free and without obligation!
We will call you and discuss all the details in detail!
Special cases
What comes first with laminate or doors
? It is impossible to cover the variety of existing materials with which modern renovations can be made. Do the floor and walls first? Where to start? In what sequence should processes be organized? Decisions on these issues often have to be made based on the specific situation. To avoid mistakes, always use a simple algorithm. When choosing between two finishing materials, first of all, use a durable one that is easy to clean. Next, work with more fragile or easily soiled ones. Here, as in medicine, the rule “Do no harm” prevails. With this in mind, you can easily organize the order of work during your home renovation.
Tsugunov Anton Valerievich
Reading time: 4 minutes
Many people are familiar with the expression “repair is a natural disaster.” To prevent the renovation of your beloved home from turning into a real “catastrophe,” you need to think through the sequence of apartment renovations and stick to it in the future. Drawing up an algorithm of actions will save you from wasting time, nerves and the family budget.
Examples in the interior
To accurately understand the progress of the work, let’s look at it using the example of finishing a kitchen.
It is necessary to decide on the layout of the room and the interior. You can come up with the interior yourself or select from ready-made works available on the Internet.
Next, the so-called “zones” are designed, for which the necessary materials are already selected. The kitchen should have two “zones” - a working one, where food is prepared, and a dining area. They are usually separated by different facing materials. The working area is decorated with tiles, and the dining area with wallpaper, thus creating a cozy atmosphere. Of course, this is an approximate standardized solution.
How much expanded clay is needed per 1 square meter?
How to calculate the required amount of expanded clay?
First, we calculate the total square footage of the room; to do this, you need to multiply the width by the length. Next, you need to decide on the thickness of the expanded clay layer. All that remains is to multiply the quadrature by the thickness, we get the cubic capacity.
What layer of expanded clay is needed to insulate the floor?
The main rule when performing thermal insulation of a floor is the accurately calculated thickness of expanded clay. It should be enough to provide thermal protection for the house: for concrete, a layer of at least 10 cm is used, and for soil – up to 30 cm.
How much expanded clay is needed per 1m3?
For a sandless mixture, based on 1 m3, the following proportions are used: 720 kg of expanded clay brand M200; 250 kg of cement sand; 100-150 liters of water.
How to calculate the amount of dry screed?
We calculate the backfill based on the volume of material; to do this, the area of the room must be multiplied by the thickness of the screed layer. It is advisable to take all dimensions in meters, for example - 60 m2 (total area of our premises) * 0.08 m (layer thickness 8 centimeters) = 4.8 m3 of dry backfill.
How much expanded clay is needed for 1 block?
For a sandless mixture, based on 1 m3, the following proportions are used:
- 720 kg of expanded clay brand M200;
- 250 kg of cement sand;
- 100-150 liters of water.
What is the consumption of screed per 1m2?
To calculate the amount of dry mixture for floor screed, you need to know the expected layer thickness, room area, and material consumption per 1 m2. Depending on the manufacturer, you will need 18–25 kg of mixture per square meter with a layer thickness of 1 cm.
How to properly fill a floor with expanded clay?
Dry expanded clay as floor insulation is used not only with wooden sheathing, but also with cement screed.
- The backfill is leveled and covered with plastic film with an overlap of 10 cm. ...
- Reinforcement mesh is placed on top. ...
- The mixture is prepared from sand and cement in a ratio of 3:1.
How to insulate a concrete floor with expanded clay?
Insulating the floor with expanded clay in an apartment
- Dismantle finishing materials (linoleum, laminate).
- Remove the old screed. ...
- Clean the surface from dust and dirt.
- Cover existing cracks and defects with cement mortar.
- Set the guides (beacons) to 10-12 cm.
Which fraction of expanded clay is best for floor insulation?
For full-bodied individuals, the 10-20 mm fraction is most suitable (but it is not necessary to use only this). For hollow ones - expanded clay 5-10 mm. This material is used not only in construction, but also in: - gardening (insulating the roots of garden plants, a fraction of 10-20 mm will provide a drainage system, for indoors - 5-10 mm);
How much does 1 cube of expanded clay weigh?
As practice shows, the weight of 1 m3 of expanded clay varies from 200 to 400 kg. For a visual representation, in order to understand how much 1 cube of expanded clay weighs, we can say that it is 20 bags of 50 kg each, 25 bags of 40 kg each, or 40 bags of 25 kg each.
How much does a cube of expanded clay 20 40 weigh?
Expanded clay fraction 10-20 is recommended to be purchased for thermal insulation of floors and ceilings. Large granules (20-40) are used to insulate water mains. One cubic meter of the most common brand M450 in this range weighs no more than 350 kg; it is well suited for insulating roofing systems and basements.
How much does 1 cube of expanded clay cost?
Expanded clay in bags and in bulk Name Unit of measurement Price per cube Expanded clay in bulk fraction 0-10 m3 from 2330 rub/m3 Expanded clay in bulk fraction 10-20 m3 from 2015 rub/m3 Expanded clay in bulk fraction 20-40 m3 from 1970 rub/m3 Expanded clay in bags fraction 10- 20m3from 130 rub/m31 more line
How much does a square meter of dry screed cost?
The cost of installing a dry floor screed in an apartment averages about 300–400 rubles per square meter. The materials themselves - dry backfill, floor covering elements, screws, edge tape, plastic film - will cost approximately 600-800 rubles per square meter, this price includes delivery.
How to calculate how much GVL is needed?
It is necessary to take the total working surface area and divide by the sheet area, you will get the quantity in pieces, and add 5% for trimming. GVL has a size of 2.5 by 1.3. Divide your square footage by 3.25 m2 + 15% percent if you are sewing up the ceiling or walls.