/Repair/Apron/
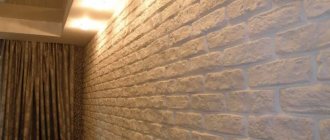
Not all specialists can be trusted to lay tiles in the kitchen backsplash. It is much safer to do everything yourself, even if you have no experience. The main thing is to know how to lay the tiles correctly. And when your apron is ready, you will be surprised how easy it was.
Methods
The edges of the decorative coating are usually the factory edges of the tiles. However, this does not always happen, especially if the fragment has a geometrically irregular shape. In addition, between the tile and the base there is a space filled with adhesive solution. This option cannot be called aesthetically pleasing.
To complete the composition, the same mortar or plaster was previously used. The ends were aligned at a slight angle and painted in the color of the rest of the wall. Today this option also occurs, but somewhat less frequently. And instead of paint, they began to use grout, which fills the seams between the same tiles.
Articles on the topic (click to view)
- Rating of the best steamers of 2022
- Photos of curtains for kitchen design 2022
- Choosing curtains for the kitchen
- Metal kitchen rack for appliances
- Instructions for the electric stove "classic plus"
- How to choose an electric stove with 4 burners and an oven for the kitchen
- Sofa in the bay window for the kitchen
Modern technologies make it possible to use special decorative strips, called finishing profiles or trims, to decorate the ends.
Preparing to lay a ceramic tile backsplash
Any instructions containing information on how to lay a tile backsplash in the kitchen indicate the need for preliminary preparatory work.
You will also need to decide on the location of the apron, based on the size of the selected tiles and/or the selected pattern, in order to eliminate the possibility of disturbing the composition.
Be sure to consider the location of sockets and service holes
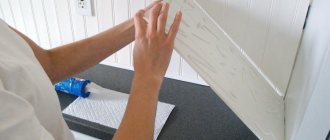
Those who want to save money on the work of a craftsman and learn how to make a kitchen apron from ceramic tiles yourself should remember the need to completely level the surface to be finished using gypsum plaster or drywall. This is one of the most important stages, on which the evenness of the tile covering and its aesthetics will subsequently depend.
The surface under the apron must be flat
Many beginners who do not know all the intricacies of how to lay a tile backsplash in the kitchen believe that the stage of leveling the wall can be skipped, as supposedly all the unevenness can be compensated for using tile adhesive. Theoretically, this can be done, however, only an experienced craftsman who knows about the property of glue will be able to cope with this; it will decrease in volume when it dries. If the adhesive is applied unevenly, the tile may move when the adhesive composition dries.
Be sure to consider the distance between tiles
If the wall being finished was covered with whitewash, then this coating will have to be completely removed. As for oil paint, it will also be advisable to remove it, although to save time you can simply make notches on it. Such notches are made with a regular chisel or grinder with a circle for cutting concrete.
After a mark is made on the wall with a construction pencil for laying the bottom row, a metal profile is laid along this line. Its installation is necessary as it will serve as a support for the tiles until the tile adhesive has completely dried. To secure the profile evenly, use a laser or regular building level.
Before attaching the reinforcing strip, make sure there are no wiring or pipes
Tools and materials
If you choose the method of our ancestors, you will need a spatula and mortar to level the end edge. After complete drying, the coating is sanded, dust-free and impregnated with a primer to improve adhesion.
Next comes paint with a brush or sealed grout, which can be spread manually without any tools. If the edges are not even enough, it is better to use a medium-hard rubber spatula. After the grout has dried, the coating should be sanded a little with fine sandpaper.
As for the finishing profile, it is installed simultaneously with laying the tiles. Fixation occurs due to the same adhesive solution.
Decorative strips are distinguished according to different parameters:
Material
- impact-resistant plastic;
- metal protected with an anti-corrosion compound or zinc film.
Design features
- roundings can be internal or external;
- flat and curly;
- straight, flexible and curved.
Functional significance
- decorative and protective, for example, for corners and end elements;
- connecting is relevant for designing the transition of dissimilar coatings, including for the end of interest to us;
- compensatory.
Among other things, trims can have a decorative coating. For example, imitation of the structure and shades of natural materials or just any color.
And plastic is painted with special pigments at the manufacturing stage. To give an unusual effect, special insoluble fillers can be used.
For example, crushed quartz or granite.
It is important not to forget that the edges of the tile must be completely secured with adhesive mortar.
Expert opinion
Mikhailova Maria Vasilievna
Furniture store manager. Knows everything about comfort and interior design
You can decorate the end beautifully using any of the methods listed above. An individual approach is also not excluded. The main thing is that there are no voids and water and dirt do not accumulate at the ends.
Hemming the edges
To obtain an even seam, a bevel is made at the junction of the fragments - cutting the ends at 45°. This can be done with an angle grinder, a roller tile cutter or fine-grained sandpaper. The trimmed pieces are placed in the corner end to end so that they coincide and form a solid transition. To do this, the wall at the corner must be perfectly evenly processed.
What comes first, a kitchen set or an apron?
“Which comes first, the chicken or the egg?” - a burning question, but even this is not associated with as much controversy and discussion as with what to do first - laying the backsplash or installing the kitchen?
p, blockquote 1,0,0,0,0 —>
Expert opinion
Mikhailova Maria Vasilievna
Furniture store manager. Knows everything about comfort and interior design
Most likely, the designer will advise you to install the kitchen first, and the tiler to lay the apron, and then hang the set. Who is right? Let's figure it out.
p, blockquote 2,0,0,0,0 —>
In fact, both options have a place to be. An acceptable option is selected by the customer based on several factors. Let's analyze both cases, their features, pros and cons.
p, blockquote 3,0,0,0,0 —>
Using Trims
Trims are also used at the joints - decorative corners made of PVC. For external corners, L-shaped trims are used, for internal corners, corners in the shape of a pressed arc are used. They are attached to the tiles with glue, silicone or acrylic sealant, and liquid nails. One part of the trim is mounted directly under the tile, the second remains on the surface. This element not only adds elegance to the apron, but also protects the joints from the penetration of dirt and moisture.
Option 1. Apron first
There are two options for the development of events:
p, blockquote 4,0,0,0,0 —>
- the apron is placed with a reserve - i.e. “goes” behind the upper and lower cabinets;
- The tiles are laid clearly between the upper cabinet and the countertop. In this case, the wall cabinet is adjacent to the top line of the apron, and the cabinets are adjusted to the bottom line using adjustable legs. But keep in mind: it’s quite difficult to hang a kitchen millimeter by millimeter.
pros
p, blockquote 5,0,0,0,0 —>
Application of adhesive composition
To properly make a kitchen apron from tiles with your own hands , you will need to know the nuances associated with kneading and applying tile adhesive:
- Before you start laying tiles with tile adhesive, a special coating is applied to the surface to be finished. primer, increasing the quality of adhesion of tiles and tile adhesive to the wall;
- It is recommended to apply tile adhesive first thin layer on the wall itself, after which reverse tile surface. This will increase the strength and durability of the finished tile covering;
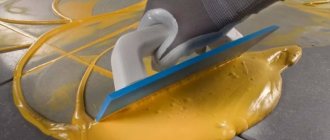
- Using a special notched trowel, the tile adhesive is evenly distributed over the wall surface. The size of the teeth of the notched trowel is selected based on the dimensions and weight of the ceramic tiles used;
- After the tile is glued to the wall, the master will have no more than 20 minutes to correct any detected jambs, since the tile adhesive has time to harden within 20 minutes after being applied to the wall.
Important : a novice master needs not only to know how to lay tiles on a kitchen backsplash, but also to remember that the mixed tile adhesive should be used within 1-1.5 hours, as it may begin to harden and lose its adhesive properties while in bucket
Other non-standard ideas
You don’t have to limit yourself to the examples described, and you can add some flair to the design, even if you make a design that is less traditional.
The area between the cabinets and the worktop will be filled with:
Wine corks (they should be cut lengthwise or crosswise, into circles and laid out in different patterns).- Beer caps.
- Pebbles.
- Shards of broken dishes.
- Remains of a parquet board.
- Disks.
- Cereal panel.
Typically the material is attached in one of two ways:
- Glued onto a sheet of chipboard, which is moisture resistant, and screwed.
- Place on mortars (this applies to dishes, stones, etc.).
It is best to use clear glass in the food preparation area. The panel will cover the apron from grease and water, but will nevertheless allow you to admire the incredible decorations of the kitchen space. A rather interesting and alternative option are vinyl stickers, which can be bought at any hardware store, hypermarket, or ordered online. Various designs - color or black and white drawings, patterns.
Interestingly, a panel is usually used as a base (for example, a sheet of moisture-resistant chipboard or MDF). It is mounted on the wall, and the decor is attached to the top. You can easily change it as soon as you get tired of it.