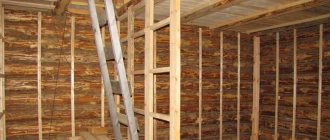
The design of the installation provides for the construction of a false wall, which, on the one hand, covers the frame and tank, and with them all communication pipes, on the other, serves as the basis for attaching the control panel for the drainage unit. The work is not very difficult, and therefore is often done with your own hands. The quality of its implementation determines the type of walls of the toilet or bathroom, access to the cistern fittings and water meters. So that there are no surprises during the operation of a wall-hung toilet, we’ll talk about the nuances of how to properly cover the installation with plasterboard.
What material to cover the toilet installation with?
To cover the toilet installation, you need a frame and sheet material.
The frame is assembled from a wooden block or galvanized profile for drywall.
The main disadvantage of wood is the change in geometry with fluctuations in humidity, which leads to the appearance of cracks in the finish at the corner joints of the frame. The disadvantages include the inaccuracy of the geometry and the difficulty of ensuring the required structural rigidity.
The steel profile does not respond to changes in humidity. And temperature fluctuations in the heated room are insignificant to affect the design of the box.
The profile has a standard geometry, clear parallels and right angles, which allow you to accurately maintain levels along all planes. The section in the form of a channel provides rigidity to each element and the structure as a whole.
For covering boxes, niches and walls, ceiling profiles are used - guides and racks:
- Knauf or domestic analogues marked UD and CD;
- Giprok with markings PPN and PP.
Note. Wall profiles UW/CW or PN/PS are intended for the construction of plasterboard interior walls and partitions indoors. They have a larger guide profile width. Even the narrowest UW has a “back” width of 50 mm (PN has a minimum size of 42 mm), and UD or PPN has a width of 28 mm. Therefore, the structure takes up more space, and this leads to a loss of useful volume of the room. And they cost more than ceiling profiles (with the same metal thickness).
GCR (plasterboard sheet) is used as a covering material.
How to make a hatch
The galvanized profile is excellent as a material for decorating the location of the inspection bow. The construction is carried out simultaneously with the installation of the main frame. If in the version without a hatch, instead of the front starting profiles, you can use a strapping one (width 27 mm), then the hatch structure can only be installed in the starting profile (width 60 mm).
Step-by-step manufacturing process:
- Determine the area where the inspection is located so that it is convenient to service taps, hoses, filters, and the insides of the drain tank.
- The second factor in choosing the location and size of the hatch is the layout of the facing tiles so that the cover contains intact elements without trimming, and they fit into the overall picture.
- A frame is made from the profile (the contour is 2 - 3 mm larger than the dimensions of the revision), it is inserted into the installation design in the form of jumpers for attaching the body of the hatch.
- The product with the door is installed in a prepared niche, secured with self-tapping screws, and the joints can be treated with silicone.
- The edge of the door should coincide with the surface of the front plane of the frame.
If you do not install a ready-made hatch with a door, but make a removable panel of plaster with tiles, they proceed differently. The frame for the panel is made in the same way. Then the plaster is cut to size and lightly fixed with self-tapping screws. Tiles are glued to it according to the pattern of the future finish. When gluing, remove the screws at the same time, then install them through the tile after the solution has hardened. The places of the caps are covered with decorative plugs. Magnets are fixed to the frame and tile for attaching and removing the panel.
Work order
Sheathing begins after all preparatory work has been completed:
- the surface of the walls and floor is cleaned of old finishing;
- water and sewer pipes are separated from risers;
- waterproofing work has been completed in full;
- rough (basic) floor finishing has been done;
- The toilet installation is installed and connected to the water supply and sewerage system.
Choose a cladding method:
- on three sides and on top - the frame of the box follows the contour of the installation for the toilet;
- on both sides and on top - the box is adjacent to one of the side walls;
- from the front side and from above - the toilet sits in a niche;
- only from the front side - the installation is located in the cladding of a wall or partition;
- on three sides - the toilet installation is sewn into a box from floor to ceiling.
A drawing (sketch) of the box and frame is made, taking into account the required rigidity. Dimensions each element of the rack and guide profiles.
Separately, a drawing is made for the front blank, which is used to sew up the installation for the toilet. It marks the holes for the button for the tank drain mechanism, mounting pins and connecting the toilet bowl.
Final stage
After completion of the work, the entire structure is again checked for leaks. To do this, simply fill the tank with water until it is completely filled. Then the water is poured into the toilet, observing whether there is a leak and what the pressure is.
The most likely possible problems and how to fix them.
- If leaks are found on the toilet bowl, the cause may be improper installation of the sealing gaskets. They are easy to adjust or change. You should turn off the water, unscrew the fasteners connecting the toilet to the supporting structure, and check the gaskets.
- If the toilet is loose, tighten the bolts securing it to the installation. Care must be taken not to damage the threads or crush the ceramics.
- If there is a weak discharge of water into the sewer, then you should make sure that the slopes of the pipes are sufficient, as well as the smoothness of their turns.
Tools and materials
List of tools required for working with profiles and drywall:
- hammer drill and drill (depending on the material of the walls and floor);
- hammer (for dowels or anchors);
- metal scissors;
- drywall knife;
- screwdriver;
- roughing plane;
- level, ruler, construction angle, tape measure, pencil;
- spatulas, trowel, sanding mesh (for putty);
- brush (for priming).
Construction Materials:
- drywall (moisture-resistant or regular);
- ceiling profiles (UD/CD or PPN/PS);
- fasteners for fixing the frame to the walls and floor;
- metal screws for assembling the frame and plasterboard sheathing;
- reinforcing elements - perforated PVC corner;
- in case of sewing the installation in a large box or in wall cladding, you need Knauf or serpyanka tape for seams;
- moisture-resistant primer and putty.
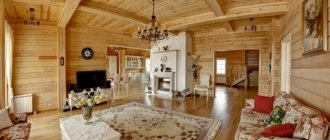
Finishing
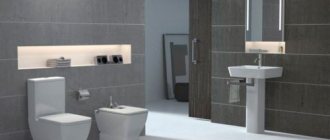
Tiles are usually glued
to the walls in the toilet and bathroom . The material is moisture-resistant, does not react to steam, increased temperature, the effects of household chemicals, and is easy to clean.
Usually the installation is done strictly vertically, the horizontal level is checked, so starting putty is not required. All you need is a thorough primer for the tile adhesive. The composition is mixed in small portions, as it hardens quickly.
Laying begins from the bottom at one corner. To separate the tiles, mounting crosses are used. Sometimes tiles are laid without crosses, but this option leads to the formation of cracks. This occurs due to the expansion of elements under the influence of operational factors, and there is no place (seam) for this. Usually the installation is not distinguished from the background of the wall, so its decoration corresponds to the general plan.
Creating a frame for installation
Below are step-by-step instructions on how to make a frame for a three-sided box around the toilet installation:
- Using a construction angle and a level, transfer the outline of the installation frame to the wall.
- From the outline on the wall, two parallel lines are drawn on the floor to the installation racks
- Two pairs of side guide profiles are cut to the size of the contour and frame. The top pair of elements is made longer by two widths of the backrest (56 mm).
- Drill holes on the wall and floor for dowels (anchors).
- The guide profiles are attached along the “outer” boundary of the contour on the wall.
- The profiles are attached to the frame through the wall (shelf). Installation is carried out in such a way that the back of the profile is flush with the “front” plane of the installation.
- Starting profiles are cut to size for mounting on the floor. They are installed between the vertical guide profiles on the wall and the toilet installation.
- Jumpers are cut from the rack ceiling profiles, which serve as stiffening ribs for the resulting structure and for the plasterboard walls of the box. The length of the segments is made shorter than the depth of the box by 3-4 mm - two thicknesses of the profile back are taken into account (0.5-0.6 mm each) plus a small margin for marking and measurement errors. You need at least five jumpers - two at the corners of the frame, one in the middle on top and on each side wall of the box. If the installation height of the toilet is more than 80 cm, then two jumpers are needed on the sides.
- Mount the jumpers by inserting them between the guide profiles on the wall and on the frame of the toilet installation.
Performing markup
When all the preparatory work has been completed and the structure for concealed mounting of the toilet has been installed, markings are made for attaching the frame:
- In the example under consideration, the top sheathing is done to a minimum, so the mark is placed flush with the metal frame. If there is no laser level to align in one plane as indicated, the line is transferred using a square or a building level.
- Then the plane of the front frame post is transferred to the walls.
Installation of drywall on a toilet installation
The technology for assembling the box for installation looks like this:
- Blanks are cut out of plasterboard, taking into account the thickness of the sheet (12.5 mm). An adjustment is made for some element so that it “covers” the end of the adjacent part of the box lining in the corner.
- On the front sheet of the toilet installation system, markings are made for the holes. They are drilled for mounting studs, and cut out for the drain button and pipes.
- If a certain plane of the sheathing is made from two pieces of drywall, then edges are made along the joint border, which are necessary for puttying the seam.
- They sheathe the wall-hung toilet installation by screwing the blanks to the guides and lintels. The fastening pitch should not exceed 20 cm, and the distance from the edge to the fastener should be at least 10 mm. The attachment points of two adjacent elements are made with a shift of about 2 cm. The heads of the screws are “screwed” into the surface of the gypsum board so that they do not protrude.
At the final stage of assembling the box, the drywall is primed, PVC corners are installed in the corners and the entire surface is puttied.
If tiles or mosaic tiles are used to finish the box, then the putty is simply leveled with a trowel. Preparation for wallpapering and painting requires mandatory grinding of the surface.
Sheathing instructions
The instructions on how to cover a toilet installation with plasterboard have several sections. This:
- frame installation;
- covering the installation with gypsum plasterboard sheets;
- installation of an inspection hatch for access to communications.
Creating a wireframe
Work on repairing the surface of the walls covered by the false panel and replacing water pipes, if necessary, must be carried out before installing the installation. If for some reason this was not done, then the installation will not be sheathed until the defects have been eliminated. After all, you won’t be able to get to leaking pipes or a collapsing wall without disassembling the mounted screen.
There are several ways to make a protective screen:
- sew up the entire space around the installation, from wall to wall, from floor to ceiling - this is a false wall;
- mount the box only around the frame;
- install a protective screen from one wall to the outside of the installation;
- sew the box from wall to wall and along the top of the frame.
Let's look at the nuances of installing a protective screen using the example of a box lined with plasterboard from wall to wall. The choice was not determined by the popularity of the method (false walls are the most popular), but by the opportunity to use this example to consider all the subtleties of the technology. The work is performed step by step in the following sequence.
Step 1. Marking of the guide profile fastenings is carried out. If you have a laser level, the procedure takes a few minutes. If you only have a level, a plumb line and a construction angle at hand, you need to be careful and follow the order of marking.
In most works devoted to how to cover an installation with plasterboard, it is recommended to start marking from the walls. To do this, measure the distance from the outside of the frame to the wall (see photo), after which the corresponding marks are placed on the adjacent walls.
However, if the wall is collapsed, the false wall will also be collapsed in the same direction.
More accurate results are obtained by markings starting from the floor. A long strip (you can also use a rule) is applied to the legs of the frame. A line is drawn along the floor, flush with the frame. Using a plumb line, it rises onto the walls (here, wall defects do not affect the measurement results). After this, at the same level as the top of the installation, a line is drawn along the back wall and adjacent ones.
Step 2. The profiles are cut to size using a grinder. Needed:
- 4 vertical guide profiles (PN) along the length of the frame - attached to the walls and frame;
Attention: some specialists make the vertical profiles attached to the installation shorter without installing a CD profile at the bottom (see photo). We advise you not to do this, since quite often when attaching sheets of drywall to the guide profile from below, under the pressure of the self-tapping screw, the side walls go inside the box, as a result of which the hardware cannot be screwed in.
- one guide profile per floor. It is cut shorter by 56 mm (the size of two PNs on the walls is taken into account). In addition, grooves are cut into it for the legs and guide profiles installed on the frame;
- one UD profile for the entire width of the wall for mounting on top of the frame along the rear wall;
- 4 CD profiles on each side of the frame. Should be 2-3 mm shorter (by the metal thickness of the guide profile 0.5-0.6 mm);
- 4 short jumpers to create rigidity between the length and depth of the installation - for fastening gypsum boards laid on top;
- one ceiling profile for mounting on the frame body from the bottom of the tank (at the discretion of a specialist).
Step 3. Markings are made on the guide profiles for self-tapping dowels in increments of 40 cm. Holes are drilled along the marks with a small drill. Points are marked along the holes on the walls, floor and frame into which dowels will be driven, and metal screws into the frame. Holes are drilled in the wall and on the floor for a dowel size of 6*60 mm (8*80 mm), and in the frame for the diameter of the “bug” (1 mm less).
Important: metal screws are now on sale. There is no need to drill holes for them: they go through the thickness of the installation frame independently.
Step 4. The damper tape is glued to the back side of the guide profile, after which it is attached to the wall and frame.
Step 5. Jumpers from the CD profile are installed in the guide profiles. The distance between them should not exceed 60cm. Fastened with metal screws. 2 pcs. for each connection.
For information: for those who are working with drywall for the first time, we explain that the larger profile (ceiling) is inserted into the guide posts so that the letter “P” (profile shape) seems to rest on the back wall, and looks outward with the crossbar.
Step 6. The formed surface of the frame is checked. It must lie in the same plane as the installation frame. If mistakes are made, they need to be corrected.
Sheathing installation
Figuring out how to cover an installation with plasterboard over a finished sheathing is much easier. Here the greatest difficulties arise only when cutting gypsum boards and cutting out holes for pipes and studs, as well as windows for the control panel.
To perform this operation, you will need 2 crowns of different diameters (holes for pipes are cut), a drill (holes for studs are drilled) and a construction knife for installing a window under a panel with buttons. Round holes can be much larger than necessary - everything will be hidden by the finishing. But the window should be as close in size to the panel as possible.
Another important point that you should pay attention to: you need a mark on the gypsum board of the line of contact between the installation frame, as well as the lintels from the ceiling profile with the plasterboard, so that you don’t have to use trial and error to find where to screw in the screws. But in the case of a frame, everything can be much worse: by drilling a hole for a screw at random in the frame of a wall-hung toilet, you can damage the tank.
And then everything is simple:
- the sheet is attached to the frame;
- Using self-tapping screws (35 mm), the plasterboard is screwed to the ceiling profile and frame profile. Step 20-25 cm. The heads are slightly recessed (some craftsmen make a countersunk one in advance). To avoid over-twisting, the screwdriver should be set to slow speed;
- The surface is finished for tiles or decorative plaster.
Stroika-port.ru
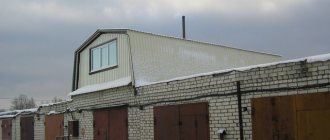
How to build a box in the toilet that can hide the shortcomings of this room? It is easy to build if you use drywall. This material is widely used for this type of work, since it is easy to work with, its price is always affordable, and its service life is virtually endless.
If you don’t have a specific idea as to what such a “cabinet” might look like, then our photo selection of ideas for a box in the toilet will be able to guide you to the desired option. In fact, you have the opportunity to use any of them that you like best, because all of them can be created absolutely independently, without the participation of craftsmen.
First of all, before purchasing materials, you need to create a diagram (it should not be approximate or approximate), it is important to accurately measure all walls and openings, mark protrusions, put the drawing and parameters on paper. Keep in mind that the box in the toilet should be installed so that access to the pipes is always open to you, so it is important not to overdo it with camouflage
Materials for the box in the toilet
When you already have the calculations in your hands, it’s time to purchase all the necessary materials. You will need:
- metallic profile;
- sheets of drywall (their number depends on the dimensions of the box itself);
- dowels and small screws.
Then it all depends on how many elements your “box” consists of. Making a frame is not easy, so there is special video material just for you, which well describes all the stages of work that are performed in the process of installing a box in a toilet.
Here you will learn everything important, but focus on the main thing - the distance from the pipe to the sash should vary from 4 to 5 cm. In addition to everything, adhere to the selected geometry, use a level, mount each element one by one. It is necessary to sheathe the walls so that there are no gaps and cracks - then the plasterboard box will look beautiful and will not stand out from the overall appearance of the toilet
It is necessary to sheathe the walls so that there are no gaps and cracks - then the plasterboard box will look beautiful and will not stand out from the overall appearance of the toilet.
Most often, ordinary drywall is covered with tiles of the same color as the entire interior of the toilet - this way you get a single space, made in the same style. You definitely need to know that installing a box in a toilet is a short-term job that does not require special skills; tiling may be much more difficult for you.
One way or another, we hope that with our help you will be able to make a box in the toilet with your own hands without unnecessary difficulties and problems. Good luck!
Universal traverse
The KNAUF company suggests using a universal traverse in its technological maps. Essentially, this is a wooden panel that is mounted inside the partition to secure built-in washbasins and flush barrels, as well as wall-mounted faucets. Not to be confused with installation!
The universal traverse is sold ready-made (see photo) made of high-quality moisture-resistant plywood. Galvanized profiles are fixed along the edges of the plywood.
Installation nuances
Every business has its own secrets. There are also some nuances when installing the installation.
Block installation
With the advent of a block design with a wall-hung toilet, mounting it to the wall became a serious problem. At the same time, the method of installing pins on which the bowl is hung, proposed by plumbing manufacturers, is unlikely to be liked by the owners, since it steals some of the space and hardly fits into the design of the toilet.
Briefly about the method. The formwork is being assembled. Studs with a washer and a nut are installed on the back side. All this is poured with concrete, which is then tiled.
Plumbing experts have adopted other methods. More on the secrets below.
1. The solid wall is drilled through with a hammer drill with a long drill. Here's another little trick: the drill is cooled with oil very often, literally every 20-30 seconds. On the reverse side, a countersunk hole is drilled under the washer and nut (bolt head).
A long pin is installed if from inside the apartment or a bolt if from the outside of the wall. The potay is sealed with putty and lined. This method is ideal for private homes. In a high-rise building, it is unlikely that the neighbors will allow the decoration of their walls to be destroyed. Therefore, it is necessary to adopt the following method.
Scheme for attaching a tank with studs through the wall.
2. Anchors are driven into the concrete wall if it is monolithic, or special dowels are used if there are cavities. There is another secret here. Before installing the toilet with studs, you need to open the spacers. You can't just turn a hairpin - there's no head. For these purposes, plumbers use a mushroom nut, that is, not a through nut.
Dowel “petal” for concrete structures with cavities.
Tightened anchor pin.
Anchor pin.
They advise those who do the work themselves to do the same. It is impossible to find such a part for sale. Therefore, there is only one option left: look for a turner and order an unusual nut from him. However, being a professional in one business does not mean that a person is a pro in another.
Our grandfathers also knew how to screw in and unscrew studs using two nuts: you screw them onto the stud, and then use two keys to lock them tightly. The stud is screwed into the top nut, and unscrewed through the bottom nut.
Frame installation
When installing a frame installation, professionals advise:
- use a more modern panel with two buttons, which will save water;
- place the drain panel either between two tiles or in the center of one of them;
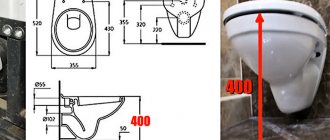
- set the upper edge of the toilet bowl to a height of 40-44 cm;
- the thickness of the protective screen or false wall should not be more than 7 cm;
- Carry out thorough quality control of work at each stage of installation.
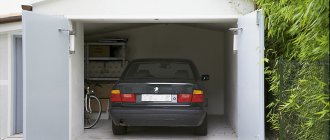
Design Features
Before proceeding directly with installation, you should understand the design. Installing a wall-hung toilet will become much easier when you know its structure and operating principle. It will immediately become clear how to act correctly and what is necessary.
READ How to install Realton on iPhone
The main feature of the product is that only the bowl remains visible.
The basis of the entire structure is a durable metal frame. The visible part is directly attached to it. It is from this element that all installation work starts. The frame must be firmly attached to the wall and firmly placed on the floor. As a result, it should be able to support an adult without any problems. Based on this, we can say that it will not be possible to fix the frame to a weak wall.
The frame has an element that allows you to change the height of the bowl, which is secured using special pins. They are the main fasteners when installing a toilet installation.
A common option is to attach two installations at once - a toilet and a bidet.
The second element is a plastic drain tank. He is also hiding in the wall. It has a specific shape, because must fit in limited space. The tank is also installed in a metal frame and insulated with a special material that prevents the formation of condensation. There is a cutout on the front wall of the tank for mounting a drain button. Modern models, including floor-mounted ones, have a dosed water discharge - 3 or 6 liters.
The next element is the toilet bowl. The only part that is visible and in active use. It has a traditional shape, but some designer models have original configurations.
The delivery set contains all the necessary parts and accessories. The attached instructions can also show the entire installation sequence of the toilet installation.
Where are the fasteners located?
Strictly at the points indicated in the instructions. During installation, you must use all the parts included in the kit. The installation is considered complete only if there are no unfixed elements in it. If the anchors are exposed to the other side of the wall, they should be combined using a 2-6mm steel backing plate.
- 1 of 1
On the picture:
Installation of plumbing does not tolerate “free creativity”. All parts included in the kit must be used. Serious manufacturers include a complete set of tools necessary for installation.
Where is the frame attached?
To a concrete floor or to a wall. Installing the installation against a wall requires caution - not every partition will support the weight of the structure. Typically, partitions made of brick, foam concrete blocks, tongue-and-groove slabs or reinforced concrete are suitable for wall installation.
Which is better: heated floors or radiators?
Warm floorBatteries
The partition for installing the installation must be reliable. This option could be a double steel frame covered with gypsum plasterboard sheets.
In the photo: Partition with two-layer cladding made of KNAUF sheets on a double spaced metal frame C 116.
But plasterboard partitions can become deformed during use due to vibration of plumbing fixtures. When choosing them as the basis for installation systems, it is worth turning to proven models like the C116 from Knauf. The thin walls of the gypsum plasterboard are strengthened with the help of a square steel sanitary profile, which is placed between the floor and the ceiling on special “legs”.
Distance of the frame from the wall?
No less than 125-130 mm. The fact is that the diameter of the polypropylene outlet pipe is 110 mm plus the socket. In general, the installation system is usually placed 185-205 mm relative to the wall. Standard mounting brackets are usually this length. The installation system can be installed further from the wall, but in this case you need to use extended threaded rods and special brackets.
- 1 of 1
On the picture:
The installation for the toilet allows for a complete hidden installation, hiding all unnecessary pipes, valves and connectors of the plumbing system.
The ultra-thin TECElux WC terminal is built directly into the wall and has height adjustment functions for the toilet, a touch flush panel, and an air filtration system.
In the photo: TECElux WC terminal from TECE factory.
Option 2. Partition with door
Door frames are installed together with the partition frame assembly. The place under the door is mounted like this:
- Where the door is installed, vertical posts (PS profile) are placed to the right and left of it. A beam is laid from them to secure the door frame. The beam is rigidly attached to the profile.
- A lintel is made from the PN profile above the door frame and additional racks are placed 20 cm from the opening;
- The door is part of the frame structure, so it must be installed before the sheathing;
- Additional vertical posts must be installed above the door.
Option 3. Partition with a heavy door (25-100 kg)
In this option, mount UA profiles on both sides of the door frame. The rest remains unchanged. Details: Installing a heavy door into a drywall partition.