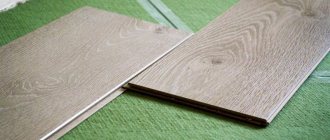
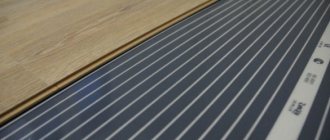
Laminate is undoubtedly one of the market leaders in the preferred flooring range. Laminated spaces look stylish, enhancing the interior of an apartment or house.
Laminate flooring is distinguished by the wide range of colors available, imitating wood or stone. Laying laminate floors can be done by the owner himself, without the involvement of craftsmen.
There is one important point. When laying laminate flooring, you must strictly follow the technological instructions. A step to the left or to the right can cause squeaks when walking on a laminated surface. In some cases, the laminate crunches or clicks, sometimes it creaks sharply, and sometimes it creaks protractedly. Without a doubt, any of these extraneous sounds emitted by the floor do not strengthen the nervous system of the owners of the house. The creaking of laminate flooring has a number of reasons, literally and figuratively.
Causes of laminate flooring squeaking
Despite the widespread opinion, the presence of squeaking is not determined by the cost of the laminate. Both cheap laminate and extremely expensive ones creak. The cause of the squeak is either an incorrect technique for laying the laminated surface, or a violation of the operating conditions for this material. It is easy to answer the question “Why does laminate flooring squeak” if you take into account the size of the height of the substrate and the condition of the base, and specifically the subfloor.
Remains of dirt on the subfloor
The weak point of laminated panels are the connections, that is, the locks. Quite often, even a short time after the completion of the repair, you can hear the characteristic crunch of the coating. Probably, after finishing grouting and sanding, the base was not cleaned of sand, fine gravel or other contaminants. Even if at first no extraneous sounds were heard due to the presence of the substrate, they will appear very soon.
Thus, the reason why laminate flooring crunches when you walk is that all sorts of debris gets under the coating, which comes through the substrate, which has lost its shape over time, and cuts into the coating from below. When walking barefoot, this sound is heard most strongly.
Creaking of laminate due to poor preparation of the base
Screed defects
- In some cases, laminate flooring creaks due to crumbling screed on the floor surface. When loaded, laminate boards bend and crumble even more. To the ear, this is perceived as creaking and crunching. To eliminate the problem, the laminate is dismantled, the screed is primed, and then everything is returned to its original position. To be sure, you can replace the backing and add a layer of plastic film underneath.
- Most often, laminate flooring makes sounds in certain places due to unevenness of the base. Keep in mind that according to the rules for laying laminated flooring, differences in the height of the base should be no more than 2 millimeters per 2 meters of surface. Recesses in the subfloor allow the laminate to sag and make unpleasant sounds. Partial dismantling of the laminated surface, putty and sealing of recesses are used. After this, the laminate is returned to its place.
Solutions:
- If the entire floor covering creaks evenly, the laminate is removed entirely, the order of its placement is marked and the base is prepared again. If measures are not taken in a timely manner, this will lead to bending of the joints and the formation of gaps and cracks at the laminate joint.
- Sometimes there is an option to make do with little damage if the creaking area of the floor surface is determined to be local. You can use PVA glue. Using a powerful drill or hammer drill with a steel hardened screw-type drill, a hole is drilled in the laminate with access to the substrate. After this, glue is pumped in there with a syringe. The required volume of glue is determined by traces of adhesive smudges protruding outward onto the surface of the laminate. Keep in mind that drilling must be carried out with the utmost care and attention to avoid cracking the laminate board and causing large chips. Subsequently, the drilled hole is masked using acrylic sealant, wax composition, putty, epoxy or polyester resin, mastic, self-adhesive film. At the end of the work, the masking material is wiped with a clean cloth to remove excess and fine-grained sandpaper. You can cover the repair area with a colorless matte varnish, applying it in one layer.
In conclusion
It is important to correctly determine the cause of the squeak and only then begin to eliminate it. We are sure that our tips will help you get rid of unpleasant sounds in your home. After all, now you know what to do in a given situation.
Now the floor does not creak, even if you walk barefoot
In the video presented in this article you will find additional information on this topic.
If you need to buy a tile leveling system in Moscow on the best terms, call or write to us, we will be glad to mutually beneficial cooperation! All our products are of the highest quality and are sold with all the necessary documentation: quality certificate, quality certificate, certificate of conformity. We sell sets of tile leveling systems in Moscow (wedges and clamps in an assortment of different quantities). Call or write to us, we will be glad to mutually beneficial cooperation. See you in touch!
Laminate flooring creaking due to thick backing
Below we will talk about how to eliminate laminate squeaking if you choose the wrong substrate. According to specialists in finishing and repair work, a thick substrate is not used when working with laminate. Its thickness should be no more than 3 millimeters.
A substrate that is more massive than the specified thickness leads to creaking of the entire surface of the floor covering. It causes the laminate to sag above the depressions and, as a result, deformation of the material.
If possible, dismantle the laminate boards in order to replace the substrate with thinner options. Among specialists, cork substrates or the Tuplex branded substrate are considered good options. This substrate has the unique ability to level out minor unevenness in the base.
What and how to lubricate door hinges
Door hinges begin to creak for various reasons. It is important to monitor their condition to avoid wear and tear in the future.
The main problems causing squeaking
Insufficient lubrication of hinges. Over time, the lubricant expires. It thickens, spreads or dries out, blocking the normal movement of the door, and as a result, has a destructive effect on the mechanism.
Corrosion. The most common cause of squeaking hinges on outdoor doors. This is due to high humidity, which not all metal elements of the door structure can tolerate. If measures against rust are not taken, the movement of the blade is gradually hampered and the iron is destroyed.
Wear of parts. Long-term or improper use of the door structure and its fittings leads to wear and tear of the mechanism and its breakdown.
Pollution. Dust and small debris often accumulate in the loop space. If nothing is done, dirt accumulates in the lubricant, gets on the hinge hinges and begins to gradually grind down the metal like an abrasive.
Door warp. If the door leaf is massive or an error was made during installation of the structure, it may become warped. This is not only detrimental to the fittings, but also leads to even greater loosening of the box itself and a change in the contours of the canvas. Usually, the consequences of unprofessional installation make themselves felt in the very first days of operation of the door structure.
Before you begin to establish normal and silent movement of the door leaf, you need to understand what kind of hinge lubricant is suitable for this. There are various special compositions on sale that are suitable for street or interior doors. The most popular hinge lubricant is WD-40.
If you don’t have a factory-made product for lubricating metal parts at hand, you can try one of the “folk” remedies.
Lubricating hinges using improvised means
A simple pencil is used to lubricate the hinges. The lead was crushed and poured into the hinges, or the door leaf was lifted and a piece was placed directly into the mechanism, and he himself crushed it into powder. The wax and oil in the stylus effectively helped get rid of the annoying squeak.
Liquid soap as a hinge lubricant. This is a more modern product for lubricating door hinges. It is always available at home. One drop of viscous concentrate is enough, and the running of the blade will become smoother and quieter. It helps for a short time, but there is always the opportunity to repeat the treatment.
Lubricate hinges with wax. There is always a candle in the house that can be used not only for lighting, but also for metal for a short time. Even a teenager can manipulate vegetable oil. No special skills or instructions are required for lubrication. But this method is considered temporary, since dust quickly sticks to the sunflower oil. The resulting dirt will quickly wear out the mechanism.
Machine oil and its processing. An option better suited for car owners. They always have such lubricant in stock.
Oil for processing sewing machine parts. Craftswomen know that such a product lubricates all moving mechanisms well. The advantage is the absence of greasy marks and ease of application. In an apartment, such neatness will not hurt.
Lubricate the hinges with Vaseline. If none of the above is available, regular Vaseline is suitable for lubricating the metal. This, of course, is a temporary measure to “tame” the squeak until it is possible to obtain a special product and carry out the procedure for rehabilitating the hinges as expected.
Rules for lubrication of any door hinges
- The product must be applied using a special oil can, using a nozzle with a thin tube or a medical syringe.
- If the hinges are disassembled, you can treat them with a thin brush or a cotton swab lubricated with lubricant. A cloth is less convenient for lubrication.
- To avoid staining the doors with excess oil, you need to use a dry paper napkin.
- When a door squeak is heard in a specific area, that area needs more intensive treatment. It is easy to find by external signs of abrasion.
- The inner part of the hinges needs more generous treatment with oil, since it is the working part of the mechanism that is subject to wear.
To process universal hinges without removing the door, you need to select a suitable lubricant and a bottle with a thin spout. If the product is already packaged in this way, you can get down to business right away. Buy WD-40 in 250ml or 420ml. Cylinders of these volumes are equipped with a special fixed tube, which is firmly fixed to the cylinder and will never get lost.
Otherwise, you should carefully pour the oil composition into a convenient container. The hinge lubricant should easily penetrate dust and cover all working parts of the hinge mechanism with a protective film.
Laminate flooring squeaks when installed incorrectly
Experienced craftsmen know: a gap of at least 10 millimeters must be left between the laminate and the walls of the room. This is the so-called temperature gap. The fact is that laminate, like other wooden coverings, expands and dries out when the temperature and humidity conditions of the environment change.
If the walls compress the surface of the laminate from the sides, it has nowhere to straighten. At this time, the locks become deformed, the laminate rises and, as a result, the entire coating creaks when walking.
To correct the situation, the edge boards are trimmed using a special power tool. Most often this is a grinder or jigsaw with fine teeth for working on metal or laminate. In this case, the cut looks extremely smooth and neat. The larger the area of the room, the larger the gap should be left separating the laminate from the wall, up to several centimeters. By the way, it is easily masked with a wide baseboard.
Also, during the initial installation, sand or small construction debris could get between the laminate boards. It gets hammered into the fastener locks, thereby compromising the strength and appearance of the laminated surface. Gaps form. Therefore, either reassembly is carried out or the problematic dies are cut out, the base is thoroughly cleaned with a vacuum cleaner, after which new dies are laid from the emergency supply. It is needed precisely for such cases.
Special preparations
Special products can be used to eliminate defects on the laminate in the form of scratches. They are designed to camouflage defects and restore the appearance of the surface.
Furniture marker
Furniture markers make it easy to remove scratches on laminate flooring without complicated processing. The surface dries after using the felt-tip pen in a matter of seconds.
Advantages of the product:
- quick drying;
- moisture resistance;
- long shelf life;
- choice of shades;
- reusable;
- good camouflage;
- affordable price;
- quick correction of defects on the surface.
The marker can be erased from the laminate only with alcohol solvents.
Soft wax pencils
Wax pencils (crayons) are an easy-to-use tool that allows you to hide coating defects.
They are produced in different shades, which allows you to choose the closest color. You can purchase such products in stores that specialize in selling laminate flooring.
Pencil use process:
- Prepare the floor - wash and dry.
- Apply several layers of wax and rub it in with a soft, lint-free cloth.
This method of eliminating laminate defects has many advantages:
- long shelf life;
- low price;
- ease of use;
- at the place of application, the coating acquires water-repellent qualities;
- extending the service life of the laminate;
- efficiency.
The disadvantages of using chalk include the following:
- over time, the wax is erased from the surface of the laminate;
- This repair option can only be used for superficial, not deep scratches.
Before using a pencil in the middle of the floor, it should be tested on an inconspicuous area.
Super hard wax
In addition to soft wax pencils, extra-hard wax can be used to fill scratches. To use such a product, you need a special melter that allows you to change the consistency of the product.
How to use:
- Clean the scratch from dust and dirt.
- Smooth the edges of the scratch with the sharp side of a spatula.
- Degrease the surface.
- Melt the wax with a melter.
- Fill the crack with some excess, as the wax decreases in size as it cools.
- Hold for 30 seconds.
- Remove excess product with the ribbed part of a plastic spatula.
- If necessary, use other shades to restore the pattern.
- Sand the surface.
- After all work is completed, it is necessary to clean the melter and spatula from wax.
If the heating increases and the wax begins to smoke, the melter should be cooled slightly by turning off the heat.
putty
In the case where the scratches on the coating are deep, affecting not only the top layer, you will have to use a more radical approach to repair. If it is impossible to solve the problem with wax, putty (paste, putty) for the laminate is used.
Putties can come in various forms:
- Powdery.
- Paste-like (in a tube).
- Solid in the form of briquettes.
Like wax crayons, putty comes in a variety of shades. This allows you to restore the missing amount of coverage and make the repair area completely invisible.
Advantages of use:
- the ability to select colors from an assortment;
- preventing moisture from entering deep layers;
- Suitable for repairing deep scratches;
- a fairly long-term solution to the problem.
The disadvantages of use include the need for skill when applying the composition. When working with putty, it is necessary to cover the areas near the scratch with masking tape. This must be done so that the material used for repairs does not get on the laminate around the defective area - it will be very difficult to remove the putty.
To work you will need:
- masking tape;
- spatula (scraper) rubber or plastic;
- putty.
Operating procedure:
- Prepare the laminate surface.
- Apply masking tape around the affected area.
- Remove a small amount of putty.
- Apply the paste to the scratch.
- Rub in well.
- Remove excess with a scraper.
- Allow the time necessary for the composition to dry completely.
- Sand the treated area.
- Apply wood varnish, if desired.
If you have no experience in carrying out such work with putty, it is recommended to first practice on an unnecessary board, since the composition dries quickly.
Laminate flooring creaking due to changes in room humidity
- Strong changes in air humidity negatively affect the quietness of the coating. The laminate begins to creak. The optimal air humidity in rooms with laminated floors should be from 40 to 60 percent.
- With less humidity, laminate boards dry out, which over time leads to the formation of microscopic gaps and cracks, which provoke creaking and cracking of the laminate surface.
- With high air humidity, creaking makes itself felt several times less often.
- If the laminate surface laid in summer creaks, wait until the radiators begin to heat up. There is a possibility that the squeaks will disappear. In the case of winter installation of laminate flooring, do not rush to take action before the start of the summer season. Give the laminate surface time to acclimatize.
- If you want to be on the safe side, you can apply a special sealant or wax to the laminate joints, which will minimize the occurrence of squeaking and cracking. This option will increase the water resistance of the laminate. Moisture will not have a chance to penetrate between the boards and cause swelling of the ends of the laminate dies.
What to do
What to do if laminate flooring creaks - eliminating the creaking that occurs when walking is the task of the master. In some cases, the laminate floor will need to be dismantled. But such measures are not always necessary. First you need to understand the causes of noise.
Dismantling the floor may be necessary if the coating laying technology is violated. In this case, it will be impossible to remove the creaking of the laminate without analysis.
Removing the laminate floor without disassembling it is possible in some cases. To do this, you should adhere to the following recommendations.
One way to eliminate squeaking laminate flooring
You can get rid of local squeaking using a paraffin candle. You need to melt it and fill the gaps with wax. Next, you should remove all excess, for example, with an old bank card.
Polyurethane foam can handle the deflection of floorboards. You should pour foam under those boards under which creaks occur. After drying, you need to remove all excess. This method has a drawback - it is not durable. The sound will return after the foam settles.
PVA glue can be used as a foam substitute. You need to pour glue into a hole with a diameter of 0.5 mm with a syringe. After the glue has dried, you can step on the floor. The squeak will disappear.
