Self-leveling flooring has become especially popular lately; it can be created in any type of room. However, the process itself is not so easy, for this reason it is necessary to understand the intricacies of the stages. One of the important actions is the use of a primer for self-leveling floors; it is responsible for obtaining a high-quality result. The types of primer solutions and the rules for working with them will be discussed in detail below.
Why do you need to prime?
The primer mixture is necessary to prepare the rough coating for further finishing; it serves not only to impart better properties, but also increases the degree of adhesion between materials. Floor bases are distinguished by their ability to absorb liquids, which increases the consumption of finishing materials. It also has a negative impact on the foundation itself, resulting in a shorter shelf life of the floors.
Among the types of materials that differ in the absorption of moisture are wood, concrete, and if we talk about metal, then water contributes to the formation of rust on the surface. Excessive accumulation of moisture leads to biological formations that are hazardous to human health.
The primer for self-leveling floors serves as a bonding layer between the rough base and the finishing coating, preventing further penetration of moisture. It is able to penetrate deeply between the pores of the base, thus blocking the path to liquids, resulting in a film coating on which the finishing material fits well.
If moisture penetrates into the rough finish, the self-leveling floor will rise due to this effect, which leads to the need to completely renew the coating.
The following functions of priming the base before pouring the self-leveling floor can be distinguished:
- Creation of a protective layer against biological formations;
- Increasing the degree of adhesion;
- Barrier layer against moisture;
- Increasing the shelf life of the surface.
The primer mixture is necessary to prepare the rough coating for further finishing.
Dry screed
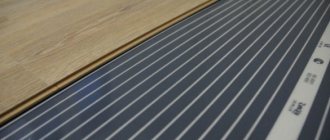
Step-by-step floor preparation for laminate flooring
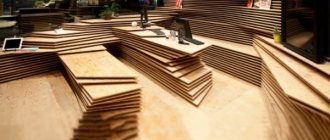
There remains an open question about how to prepare the floor for laying laminate flooring if its unevenness exceeds 10 centimeters. It will be most effective to create a dry prefabricated screed, which can reduce the load on the floor, even with a thickness of over 10 centimeters.
This construction is created as follows:
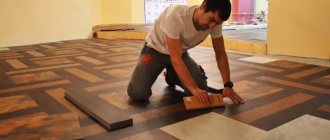
- The floor is prepared in a similar way to the previous methods.
- Beacons are also set and the zero level is found. With one difference: beacons can be attached to any substrate.
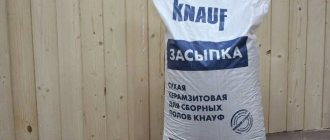
- Between the beacons, filler is poured: expanded clay, perlite, polystyrene foam is laid, etc.
- This layer is compacted to the level of the beacons and covered on top with sheet rough material of the GVL type. The beacons are removed from under such flooring, and the sheets are overlapped to create a uniform surface for further work on laying the laminate.
How to choose the right material
Soil for self-leveling floors can be different; in order to choose the right product, you should understand what types of composition exist and what floor coverings they are best suited for. The operating conditions of the floors must also be taken into account.
Soil for self-leveling floors can be different; in order to choose the right product, you need to understand what types of composition exist.
Epoxy mixtures
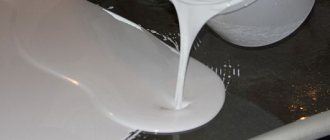
A good option if the work will be carried out on a concrete base; the epoxy type helps to obtain a reliably reinforced coating that increases the shelf life of the floor. It is possible to choose products for working with wood, for example, parquet.
The composition includes two components, the main part and the hardener. There are options for deep penetration primers; they differ from others in being more liquid. Thick types are used to eliminate surface defects. It is advisable to use a similar product for the finishing coat.
The epoxy look helps provide a well-reinforced coating that increases the shelf life of the floor.
Polyurethane solutions
Floor primer for self-leveling polyurethane flooring can be used for different materials; it can be used for a protective function for concrete, wooden floors, or ceramic tiles. Just like with an epoxy mixture, it is better to lay a self-leveling floor of the same type on top, so it is recommended to choose a polyurethane self-leveling floor in addition to a polyurethane primer.
If work is carried out with an old, fragile coating, then it is better to pre-treat it with an epoxy primer.
Floor primer for self-leveling polyurethane type flooring can be used for different materials.
Acrylic and latex compositions
These products can be used to pre-treat plaster or wood floors. These compositions create an even and smooth floor, strengthening their strength characteristics. However, it is undesirable to choose them for concrete material, as well as for the purpose of repairing surface defects.
Acrylic and latex compounds create an even and smooth floor, strengthening their strength characteristics.
Silicone primers
This type is highly resistant to moisture, so it can be used on screed that has not completely dried. The product penetrates deeply into the concrete and displaces remaining moisture. Creates a reliable barrier against the formation of mold and fungi.
This type is highly resistant to moisture, so it can be used for application to screed that has not completely dried.
Range of primers
There are a great variety of primers on the market from different manufacturers. Let's look at some of them.
Primers from
Primers from the manufacturer Bomard of the UZIN-PE line
| Name | Properties | Purpose | Consumption (g/m2) |
| UZIN-PE 260 | White color. High level of grip and water protection. Drying time: from 2 hours to a day. | Dispersion composition. Processed: screeds - magnesite and asphalt, bases - made of wood and particle boards. Carry out interior work. Used for interior work. | 100-150 |
| UZIN-PE 260L | Black color. Electrical resistance property: 5 ohms. Drying time: 2-12 hours. | Dispersion composition. Cover for subsequent gluing of textiles and electrically conductive PVC. | 100-150 |
| UZIN-PE 317 | Red color. Frost-resistant and deeply penetrating. Drying time: from 30 to 60 minutes. | Adhesive composition. The basis was a solvent for internal use. Treat wood, gypsum, cement, concrete and moisture-sensitive screeds before laying leveling mixtures. | 100-200 |
| UZIN-PE 360 | Strengthens and improves grip. Drying time: 2-24 hours. | Dispersive type. Suitable for processing gypsum, concrete, brick and cement screed. | 100-150 |
| UZIN-PE 440 | Light blue color. Afraid of frost. Drying time: 2-12 hours. | Two-component epoxy composition. Used to cover non-absorbent substrates. Interior work. | 100-200 |
| UZIN-PE 450 | Yellowish in color. Strengthens. Resistant to chemically active substances. Drying time: 12-24 hours. | Two-component epoxy composition. Old stone, concrete and cement foundations are treated. stone, cement, terrazzo. Use indoors and outdoors. | 300-400 |
| UZIN-PE 460 | Transparent. Strengthens, protects, replaces waterproofing. Resistant to acids and alkalis. Drying time: 12-24 hours. | Two-component epoxy composition. Strengthens mineral bases and provides vapor barrier. External and internal use for coating wood, ceramics, potassium sulphate and cement screeds, concrete, wood terrazzo. | 200-400 |
| UZIN-PE 630 | Pasty, dark gray in color. Fills cracks and smoothes the surface. Apply a thin layer (no more than 1 mm). Drying time: 1-2 hours. | Two-component dispersion-cement composition. Parquet and wood floors and old ceramic coatings are treated. Internal use | 200-600 |
Popular primer manufacturers (briefly)
The surface should be primed before pouring with a quality product, then you can be sure that the coating will last longer. There are a large number of primer compositions on the construction market, but not all of them are of good quality or high stability.
If the process is to be done with your own hands, then it is better when choosing to focus on popular brands that have proven themselves to be high-quality mixtures among consumers. You can highlight the products of the brands Ceresit, Knauf, Bergauf, you can also highlight the domestic manufacturer Volma, which produces a series of Nivelir primers, kg. the mixtures are not expensive, and their quality is high.
When choosing, you should study the instructions from the manufacturer, which indicate for which materials it is better to use a specific type of primer solution.
The surface should be primed before pouring with a quality product, then you can be sure that the coating will last longer.
How to calculate consumption
To find out how much product will be needed to prime the entire floor surface, calculate the area in advance. Each manufacturer indicates on the packaging the average consumption of their product. The base material is also taken into account; the more porous the floor covering is, the higher the primer consumption will be.
The consumption is affected by the constituent components of primer mixtures. To make the calculation easier, you can use an online calculator, which can be easily found on the Internet. Typically, the first layer requires applying 200-500 milliliters of product per square meter of area. The following layers require less solution, approximately 100-200 milliliters.
The more porous the floor covering, the higher the primer consumption will be.
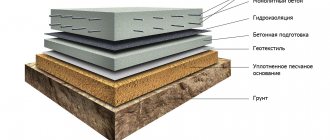
Base requirements
There are a number of requirements that apply to all types of bases for this floor covering. These include:
- Evenness. The maximum permissible difference in height is 2 mm per 2 linear meters of surface length.
- Purity. Fine sand and dirt particles remaining under the laminate create an unpleasant squeaking sound when moving on it.
- Uniform slope. This parameter should not exceed 4 mm per 2 m2 of room.
- Dryness. Any substrate must be allowed to dry thoroughly before applying primer. Otherwise, this may lead to swelling of the coating.
Preparing the floor surface
The preparatory stage must be treated with due attention; the quality of the final result largely depends on this stage. Here it is important to create a level base so that pouring the self-leveling floor can be done without difficulty, and the coating will be beautiful and even. This especially applies to the process when they are going to fill the base with a transparent self-leveling floor to get unusual floors.
If the surface is not new, then it may be necessary to remove poorly adhering areas of the old material, for example, old paint. In any case, it is necessary to remove all dirt so that no dust remains. For this purpose, it is necessary to rinse the surface. If required, pour a cement screed or use a self-leveling mixture.
It is necessary to repair all defects and seam parts to obtain a smooth surface. Then the base is sanded and the resulting dust is removed. The preparation stage can be considered complete, but the surface can only be primed after the floor has completely dried.
To avoid mistakes, check the quality of drying by stretching the film onto the surface, look at it after 24 hours, if no condensation is detected on the films, then proceed to applying a primer. If moisture appears, then wait a couple more days to obtain a dry base.
The joint elements, as well as the corner parts, can be leveled by treating them with sealant.
The preparatory stage must be treated with due attention; the quality of the final result largely depends on this stage.
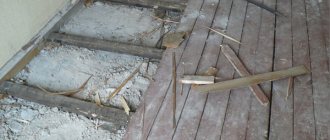
Laying on a wooden base
Before laying laminate flooring on an old wooden base, you need to make sure that the boards have not rotted and are suitable for further use. Otherwise, they need to be replaced. Small unevenness can be smoothed out by scraping, but a significant difference in level can only be corrected by laying OSB boards or similar materials. They are fastened to the floor with self-tapping screws, the heads of which are recessed into the coating by 2-3 mm.
Deflection of boards when subjected to mechanical impact is unacceptable and must be eliminated. The reason may be incorrect spacing between the joists, which can be corrected by increasing the thickness of the boards. Another solution to the problem could be to lay another layer of material perpendicular to the existing one, and secure a sheet of plywood on top.
The creaking of a wooden floor will be heard even after installing laminate flooring on it. Therefore, this defect must be eliminated.
The next preparatory step will be applying a primer.
Types of protective coating for wood flooring
To treat wooden surfaces, a universal acrylic mixture can be used, as well as specialized solutions, which include:
- alkyd mixture;
- polystyrene primer, which must be used very carefully and only in a well-ventilated area, since it contains toxic substances;
- shellac mixture - intended only for fresh coniferous wood. It prevents resin from reaching the surface of the material.
After treatment with a primer, the floor surface is lined with a substrate and covered with laminate elements so that they are directed perpendicular to the boards.
Priming technology
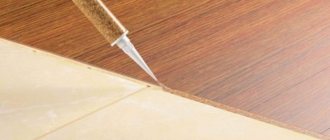
In order to effectively prime the surface and obtain the declared properties from the layer, the solution should be applied correctly. So the following procedure is performed:
- If the preparatory stage has been completely completed and the base has dried, then you can proceed to preparing the solution; it is prepared according to the manufacturer’s recommendations, the rules are always written on the label;
- Afterwards, you can begin to apply the mixture to the surface; you can choose a roller or spatula as your tool. The choice is made taking into account the thickness and type of solution. Start by selecting the far corner from the entrance door to the room;
- Moving one by one, cover the entire base with a primer solution, making sure that it is distributed in an even layer;
- When the process is completed, they wait a certain time until the next stage of applying the self-leveling floor so that the primer coating is completely dry. The timing is indicated by the manufacturer; on average, the process takes four hours.
If finishing work was previously carried out on the walls in the room, then in order not to spoil their surface, masking tape is glued in the transition zone.
The floor covering should be poured only when the base is completely dry. In this case, a damper tape is first glued along the walls; it serves to preserve space if, after drying, expansion of the layer occurs due to temperature effects.
Moving one by one, cover the entire base with a primer solution, making sure that it is distributed in an even layer.
The article answered the question: is it necessary to prime a self-leveling floor? If owners want to get a high-quality coating that will last a long time, then applying a primer to the floor is indispensable. It is important to choose a remedy that suits the conditions. Also, do not neglect the stage of preparing the base; the evenness of the floor in the end depends on it.
Combination with floor coverings
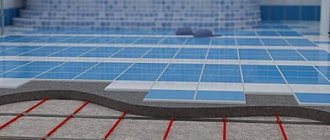
Each person has their own taste preferences. During renovations, many people quite actively use tiles, which can be used to decorate a wide variety of surfaces without any problems. In this case, you need to figure out whether it is necessary to prime the floor before laying the tiles and how to act in this situation. In this case, soil mixtures are applied to significantly improve the adhesion between the cladding and the base. Of course, you can lay tiles on cement mortar the old fashioned way, but practice shows that the corresponding method is clearly inferior in many respects to modern soil mixtures.
Quite common floor coverings today are linoleum and laminate. In this case, it is also impossible to do without preliminary preparation of the foundation. It is not enough to know whether it is necessary to prime the floor before laying linoleum, because you still need to approach the corresponding process correctly. Linoleum is known to have an attractive appearance and low cost compared to other coating options. Thanks to pre-priming, the corresponding material will also experience a significant improvement in its own technical parameters.