This method of laying out the material allows you to extend the service life of the panels, making them less susceptible to mechanical loads, makes it possible to replace failed sections without disassembling the entire panel, visually enlarges the room, and also hides unevenness of the rough foundation. Let's take a closer look at the features of laminate deck installation and talk about the advantages and disadvantages of this method.
Photo by Max Vakhtbovych: Pexels
What will you need for installation?
It takes 3-4 hours to lay laminate flooring in a room with an area of 15–25 m2 on a finished base. This type of coating refers to “floating floors”, which are not rigidly fixed to the base from below, but simply lie on it without fastening. Therefore, you just need to lay out individual laminate lamellas on a screed or flooring made of wood boards, connecting them firmly to each other.
To lay laminate flooring you will need the following tools:
Nothing particularly specialized is needed to install the coating in question. No special skills are required for this. Most home craftsmen can handle this tool without any problems and correctly. Installing interior doors with your own hands can still cause difficulties. With a laminated finish flooring, everything is much simpler.
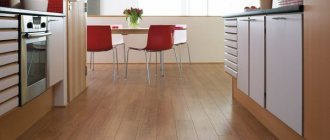
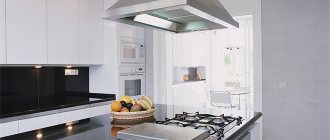
Laminate in the interior
In addition to the lamellas of the laminate itself, in order to lay it on the floor, you will also need a plastic film for waterproofing. Plus, you will need a backing made of cork, foamed polyethylene or other similar material. The purpose of this lining is to increase sound insulation and distribute the load from individual laminate flooring strips to the base.
It is not recommended to neglect laying the substrate. It is provided with all step-by-step instructions from laminate manufacturers. If you don’t put it in, you can immediately forget about the coverage warranty.
Flooring options
Click connection
The installation sequence will be as follows:
- We measure the distances between the walls to understand how many panels are needed and how much trimming the panels will have to do at the walls on each row.
- If the rows of laminate are laid with a 50 percent shift of panels, then it is better to provide the first and last panels in the row with the same length. Thus, the finished base, due to its symmetry, will look more aesthetically pleasing and more complete.
- The first strip of laminate should be laid in the far corner. Wedges 10 mm wide are inserted between the panel and the wall.
- The panel of the next row is brought to the panel of the previous one with the side equipped with a lock at an angle of 30 degrees. To latch the panel you need to insert it and press down. The entire row is laid in this way.
- Next, the next row is laid. If the panel fits tightly, then it is knocked down with a rubber mallet.
- Such operations are carried out until the entire floor is laid.
Floor preparation
In order for the laminate to last a long time, the base underneath must be perfectly level. Differences in height are permissible only within a couple of millimeters per meter of coverage. If the unevenness on the subfloor is greater, the lamellas will move apart at the joints due to uneven distribution of the load.
The laminate is laid on bases made of:
- floor boards and parquet strips;
- wood boards;
- tiles;
- linoleum;
- concrete (screeds or floor slabs).
Styling tools
The main condition is that the base must be level and stable under the feet of a person walking on it. Sagging boards or recesses (bulges) on the concrete surface are unacceptable here. If there are such defects on the rough base, they should be eliminated before starting to lay the laminate.
If the ceiling or floor covering meets the requirements for levelness and resistance to loads, then it can be left. Otherwise, you will have to dismantle this foundation and build a new one.
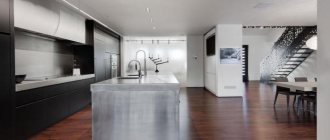
Laminate in the house
Leveling the floor
To level the rough base, most often they use a wet or semi-dry floor screed made from DSP. This is the most reliable and durable option. Concrete can withstand heavy loads and is resistant to moisture. However, it will take up to three weeks to set and harden. If you decide to lay laminate flooring on a concrete screed, then repairs to the house may last more than a month.
The subfloor is also made from gypsum fiber boards, chipboard, fiberboard or plywood. This option eliminates wet processes and is faster, since there is no need to wait for the cement mortar to set. However, if pipes break, such a base usually has to be completely or partially replaced along with the laminate. Contact with water for wood and gypsum fiber sheets is contraindicated. But in its finished form, such a prefabricated screed weighs much less than a concrete screed.
Substrate
Almost all manufacturers prohibit laying laminate flooring without a backing. This underlying layer is needed to redistribute the load on the floor, reduce noise and additionally insulate the laminated slats from moisture from below on the base side.
Most often, a film of foamed polyethylene with a thickness of 2–3 mm is laid as a substrate under the laminate. It is not afraid of moisture and is cheap. But you can also use analogues made from cork, pine needles and polystyrene foam. Cork and coniferous options are natural, eco-friendly materials, but they become unusable when exposed to water. Expanded polystyrene boards have increased noise and heat insulation, but are flammable.
Laying the substrate
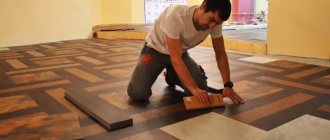
Methods for laying laminate
Before you go to the store for the coating in question, you need to carefully figure out how to calculate the laminate for a room of a specific size in pieces. Nobody needs extra material, and if there is a shortage of it, it is not always possible to purchase even a couple of planks exactly the same as those taken earlier. And here the method of laying out the slats on the floor plays an important role.
Laminate planks are laid in two ways:
- straight (deck);
- diagonal.
The first one is easier to install and requires less material. In the second case, much more scraps are obtained due to the need to cut the planks at an angle near the walls. But the lamellas laid diagonally in the assembly look more impressive. In both options, the boards are laid with an offset of 10–35 cm to the adjacent row.
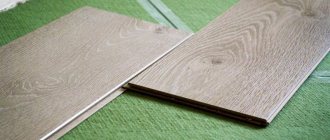
Laminate assembly
The connection of laminate planks is made with or without glue. The use of the adhesive method is recommended when it is necessary to increase the moisture resistance of the entire coating. Water then cannot penetrate into the joints between the lamellas and does not harm the substrate and the bottom layer of the laminate.
In this case, the second option is often more preferable. After laying the laminated finish without glue, it can be disassembled if necessary to replace one or more lamellas. It is impossible to separate glued boards without damage.
The laminate is connected using end locks:
- “Lock” (groove-ridge).
- "Click" (simple latch).
- "UniClick" (complex latch).
The first of the locks is the weakest to break, and the third is the most durable and reliable. However, if the laying of the laminate is done professionally, then all of them guarantee a strong connection of the lamellas into a single laminated coating.
The principle of laying laminate
What type of fastening is it suitable for?
There are two types of fastening. The method and type of installation depends on this indicator. Each type of fastening implies the presence of a groove on one element and a tenon on the other. The only difference is their appearance and method of connection.
- Click . Quite a simple connection method. So named because of the characteristic sound during connection. For installation you only need the components and your own hands. Laying occurs as follows : install the first board, then bring the next one at an angle of 45 degrees, insert it into the groove and snap it into place. If necessary, you can tap the board with the back of your hand.
- Lok . The next method is somewhat more complicated than the previous one. It also assumes the presence of a groove and a tenon. Only they are slightly different. If in the first version the groove is adjusted so that the tenon fits into it easily, then this is a tight connection. Therefore, for installation you will additionally need a rubber mallet. It happens as follows : the boards are laid sequentially, then you need to precisely adjust their position, then insert the tenon into the groove and hit the board with a mallet so that the tenon fits tightly into the groove.
For the deck look, both types of locks are suitable. But locks like locks are better suited. It will be easier to lay them using the deck method, because in boards with this type of locks, longitudinal locks are first connected, then longitudinal ones.
How to cut laminate correctly?
You can cut the laminate into the necessary parts with your own hands:
- electric jigsaw;
- small hacksaw for metal;
- a durable construction knife.
When cutting, you must ensure that no cuts or scratches appear on the top decorative layer. Then, on the surface under the sun's rays, they will all be visible to the naked eye. That is why it is not recommended to use a hacksaw on wood with large and medium teeth. It is almost impossible to make a cut without creating unsightly grooves.
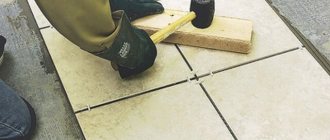
Laying laminate flooring near the threshold
To get an even cross-section, it is best to use some kind of metal guide or square. And you should cut out the holes for the pipes slowly with a knife.
Using the tools listed above almost always produces a burr-free cut. If they do form, then such rags can be cut off with a knife or ground off with a flat rasp on wood.
Laying floors around pipes
Required tools and materials
To lay laminate flooring in a continuous area, including the process of preparing the base, a standard set of household household tools is quite sufficient.
So, to complete the program with a maximum of screed arrangement, you will need:
- perforator;
- metal scissors;
- hacksaw with fine teeth;
- level, roulette, rule;
- miter box;
- mallet;
- shaped stop;
- mounting foot;
- metal profile for beacons;
- shovel;
- wide spatula;
- sand and cement (self-leveling mixture);
- container for mixing the solution;
- paint brush;
- scissors;
- scotch;
- marker;
- antiseptic.
To ensure your own safety, you should work in safety glasses and gloves, and when mixing the solution, wear a construction respirator.
Recommendations
Laminate flooring should be laid in compliance with the following simple rules:
- Before installation, the lamellas must lie in the room in a horizontal position for at least a day to cool down or warm up to room temperature.
- Laying laminate flooring is only permitted on dry substrates. If a concrete screed was originally made, then laying the coating is permissible only after it has completely dried.
- Before starting work, the rough foundation must be thoroughly swept so that there are no pebbles or other debris left on it. If you leave them under the laminate, sooner or later the substrate will tear first, and then the coating itself will be damaged.
- To identify differences in the subfloor, you should use a long rule or level - the slightest deflections will be visible in the gaps that appear.
- It is best to lay the planks away from the window so that the seams along the locks are less visible in daylight.
- Compensation gaps 8–10 mm wide should remain between the walls and the laminate. Without them, the laminated coating, during thermal expansion, will rest against the wall surface and rise like a mound in the middle of the room.
- To prevent the slats from moving during installation and closing the gaps along the walls, spacer wedges should be placed. Then they clean up.
- Compensation gaps must also be made in the middle of the room if the coating is more than 10 meters long. Afterwards, these seams must be closed with decorative thresholds made of plastic or metal.
- The substrate and waterproofing should be glued with tape at the junction of their individual strips. At the same time, you cannot nail this sublayer to the rough base with nails or screw it with self-tapping screws. Gaps are not allowed here.
- The first row is laid against the wall with a tenon, for which it is pre-cut so as not to interfere.
If the walls are uneven, then special attention should be paid to placing spacer wedges and laying the first row. The smoother the first slats are laid out, the more reliable the connection of all the remaining slats will be.
If you strictly follow the given step-by-step instructions and recommendations, the laid laminated coating will last for many years. There is nothing particularly difficult about its installation. In order to figure out how to choose the entrance door to an apartment and then install it, you will have to use your head completely. With the floor finish in question, things are not so scary.
Step-by-step instruction
Main types of thresholds
- Aluminum sill
very useful for designing the connection of various surfaces, especially in the area of the doorway. It can connect laminate and laminate, and also act as a transition threshold from tile to laminate. Can connect two surfaces located at different levels.
The top of the threshold is covered with a decorative layer, this makes it possible to accurately match the product to the joining surfaces by color.
The threshold between tiles and laminate is multi-level
It has proven itself very well in many years of use in a variety of situations; it can be mounted using both an open method and a hidden, decorative one.
- The flexible PVC profile
is very good for designing joints of various shapes with bends and curved sections. Can also be used for straight joints. This is a flexible threshold between tile and laminate, laminate and laminate.