Advertisements are full of big names - houses using Finnish, Canadian, American, German and other technologies. How to make sense of this diversity and separate the wheat from the chaff?
Below is a review article from one of the companies that does this in Russia and a selection of videos from one author who built such a house himself and now teaches others (22 pieces in one playlist)
Why did the project of a house made of aerated concrete become a Finnish classic?
Zapp_BranniganFORUMHOUSE Member
First, a little history - I’m from Moscow, but for work I’ve been living in the center of Riga for 6 years. The idea to build and leave the city was born 3 years ago - I desperately wanted to go to nature. A plot of land was immediately purchased near Riga, not far from the sea, with a total area of 16 acres in a cottage community under construction for 150 houses. The only communications in the village are electricity, lighting and roads. Water and sewerage are autonomous.
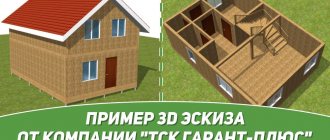
After acquiring the land, Zapp_Brannigan spent another year searching for information, comparing different design and architecture options, considering the number of storeys, the location of the house on the site, and other important points. The result of the brainstorming was the following concept:
- a one-story house with an area of about 150 m², L-shaped, with a terrace;
- foundation – insulated Swedish slab;
- wall material – aerated concrete block.
Having decided on what he wanted, Zapp_Brannigan ordered the project, agreed and began searching for a contractor, discussing estimates and the final budget. Based on the results of this stage, which included a comparison of terms and prices, and visits to the sites of potential contractors, three factors with a minus sign were revealed:
- the final price per square meter is significantly more expensive than planned;
- construction time - it’s clear that it’s not fast, but not that fast;
- quality of workmanship means there is a very high probability of carelessness and construction errors, and the material is sensitive to “crooked hands.”
The last point forced us to change our approach and pay attention to factory-made options: concrete panels, house kits made of laminated veneer lumber, frames, etc. But Latvia, in terms of the quality of construction, production culture and professionalism of workers, has not moved far from domestic realities, due to why a non-standard decision was made.
Zapp_BranniganFORUMHOUSE Member
After processing a huge amount of information, I finally made a decision on the house - it will be a frame house entirely using Finnish technology, already produced with block walls at a factory in Finland and assembled on site. The foundation is standard, UFF - an insulated Finnish foundation as recommended by the factory, windows and doors are already in the walls. The rest, of course, is already in place.
The advantages of such a change of direction.
- The cost of a finished square with finishing at the “bring in furniture and move in” stage is 980 euros, when for a similar one, but made of aerated concrete, companies were rolling out a price tag of 1,400 euros.
- Time frame – 8 days directly for assembling the box, and three months for the entire cycle (foundation, engineering, finishing).
- Maximum “foolproofing” - bad materials, poor installation of thermal insulation, joints “everyone is fine.” Plus, dry wood of CE24 quality after chamber processing.
External slab cladding, wind protection and frame stiffening elements.
Another striking difference from the Americans.
In the American frame, in 99% of cases, continuous cladding with OSB3 boards is used on the outside + a wind-hydroprotective membrane on top. OSB plays a structural role - giving the frame spatial rigidity. And the membrane protects the OSB from excess moisture in case of any leaks along the facade.
In Scandinavian frames, this is an extremely rare, almost never seen option. Basically, three types of implementation of sheathing, wind protection and stiffening elements can be distinguished.
- External use of soft fiberboards (MDF). In our market, such slabs are known under the brands Isoplaat and Steico. These plates perform 4 roles at once. They give spatial rigidity to the frame, perform the function of wind protection, additional insulation and sound insulation.
- Facade plasterboard. This is a very common solution. The most typical option is Gyproc GTS9. Unfortunately, this type of material is not available for free sale on the Russian market at all. Knauf tried to release a trial batch, but the product did not find widespread consumer demand and production was discontinued. I hope with the development of frame housing construction the situation will change. Since this is an excellent solution for spatial rigidity of the frame and wind protection for minimal money.
- Giving rigidity to the frame with embedded jibs or rigid board materials (plywood) installed only at the corners of the building. There is no slab covering on the outside of the frame, only a windproof film.
Recently, options have begun to appear using OSB in the wall, but unlike the American version, in the Scandinavian version OSB is usually installed on the inside of the room.
In addition, sometimes (but not always) in the first two options a windproof film is also placed on top.
I am impressed by this approach to wall construction, because the Scandinavians never use material with relatively low vapor transmission (for example, OSB) on the outside - due to which, from the point of view of vapor permeability, the design turns out to be more correct and “foolproof”.
On the Russian “Internet” you can often come across the opinion that if you use fairly soft materials such as gypsum plasterboard or MDVP for cladding, then you must definitely use jibs. Because compared to American OSB, these materials are flimsy. I don't agree with this opinion. Firstly, you need to understand in which direction these materials work in the wall. And in this direction, soft materials are very durable. In addition, what I call the “bundle of arrows principle” operates here. Perhaps slab cladding alone with these materials will not be enough, but in combination with internal and external facade cladding - it is quite enough. That is, each “layer of the wall cake” makes a small contribution to the structural rigidity and the result is quite sufficient.
Finalization of the project
The project has not undergone any fundamental changes - the same one floor, shaped like the letter L, 146 m around the perimeter, with a cold attic. But not on an insulated slab, but on an insulated tape, with insulation of the attic floor with a layer of 400 mm, cement-sand tiles, and finishing with dry boards, also made in Finland. Heating is planned with a heated floor system from an air-to-water heat pump.
We adapted to the frame a project that was already available at the partner company of the Finnish plant, which will produce the house kit. We got three bedrooms, a dressing room, two bathrooms and a large kitchen-living room with second light.
Plus, the project included a guest house of 40 m² and a carport for two cars between the houses.
But the canopy and the second house are a prospect for the future; a residential building will be realized first. It will take about two months to produce a house kit according to the project.
What is an unedged board
An unedged board is a log sawn into thin lamellas along the grain
An unedged board is a log sawn into thin lamellas along the grain. Moreover, if the planes of the lumber are approximately even and uniform throughout the entire thickness, then the end sides of the unedged board are not processed. That is, the bark, bast and sapwood remain in their pure form along the edge. Most often, unedged material is used for auxiliary purposes during construction (creating formwork, covering a subfloor or roof, etc.).
Important: in order to embody the country style in the exterior of the house, it is customary to do the cladding with unedged boards. However, everything is at the discretion of the owners.
Box design
The plant produces two versions of house kits:
- Finished walls, right up to facade finishing.
- Also completely finished, but not the entire walls, but smaller fragments - 2.6 m in height and 2 m in width.
According to the first option, it is impossible to deliver large-sized items to the Baltic states; we had to order small-format wall panels. The cake includes a windproof board (MDVP), a frame made of dry boards of the highest quality, insulation, vapor barrier film and gypsum (moisture-resistant drywall with plasticizers). The panel is closed at the ends by a supporting stand; during assembly, the joining is performed through a specialized seal.
The load-bearing board (250 mm) in the frame panels is made with a thermal break - a technology patented by the plant in 1990. Finns even consider wooden frame elements to be cold bridges and in this way reduce heat loss.
Windows and doors with fittings are also installed in panels at the factory - the doors are frost-resistant and made in Finland. The windows are also local, composite, with a wooden profile on the inside, aluminum on the outside, and even built-in blinds.
Wood species for board cladding
Cut and uncut boards are made from larch and pine needles. The cheapest materials will be made from pine and spruce. But they have disadvantages - under a layer of sheathing and thermal insulation, the house risks being damaged by precipitation, but additional protection can be created using fire retardants, varnishes and antiseptics. Let's look at the main types of wood suitable for cladding:
- Hardwood boards are denser and provide reliable protection from excess moisture. By the way, it is resistant to rotting and fungal infections. It is easy to process, holds nails and the degree of warping is noticeably lower.
- Pine, on the other hand, quickly warps and deteriorates, so it should not be used for exterior finishing.
- Spruce is wood that is naturally impregnated with resin. In terms of characteristics, it is slightly inferior to larch. A pile of knots is a beautiful decoration, but after a while cracks form around them. Therefore, spruce is rarely chosen for facade decoration.
- Hardwoods look beautiful and last a long time. They are not difficult to process. The high price and the risk of splitting when driving nails are the main disadvantages.
Foundation, well
The soil on the site is sandy, only 20 cm of sand on top, which was confirmed by geology. According to the project, the Finnish insulated foundation is standard for Finnish houses.
Preparation.
Assembling the formwork, adding a crushed stone cushion, binding and installing the reinforced frame, concreting the “heel” and support columns for the terrace and canopy.
Five days later, when the concrete had gained sufficient strength, the KBB was laid out on the mortar - 7 rows, two of which, after insulation and backfilling, would remain above the ground level as a plinth. We treated the masonry with rubber waterproofing and laid inlets for utility systems.
Insulation of the foundation with PSB slabs in two layers with overlap, using glue, backfilling with sand with layer-by-layer tamping.
Laying the cable from the box underground - 20 Amp, 3 phases.
In parallel, in ten days we drilled a well for water, casing it with a plastic food pipe with a wall of 125 mm, and the outermost upper pipe made of stainless steel with a filter.
Pros and cons of one-story and two-story wooden Scandinavian cottages
When choosing construction technologies and materials, many factors must be taken into account, but the financial side of the issue is often decisive.
As for Finnish technology, it can be called universal, since it is equally suitable for the construction of luxury cottages, “budget” townhouses and buildings for technical purposes.
Speaking about the advantages of Scandinavian houses, it is also worth highlighting:
- Comfortable indoor microclimate - insulated walls retain heat well, and they “breathe”, so harmful condensation does not form on surfaces.
- Environmental friendliness and safety, and there is no need to even talk about how environmentally friendly natural wood is.
- The wooden products used during construction are durable and resistant to temperature changes and precipitation.
- Low construction costs, and experts say that you can build a Finnish house with an area of just over 100 square meters for 900-950 thousand rubles, which is much cheaper than the same brick houses. Prices for the construction of the latter amount to millions of rubles.
- Easy installation and no need to use expensive equipment, for which, moreover, you need to organize an entrance.
- The construction of Finnish houses can be carried out all year round, since the technology does not require, due to the lightness of the structure, the construction of a heavy concrete foundation. Instead of expensive reinforced concrete, solid brick (often used) or rubble concrete is used.
- The flexibility of the design and large cross-section allow frame structures to withstand strong gusts of wind and other natural factors that brick and block houses cannot withstand.
Everyone wants to build the ideal home of “their dreams,” but it is worth understanding that there are no ideal construction technologies and materials that are flawless in all respects.
The same applies to Scandinavian houses, which have some disadvantages:
- Poor sound insulation, but this can be solved by installing an additional layer of insulation;
- Low vibration resistance;
- Wooden houses are “popular” with various pests such as insects and rodents, but the same can be said about other materials. The problem can be avoided by treating the wood with special preparations and taking other protective measures;
- Highly flammable, and to avoid fire, special impregnations are used - fire retardants;
- If the dew point is incorrectly calculated, mold and mildew may appear in frame houses.
You can avoid many problems by correctly assembling the frame house pie. It is also important to choose the right materials and create the right project.
In Germany, for example, they are building houses that can survive a magnitude 7 earthquake, and second generations are already living in them . Some houses built using similar technology last 500 years or even more.
Box assembly, engineer
The house kit was delivered to the construction site on June 19, in two trucks, unloading with a manipulator mainly into the perimeter of the house, and trusses were unloaded nearby. The packaging was sealed, plus the kit included a film that was additionally used to cover the panels after unloading.
Unpacking and assembly began on the second day - the Mauerlat is fixed to the tape through a seal, also included in the package. Assembly according to the design type according to the instructions.
On the third day the perimeter was closed, all that remained was to connect the corner elements.
Day four - installation of corners and internal load-bearing walls.
On the fifth day, 20 tons of dolomite crushed stone were delivered to plan the arrival.
Day six – assembly of three types of trusses. Under the ceiling in the rooms, under the second light with a partially raised beam (height 3.9 m), under the smaller part.
Day seven – lifting and installation of trusses.
The eighth day - strengthening the rafter system, lathing, laying insulating film (also included, designed for three months without a roof).
Day nine – additional fixation of the wind protection with nails.
Tenth day - they delivered and immediately began laying composite tiles. The calculation of the load-bearing capacity of the floors was carried out taking into account the heavy roof covering.
In parallel with the tiles, we began interior work with the laying of sewer pipes, plus we installed a water supply for the guest house.
The project for which the house kit was manufactured also includes an engineering section.
On the fifteenth day, we foamed the seams of the Mauerlat along the entire perimeter, tamped the backfill and installed gutters.
The sixteenth and seventeenth days were spent laying EPS - a waterproofing membrane on top of the compacted backfill, then three layers of EPS, density 150, 50 mm thick.
While construction continues, Zapp_Brannigan also ordered a façade kit from the Finns.
Zapp_BranniganFORUMHOUSE Member
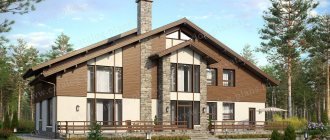
Thin-sawn chamber drying board GOST CE20, grate and counter-lattice, protection against rodents, fasteners, etc. The set will arrive in 2 weeks. The facade board is already completely dried, the pile is raised with a special cutter and primed at the factory within 24 hours. Two coats of paint will already be in place. It will look something like this - but in a different color.
Wood species for board cladding
As a rule, cut and uncut boards are made from softwood and hardwood
As a rule, cut and uncut boards are made from softwood and hardwood. The cheapest and simplest are pine and spruce wood. However, such lumber does little to protect the house under the cladding from precipitation. Or it requires high-quality final treatment with various antiseptics, fire retardants and varnishes, which is quite expensive.
Larch boards have a higher density and are able to protect the house from excess moisture during seasonal rainfall. Therefore, larch lumber is mainly used for finishing the outside of a house. Its resistance to fungus and decay is known to many.
Important: the cost of a cubic meter of uncut larch lumber varies between 210-230 USD/m3.
For exterior decoration of a cottage, it is better and more convenient to use a board whose width is 30 cm. In this case, the thickness of the panels can fluctuate in the range of 20-30 mm.
Advice: before finishing the house, it is recommended to additionally dry the building material for 1-2 weeks in the open sun, avoiding accidental rain. This preparation will result in the least shrinkage and shrinkage of the finish. After all, wood initially has natural moisture, which will begin to evaporate over time.
Heating, recovery
He also ordered a heating kit:
- air-to-water heat pump;
- boiler;
- thermal accumulator;
- WI FI control unit;
- strapping and fasteners.
Taking into account the energy efficiency class of the house, it is estimated that on average it will cost about 2,000 rubles per month for hot water supply and heating.
Zapp_BranniganFORUMHOUSE Member
The heat accumulator allows you not to turn on the pump every hour or two or three in cold weather - the system gets its 8-10 degrees from the battery and reheats it once every 12 hours. Saving energy and pump life. To support heating of a warm floor, the battery is enough as a buffer for the eyes. In terms of cost, it costs, like in Russia, my kit, about 400,000 rubles. Installation costs about 40,000 rubles. Even if you order from Poland to the Russian Federation, the price is the same.
Since a high-quality frame house is a thermos with maximum insulation, it must have a ventilation system, and ideally, a recovery system. In this case, we preferred the second option and ordered a recovery system based on an installation with a capacity of 472 m³/h/100 Pa with intelligent automation.
Ventilation duct wiring diagram.
How to properly plank a house
Facade cladding is advisable not only for decorative purposes, but also as protection from the negative effects of the environment - wind, rain, frost, ultraviolet radiation. The most environmentally friendly option is wood. Sheathing a house with boards is not a cheap method, but it creates a threshold for air flows and moisture, which drains without penetrating under the sheathing and onto the walls. But it also has a lot of advantages.
Interior work
Installation of heated floors.
Semi-dry screed - thickness 80 mm, while the concrete was gaining strength, the floor was periodically wetted.
After the floor had set, we began interior finishing - to avoid cracks and deformations, we added another layer of plaster of Paris to the walls using self-tapping screws and glue with overlapping joints.
Ventilation distribution - air ducts in the attic, exhaust through fungi in the roof, fence - through the entrance in the gable.
Non-load-bearing partitions - metal profile, mineral wool for sound insulation, plaster lining. The frame for the wall-hung kitchen set is covered with especially durable Finnish gypsum, the walls for sinks and wall-hung toilets are also reinforced. The shower is planned to be built-in.
Insulation of the attic - when blown in, the ecowool layer is about 420 mm, after shrinkage 380-400 mm will remain.
Electrical wiring, installation of channels for TV and related extras, complete wiring for alarm sensors.
We have reached the finish line with the walls and ceilings ready for final finishing. Next comes tiling and painting.
Tiling works.
How to plank a house
To decorate the facade of a house, many facing materials are used that decorate any facade, if everything is done correctly. Boards are an ideal option, but during installation the joints are coated with sealant.
Installation of sheathing
The timber for creating the sheathing is positioned vertically, because the plank trim is attached horizontally. Overlapping or herringbone boards are attached to the sheathing. This method is good because it is possible to put insulation or a membrane under the cladding, which is important for buildings made of gas or foam blocks.
When creating the frame, a beam is used, the cross-section of which is 5x5 cm. Be sure to treat it with an antiseptic before installation to create protection against rotting processes. If you plan to apply several layers, take breaks so that the product has time to dry completely.
Several methods have been developed for attaching the sheathing, taking into account the wall material:
- blocks - the frame is secured to the walls with dowel screws;
- wood - timber is nailed down with long nails (if there is no insulation under the frame);
- when using insulation, the frame is attached to special hangers for drywall, taking into account its thickness.
Each block must be placed at a distance of up to one and a half meters from each other. In practice, the pitch is equal to the length of the board used for sheathing. When planning to install insulation, keep in mind that the step is equal to the width of the roll or slab of thermal insulation.
Facade preparation and waterproofing
If the exterior is finished using edged or unedged boards and plans to lay a layer of insulation, then the following rule is taken into account - the vapor permeability of the entire finish gradually increases outward from the walls. Neglecting it, you will get an accumulation of condensation in each layer of finishing, which will lead to the destruction of finishing materials and the walls themselves.
This means that the walls are initially waterproofed. When work is carried out in buildings made of bricks or blocks, bitumen mastic is used. But in practice, materials are more often used in the form of rolls, laid over the sheathing with an overlap, and the joint should be 10 cm. It is important that a small distance is left between the insulation and the walls for ventilation.
For insulation, slabs of mineral wool or expanded polystyrene foam are usually used. A layer of thermal insulation is glued to the walls and attached to dowel mushrooms. Each joint is foamed with polyurethane foam. At the next stage, the insulation is covered with a membrane, so that there remains a small gap between it and the board after the work is completed.
When it is planned to sheathe a log house with boards, the methods for preparing the external part are similar.
How to sheathe a house with unedged boards
Prepare everything you need for the work: sealant, timber, mastic, unedged board, nails or dowels, insulation. The cladding boards can be mounted either tightly together or overlapping. The quality of this cladding option is no worse than siding. The first option is more complex, but looks more presentable in appearance. The second option is more practical, because it is resistant to moisture penetration, but installation is carried out on a layer of waterproofing, so that the ends are joined with a miter cut, and after completion of the work, the ends are treated with silicone sealant. If necessary, the board can be coated with a primer.
Wall finishing with unedged boards is done with the front part above the previous one. Nails are used for fastening. This method is relevant when the humidity level fluctuates to maintain the integrity of the structure.
Facade finishing
Lathing and coating of the base.
The boards for cladding are coated with sealant immediately at the factory, painting is planned after the cladding, already on the facade, and adjusted to size on site.
The gables were clad, the eaves were trimmed, and they were painted.
House paneling technology
Sheathing a house with planks
The technology for cladding a house from unedged boards involves installing a frame. The design is designed to level the base. In addition, the sheathing eliminates defects that have arisen as a result of the operation of the structure.
Frame installation
When planning to cover a building with unedged “overlapping” boards, approach the construction of the frame responsibly. The lathing created using technology ensures a high-quality fit of the elements. The work is carried out according to the following principle:
- From the corner of the house, mark a point at a distance of 15 cm - the first structural element is installed at this place.
- For the second corner of the building, carry out similar actions.
- Divide the remaining area of the building into equal parts with a width similar to that of thermal insulation sheets.
- At the previously marked places, secure the material used with dowels.
The purpose of installing the frame is to retain the insulation. The design forms a ventilation gap through which condensation is eliminated.
Sheathing a house using overlap technology
Overlapping sheathing from bottom to top on vertical slats
You can sheathe a house with both edged and unedged boards. The first option is a rectangular material that is perfectly cut on all sides. All elements are the same in length and width. The second type of board is presented in stores along with bark. If it holds securely and does not crumble, it is left. When bark is not needed, the lumber is cleaned and sanded.
To sheathe a house with lapped boards, follow these steps:
- Mark the walls along which the frame will be mounted on the guide rails.
- If you plan to additionally insulate the building, place the appropriate material in the cells.
- Fix the facade boards vertically, then fix the horizontal elements. When placing parts, use a building level.
- Take nails as fasteners and install them in a checkerboard pattern. This approach will prevent the canvas from bending due to natural deformation of the wood.
- Each layer of herringbone is fixed to the previous one with an overlap of approximately 2 cm.
If the width of the planks is 10 cm, then the overlap should be 23-26 mm on each side. Adhere to these proportions throughout the entire area of the cladding. The joining of elements is covered with even boards.
Leak test
Although the final finishing and façade remain in progress, the house has already passed the leak test very, very successfully, despite the identified shortcomings.
Zapp_BranniganFORUMHOUSE Member
Today we checked the house for leaks. The air door arrived, first they set the back pressure to 60 pascals, then they inflated the house the same way. We went through a thermal imager. We went through a smoke machine at overpressure. We found two jambs - with double-glazed windows joining, the Finns will fix it. Global conclusions - with a tightness standard of 1.5, my house shows 0.8 - which is twice as good as the basic standards for a frame house with a hand-operated system. As they told me, I have the best performance in two years in their work.
Features of the construction process
The technological process for the construction of a traditional Finnish frame house must have the following stages:
- The construction of a shallow strip foundation or columnar foundation, which gives developers significant savings in building materials.
- During the process of pouring the foundation, embedded parts are installed to tie the wall frame.
- After the foundation, the installation of floors for the 1st floor is carried out.
- Next, the subfloor is laid, a frame is prepared under it from beams 245x100 mm and an inter-beam spacing of up to 40 cm. It is covered with plywood of at least 18 mm and the construction of the wall frame begins.
- The walls are built in a lying position on the floor, the base is a 150x50 mm board.
- The frame lock, in a wooden beam, is in addition reinforced with self-tapping screws, and movable joints are also used.
- Then the frame is protected by a wind- and vapor-permeable membrane up to 25 mm.
- Next, the wall is installed vertically and connected to the lower ceiling; the strongest connection is considered to be fixed with studs. The walls are connected to each other by bolts through special holes in the corner bars of the structure.
- If the house is two-story, on the walls of the 1st floor, the interfloor ceiling is strengthened using beams of a smaller section of 245x50 mm and a pitch of up to 35 cm, since this structure experiences less load.
- The subfloor and wall installation are carried out in the same way as the first floor.
- The base for the roof is the upper part of the walls; the rafter beam is taken 150x50 mm for a house without a residential attic.
- The inside of the beams is lined with plywood from 8 to 10 mm.
- Roof rafters are placed on the beams, which are covered with lathing, heat insulation, wind and vapor protection and roofing material.
- The building is finished with a block house or clapboard; a ventilation gap is left between the finishing and the wind protection.
- After this, windows, doors and utility networks are installed.
- Finally, the final finishing of the premises is carried out.
Important! Before installing wooden products, they must be subjected to protective treatment with fire retardants and antiseptics.
OLIMP Omicron-Maximum – Wood-protective glazing thixotropic composition with a UV filter.
Why OLYMPUS? Everything is simple - budget-friendly and proven by repeated use on other objects. I first became acquainted with Olympic impregnations when I was making a balcony in my apartment in Moscow. There we made a bar counter from pine boards. And then we covered it with this same “NUT” color impregnation... Now almost 8 years have passed... It’s just that the “convergence” of the paint layer has become noticeable. But this is the 19th floor of the northern part of Moscow, blown by the most terrible winds and practically this table is always very heavily flooded when it rains. We have covered the walls in the rest room of the bathhouse with azure from OLYMPUS, covered the pediment of the guest room from the street side, covered all the roof linings of a large house ... After using it for a long time, it still shows its good side. Therefore, we didn’t think twice and also bought glaze from OLYMPUS for the walls.. The only difference is that this time we chose a non-water-based glaze. Therefore, it smelled strongly, was quite thick, you only need to dilute it with white spirit, and, accordingly, different care for brushes and rollers. What I liked was that we covered both the pediment of the roof and walls with azure, and the material there is different (on the pediment - OSB, on walls - a board), then the visual effect turned out to be different. Otherwise, I was very worried that everything would turn into mush... The glaze lay flat on the OSB and formed a glossy shiny film. And on the walls it became matte. You need to apply at least 2 layers. The first layer is absorbed into the wood and the color does not reach the desired saturation. The second layer is already showing itself well. I applied the glaze - sometimes with a roller, sometimes with a brush. It was imperative to paint the ends of the board - the boards usually rot at the ends... I liked it most of all with a wide flute brush. The glaze dries quickly from dust - which perfectly protects fresh walls from sand, which with gusts of wind could be applied to the walls in bad weather. Let's wait the five years stated by the manufacturer - and see how everything will look.
At this moment, I want to immediately answer the question - why is it so difficult to mess with the board... Yes, I know that there is modern siding, thanks to which I can, in principle, achieve the same result... Almost, but still not ideal.. .I didn’t want any siding - I wanted wood...
And there is always a BUT. Firstly, we already HAD a board. Secondly, the siding is good, which does not fade in the sun, does not lose its position from strong storm winds, from snowdrifts two meters high... it would cost us significantly more than the board at the moment. Thirdly, yes, after some time I will have to paint the house again, and for now I don’t know how the azure from Olympus will behave in 7-10 years.. But it will be in 7-10 years... not today.
What to do with the corners? That's right - beautifully hidden behind a corner element. We also made it from boards. Only it was already a board 15 cm wide and 3 cm thick. Everything fell neatly into place and was painted white.
How it was before the sheathing
Porch to…..
And how it turned out after... my special pride is the porch :)
Porch after)))
Dusya is happy
Thank you all for your attention - stay with me! And... come to my website ON THE WAVE OF DECOR.
GOOD LUCK WITH THE REPAIR!
1 Christmas tree (Canadian way)
Continuous skin without gaps, the elements of which can easily expand and contract with changes in humidity. If you nail only the top edges of the boards, the nail heads will be hidden from view and protected from moisture, but the likelihood of warping of the sheathing will increase (this fastening option is only applicable for thermowood and wood-polymer composite products). The disadvantages of the herringbone include, first of all, the increased consumption of material and the need to cover the corner joints with fairly wide vertical strips.
Construction materials
The basic requirement for materials for a building frame is a low percentage of humidity.
Bars
For the construction of the frame, laminated veneer lumber is used.
For the installation of the frame racks, laminated veneer lumber is used. It undergoes chamber drying, does not shrink, and is not deformed. The cross-section of the material is selected depending on the climate. The lower and upper trim is made of dry planed boards with a cross-section of 145×45 or 195×45 mm. Lumber can also be used for racks. The beam will be required when installing floors and floor joists. Materials suitable for construction are made from coniferous wood - pine, spruce, larch.
Plates
MDVP boards for protecting walls from wind
Soft wood fiber boards (MDVP) are installed as wind protection. They have good heat and noise insulation properties due to their porous-fiber structure. Their use improves the energy efficiency of housing. The slabs are an additional element that imparts rigidity to the structure. The best products are offered by the brands Izoplat, Shteiko, Beltermo.
Another popular option is facade gypsum fiber boards. These are moisture-resistant, durable, non-flammable sheets that provide wind protection. Facade plasterboard is environmentally friendly, easy to install and vapor permeable. A popular manufacturer of the material is the KNAUF company.
In some cases, only a special membrane plays the role of a wind barrier, and plywood is installed for rigidity. The disadvantage of the design is the low thermal insulation properties. This option is not suitable for houses in the middle zone and northern regions; it is suitable for houses with seasonal residence.