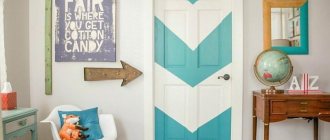
Hello readers of my blog! Today we will talk about how to install double interior doors with your own hands. It would seem that this is not a tricky matter, but when you are faced with this problem, you have to think about how to do it correctly, what preparation to do, what materials to choose. Thus, I decided that this article would be useful to someone, and I am devoting my efforts to this topic. In it, I will answer a number of questions that will arise immediately before installing double interior doors with your own hands, and some even after that. This topic is quite broad, because before work, thorough preparation is necessary, but how to do this? And this is a separate topic. You can learn about all this in great detail in the article below.\How to install double interior doors with your own hands
When installing a metal entrance door, the question of the need for a second door often becomes relevant. For some it is a relic of the past, for others it is reliable protection from intruders, noise from the entrance, drafts and unpleasant odors.
Most often, an interior door is purchased as a second door. In our material you will find out why the second door is needed - this will help you make your choice.
What is the second door for?
Simple logic: a double door block retains heat and prevents sound penetration twice as well as a single door block.
This creates an additional layer that dampens sound waves and does not allow heat to pass through.
\The interior door serves as additional protection against odors, which often come from the garbage disposal.
In private homes, especially in summer, a second removable door protects against flying and crawling insects. However, for this it is not at all necessary to have a second entrance door - a canvas with a mesh that matches the size of the door frames is enough.
\It will not be so easy for burglars to enter a room with double doors, especially if you also have video surveillance installed. Protect yourself further by installing secure locks on both panels.
Where should the canvas open?
It is considered best to open the sash towards the nearest wall. This helps create a feeling of open space. When opening in the opposite direction, it seems that you are entering a buried space, which causes a feeling of inconvenience.
If the front door is mounted directly opposite the back exit, then the Chi energy passes directly through the corridor and leaves the house.
To delay the beneficial flow, it is recommended to create a protective barrier on its path. For this purpose the following is used:
- mirror;
- screen;
- decorative lattice.
Sometimes it is difficult to install a suitable obstacle. To prevent the passage of Qi energy, the second canvas (black entrance) is covered with a curtain. It is not at all necessary to hang a heavy velvet curtain; it will be replaced by an ordinary tulle curtain with an original pattern.
If the first thing you see when entering a room is the corner of the wall, this situation is unfavorable for both residents and guests of the house. The following will help to extinguish the negative influence:
- plant;
- beautiful ornament;
- decorative screen.
Excellent location of the entrance to the bedroom
Installation Features
It is advisable to order the designs of entrance and second doors in one block. But usually second interior doors are installed after some time. The installation process is the same as when installing swing doors.
When working, you should pay attention to the following points:
The distance between the doors should be within 25-30 cm. Less - it is undesirable for the door handles not to touch each other.
More - too, as this will affect the heat and sound insulation properties. If the apartment has thin walls and installing two doors is impossible, then this problem is solved with the help of a plasterboard structure.
For a doorway that takes up a lot of space in the hallway, a partition is made from wall to wall. Or they make a partition corresponding to the width of the door leaf, with an allowance of 10-15 cm on each side.
If the threshold is not needed, then with a minimum gap made between the end at the bottom and the clean floor surface, fix the brush with a seal, as in sliding wardrobes.
Installation of sliding doors
How to install sliding interior doors: additional recommendations
Sliding doors have many advantages, but the most important thing is the small footprint when opening them.
It is for this reason that more and more people living in cramped city apartments prefer such doors over some others. We will talk about them in this article, in which we will answer the question, how is sliding doors installed? Together with the site dveridoma.net, we will analyze the sequence of performing this work and get acquainted with all its subtleties and nuances.
How to install a sliding door
Trapezoidal layout
For some reason, people are very afraid of non-standard premises.
It's a pity! There are usually more opportunities for arranging furniture and it becomes less boring. Remember a couple of living rooms in panel houses. What's there? Most likely, there is a sofa on the left, and on the opposite there is a “wall” with a TV. Or vice versa. That's all! And so in every apartment on every floor! One day my sister took part in the census. She discovered with horror that almost all the families on her property had the same furniture, moreover: the same as hers! She entered the apartments and already knew what would be there and how. Returning home, she decided to arrange a rearrangement at all costs! I placed the sofa with its back to the window, the TV on the side, facing the sofa. How all our relatives scolded her, that she was “not like everyone else”! But it turned out interesting! And, by the way, more spacious...
Now look at the opportunities available to the owners of such apartments in the corner section of a 9-story building on Zhukov Avenue. One room turns out to be trapezoidal, and the other acquires a fifth corner. But how many options for redevelopment! For any family composition, for any lifestyle!
Installation of sliding doors: their design and choice of mechanism
Before we begin directly studying the question of how to install a sliding door, let’s first understand its design - knowledge of the structure and operating principle of this door will help you more easily understand the essence of their installation and do everything efficiently, and most importantly, correctly.
What distinguishes a sliding door from a regular swing door?
If you delve into the nuances, you can find a lot of differences, but all of them will certainly lead to one main difference - the sliding door leaf is not connected to the frame. In fact, these are two separate and independent parts that perform different functions - if in swing doors the frame plays the role of a supporting structure for the door leaf, then in a sliding door it performs exclusively decorative functions, giving the doorway a neat appearance.
The function of the supporting structure for a sliding door is performed by a special guide along which the door slides, supported by rollers.
Now a few words about the roller mechanism itself - as you already understand, this is practically the most important part of such door structures.
It is designed quite simply - in fact, it is a steel or aluminum rail of a profile structure, inside which rollers slide along a special groove or grooves (depending on the characteristics of the mechanism), which are attached to the door leaf.
The latter simply hangs on the profile, and the rollers themselves additionally serve as suspensions, so to speak. In addition, in the profile of the sliding mechanism there is a pair of adjustable stops that limit the movement of the canvas both in the direction of opening and in the side of closing.
It is this design, in which the leaf and the roller mechanism, seeming to be one whole and at the same time remaining largely independent, ensures simple and easy installation of interior sliding doors.
Roller mechanism for sliding door photo
“Five corners” layout option No. 2
Family with a child (if desired, the nursery can be adapted for 2 children; it is enough to purchase a bunk bed).
Here, the parents’ bedroom also serves two functions: a living room and, directly, the bedroom itself. The zones are divided by a partition up to the ceiling, but not long, only 2 m, in order to close the sleeping people from the eyes of the person entering. Thanks to the fifth corner and an additional window, daylight penetrates into the living area and the room does not seem cramped. Stained glass inserts in the partition make it more openwork and lighter, and also add light. The head of the bed is decorated with a romantic photograph.
“Fifth Corner” - bedroom layout
Children's room. So that the bed is not visible immediately from the entrance (it is psychologically more comfortable to sleep this way), it is hidden behind a narrow partition up to the ceiling. Thus, it will not take away space, but will add convenience. In addition, if your parents allow, you can hang a small TV on it to watch cartoons before bed. The rest of the furniture can be easily placed around the room: a regular desk, a closet, a shelving unit. No custom furniture!
“Fifth Corner” - children's room layout
How to install sliding doors with your own hands: sequence of work
Having familiarized yourself a little with the design and operating principle of sliding doors, you can safely begin installing them.
But first, let’s clarify a few points regarding the choice of a sliding system.
- Firstly, this is the length of the guide - it should be slightly more than twice the width of the canvas that will be installed on it.
- Secondly, pay attention to the profile itself and the number of rollers in the mechanism - if we are talking about a single door, then there should be a pair of rollers, and if you plan to install double sliding doors, then two pairs of rollers should be included with the guide.
Now you can proceed to the actual installation. To better understand the essence of the issue, let’s consider the sequence of work point by point.
To begin with, we prepare the door leaf and first of all screw a couple of rollers to its upper end - there is no need to select any grooves for them. We just take and fasten them with self-tapping screws at a distance of 50-100mm from the edges of the canvas. The second stage of work associated with the preparation of this part of the sliding door is to cut handles into the door leaf and, if necessary, a latch of a special design.
To insert a handle, you will need to select grooves in the blade or simply drill or cut an oblong through hole with a jigsaw (if the edges of the handles you choose are rounded).
As for the lock, its insertion is carried out in exactly the same way as installation in swing doors - the difference lies only in the design of the lock itself. I completely forgot, in the center of the lower end of the canvas you will need to cut a groove 1.5 cm deep and 5 mm wide for a floor stop - a hand router is used for this purpose, but if you try hard, a grinder with a circle for wood will do.
Installation of sliding interior doors photo
Now let's fix the guide - there shouldn't be any difficulties here either.
You will need to make a wooden lining under the guide - it is needed so that the canvas does not rub against the wall during operation. Essentially, this is a beautifully processed and painted wooden slat with a thickness of 10 to 40 mm (here it all depends on the degree of curvature of the walls in the area of the doorway).
The rail is attached above the opening with dowels or anchor screws - the height of its installation should correspond to the height of the canvas together with the rollers, plus a centimeter gap above the floor. After the rail is installed, a guide is mounted on it using a level.
Everything here is generally simple - a few self-tapping screws solve the whole problem. Now it’s time to tackle the doorway itself - don’t you think that you can just throw it away without taking care of its appearance?
In principle, this could have been thought about earlier, from the very beginning of work. You can decorate a doorway in different ways - it can be puttied and painted, covered with bamboo wallpaper, or simply sheathed with slats.
The best option is still a door frame assembled from a smooth centimeter strip - it is twisted with self-tapping screws and installed on polyurethane foam, after which it is covered with molding.
When the doorway is ready, you can begin the final stage of work - connecting the door leaf with the mechanism (guide). If everything was done correctly before, and you did not make any mistakes when installing the guide, then this stage of work will be quite simple.
All you need is to start the rollers installed on the door leaf on the side of the guide and check their movement, install the floor guide, which ensures a constant vertical position of the door, and also install stops that limit the movement of the door leaf
How to install sliding interior doors photo
Having completed the installation of sliding interior doors, or rather their main phase, all you have to do is install special shutter slats, cover the mechanism itself with a decorative panel and, in general, that’s all. But you can do without a door rail - in most cases it is only necessary if there is a lock on the sliding door.
For a visual guide to installing a sliding interior door with your own hands, watch the video.
Types of moldings
These simple but very effective decorative elements are made from a variety of materials, differing not only in cost and appearance, but also in characteristics.
- The cheapest ones are made from polystyrene foam . It is very light, moisture resistant, but completely fragile and requires painting. Another drawback is the difficulty of accurate sawing and, as a result, high-quality joining of parts.
Styrofoam
- Wooden moldings are much more expensive, their price depends on the type of wood and the complexity of the terrain. Like all other wood products, they are afraid of moisture, but this is hardly worth paying attention to when decorating living rooms. But they are very strong and durable.
Tree
- Products made from polyurethane are considered the most versatile and easy to install . They are quite strong and durable, and are not afraid of moisture, and are easy to cut and paint.
Polyurethane products are flexible
- The traditional material for the manufacture of not only moldings, but also other interior decor is gypsum . But its use is justified only in expensive historical interiors with a claim to luxury. Gypsum is quite fragile, heavy, not moisture resistant, and difficult to install material.
Plaster stucco
For interior decor I will choose polyurethane moldings, and for furniture decoration I will choose either them or wooden ones.
How to install sliding interior doors: additional recommendations
In principle, most of the subtleties and nuances of this process have been described above, and only a little remains to be added here.
- The first concerns the door leaf - its size, or rather width, must be correctly correlated with the same dimensions of the doorway. Ideally, the width of the canvas should be approximately 10 cm greater than the width of the doorway - it should be, as it were, superimposed on the opening in the closed position.
- The second is the mechanism itself. Often it has to be shortened a little - when doing this work, you need to take care of removing the burrs left by the grinder saw. In principle, they do not interfere much during work, but they still create some inconvenience during installation.
- And the third concerns the floor support. It is installed as follows: we close the door leaf completely, insert the stop cut at the preparation stage into the lower groove so that it half peeks out, and install two fasteners. After this, we open the canvas to the limit and install the two remaining fasteners. How to install sliding doors with your own hands
As you can see, installing sliding doors is quite simple and can be done by any home craftsman. There is nothing complicated here - the only thing you need to pay attention to is accuracy and precision. It is impossible to do without this in modern repairs - the result of a negligent attitude to work and neglect of technology can be wasted money and effort.
Do-it-yourself installation of sliding interior doors
Sliding door systems have firmly strengthened their position in interior design.
Their functions combine several advantages: convenience, efficiency and originality. The installation of such doors differs significantly from the installation of conventional swing models. You can get acquainted with the principles and features of installing sliding systems by reading the section - installing sliding interior doors with your own hands: assembly video for non-professionals.
Do-it-yourself single-leaf sliding door installation
Designers do not skimp on ideas, developing new models of sliding interior systems. They may vary in the following ways:
Double sliding doors made of translucent glass between the kitchen and living room
\
Sliding doors, the top guide of which is attached to the ceiling, visually increase the height of the room. Designs that do not involve a bottom rail will maintain the unity of the floor covering of the entire room.
In the open position, the cassette sliding door leaf is located in a niche inside the wall
When purchasing sliding interior systems for DIY installation, make sure that standard equipment is available. It includes:
Double sliding doors with double row of top rails
The model of roller mechanisms and their number depend on the weight of the door leaf. If you purchase a door without a set of fittings, ask what its weight is.
Requirements for openings
Installation of a metal door is possible in the opening of a brick or concrete wall with a thickness of at least 160 mm. These are standard requirements for reliable operation of the door, and if observed, the durability of the structure is guaranteed.
If the opening is made of sand concrete, foam concrete and other materials with a density lower than red brick, it is necessary for a craftsman to inspect the opening on site and determine the installation method. To strengthen the opening, metal channels, extended mounting pins, lugs, or other elements can be used. The installation method is assessed by the master, based on the weight and design of the door, the features of the opening and load-bearing walls.
Before installing metal doors in a cottage or apartment, you should carefully clean the doorway down to the supporting structures. There should be no mortar or plaster residue left.
After this, you need to prepare the necessary tools.
DIY tools for installing sliding doors
To install sliding interior doors with your own hands, there is no need to have a special tool. For DIY installation you will need the usual “standby” kit:
White wooden sliding doors with glass inserts
As for the accessories, you can stock up on a number of wooden wedges and a square beam measuring 50 or 40 (mm) for attaching the guides.
Installing sliding interior doors with your own hands: video tutorial for non-professionals
As can be seen from the video, even a non-professional can install a sliding interior door with his own hands. Once the desired door design has been selected and the appropriate components have been purchased, installation can begin.
Sliding doors as an element of space zoning in the interior
The most popular models for do-it-yourself installation are sliding interior single-leaf doors. The assembly and fastening of such doors is relatively simple, and at the same time they have common installation features with other types of sliding doors:
Step 1: taking measurements of the doorway
sliding doors running along a wall or partition on an upper guide, assembled and installed when the flooring is laid.
Make an accurate measurement of the opening, using a level to check the horizontal and vertical of the wall, especially in the place where the guide rail is attached. It is very important that the walls and floor where the guides are attached are level. Otherwise, this will affect the operation of the sliding mechanism and the door structure as a whole;
Step 2: assembly of the door structure and pseudo-frame
Useful advice! If you decide to install a door model that moves along the wall, plan the arrangement of furniture and accessories so that they are not in the area of the door movement.
Schematic representation of the movement of a sliding door along a wall
Step 3: installing the pseudo-box in the opening, aligning it vertically and horizontally
to attach the top guide, draw a pencil line above the opening at a height equal to the height of the door plus 7 mm. We apply a beam (50x50 mm) along the line so that it is under it, and screw it to the wall with bolts.
In this case, it is necessary to strictly monitor the horizontal position of the beam. The beginning of the beam should coincide with the beginning of the opening where the door will be located when closed. We drill holes in the guide for fastenings in increments of 20 cm and through them we attach it to the lower surface of the beam, retreating 6 or 7 (mm) from the wall;
Step 4: Attaching the Top Rail
to assemble a sliding mechanism for interior doors with your own hands - we connect the rollers with the carriages, insert them into the guide and check their movement. We install stopper plugs at the ends.
We screw the brackets to the upper end of the door. First, we mark and drill holes along the brackets, and then fasten the brackets using self-tapping screws. We hang the door leaf and check whether it touches the wall when moving;
Step 5: attaching staples to the upper end of the door leaf
Helpful advice! Don't skimp on accessories! When choosing a sliding mechanism for an interior door, make a choice in favor of quality products. This determines how softly, silently and how long the mechanism will function.
Step 6: Installing the Roller Carriages in the Top Rail
A flag is traditionally used as a bottom guide.
For such an element, a groove is selected at the bottom of the door. It is cut using a milling cutter, and not everyone has this tool at hand. An alternative is a guide threshold (included in the hardware kit), but it is a visible element;
Step 7: Adjusting the Position of the Roller Carriages
Step 8: Attaching the Bottom Guide Rail
Additional information and videos of installing sliding interior doors with your own hands can be found on the Internet.
Sliding systems with a sliding door inside the wall. Do-it-yourself installation specifics
For interior sliding systems, the doors of which are “hidden” into the wall, the installation technology is somewhat different. This does not concern the basic principles of assembling and fastening the sliding mechanism, but rather the calculations and preparatory work for constructing a false wall. \
The door will be rolled into the niche of this wall or a cassette will be installed (if you purchased a door with a cassette block):
Preparation for do-it-yourself installation of cassette doors begins at the stage of rough construction work.
The main feature is that the beam on which the guide rail is attached is mounted before the construction of the false plasterboard wall. The width and depth of the niche depends on the size of the cassette or is calculated based on the size of the opening. This takes into account the width at which the canvas can move unhindered in the niche;
Step 1: arranging the frame for the double wall partition
Step 2: designing a space inside the wall for the sliding door to move
Due to the fact that the rough work has not yet been completed, the door leaf will not be attached yet. Instead, a template beam will move along the guide. Its length should correspond to the width of the door.
It will be fastened using the same brackets that will subsequently be installed on the upper end of the interior door. Using a template, we determine the installation location of the limiter plug so that the door is not completely hidden in the opening. To attach the handle, part of the canvas (7 cm) must remain visible;
Step 3: covering the false wall with plasterboard and finishing
Useful advice! When determining the installation location of the limiter on the top rail inside the cassette, do not forget to take into account the thickness of the decorative trim that will frame the opening.
Schematic illustration of the location of the door leaf inside a plasterboard wall partition
Step 4: Sliding door sliding inside the wall
The DIY installation video of sliding interior doors shows the technology of the process at all stages.
Installing sliding doors with your own hands (the video confirms this) is a process that does not require professional skills and effort.
It is enough to have the necessary minimum of tools and feel free to start installing it yourself. Accurate measurements, following the recommendations - and your room will be transformed by a functional and stylish sliding door. In addition, self-installation will “balance” the costs of purchasing structures that are more expensive in price than swing analogues.
Do-it-yourself interior door installation
Experts say there can be no trifles in repairs. Every element, every detail of the interior must be executed competently, organically fitting into the overall picture. Especially when it comes to installing doors.
Installing an interior door is a painstaking, but entirely feasible process. To help craftsmen who decide to install door structures themselves, a master class on how to install interior doors with your own hands. It is better to watch a video with practical tips before starting installation work.
Following the instructions, installing an interior door yourself is not at all difficult.
Step-by-step instructions for installing interior doors yourself will help you achieve an impeccable installation result. Armed with patience and the necessary tools, you can begin the process yourself.
Door frame - do it yourself
Before assembly begins, the space where the work will be carried out is cleared. It is more convenient if it is a flat floor surface. To avoid damage to the floor covering, it is recommended to cover the floor with cardboard.
The bathroom has doors made of frosted opaque glass
Using a miter box, make a 45° angle cut at the top of both vertical posts and on one side of the horizontal crossbar of the box. We use self-tapping screws to connect one of the vertical posts to the horizontal component of the box.
Self-tapping screws are screwed into holes previously prepared with a drill so that the door covering does not burst. We calculate the internal size of the horizontal crossbar of the door frame. It is defined as the sum of the following quantities: double the thickness of the vertical post + the width of the door + two gaps (left and right).
Gaps are arranged to the left and right of the frame for free movement of the door leaf and their size corresponds to 3 mm. We cut the ceiling at an angle of 45° and connect it with self-tapping screws to the second vertical post. We get a U-shaped structure.
The door and wall in the bedroom are lined with the same wood veneer
The length of the vertical posts along the internal contour is determined as the sum of the upper gap (3 mm), the height of the door leaf and the lower gap (10 mm). We make marks according to size and saw off the extra centimeters of the racks.
For example, you can find and look at a photo of installing a door frame with your own hands.
“Five corners” layout option No. 1
Young family without children. The living room is quite traditional in content: a sofa and TV. But in the “extra” corner a cozy fireplace corner has settled perfectly. The electric fireplace is built into a plasterboard portal. This design will not cause difficulties even for more or less normal builders. And it will cost even less than a ready-made traditional wooden portal.
“Fifth Corner” - living room layout
The bedroom here is more interesting. A low partition is erected in the center of the room. 1.2 - 1.5 m is enough. This will not hide the space. It separates the sleeping area and the work area. On one side is the head of the bed. In the absence of bedside tables (again, saving money), niches are arranged in the partition for all sorts of little things: put a phone, a book, glasses. And on the other side there is a sofa with a table - a workplace.
“Fifth Corner” - bedroom layout
The sleeping area is visually closed from the door, which provides psychological comfort. Anyone who enters the room will see not the sleeping people, but a sofa and a table. For additional zoning, the room can be divided by a purely symbolic arch. The walls of the “office” can be painted or covered with photo wallpaper in active colors - this is where we are awake. And the sleeping area is decorated in the same range, but in calmer shades.
Do-it-yourself fastening and insertion of fittings: awnings, handles, locks
To attach the hinges to the door, mark 200 mm at the top and bottom of the end of the door leaf. We fix with a pencil the places where the canopies begin. Place the loops between the marks so that the edge of the loop bar aligns with the edge of the end of the fabric.
Having made loops in two places, we draw them along the perimeter of the canopy with a knife.
This marks the boundaries of the loop surface. It is advisable to run the knife several times and go a little deeper. When the contour of the loop is clearly marked, use a chisel to remove the top layer of covering under the canopy.
Do-it-yourself lock mortise and door hardware installation
We do this carefully so as not to damage the coating outside the perimeter of the canopy. The hinge should fit into the recess flush with the surface of the door. Then, having previously marked the holes, we fasten the canopies with “original” self-tapping screws.
We attach the hinges to the box in the same way. At the same time, we take into account that the distance from the top of the frame to the beginning of the hinge will be greater by 3 mm, and from the bottom by 10 mm (these are gaps). We recommend watching photos and videos of installing interior doors with your own hands.
Arched double doors in the living room
\
We choose a place for inserting the handle and lock. As a rule, door handles are installed at a distance of about a meter from the bottom of the door leaf. You can insert the lock a little higher or lower for your convenience.
Having stepped back the required distance from the edge, we place the lock body against the canvas. Mark where the door handles will be. Using pens and a drill, we cut out a hole slightly smaller in diameter than the handles.
On the end surface of the door we outline the perimeter of the recess for the lock.
Using feathers (feather drills), we make a recess for the lock mechanism. It should fit completely into this recess. As in the case of hinges, use a chisel to remove the layer around the perimeter of the plate covering the lock.
Massive wooden doors in the room
Useful advice!Fittings are an important accent in the composition of the door. Check out the photos in the catalogs and choose models of handle locks that are suitable in style and of good quality. Remember, a cheap thing cannot be of high quality.
When all the holes are prepared, install the handle and lock, fixing their position with screws.
In the same way, but on the box, we cut out a recess for the strike plate and make a recess for the lock tongue. Having attached the bar, we check how the latch works when closing the door. If the calculation is correct, we finally screw the striker. It’s worth watching educational photos and videos on how to attach the fittings to the doors.
New design solutions for the hall: how to zone the room
To choose the entrance to the living room, zoning the room, you need to choose an option that is beneficial for the living room.
You can zone a room using the following methods:
These are the most popular zoning methods that effectively divide the living room into two or even three parts. Many people believe that the living room can only be combined with the kitchen, but in fact, in addition to the kitchen, the living room can also include an office area. For example, a large living room can be divided into three zones, including a hotel zone.
The kitchen can be separated from the living room by a bar counter, for example, and the office from the hotel area can be separated by an arch or curtain.
Installing an interior door frame with your own hands
When installing a door frame in the opening, we first make three holes in it in the places under the hinges and the strike plate. We place the box in the opening, fix the position of the racks using spacers and wedges.
Using a level, we align the box vertically and secure it with self-tapping screws through the previously prepared holes. We check that the cracks (gaps) correspond to the established size and make sure that they are equal around the entire perimeter. We check the movement of the door - it should remain in the position in which you left it.
Practical sliding doors in the living room
We fill the voids with foam in the position when the door is closed. Before filling the void, we fix the position of the door relative to the frame using cardboard. This is necessary so that the box does not move under the influence of foam.
Useful advice! When filling the gaps between the door frame and the end of the opening, use foam with a small secondary increase in volume. In this case, you will prevent uncontrolled deformation of the box under the action of the sealant.
Paper tape will help protect the front surfaces of the box from contamination with foam. A complete picture of the process is illustrated by a photo of installing an interior door with your own hands. After filling the gaps with foam, let it sit for a day. Then, carefully, flush with the wall, cut off the excess volume of foam with a knife.
White door with a three-dimensional geometric pattern
Do-it-yourself installation of interior door trims (video tutorial is offered below) is carried out in the case when the door frame does not cover the width of the end of the wall.
Previously, such a deficiency was addressed by installing a slope. But it didn't look very neat. Today this is disguised with the help of extras.
Having installed the box in the opening with your own hands, we measure the width of the section of the wall uncovered by the door jamb. This will be the width of the extension. If the door panel you purchased is wider than this value, it must be opened lengthwise.
Dark wood swing door in the bathroom
We measure the length of the vertical trim strips. This value will be equal to the distance from the floor to the horizontal jamb. When giving the desired size to the transverse trim, you need to make sure that it fits clearly on the vertical trim strips.
We insert the extensions into special grooves in the opening and secure them on the outside of the box with self-tapping screws. Holes for self-tapping screws must be drilled in advance.
Useful advice! When purchasing door blocks and additional strips for them, make sure that they are the same in texture and color. Be careful when choosing a door online or from a photo catalog - the shade may differ from the real one!
The video will show you how to install an interior door yourself using extensions.
No. 7. How to place furniture in non-standard living rooms?
When the room has the shape of a regular square or rectangle, it is easier to properly plan its space. In most apartments today, unfortunately, there are such elements as a fifth corner, a niche, ledges , etc. They are considered to be obvious disadvantages, but if you choose suitable furniture and think about its location, then the disadvantages can be turned into advantages.
Thus, niches can be used to place cabinets of the appropriate size, and as a result, the space will be used profitably. Also, a niche can be an excellent place for a sofa, or be decorated with a TV, and the fifth corner can be used to place a corner sofa. If the living room is elongated, then you can place a closet along the narrow wall.
Do-it-yourself door frame framing
To hide the installation gaps between the block and the wall, as well as to make the door structure decorative, platbands are used.
If the surface of the platband is flat, then it is not necessary to saw it at an angle of 45°. Platbands connected at right angles look impressive. If the shape of the trim strip is rounded, then sawing at 45° cannot be avoided.
Do-it-yourself door trim installation
It is recommended to first adjust the length and saw the upper horizontal casing. Then, applying the left and right posts to it alternately, saw them using a miter box.
All that remains is to secure the trim strips with special (finishing) nails, the heads of which are invisible on the surface of the casing.
A complete picture of the process is illustrated by a video of the installation of door trims.
Sliding wooden doors in the living room
As soon as the door installation work is completed, you need to check the correct installation:
The bathroom door is made of embossed frosted glass
We invite you to watch the video “How to install interior doors with your own hands.” After carefully studying the recommendations for installing doors and reading the photos and videos, you can easily handle the installation of the door yourself. Correctly selected and installed doors will be a reason to be proud of your work.
Simple hall design: corner as a means of zoning
In order not to constantly hit the corner of the sofa, corner sofas with a round shape were specially invented. As a rule, such a sofa is larger in area and can accommodate more people. Suitable for a large living room.
The corner sofa performs the following functions:
- Promotes rest and relaxation;
- Zones the premises;
- Helps accommodate large groups of people at home.
As you can see, a corner living room can look comfortable and stylish if the sofa is chosen correctly.
Do-it-yourself installation of interior doors (video)
Well, now it's time to finish the article. All the material I wanted to share has been reviewed. I hope it will be useful to you, and you will use it if you need to install double interior doors with your own hands. Improve your own practical skills and gain new knowledge, they say: “It’s never too late to learn!” That's all, thank you for your attention, successful and easy repair!