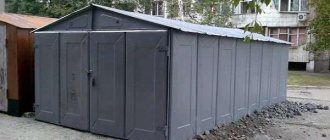
When a garage is purchased ready-made from a cooperative or other place, you do not have to choose its height. But a situation may arise in which you have to think about how to raise the roof of the garage. This can happen when it is necessary to park a minibus in it, which is significantly larger in size than a regular passenger car. This article will describe how such an operation can be carried out.
How to raise a garage
The problem of how to raise a metal garage can arise for many reasons:
- the gates have sagged and are difficult to open;
- the groundwater level in the area has risen;
- the wooden flooring needs to be replaced;
- There is a desire to insulate the garage and get rid of dampness.
An insulated cement floor screed also requires lifting the metal box of the garage. If sagging gates can simply be trimmed with a grinder or excess soil removed, other problems are not so easily solved.
No. 3. Linocrom
Linocrom is a modern rolled material with a fiberglass base, which is treated with bitumen and protected with powder and polymer film.
Advantages:
- ease of installation;
- resistance to temperature changes;
- low weight;
- maintainability. If any part of the coating is damaged, then it is enough to simply fuse new material onto the desired area;
- tensile strength - the material can withstand significant loads;
- durability up to 10 years.
Flaws:
- the top layer is poorly resistant to aggressive substances;
- the material is only suitable for low pitched roofs;
- installation with construction tape is not suitable - the seams in this case will be a weak point.
Installation of linochrome is carried out in dry, windless weather, having previously cleaned the roof surface. The bottom layer is heated with a blowtorch or torch, and rolls of material are laid overlapping.
Description of the work process and preparation for it
To get the job done quickly and efficiently, you need to properly prepare for it. Therefore, you will have to understand a number of important nuances to determine whether your garage can be raised.
Reasons for raising the structure and conditions for safe work
First, let's look at what factors cause the need to raise the garage, there are several of them:
- Raising the groundwater level in the area. It often happens that when construction work is carried out nearby or a road embankment is built, the groundwater level rises. If your garage floods every spring and autumn, then this will be the main reason. The problem can only be solved by raising the structure; there are simply no other options;
- The gate has sagged and opens very poorly. Here many begin to cut the doors and try to make do with small sacrifices. Although it is much more reasonable to raise the structure by 3-5 cm and get rid of this problem for a long time. Of course, if the hinges have sagged, then there is no point in raising the garage, but if the doors are stuck because the garage has sunk into the ground, then the problem must be solved correctly;
- It is necessary to raise the floor level and insulate it. If you decide to make a screed and put foam plastic under it, then the height of the ceiling in the garage will decrease by at least 10 cm, and the gate will be lower than the floor. Therefore, before such work, it is worth raising the entire structure, and then you will not have to overcook the gate, or walk crouched in the garage;
- The structure was distorted due to uneven settlement. This also happens, in order to compensate for all the unevenness you need to raise either the entire garage or its sagging part, it all depends on the specific situation. This can also happen due to the destruction of the base or foundation; in order to update it, you also need to lift the structure and set it up as expected.
We’ve sorted out the causes of the problems, now let’s look at the factors that make raising the garage impossible:
- Dilapidated structure . If the reliability of the load-bearing elements is of concern, then it is better to refuse to raise the garage. During operation, the frame is inevitably subjected to deformation, and the entire structure may simply collapse;
Advice! If the garage is rusty and you need to lift it, then you should first weld all the problem areas and strengthen the frame with corners or channels.
- Connection with other garages . Very often, in garage arrays, individual elements are connected to each other, and when you raise your building, you can deform the neighboring ones. Make sure in advance that your structure is not connected to neighboring ones and you will not damage other people’s property;
- Lack of necessary tools . Lifting a metal structure with bare hands or with a crowbar is a questionable decision. Most likely, you will not be able to do this, and in the process of work there is a high probability of injury.
Work options
In this section, you will learn two ways to raise a garage with your own hands. We chose different options for carrying out the work; they differ in both the approach and the materials used. You need to choose the one that works best for your situation.
Instructions for lifting the structure from the outside look like this:
No. 2. Rubemast
This is an improved type of roofing felt . It is also based on thick construction cardboard (although fiberglass can also be used), which is impregnated with bitumen on both sides. There is much more of the latter than in roofing felt, which ensures higher ductility, waterproofing and resistance to cracks. Powder is used for additional protection. The bottom layer is a polymer film designed to be melted by a burner during installation.
Advantages:
- low price;
- relative ease of installation;
- excellent waterproofing properties;
- resistance to heat and precipitation;
- durability up to 15 years.
Minuses:
- cannot withstand even light loads. If a person weighing more than 50 kg walks on the coating, then the appearance of cracks is inevitable;
- the base must be level, otherwise cracks may occur during operation;
- under constant exposure to direct sunlight, microcracks appear after 1.5-2 years.
Installation can be carried out using bitumen mastic (as in the option described above for roofing felt) or using a gas burner. If the installation work is carried out correctly, then the problem of roof leaks in the garage will not affect you for a long time.
Do-it-yourself garage repair: how and why to do it
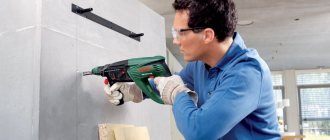
Timely repair work is a necessity, since cold air can penetrate through the gate, which adversely affects the technical condition of the car. Fortunately, you can carry out routine repairs yourself.
How to raise the gate
There may be several reasons why this type of repair is required. Most often, it is necessary to raise the gate when it is impossible to open it not only in winter due to icing, but also in summer. The easiest way to solve this problem is to trim the gate and then concrete the driveway. However, it is better to carry out a full repair so as not to reduce the dimensions of the structure.
No. 6. Corrugated sheet
Another popular option for arranging a garage roof. Corrugated sheeting is a sheet of cold-rolled steel with a protective coating of zinc, aluminum or polymer. By giving the sheet a profile, it is possible to increase its strength qualities and at the same time improve its appearance. The profile can be in the form of waves or trapezoids, its height varies from 8 mm to 7.5 cm; sheets with a wave height of 35 mm or more are suitable for roofing work.
The protective coating is most often made of polyester, which well protects the steel sheet from corrosion, heat and frost, and mechanical damage. Acrylic and PVC coatings are cheaper and perform relatively well in operation. A good level of protection is provided by pural (polyurethane with the addition of polyamide and other substances). Zinc coating is the cheapest and is applied during the repair and restoration of sheets. For garages near the sea, busy highways or industries, you can take a profiled sheet with an aluminum-zinc coating, and for garages located in the northern regions - with plastisol protection.
pros:
- low cost;
- relative ease of installation;
- durability up to 50 years;
- resistance to fires and temperature changes;
- high strength - the metal sheet will withstand a person walking on the roof;
- corrosion resistance due to the use of protective coatings;
- wide range of colors.
Minuses:
- the metal gets very hot in the sun, so in the summer the garage will be like a bathhouse;
- The corrugated sheet makes a lot of noise when raindrops fall.
Both of these disadvantages can be minimized if the roof is properly insulated.
Installation of the profiled sheet is carried out on a 60*40 cm sheathing; the timber is pre-treated with an antiseptic. The sheets are secured using special self-tapping screws with rubber linings. The sheets are laid on top of each other with a slight overlap, the width of one wave. The corrugated sheets are fastened together with special rivets in the color of steel, and the space between the sheets is filled with sealant. You cannot fasten profiled sheets with ordinary nails - they will come off in a strong gust of wind.
Lock care and conclusions
Taking into account the peculiarities of the Russian climate, it is necessary to say a few words about jamming of garage locks. Unfortunately, this happens quite often - the area of the garage door is quite large and, taking into account the thermal conductivity of the metal, distortions in the structure are inevitable. If the garage lock is jammed, do not use brute force to unlock it. Try to determine where the geometry of the gate is broken and level it using a pry bar or jack. If possible, pour penetrating lubricant into the lock mechanism (WD-40 is used in most cases), then wait a while and try to open the lock again. If the lock design does not use “dry levers,” lubricate the lock only with liquid frost-resistant lubricants.
Often used outdoors or in an unheated, dirty room (such as a garage), locks fail due to drying out (loss of lubricant) or clogging of the structure. To avoid this, it would not hurt to make a closed box for a lock. This will extend its service life.
Of course, reliably protecting a garage from attacks by a burglar is a little more difficult than an apartment or house. Yes, in most cases, garage cooperatives are located on the outskirts in sparsely populated areas. Yes, a single watchman cannot provide any reliable protection - in most cases he must only raise the alarm. Yes, an attacker has much more opportunities to use brute physical force and a powerful tool when trying to break into a garage. This is all true, but... Not trying to properly protect yourself from theft of your property means putting yourself in the position of a victim in advance, and then bitterly regretting that you did not take the proper security measures. Remember that there are no unpickable locks - it's just a matter of how long it takes to open it, which is often the most important factor. Use the tips above to protect your car - often reliable and properly installed locks force an attacker to abandon their intentions.
Installation of a pitched roof
The shed roof of the garage has a simple sloping design. In most cases, the supports are 2 beams mounted on load-bearing walls. It can have a different angle of inclination, based on the type of roofing material used and the planned load. The angle of inclination is formed due to the difference in the height of the walls.
Installation procedure:
- Installation of Mauerlat on load-bearing walls. These are the beams on which the rafters rest. It is optimal to use timber 10x10 cm or 12x12 cm.
- Fixing beams with anchors of sufficient length.
- Making fastening grooves in places where rafters are installed.
- Installation of rafters on the mauerlat. Nails or anchors can be used for fixation.
- Installation of wooden sheathing on rafters. For lathing, boards up to 4 cm thick are used.
Often the garage roof is made from ready-made reinforced concrete slabs. In this case, the angle of inclination should not exceed 15°. It is better to cover concrete floors with soft roofing material.
Ways to lift a box
You can raise the garage using a special truck crane with a sufficiently long boom or a jack. It is advisable to use a truck crane for newly built garages. In this case, the roof of the structure must be equipped with strong special metal hinges. In addition, the cost of the work is quite high.
Otherwise, the problem may only be that the jack must be powerful enough. It is better to purchase a hydraulic one or, if possible, use a railway one.
Instructions for raising a garage with a jack
To lift a garage with a jack you will need:
- A jack for a UAZ vehicle, designed for a 5-ton load. Less powerful ones will not work. They simply cannot lift a metal box;
- A piece of metal pipe with a diameter of at least 60-80mm;
- About half a meter of channel No. 20;
- Corner 45X45 – approximately 15cm for placement on a jack;
- Pieces of timber 50mm;
- Ceramic bricks in the amount of 10-12 pieces.
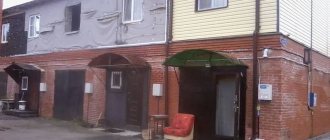
Before starting work, it is advisable to remove the gate, as this will greatly facilitate the construction. Calculate the height to which you need to raise the garage. If you decide to carry out work due to a sagging gate, then the height to which you need to lift should provide at least 3cm of clearance between the base and the gate.
Start work by digging out the walls. Sometimes they “grow” into the ground to a considerable depth. After digging out the walls to the base, begin to lift the back wall, then the front, one by one. Some dig holes in the corners and in the center of each side.
Lift to a small height (no more than 15cm) to prevent the frame from skewing and the seams from breaking at the joints of the sheets..
Start work from the back side. When lifting a wall into the resulting space, you should immediately place a board and begin lifting the next one. Make sure there is no significant distortion. Raise all the walls so that there are through holes around the perimeter. Place boards under all the walls.
Now it's time for the jack. It should be installed in a corner on a board. A corner is placed on it, and a piece of metal pipe is installed on the corner. A channel is placed on the pipe so that the emphasis is on the stiffening rib of the garage base.
Further raising of the opposite walls is carried out in stages. Using a level, check the slope of the roof area. Perform leveling by placing boards or stones. After leveling, place bricks at all corners and in the middle of the long walls. You can also use concrete paving slabs. The main thing is that the material has sufficient strength and durability. You can install a garage on sleepers that are protected by impregnation from fungi and mold.
The structure should remain in this state for about a month. This will allow the foundation and soil to dry thoroughly.
No. 1. Ruberoid
The cheapest way to organize a garage roof. Roofing felt is produced on the basis of roofing cardboard, which is impregnated with bitumen and protected with asbestos coating, which increases resistance to moisture, sunlight and mechanical loads.
Advantages of the material:
- cheapness;
- high degree of waterproofing;
- good for protecting hard-to-reach places;
- in the presence of special polymer additives, resistance to sunlight and temperature changes increases (these are the weak points of roofing material).
Main disadvantages :
- low durability. Within a few years after installation, there will be a lot of cracks on the roofing felt, so leaks are possible, and there is no need to talk about reliable protection of the garage;
- sensitivity to high temperatures (roofing material softens greatly) and low temperatures (becomes brittle);
- fire hazard.
In new types of roofing felt with modifying additives, some disadvantages were significantly reduced, which is why the material is consistently in demand. Experts call roofing felt more likely an option for waterproofing than for roofing.
Ruberoid is excellent for single-pitch, almost flat (slope up to 5 degrees) roofs. On the concrete base of the roof, a screed is first performed, creating a slight slope for better precipitation. For the screed, formwork is formed from boards; it is better to pour concrete at once. After 3-4 days, you can remove the formwork, and when the concrete has set well (15-20 days), you can begin installing roofing felt . Briefly the process looks like this:
- the screed is cleared of debris (swept up);
- the screed is covered with bitumen mastic, which will improve waterproofing;
- proceed to the installation of roofing felt, which is laid in strips in a direction transverse to the angle of inclination, the base is lubricated with concrete mastic, the bottom layer of bitumen is heated with a gas burner. The overlap of the sheets is 10-15 cm, installation begins from the bottom of the roof. After this, the roofing material is mounted in a perpendicular direction, coating it with bitumen;
- You can lay roofing felt in three layers, then the first is done in the longitudinal direction to the slope of the roof, the second - in the transverse direction, the third - again in the longitudinal direction. The bottom layer can be made not with roofing, but with lining roofing material.
Self-propelling and bulk roofing felt are also on sale.
Finishing the garage inside with clapboard in Khabarovsk
Finishing a garage with clapboard is probably the most practical and inexpensive finishing option. It is worth considering whether you need to spend more when there is reliable, cheap and at the same time practical material. The average cost of lining per 1 m3 depends on its thickness and type of wood - but on average it is somewhere from 100 rubles and above. This material breathes well and is easy to install.
| № | Name of works | Price, rub.) |
| 1 | Garage finishing with clapboard (excluding material) | from 600 rub./sq.m. |
Finishing the walls in the garage is a rather labor-intensive process. However, this is compensated by the fact that the lining is cheap. It is very easy to care for and finally, it is an environmentally friendly product.
Our company, depending on the agreed price, uses the 3 most popular types of lining:
- Coniferous (pine, spruce); Larch; Linden.
The price for them on the building materials market, in accordance with the list, starts from 100/200/500 rubles per 1 m3.
No. 7. Metal tiles
Metal tiles, just like corrugated sheets, are made from galvanized steel sheets, only they are given not just a wave profile, but imitate the profile of natural tiles. A phosphate layer (additional protection), a primer and a polymer-decorative coating are applied over the protective zinc layer. A protective transparent varnish is applied to the back side. The greater the thickness of the sheet, the stronger the coating: for roofing it is better to take material with a thickness of at least 0.5 mm. Performance properties strongly depend on the type of protective polymer coating. The coating made of pural and plastisol has proven itself best. Matte and glossy polyester are cheaper, but if the installation technique is followed, they can also provide reliable protection.
pros:
- light weight, which simplifies installation and reduces the load on the foundation and rafter system;
- resistance to low and high temperatures, high humidity due to the protective coating. It also ensures free drainage of precipitation from the roof surface;
- relative ease of installation;
- excellent decorative qualities, wide range of colors;
- the material does not support combustion;
- relatively low cost.
Minuses:
- loss of a significant part of the performance qualities when the protective coating is damaged;
- difficulties when arranging a roof of a non-standard shape, but garages are usually built with fairly simple roofs, so this cannot be considered a minus in our case;
- heating in the sun and noise during rain, but with proper sound insulation, this disadvantage can be easily eliminated.
Metal tiles can be used on roofs with a slope angle of more than 15 degrees, otherwise snow removal will be complicated due to the topography of the coating. The material is often used when the garage is located on the same site as the house, so that all buildings have the same type of roof.
Floor insulation
Sometimes there is a need to insulate the bottom of the garage. For example, if there are large gaps or the importance of the caisson (cellar). A suitable material would be polystyrene foam, on top of which a material is applied that prevents its destruction from human movement. Follow these steps:
- Level the surface, remove cracks and holes with putty.
- Prime the floor twice if it is concrete.
- Make lathing from steel profiles.
- Apply a layer of waterproofing.
- Apply glue, put foam on top of it, press it to the floor.
- Screed the floor with a special solution. Extracted granules are added to increase strength.
Carrying out the operations described above will allow you to maintain an optimal microclimate inside the garage. Even a beginner can master the process, and the result will be the safety of the car, food or other items of value stored inside the box.
No. 5. Ondulin
Externally, ondulin resembles slate. It is also sold in the form of corrugated sheets, but they are produced on the basis of cellulose fibers, which are mixed with minerals, impregnated with bitumen, resins and special additives. From above (and sometimes both above and below) ondulin is painted in one of many shades. Due to impregnation with bitumen and other protective substances, the material receives solid resistance to external adverse influences, and painting allows you to obtain an aesthetic coating, and all this at a relatively low cost.
pros:
- moisture resistance. According to this indicator, ondulin outperforms almost all other roofing materials. Over time, cellulose fibers become even stronger when exposed to sunlight, providing an even higher level of moisture resistance;
- light weight. An ondulin sheet is 4 times lighter than a slate sheet with the same dimensions, therefore it is much easier to transport and install the material;
- corrosion resistance;
- sound insulation - the sound of raindrops on the roof will not block out all other sounds in the room;
- ease of processing. Using a hacksaw for wood, sheets are easy to cut, and thanks to the flexibility of the material, it can be given a complex shape, which will come in handy if the roof has a non-standard shape;
- low cost.
Minuses:
- fading due to sunlight;
- flammability. Already at a temperature of +2500C, ondulin begins to burn;
- an unpleasant odor may appear in the summer heat;
- brittleness at low temperatures;
- low strength is usually associated with a violation of installation technology. If you fasten each sheet with 20 nails and make the sheathing in increments of at least 0.6 m, then you will not have any problems. However, in the heat, when the bitumen impregnation softens, it is better not to walk on the roof.
The durability of the material is 15-20 years, subject to proper installation and operation.
Ondulin is attached to a crate made of wooden beams, and the beams must be strictly parallel to each other. It is most convenient to cut sheets of ondulin while still on the ground. Installation work is carried out at above-zero temperatures; ondulin sheets are attached to special hardware with wide caps.
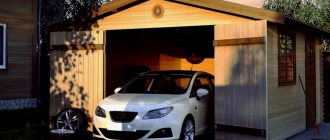
Advantages and disadvantages of frameless design
- Possibility of transportation, movement on site, warehousing and storage.
- Simplicity and speed of assembly.
- Increased strength of wall and gable sections due to embossed relief.
- This design can do without a capital foundation.
- The product perfectly copes with the functions of utility and storage space for equipment, snow removal equipment, walk-behind tractors, bicycles and motor vehicles.
- Natural ventilation through the cracks prevents condensation.
- It is permissible to use combined assembly technologies (bolted connection and welding).
- We will allow fragmentary repairs with replacement of sections.
- Strength and durability.
- This is one of the cheapest types of garage.
Metal roofing
For garages, corrugated sheeting is usually used. This is an inexpensive, durable and lightweight material. Due to its lightness, you can reduce the cost of installing a rafter system by choosing beams of a smaller cross-section. Corrugated sheeting is installed in a similar way to slate, but in this case special self-tapping screws with rubberized heads are used.
When installing a metal roof, waterproofing must be done. Polyethylene film or roofing felt can be used as a waterproofing material.
The waterproofing is laid on the sheathing, and metal sheets are mounted on top. If necessary, the roof can be insulated by installing heat-insulating material from the inside between the rafters.
Elimination technology
General instructions on how to level a concrete floor in a garage begin with assessing the extent of its damage. If the cracks and chips are small, or there is a fairly large but isolated damage, then the repair consists of restoring the defects with your own hands. Otherwise, you need to fill the floor from scratch.
Before starting work:
The finishing is done by ironing the surface or covering it with paint. If necessary, install a decorative floor and lay tiles.
Cracks
If you fill the screed in violation of the rules, or the floor is very old, cracks may form on its surface. To eliminate the defect, first widen the cracks with a chisel, so you can see hidden cavities. Afterwards they are thoroughly cleaned.
For large cracks, reinforcement is made by inserting metal rods into additional grooves perpendicular to the crack.
The defect is filled with a cement solution with the addition of 1 part of PVA glue or liquid glass. After the floor has dried, the cracks are grouted and the resulting flat area is treated.
No. 4. Slate
Asbestos-cement wave slate is a coating that is well known to everyone and is widely used in the arrangement of garages. The material is based on Portland cement, asbestos and water, while asbestos plays the role of a reinforcement cage, providing the slate with the necessary strength. The typical color is grey, but slate can be painted if desired to enhance its aesthetic appeal and level of protection.
Advantages:
- relatively little heating in sunny weather (when compared with roofing felt or metal coatings);
- high strength - an adult can walk on the roof without breaking a sheet of slate, which is important if necessary to carry out repair work;
- fire resistance, no release of toxic substances during combustion;
- good sound insulation. When it rains heavily outside, the inside of the garage will be almost silent;
- corrosion resistance;
- low price;
- durability up to 25 years.
It would seem that the ideal roofing material for the garage has been found, but that was not the case. Among the disadvantages of slate it is worth noting:
- the carcinogenicity of asbestos, which is part of the slate, therefore it is better to take chrysolite cement sheets;
- the high weight and fragility of the material significantly complicate installation;
- low resistance to temperature changes;
- under the influence of high temperatures, although slate does not burn, it cracks with the formation of sparks.
And even despite these shortcomings and the abundance of other materials, slate remains almost the most popular material for garage roofing.
Sheets of slate are placed on the sheathing, placing one sheet on top of another with an overlap of 20 cm. For fastening, special nails with an enlarged head are used; they are not driven in tightly, but leave a gap of 2-3 mm to avoid the appearance of cracks on the slate. In order not to deform the slate, it is better to pre-drill holes in it for nails. However, it is almost impossible to completely avoid cracks during installation, so upon completion of installation, the cracks are covered with a solution prepared from cement, PVA glue, asbestos and water in a ratio of 2:1:3:1.
Raising garage doors: complex problems and simple solutions
There is a proverb: “If you pass the evidence, you pass everything.” And also, some garage “experts” like to claim that they have made “hard doors”. Competent engineers are aware of the simple truth - “there are no rigid metal structures” , and a shipbuilding engineer, having heard about the strength of materials, will grin and say that “The strength of strength is a special case of Structural Mechanics, in which movement is not taken into account.” This brings us to the question of why it is sometimes necessary to raise garage doors. Now a little more detail on how to do this.
Jumper reduction
This option for lifting the sashes can be called one of the most difficult and costly in terms of time and effort. But the result obtained can be considered the most effective. This option is also called raising the frame. To implement this, you will need to completely remove the garage door leaves. In some cases, the frame does not need to be dismantled, but it is necessary to free it from the clamps that hold it in the wall. These can be metal pieces of reinforcement that are driven into the holes. It will be easier to lift if brickwork is used as a lintel at the top of the frame. In this case, it will be enough to remove one or more rows. Everything will depend on the required lifting height of the garage door frame.
If there is a concrete lintel above the frame crossbar, then more effort will have to be applied. When using a standard element, it will be possible to raise the gate by about 10 cm. This is due to the fact that concrete is located at this level, and then reinforcement comes. You will need a hammer drill with a long drill bit. The diameter of the drill is selected to be 10 or 12 mm. The grinder marks the line along which the drilling will be carried out. It must be horizontal and located directly under the reinforcement. Holes are drilled in a row without a large gap. The next step is to install the chisel and begin beating the upper part of the jumper. Once the task is completed, it is necessary to remove the remaining concrete and level the surface of the lintel.
The next step is to raise the frame to the required height. If the metal fasteners have already been cut off, you need to use a hammer drill and a chisel in those places where the frame is concreted into the wall. It must be completely released and move freely. There are two ways to raise the frame:
- wedges from below;
- jack from above.
In the first case, you need to act starting from the middle. At this point, a strong crowbar is placed and a slow rise begins. You shouldn't start from the edges, because the gate frame will simply jam in the opening. After a slight lift, you need to place wooden spacers under the frame. Then you can move alternately to the left and right edges. As soon as one of them is raised, a wedge is also placed under it. It is worth understanding that the extreme points may be more difficult to give in than the central one. When it is possible to achieve a large gap, one or more rolling jacks are installed in it.
Further lifting is carried out using jacks. In this case, it is important to act synchronously with an assistant or lift to a small level on each jack in turn. You should not try to do everything quickly, because the frame may become warped. If this happens, then you need to lower one of the jacks and tap the garage door frame with a sledgehammer. The operation can be performed in another way. If it is impossible to place spacers and a jack under the frame threshold, you must do this under its top crossbar. Jacks in this version are mounted as shown in the diagram above. High stands made of beams are made under them. A board gasket is placed on top of the head to prevent slippage. The garage door frame must also be raised evenly.
After such an operation, in most cases there is no need to digest the gate hinges, since they are mounted in their usual place. The question arises in relation to the lower part of the gate, because a gap is formed there equal to the height of the frame. It can be closed by welding sheet metal onto the gate. It is also suitable for forming a threshold that will prevent rainwater from entering the room. The last option is necessary if the gate was initially too low.
We eliminate shortcomings
In most cases, everything can be fixed quite easily by removing the horizontal beam from above. In our situation, there is no load on the beam at all, because the slab itself is installed exclusively on the side walls. This is evidenced by the carelessly plastered plane that is located between the slab and the beam.
Beam on top of garage door - photo
Already in the beam itself there are two holes that are designed to supply electrical wires and fresh air. This fact should never be forgotten during further reconstruction work on garage doors.
Tools we will need:
- — Grinder with a circle for concrete and metal;
- — Medium or high power hammer drill. Power is needed because you need to make holes in a thick concrete wall with possible stones;
- — Semi-automatic welding machine;
- — Sanding machine with several spare belts;
- — Metal sheets and channels;
- — Ten millimeter drill;
- — Five square meters of lining and screws.
But the most important thing is free time and the desire to work.
Repair washers
This option for increasing the height of the valves above ground level can be considered one of the simplest. Repair washers will help in cases where the doors do not open well due to wear on the hinges. With proper skill, you can do the work of installing washers yourself. In this way, you can usually raise the sashes by 1 cm. To implement the idea, washers of the required thickness are selected or a selection of several elements is made. The hole in the washer must be such that the hinge rod can fit freely into it. The washer must be lubricated on one side only. The second should be fixedly fixed on the loop.
The main reasons for changing the geometry of the gate or opening
General fatigue of the metal, subsidence of hinges, natural deformations upon completion of installation, subsidence of the opening (the frame in which the gate is mounted) for various reasons, some other factors (for example, in hot, cloudless weather a couple of years ago there were problems with thermal deformations of metal structures).
External reasons independent of the material part. We bought a taller car - it doesn’t fit the dimensions, we made a mistake in the lower gap - in winter the gate is extremely difficult to open, one of the walls of the garage sank more, which caused the opening to skew, and others that are sometimes difficult to foresee.
In each of these cases, the decision is made individually, but we will consider several simple methods that are available if you have a simple tool with an assistant.
Threshold level
This option for increasing the height of the gate with your own hands does not involve dismantling the gate and is one of the simpler options. It is worth noting that it can only be implemented if the height of the threshold is sufficient and there is a small margin. You should not resort to this method in the case when the lower part of the frame is almost at road level. To implement this plan, you will need to install horizontal struts that will temporarily fix the frame. The gate leaves are opened and the lower part of the frame is dismantled.
You should not throw it away, because this element will be used in its place. For the next step, you need a jackhammer or a powerful hammer drill. It will be necessary to knock down part of the concrete threshold. After reaching the required level, the lower part of the gate frame is welded into place and the horizontal struts are removed. You can start filling the threshold with cement mortar.
Gate trimming
This method is the simplest and most undesirable. It can be implemented only if the total height of the gate is quite large and you do not plan to buy a large car. The method of cutting the gate is used only when it is necessary to understand the level of the threshold so that water does not get inside. For work you will need a grinder. The first step is to separate the sheet metal from the sash frame at the bottom. The bottom crossbar is completely cut out, but will be needed later. After this, it is necessary to determine at what height the gate will be trimmed.
Using a chockline or a thread with paint, the line along which you want to make the cut is marked. Using a grinder, the lower part of the sheet material of the gate is cut along the marked line. This, in principle, can be done in weight, but the best option would be to completely dismantle the sashes and make the cut in a horizontal position. In this case, there is less chance of biting the canvas and causing injury. After trimming each sash, it is necessary to weld the lower spacer into place. Next, the gate is mounted in its place and the threshold is filled. A video about three options for lifting the gate is below.
As you can see, in some cases, lifting the gate is necessary due to certain circumstances. It can be done in several ways. Some of them can be combined to achieve optimal results. Another way to raise the gate is to replace the sash version with a roller version. In this case, the gate will rise rather than slide apart. In this case, before installing the gate, you can expand the opening to the required dimensions.