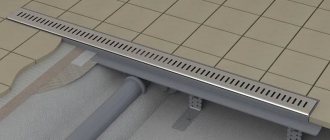
After completing the installation of the shower stall, the cracks around it should be carefully sealed. Special sealants are used to seal holes. They come in different compositions, each of them has its own positive and negative sides. Before buying such a product for your own needs, it is important to familiarize yourself with its characteristics and method of application. This will allow you to choose the most suitable option, which means high-quality sealing of the multifunctional plumbing fixture.
To ensure the proper condition of the bathroom, after installing the shower stall, it is necessary to seal all joints Source vseovanne.ru
All the nuances of installing a shower cabin:
Buying a shower cabin:
First of all, check the integrity and availability of all components (this is especially true for shower cabins ordered online).
Pay special attention to the integrity of the glass, check the cabin for scratches and chips, and review the instructions (they must be present). If there are any shortcomings, do not sign the documents under any circumstances; you have every right to ask for a replacement.
If you sign the documents before thoroughly checking the contents, then subsequent claims are practically useless; in 98% of cases, customers trust the supplier, which they take advantage of by loading broken or incomplete shower cabins into their cars.
What tools and materials will you need:
Tools:
- Adjustable wrench (Swedish)
- Phillips-head screwdriver or similar screwdriver
- Small diameter drill (not available on all models)
- Silicone extrusion gun
- Small flathead screwdriver (needed when tightening small bolts in faucet levers)
Necessary materials:
- Silicone antibacterial transparent
- Two Mama-Mama hoses, 1.5 meters each (optimal length)
- Transition to sewer diameter 32/50 (may not be needed, look at the corrugation of the siphon)
So, the cabin has been delivered and its integrity has been checked. Let's start installation.
Universal scheme for preparing communications
This assembly scheme is suitable for almost all shower cabins, for example, using this scheme you can assemble a shower cabin measuring 80 by 80 centimeters, 90 by 90 centimeters, 100 by 100 centimeters.
General diagram of the shower cabin assembly
Assembling a shower tray with your own hands 2 Options:
Option #1:
Sort through the numerous boxes (everything is labeled). Find the shower tray. Carefully open the box with the shower tray, there you should find the following elements: the tray itself, the tray apron, the tray frame, the studs that will hold the legs, the brackets for the apron, numerous nuts, screws and a siphon.
If there are no elements, then there must be a box in which all this is located.
- Remove the protective film from the pallet.
- Then we turn it over and place it on a previously prepared large piece of cardboard, which will prevent scratches from appearing on the pallet left without a protective film.
- We take out the frame; if the pallet frame is not on the pallet itself and it does not need to be assembled from many elements, then we place it on the pallet so that the holes on the frame coincide with the fastening inserts on the pallet.
- We take four large studs, the diameter of which is usually 10mm or 12mm (which is rare, you're in luck =)). We tighten the nuts and place the washers as you see in the next photo.
- Once you have screwed two nuts onto all the studs, as shown in the photo, screw them into the mounting inserts, first cleaning the holes from excess acrylic and tape.
Precautionary measures:
- Be careful when touching the bottom of the pan; you may be injured
by the sharp, unpolished surface.
- Then put the frame on the studs, the frame should touch the tray a
. Next, tighten the nuts from above; there should be no gap between the pallet and the frame.
- Lightly tighten the nuts with an adjustable wrench. First the top nuts to hold the frame to the pallet, then the bottom ones.
- Do not overdo it - the frame is thin, it can bend and then the rigidity of the structure will be broken and the cabin will be unstable.
- Choose from a variety of screws that match the number of holes and length (profile height + 5mm) for fastening the frame to the pallet. We place the frame evenly on the mounting bulges with mortgages and fasten it with screws.
Installing a shower screen (apron):
- First remove the protective film from the apron and install the apron along the façade perimeter of the pallet. Take the brackets and screw them onto the mortgages; they are secured with two screws of suitable length.
- After that, take the brackets for attaching the apron to the top of the pallet (small white or black, bent in the shape of a question, or steel - there is always a lot of fuss with them).
- Then, screw nuts and put washers on three or four studs located on the facade. Place black brackets in the shape of the letter “L” with a perforated short side on top, then put washers (if any) and screw the nuts on top.
Frame option No. 2:
- We assemble it as in the photo. The only rule is to first fold it without twisting it
(try it on) so that the mounting plates with holes are on one side. Tighten without applying any force. The profile bends and loses rigidity. Also, a nut that is welded rotten may fall off.
- All operations are basically similar to the first version of the pallet. Only “hemorrhages” in the additional assembly of the shower cabin frame with your own hands. In order to quickly and evenly screw in all the studs to an equal depth in one plane, I used to use a tape measure, measuring the distance from the floor to the end of the stud, and then the legs.
- It is better not to measure from the body of the tray; it is rare to come across even shower trays, and especially even ones at the bottom. Now I have improved the method using a laser level. Everything is done much faster.
Important:
- Be sure to adjust the fit of the bottom of the apron to the brackets (the main thing is perpendicularity and normal curvature of the circle). Then it will be very difficult to do...
How to seal
In order for the DIY sealing process to be carried out correctly, you should use special equipment, which most often comes with sealant. We are talking about a so-called gun, into which a capsule with sealant is inserted, and the force is transmitted from the trigger through a special design to the piston. This allows the sealed mass to be applied in an even layer without breaks along the entire joint length. But before doing this, you need to degrease the surface, completely and very thoroughly clean it of dirt and dust particles to ensure a reliable connection of the silicone to the edges of the degreased surface. It would not be superfluous to apply an antifungal composition to prevent any formation of fungus or mold at all.
The speed of hardening is influenced by the following factors:
- thickness of applied sealant;
- temperature;
- moisture level in the room where work is being carried out.
Considering the last two factors, you should not use the bathroom for some time so as not to increase the humidity and temperature in it before carrying out work. Once the required area has been sealed, experts do not recommend using the shower for a while. As stated, silicone-based caulk is the ideal solution for protecting joints during shower stall installation. It is easier to handle than acrylic sealant, and its properties will be better. And the affordable price indicates that it is better to choose this type of sealant.
If we move directly to the sealing process, then shower cabins should be siliconized either during assembly (each connection) or after installation (all joints that have formed). It is necessary to carefully apply the sealant to areas that are already sealed with cords or rubberized gaskets. It is necessary to process the joints in such a way that the places where the parts are attached to the structure with screws or bolts are on the outside of the sealant strip.
Sealing should be carried out according to the manufacturer’s instructions.
, which clearly and step-by-step describes the entire process. And at each stage, silicone must be applied to all joints and joints.
Processing of seams should be carried out as carefully and very carefully as possible. The substance should not come into contact with the internal parts of the shower box, bathtub or tray. A small amount of sealant will be enough for any corner. If you are not confident that you can carefully apply silicone, then some places, and especially those located next to the seal line, can be covered with masking tape. This will protect them from accidental contact with sealant.
When all work is completely completed, the tape can be easily removed.
If suddenly you accidentally stain some unprotected place, then the fresh composition can be removed with a piece of cloth. Once the sealant dries, it will be nearly impossible to remove without damaging the surface.
When all the joints inside the shower stall are treated with silicone or other sealant, and the structure is fully assembled and secured with all fasteners, it is necessary to conduct a general inspection of the shower stall from the outside. You should inspect it very carefully for the presence of excess sealant on the outside.
If such excess is found, you should carefully wipe it off with a rag or piece of cloth.
Next, you need to give the sealant time to dry.
As a rule, its drying time is indicated on the tube. When it is completely dry, then you need to check the structure for leaks. To do this, simply turn off the drain and collect water in a pan or on the floor to a certain level, and then drain it. While drawing water, you will be able to understand whether the shower stall is leaking in the most important places. If such a leak is discovered, then in order to eliminate it, you will need to replace all the sealant already applied with a new one. It will be pointless to use sealant specifically in places of leakage, since it will not form a single tenacious mass. This solution is temporary. But sooner or later a leak will appear in this place again.
Installing a shower siphon:
- We install the siphon, find the lower plastic part and the upper steel part. We place one rubber gasket with a larger concavity at the top. We silicone it thoroughly. (later I will add other variations of siphons)
- We insert the steel part together with the gasket into the hole for the siphon. Take the second flat gasket and nut. There is a gap on the bottom side of the pan through which water can flow during operation of the cabin. Treat this gap with silicone. Place the flat gasket and screw on the brass nut.
- Apply a thick layer of silicone to the threads remaining after screwing on the nut, and also apply silicone to the internal threads in the lower inner part of the plastic siphon.
- Carefully, along the thread, screw the lower plastic part of the siphon to the steel one. Make sure that there are no distortions in the thread (the thread may break, and a new siphon is not cheap).
- Spread the excess squeezed out silicone over the nut. You can't spoil porridge with oil =)
Stage eight
Door assembly
1.Attach the upper and lower rollers to the doors, with the wheels facing outward
2.Attach the door handles to the holes on the sides of the doors.
3.Using sealant, install the shutters and magnetic seals on the door
4.Install the door stops on the upper and lower cross sections
5.Hang the doors on the upper rollers, placing the wheels in the groove of the cross profile.
6.Snap the lower rollers into the lower roller slot by lowering the wheel.
7.Adjust the rollers so that the shower doors close tightly and move effortlessly along the guides.
Installing a shower tray by level:
- When you have completed all of the above operations with the pallet, you will finally be able to install the pallet in its installation location and adjust it to its level.
- Here, pay attention to this event with special pedantry. On other sites, when viewing the instructions, the pallet is leveled only after installing the upper structure - this is a huge mistake, adding unnecessary complexity to the work.
- After installing all the elements, we will also check the level and make a little adjustment.
- And so, you have done a great job! You can go smoke (smoking is harmful to your health), drink tea or sip beer (just not a lot) =)
- Yes, by the way, you should not connect the siphon to the sewer system yet, because during further installation the cabin will move more than once.
Recommendations from professionals
- To make the structure rigid, the kit contains bolts and nuts instead of self-tapping screws. During installation, the hoses rotate on the nut even if the nut is squeezed out.
- The use of a fine filter and a safety cut-out device will increase the service life of the product.
- Before installing the central pillar, you need to assemble everything and attach it with 2 screws from below. Only then do you need to tighten the rack and secure the roof.
- It is necessary to carefully select products, as there are fakes. Unscrupulous manufacturers of cheap factories use water and chalk during reinforcement, which is prohibited. This is how voids appear between the reinforcing layer and the ABS sheet. You need to check the quality of the product: you should stand on the pallet. If cracking appears, this indicates a poor quality product.
The goods comply with the technical requirements that apply to manufacturers producing products for delivery to EU countries. The products are created in accordance with the sanitary and epidemiological standards of the Russian Federation. The product package includes a description of installation and assembly. The factory provides a 1 year warranty.
Installation can be ordered from specialists at Erlit brand centers. Then the consumer receives not only high-quality work, but also an additional 1-year warranty. The manufacturer supplies components and spare parts for 10 years.
Assembling the shower ceiling:
Lamp Installation:
- First of all, it is convenient to assemble the roof after the pallet (this is my personal opinion). To do this, we find a lamp, an epic shower (humorous joke), a cooler, a speaker and decorative covers (the configurations are different, all this may not exist) - all this stuff usually lies in a separate or common box.
- First of all, remove the protective film.
- First, we thread the wire into the hole that is completely suitable in size and shape.
- Be sure to check your work. The lamp must be well secured using steel spacers.
- To prevent the speaker from rattling, you can apply sealant around the circumference, just a little bit.
- We find 2 decorative, usually round, grilles.
- Ceiling screws usually come in one small bag. They can be identified by the required quantity and by trying on the length.
- It is better for you not to use a screwdriver, but to screw it with a screwdriver. Otherwise, you can damage the socket into which the screw is screwed.
Fan (cooler) installation:
- The screws for the cooler should protrude 5 mm from the case, if more, then look again... .
- In order to quickly hit the holes with this action, you need to thread the screws through the cooler, hold the screws with your palm so that they do not fall out, and insert them into the holes. Then place the grate. This method is the fastest.
- The main thing is not to twist it, I think you succeeded.
Adviсe
- If you don't want to buy a caulking gun, buy sealant in tubes.
- Do not try to fill large (more than 6 mm) cracks with sealant. For this, use a dense insert (wood, plastic, etc.) or a special waxed braid. Fill the gap with sealant over the insert.
- Plan to apply the sealant in one go. If you take breaks and come back to apply the sealant again, it will adhere unevenly, thereby creating points of moisture penetration and mold growth.
Installing a rain shower in the shower ceiling:
- The nut must be screwed onto the thread and tightened lightly; on the reverse side, check the symmetry of the location; if you need to move the rain shower, then first loosen the nut a little, and then tighten it again.
Assembling the frame for installing shower doors:
Option #1:
- We find all the frame elements. It is presented from the following elements: two semicircular profiles and two vertical ones; 8 stainless steel screws.
- We begin to assemble the frame for the cabin doors; it consists of two semicircular profiles and two straight ones. To do this, we find 8 screws of suitable length and assemble it.
- This is the time to think and carefully examine these elements, because if the door frame is assembled incorrectly, further assembly is impossible.
- Semicircular profiles usually have stickers on them indicating where the profile should be located. " Up
" - upper, "
Down
" - lower. But the main criterion that guides our master is not the stickers at all, but the position in the space of the recesses for installing enclosing glass.
- With straight profiles, the situation is simpler - in the lower part there is a square-shaped cutout for more tight installation of the profile to the edge of the pallet.
- Then, having figured out the location of the elements, we begin to twist them. The screwdriver is placed at approximately " three
“, take the screws and begin to twist these elements.
- If you have difficulty getting the screw you put on the bit into the frame hole (the screw slips and falls), take silicone and apply silicone to all the screw heads - this usually helps.
How?
Any waterproof sealed mixture can be used. For example, antibacterial or aquarium. The composition of most mixtures is quite homogeneous:
- Silicone-silicon (synthetic) rubber.
- Hydrophobic filler (water repellent).
- Plasticizer.
- Fungicide (against mold and bacteria).
- Catalysts.
- Thixotroping agent.
Pan sealing
May include:
- Organic solvents.
- Fillers.
- Extenders.
Thixotropy shows the ability to take pore seams at different angles. This is achieved by achieving the desired consistency and thickness. So that the glue adheres equally well to a plane at any angle in space. The fungicide kills mold well. It is better to choose a neutral silicone adhesive with a maximum content of synthetic rubber. Organic solvents have a strong, unpleasant odor. They are sold in tubes, extruded by hand or with a pistol, leveled with a spatula and cost from 150 to 200 rubles per unit.
Butyl, acrylic and polysulfide sealants are widely available on sale. The optimal temperature range for coating is from 5 to 40 degrees Celsius. The glue tube should also be kept at room temperature for some time. The seam is leveled using a spatula soaked in water. The drying time of the joints depends on the thickness of the application. The speed ranges from 2 to 4 millimeters daily and depends on the manufacturer and composition.
Acrylic sealant is widely used to seal cracks in wood. Here are some properties of this class of materials:
- high degree of adhesion to wood, concrete, polymers (PVC, acrylic);
- high resistance to solar radiation;
- is an insulator not only of moisture, but also of heat;
- high thixotropy;
- good plasticity even after drying;
- of all other compositions it is characterized by maximum plasticity.
The shrinkage of acrylic (to ensure competitiveness) is reduced by a special filler. Ideal for wooden structures whose dimensions change according to weather conditions, especially ambient temperature. Since acrylic dissolves well in water, it serves as the basis for the glue.
Assembling the frame for installing shower doors:
Option #2:
- The arrow indicates the upper semicircular profile or there is a sticker with the word “ UP
”
- The main difference between this option is the method of fastening the profiles together.
- They are held together with such cunning Chinese clamps - you can see it here in the photo.
- It is necessary to loosen it three turns, for this we find a hexagon, which the caring Chinese included in the kit. We twist, as always, counterclockwise.
- We connect them as shown in the photo.
Important:
- Do not overtighten and align the edges
. If these damn things are broken, there will be a lot of sadness.
- The assembly algorithm for such a frame, like the first option, is quite simple.
- If you are embarrassed by the instability of the structure, then you should not pull the bolts. The structure will become rigid when everything is in place.
- Next, take the rubber door movement limiters, as shown in the photo. They may be different, but this is not important, the main thing is to understand the principle that I will outline in the following information.
- Others “by appearance” must be placed with a semicircular recess to meet the vector of movement of the cabin doors, but in a simple way - they look towards the door.
- On the one hand, they limit the door so that it does not crash or fly off the guides, and on the other hand, so that the doors close. First we thread short screws into them so that they stick out from the stopper to a length of no more than 3 mm.
- If you insert the wrong screws, you can seriously screw up and damage the front profile in the most visible place. The solution is to look for screws of suitable length.
- We screw them into the holes that are located on the semicircular profiles in the recess where the door rollers will slide.
- By the way, about sliding. Here's my mega advice - lubricate the rollers with grease or other thick, high-quality lubricant. There is always lubrication in luxury cabins. Your doors will always open with effortless ease.
Pfft, how important:
- The holes must be located synchronously on both profiles. This can be checked even with a regular tape measure.
- If the Chinese drilled differently, don’t do anything about it for now. Then, when it comes to installing the doors, I will guide you. The screwdriver can be set to “one” or it is generally better to tighten them with a screwdriver.
- Because of this jamb, which an inexperienced installer misses, the doors fly off the shower stall.
- And the clients are told the following: “You bought a crappy cabin, I don’t know what’s wrong!”
Assembling the walls of the shower stall is not difficult, the main thing is patience and accuracy... .
- We begin to complete the walls and enclosures of the shower stall. Usually there is a watering can, holder, mirror, shelf, etc.
- The most important rule for a beginner is try it on, think about it, twist it, don’t overtighten it
. This rule always helps me out when I come across an unfamiliar shower stall configuration.
Types of sealant
For those who are encountering such work for the first time, we will give a little information. A sealant is a substance in the form of a paste or a very thick gel, which contains a polymer, filler and various targeted additives.
This product, as the name suggests, is used to seal various connections. It is used in many areas of repair and construction work. For example, with the help of a sealing compound, the joints of windows and doors with the corresponding openings, as well as connections of water pipes, seams between tiles and much more are treated.
Naturally, the composition is slightly different for each purpose. But most often it is based on silicone, which is not surprising. This substance has water-resistant qualities and also perfectly withstands exposure to ultraviolet radiation, which is important, for example, for the same window openings.
The sealant also has an antibacterial effect, so it works great in the bathroom. After all, a sanitary and hygienic room has many requirements for cleanliness. Therefore, a sealing compound is used there when installing each element, be it a shower corner, faucet or toilet drain pipe.
In addition to silicone, the sealant also contains a plasticizer, a catalyst and various additives. The latter are various useful substances that serve specific purposes. For example, a fungicide is needed to prevent mold or mildew from growing in humid conditions. This is exactly what is needed in our case.
When choosing a sealant, you need to focus both on the presence of the necessary additions (for example, the same fungicide) and on the quality of the composition. You should not take the cheapest variety, since such a sealing layer will have to be constantly updated. So it’s better to spend money once, but protect yourself from an endlessly repeating repair procedure.
You should also pay attention to what type of silicone sealant it is. It can be neutral or acidic. Both composition options are perfect for our purposes. But the acidic one has a not very pleasant aroma, which does not dissipate for quite a long time. But neutral has no smell at all.
Assembly of the central panel:
- We assemble the central panel if it is disassembled. No need to roll the square one =)
- It is very important to place a decorative cover, which is correct in the photo. We are guided by the pictures that the people of one very numerous country have carefully depicted for us.
- The handles of the lever mixer are installed using a small mounting bolt with a flat-head screwdriver, or there is also an option with a small hexagon, which is most likely included in the shower cabin kit. If you don’t have it, a set of bits will save you .
Best answers
Grandfather Stupid:
Good fresh cement diluted in liquid glass. In general, the sealant should not come off. Two options: when they smeared it, didn’t degrease it, or the cabin was shaking, it came off.
cement =)
errare humanum est:
There is white - then you can’t get it off. I didn’t clean it when I scored it - it’s still there in chunks (((
Michael:
There should be no sealant there; if there should be, then it should be covered with moldings and overlays. Silicone is applied to the parts of the cabins that are joined together, at the junction with the wall
Gugumot:
What the hell are you... oh, you didn’t buy sealant. When I sealed mine, I first degreased everything, and then went over it with sealant. It's been 4 years now that nothing has happened with the sealant, I haven't missed a drop.
Beauty:
my husband said to use a ceramic border, apply tile adhesive, and grout it... once it dries...
valli:
Special epoxy resin with synthetic additives using special fiberglass
Hydromassage assembly:
- Typically, all spare parts for a hydromassage shower are tightly rewound in shipping bags in the central panel. Well, or in a box.
- In order not to mess up, we initially find the only one and unique nozzle
. It only has an inlet fitting, and there is no hole in the outlet
- The photo shows the “end” hydromassage nozzle. In order to assemble everything correctly the first time, if you read carefully, so that the mixer and mode switch are already assembled correctly. Otherwise, there will later be problems with displaying modes for switching functions of the shower cabin.
- Oh, by the way, one more mega tip - during operation, twist it less (usually children twist it), it breaks very often, because it’s crap. The simplest one is very expensive.
- The finger shows the mode we need. Now knowing which output goes to the hydromassage, you will accurately connect everything correctly
- This photo shows the correct location of the starting and ending jets of a shower cabin hydromassage.
- Insert the nozzle into the hole and tighten the nut. By the way, we don’t mess around, we don’t forget to put the washers, otherwise everything will come loose later.
- You don't have to pull with the key, you just have to turn it with a handle. After installation, you should get the same thing as in the picture.
Important
:
- The smelly Chinese hose must first be used for hydromassage in order to be enough.
- Then connect a regular watering can.
- Lastly, we connect the rain shower with the mixer.
- It would be better to change it altogether to our Russian oxygen one.
- We put the hose on the desired fitting and put the other end on the fitting of the initial nozzle. Then we connect all the injectors according to this principle. For pedagogical reasons, I will repeat, it is important to save the hose and not make a reserve - it may not be enough.
- The main thing is not to allow very sharp bends. Because of this problem, the injectors may not work the same way.
- If it turns out differently than in the photo, call a plumber
out of harm’s way (just kidding), re-read the article and
redo it as it should .
GO to Part No. 2
Characteristics
Manufacturer of Erlit shower cabins - HANGZHOU LIAONA SANITARY CO. The products are in demand in the markets of Europe, the USA and Russia. The manufacturer skillfully responds to consumer requests, takes into account market requirements, thanks to which it produces reliable products. This allows you to keep sales at a high level.
Etlit produces more than 100 cabin models. In form they can be:
- rectangular;
- corner;
- asymmetrical.
The parameters of symmetrical views are 800-900 mm on both sides. Some shower enclosures have roofs. Some models have a mirrored wall and seats. The water supply function works thanks to brass faucets and ceramic cartridges. The shower can be an overhead tropical shower or a hand shower with a watering can. It is very convenient to use.
The trays of shower boxes vary in depth; they are made of high-quality acrylic. Their outer part is treated with special polymer materials, making the products rigid and protected from cracks. The frame is made of galvanized iron, which is not damaged by corrosion. Along the perimeter of the pan there is a side and drains that protect against leaks. The bottom, which can withstand 150 kg, is non-slip due to the corrugation.
Case and sash glass with a thickness of 5 mm is tempered using a special technology, resulting in a reliable material compared to sheet glass. The cabin can withstand temperature changes associated with the use of a steam generator. The glass can be either frosted or tinted. The cabin doors are sliding, they have a magnetic lock, and rubber seals on the sides. Lighting is provided using LEDs. As you can see from the reviews, Erlit shower cabins are easy to use at home. At an affordable price, it becomes possible to make bathing more enjoyable.