Recently, consumers often prefer not the usual bathtub, but a shower stall, in which they see more advantages . But when installing it, not everyone follows the recommendations of specialists.
This is where problems arise: mold forms at the joints soap stains appear , and water does not drain well.
In our article we will give 3 effective ways to eliminate the problem of slow drainage caused by improper installation of the shower stall.
Pros and cons of a tile shower
Although today in plumbing stores you can choose the furnishings to suit any interior style, homemade shower stalls do not lose popularity.
The main reasons are the bulky dimensions and the impressive cost of truly high-quality factory products. Budget options are most often made of inexpensive plastic and with cheap components, which soon manifest themselves in all their glory in the form of frequent breakdowns. Some of them can be eliminated with your own hands, but to repair individual elements of the shower cabin you will have to turn to the experts.
The color design of plastic cabins is quite sparse - most often they are produced in white or silver, while ceramic elements will allow you to decorate the shower enclosure in the same style as the bathroom
Additionally, many cabins are equipped with all kinds of electronics - from a radio point to a steam generator, lighting effects and a Charcot shower, the need for which is very doubtful, but they significantly increase the cost of plumbing.
In addition, factory products are manufactured according to a standard size range, which does not always fit small rooms in country houses or apartments of old buildings, where every centimeter counts.
Factory cabins are demanding on the evenness of floor and wall surfaces, and when making a homemade shower, these errors can be eliminated during the construction process
Therefore, a homemade tile shower has a number of advantages:
- Reliability and simplicity - the design with ceramic lining is much stronger than the plastic walls of standard shower cabins, so it will last a long time.
- The opportunity to create an original design - in addition to the shape of the cabin itself, you can experiment with its design, because the range of mosaics, tiles and porcelain stoneware is very diverse.
- Safety and environmental friendliness - ceramics do not conduct electricity and do not emit unpleasant odors (unlike some types of plastic).
- Easy care - it is easy to care for the tiles, they do not turn yellow, do not require detergents and can be easily cleaned of limescale deposits from hard water and soap stains.
There are not so many disadvantages to a tiled cabin (of course, if its installation is carried out according to all the rules and in compliance with the slope). Mostly they note poor sound insulation, which can be solved by laying an additional layer under the screed or installing a ready-made pallet.
Also, many people think that taking a shower while standing on a cold tile is not very comfortable. But in fact, ceramics quickly heat up under a warm flow, and if desired, a “warm floor” system and an additional heat-insulating layer can be installed under such cladding.
Selection of materials
If the main parameters of the shower tray in the bathroom (location, height, type of drain) are determined, it is important to choose the right materials for construction. The main options are:
- installation of the finished pallet on legs, concrete base, brickwork or other types of “bed”;
- raising the podium to the required height using slab materials (OSB and others) and legs or masonry (filling) supports;
- creating a monolithic or brick (block) pallet.
The first option is convenient because it minimizes work and allows you to adjust finished walls without additional effort. The second provides access for repairs in case of leaks or other problems. The third guarantees maximum strength of the podium, but makes it difficult to fix a leak or replace a drain.
The materials used are:
- a ready-made pallet of any configuration, brick or aerated concrete blocks for supports, or concrete and formwork for constructing a monolithic bed, a shower drain, tiles or a ready-made facade for external finishing;
- timber or metal profile for the frame, moisture-resistant board materials for the podium, waterproofing, shower drain, finishing materials;
- cement-sand (cement-expanded clay) mixture and boards (moisture-resistant plywood) for formwork, shower drain, waterproofing, finishing materials. When laying a bed of bricks (blocks), you will need a certain amount of cement-sand mixture to level the base for the tiles.
Let's consider three options for constructing a podium for a shower stall, which is completely created independently (without a ready-made tray).
The preparatory work for all types of pallets is the same. The floor of the bathroom is cleaned of all contaminants, leveled as necessary, and waterproofing is installed extending onto the walls (height 10...20 cm, where the shower stall is located, waterproofing is installed along all walls to the height of human height or more). For concrete (reinforced concrete) floors and walls, the option of penetrating waterproofing is convenient; more information about this method of protecting structures from water can be read in the article “Waterproofing the basement from the inside.”
Video reviews of plumbing fixtures with a grinder
Shredder pump for hidden installation:
Golden rules for installation and types of SFA shredder pumps:
Sewage pump GRUNDFOS SOLOLIFT2:
Toilet grinder pumps are practical and very effective equipment. Their use allows you to install plumbing fixtures at any distance from the sewer riser and even lower them into the basement floors, where they will be below the level of the sewer main
In order for the device to work without interruption, it is important to correctly calculate its power and install the device correctly.
Installation and connection methods
Siphon for shower tray
First, calculate the height of the podium so that a good drain can be formed. The sewer pipe is installed 6-8 cm below the pan. This will prevent the occurrence of a siphon effect (in which water does not leave the pan). The shower tray should be no closer than 25 cm from the walls - the podium should be 25 cm wider than the tray on all sides.
Drain device
This element of the shower stall is built into the podium. For the correct drainage device, it is advisable to provide in advance a place for its installation. When the drain pipe is installed, it is waterproofed.
Laying the podium
Most often, this structure is made of brick; good appearance and efficiency are the main differences of this material. When laying, think through the design of the drain channel in advance. The tiles are laid on the brick after connecting the sewer system and checking the functionality of the structure.
This is especially important when installing a hydromassage shower cabin, since high-performance pumps are used. Ground and install protective electrical devices.
Installation Features
To ensure proper drainage of water and prevent splashes from hitting the walls, a tray and a special curtain made of material that is not afraid of moisture are installed. Factory shower enclosure models are equipped with a tray made of plastic, metal or even stone. However, the plastic version turns yellow over time and may burst; the metal tray is susceptible to corrosion, and stone specimens are very expensive.
The most profitable project will be a do-it-yourself shower corner, which will not only save money, but also realize individual preferences. A significant stage is the arrangement of the drain. There are several ways to install a sewer structure. The size of the pipe is selected taking into account the interval from the bathroom to the sewer riser. It must be remembered that the height slope is taken to be at least two millimeters.
If the height is low, provision should be made for raising the floor level for camouflage. You can also install elements in the wall, hiding them in a special box. Next, the sewer pipe is extended to the center of the pan, proper waterproofing is ensured, a drain is installed and the placement of the pipe is adjusted.
The need to create a podium
The drain pipe in typical bathrooms is located above the floor level, which causes difficulties when installing a shower stall. The sewer line must run with a slope along its entire length. This way, water will not stagnate in the system. Improper installation of drainage equipment can lead to blockages and leaks. To create the desired slope, use a podium.
Another purpose of the structure is to decorate the room. The correct choice of material allows you to create a design that is in harmony with both classic and modern interiors.
The shower podium is also used to zone the space. It also gives the cabin greater stability.
Main works
Installation of doors, frame and other elements is also carried out in stages:
For the installation of door and frame structures, special fasteners are used that do not interfere with the aesthetics of the booth. To create a practical and reliable shower enclosure, do-it-yourself installation of the frame and its fastening to the floor and ceiling is done using dowels
The horizontal elements fixed in the wall are fixed to the support pipes. Then the location and type of door is selected, which can be central or side type. The most reliable door structures in this case are products made of glass, as well as acrylic or plastic. Installing the door requires attention and care. It is necessary to carefully place the rollers of the structure into the guide grooves and check their sliding. The locking mechanism is also checked for the presence of cracks and smooth opening over the entire movement area.
Requirements for covering a shower area without a tray
The requirements for the coating of the shower area are great, since in this room, due to the slippery floor, there is a high probability of an accident.
An important safety condition is the choice of high-quality non-slip flooring.
The tile must be non-slip and treated with a special coating. If desired and possible, you can lay the floor with tiles made of natural or artificial stone. But the problem is that it is thin - 3-4 mm. This leads to the following requirement - the thickness of the laid tiles in the shower should be 8-10 mm, and the adhesive coating should be 4-9 mm.
Tiles are often used for durable flooring.
Choosing a shower drain
For showers without a tray, the choice of a drain that collects used water and directs it to the sewer is very important. The comfort of taking a shower directly depends on the efficiency of the drain, so the issue of choosing this element must be approached with the greatest possible responsibility. Shower drains are divided into several categories depending on the material of manufacture and location in the stall.
Two materials are used to make ladders:
- Plastic
. The most popular option. Plastic ladders are used almost everywhere. Among the advantages of this material, it is worth highlighting first of all its resistance to aggressive substances and good mechanical strength. In addition, plastic is easy to clean and lightweight, making it easier to install the shower. Plastic shower drains are equipped with siphons that prevent the spread of sewer odors. - Stainless steel
. Stainless steel drains are mainly intended for installation in rooms where there are special sanitary requirements. Otherwise, such products have all the advantages of stainless steel - high strength, easy installation and reliability.
Depending on the type and location, drains are divided into two categories:
- Spot
. When using point drains, drainage is carried out due to a funnel-shaped hole connected to the sewer, to which the slope must be directed. The dimensions of such drains are small, which allows them to be installed anywhere in the shower stall. - Linear
. The most common type of shower drains. The popularity of this option is mainly due to the very high drainage efficiency. Structurally, a linear drain is a tray or gutter, which is covered with a plastic or metal grill. There must be a slight slope to the tray located along one of the walls of the shower.
In addition to the types of drains already described, there is also a wall-mounted option, which is a kind of hybrid of point and linear devices. Wall drains are complemented by a wastewater receiver, which must be built into the adjacent wall. However, such devices are more expensive, so they are rarely chosen. For small showers, point drains are used, but in all other cases, linear systems are the best option.
Shower drains made from high-quality materials, if installed correctly, can withstand loads of up to 300 kg. The temperature of the water in the drain should not exceed 85 degrees. Standard drain performance ranges from 8 to 15 l/min. If it is necessary to drain a larger volume of water, drain-trays with a length of 30 to 120 cm are usually used, the throughput of which reaches 40 l/min.
Advantages and disadvantages of a shower on the floor
A modern solution is a stylish shower cabin without a tray on the floor.
Any new trend has its advantages, otherwise why was it created?
- Safety. An important parameter, since accidents often occur in the bathroom. Here you won’t have to step over the high side of the pallet. It simply doesn't exist. Very convenient for children and elderly people, most of whom have problems with their feet. And a healthy person can easily slip when leaving the cabin.
- Save time. When you buy a shower with a tray, you have to additionally purchase various accessories and components. In some models, for example, the tray comes separately. And if it is not available, you need to go shopping and look for it. Or order, which is also not fast. In this case, everything you need for installation can be found in any hardware store. The only components are identical walls and doors. Everything else is easy to pick up.
- Space saving. Not many bathrooms can boast of large footage. Having thrown out the bathtub, on the contrary, you want to save space, and not clutter it from floor to ceiling. Here, in addition to taking up minimal space, you can also visualize free space with the help of glass shower walls. The effect of transparency seems to enlarge the room and “lighten” the glass shower cabin without a tray.
- Easy transportation. It is easy to load thin walls and doors into the car, as well as a separate kit. That's all. There are no modules with unnecessary programs, no pallets, no roofs. If delivery is to your home, then it will not be difficult for the movers or the owner himself to bring everything to any floor. This saves money on delivery and additional inconvenience for workers.
- No tray or roof. It is very convenient for tall people, who, when entering the shower, hit the ceiling with their heads, or even rested against it when they washed. In addition, it is easier to wash the structure later due to the minimum of parts.
- Long lasting service. Tile is a fairly durable material and is difficult to break. While an acrylic tray can easily be damaged by, for example, a shampoo bottle that falls out of your hands. Yes, and additional shower stall options may gradually fail, which will lead to the repair of the module, and this is an extra waste of money.
- A unified bathroom style from which the shower can stand out. The floor tray may not match the color scheme, etc. At the same time, a cabin without a pallet can be easily installed in a room to match if its walls are transparent. Or tinted, which also will not stand out from the uniform design.
A shower cabin without a tray is a convenient and beautiful solution, but it also has its drawbacks.
Nothing can be ideal, and a shower cabin without a tray has its disadvantages:
- Serious preparation of the room before installing the shower. In order for the drainage system to work smoothly and the water to drain downhill, you need to prepare the floor in the room. Ideally, it needs to be “drowned” a few centimeters. This makes it difficult to install a cabin in an apartment - but everything is possible with special skills.
- Lacks all the convenient features found in tray booths. For example, the same hydromassage or sauna. But they can also be installed separately in the booth, if desired.
- To avoid sewer odor, you will need to install a siphon. And this is additional work.
- In old apartments, the tiles were not laid particularly evenly, so you will have to redo the floor so that water does not stagnate in puddles in curved areas and it is dry. The same applies to the walls in the bathroom. Everything must be perfectly level initially or leveled before installation work. Otherwise, the cabin will not be airtight. If blockages form in the pipes, water can seep into the bathroom area and flood the apartment.
There are, of course, more advantages than disadvantages, but the latter are quite noticeable and require labor-intensive work. If specialists get down to business, they will install everything from preparatory work to launch.
Installing a shower cabin without a tray requires effort, but the result of high-quality work will certainly please you.
It is worth understanding in more detail what are the significant differences between a stationary shower cabin and a cabin with a tray:
- Installation. When installing cabins with a pallet, you will have to work hard, but if you follow the instructions, you can install it in a couple of hours in any convenient place. While stationary cabins without a pallet require lengthy installation and preparatory work.
- Options for sauna, hydromassage, radio, etc. built-in only in a booth with a tray. When purchasing, you can choose the desired set of functions of the shower module and purchase everything ready-made and complete. But in a cabin without a pallet, everything will have to be built in separately (if desired).
- Care and cleaning. A cabin with a tray is more difficult to wash due to its design and additional parts. And in a regular cabin it is enough to wipe the walls and floor.
During the installation of a cabin without a pallet, it is imperative to treat all surfaces and hard-to-reach places against the occurrence of fungus and mold, so as not to experience discomfort with their appearance in the future. It is better to work in advance than to remove bacteria later.
Types of cabins and equipment
It is worth immediately noting that all types of shower cabins differ in shape, materials of manufacture and method of installation relative to the bathroom space. Let's look at each type in more detail:
Open cabins
In this case, the wall will be the wall of the room itself. The complete set of this type of shower stall includes only a door, a tray on which a person stands, and a shower head. The option is quite simple and does not have any additional features. Mostly such models are installed in the corner of the bathroom.
Of course, their main advantage is cost. This cabin is the most budget-friendly among all those on the market. It is also possible to construct a cabin of any size that will be necessary for comfortable use.
Their main drawback is the difficult repair of sewer and water supply units. Open models do not have an upper base, that is, a roof. Thus, a “tropical shower” is not possible in this case. A regular shower head is used, which is connected to the mixer.
This type of shower stall is intended only for just washing, but not relaxing under warm water.
Pallets are needed to collect water and also drain it into the sewer. According to their shape, pallets are divided into corner and rectangular.
When choosing it, first of all pay attention to the depth, which is divided into:
- Deep or high pallets. Very similar to a small bathtub, in which you can sit and draw water.
- Medium size pallets. They are considered the most universal and are used much more often than other types.
- Low pallets. They are quite compact. They are often called flat. This is due to the fact that they are practically invisible. Such pallets require special techniques for installing water drainage. Otherwise, problems may arise and the water will not go down the drain.
The most common pallets are made of acrylic.
You can also find products made from other materials:
- cast iron;
- steel;
- earthenware;
- from artificial marble;
- natural stone.
As a rule, the most popular and frequently used is the acrylic tray. It is durable, easy to maintain and inexpensive.
The most expensive is a pallet made of natural stone. Its main advantage is fast heating. As a rule, the tray retains heat for a long time, which makes your stay in the shower more comfortable.
Walls are essential components of a shower room. Their main function is to protect against the ingress of water, which can extend far beyond the cabin.
The raw materials for the production of doors are plastic, glass or aluminum. Glass doors are the most popular. They are presented on the market in two versions: frosted and tinted glass.
The standard equipment of the shower stall includes the following elements:
- pallet;
- back panel;
- roof;
- racks.
Closed models
They are the most common option. Every second person who prefers showers can find this type. It is characterized by closed walls and is a separate small room. An enclosed shower cabin also has a door, a tray, a roof and a shower head.
Additional functions are built inside that are necessary for a comfortable shower. If desired, you can install a water heater and even a radio. The main disadvantage of this type of shower cabin is the cost, which is higher than the market average.
Much depends on the manufacturer, as well as the material from which the booth is made. One of the main advantages of such models is good sound insulation. Advantages also include additional features, variety of models on the market and quick installation.
Why is this necessary?
In terms of design, the podium plays an important role as a space delimiter, which is used in adjacent bathrooms, and can simply highlight different elements, for example, a bathtub or shower. In the brave hands of a designer, there are opportunities to build a bathtub into a podium, create a Japanese-style bathhouse, or something like a Turkish bath (see also the article “Wooden shower cabin - how to build a structure on your own”).
There are many materials used for the construction of the structure, but only three were used. The most affordable is natural hardwood, followed by solid baked brick masonry, but the most durable is considered to be a cement monolith.
By and large, it is possible to use any materials, the main thing is that they have sufficient strength, durability and are reliable for health. The choice depends entirely on the owner’s decision.
Advice: if you want to know how to raise a shower stall without a podium, then certain solutions have been invented for this. One of these is installing the structure on an iron frame. This method is only suitable for some models; please check this issue with the store.
How to make a podium for a shower enclosure
Let us remind you that such a platform will be needed for products that do not have room for a siphon and for those that need additional reinforcement. For example, for thin-walled acrylic models. The structure must be installed after all communications have been installed and pipes have been connected.
Concrete
- Place the product in the installation location and outline it with dotted lines.
- Add 2-3 cm to the outlined lines.
- Remove the floor covering in the designated area and prime the screed underneath.
- Cover the surface with a layer of waterproofing: coating, impregnating or pasting.
- Build formwork of the desired shape and, if necessary, a frame made of reinforcement. Separate the drain area with drywall or boards.
- Prepare a solution of cement, sand and water at 30-40°C in a ratio of 1:3. You need the consistency of thick sour cream.
- Pour the mixture into the formwork, leaving space for the cabin and level the surface.
- Spray the prepared area every day if it hardens too quickly.
- Treat the surface again with waterproofing.
After three weeks or a little earlier, you can continue work. A step is sometimes added to high platforms with deep bowls. It is also made from concrete. The concrete formwork itself is finished with mosaics, tiles, waterproof plaster or painted with silicone paint.
Instagram @remontistroy.ru
Instagram @art__objects
Instagram @ivanmaslovspb
Instagram @nikolaileshcuk
Instagram @nikolaileshcuk
Instagram @konstantinseleverst
Brick
Brick, like concrete, is not afraid of moisture. It is durable and easy to install. Instead, you can use foam blocks and aerated concrete.
- Circle the location of the cabin with a pencil or marker, adding 2-3 cm.
- Dismantle the floor covering in this area, prime and waterproof it with any material.
- Make formwork of the required height from brick. Build steps if necessary.
- Seal off and close the drain to prevent fill from getting into it.
- Prepare cement-sand mortar in a ratio of 1:3 and fill the site.
- Flatten it and wait for it to dry. Afterwards, remove the drainage barrier.
- Waterproof the site.
Instagram @master_remstroy.ru
Instagram @svet_a_r_t
The work process can be simplified by using only bricks or foam concrete blocks. They are laid out around the perimeter, as well as in the middle, so that the acrylic bottom stands on a support and does not sag. The blocks are fixed to the floor using tile adhesive.
Concrete podium
Sometimes it is best to make a structure out of concrete. This strong, durable material is not subject to deformation and the destructive influence of time. Before developing a concrete elevation, we need to place a pallet in its place, outline its contours with a marker, adding a couple of centimeters on all sides, remove the pallet and start diluting the concrete composition.
Before pouring the solution, you should remove the tiles in the height setting area, if there are any, install a waterproofing layer, make a frame of iron reinforcement and formwork. Then the concrete will take the required shape and cracks will not appear on its surface. Then a place for the upcoming drain is selected.
For the solution, take one part cement, three parts sand and three parts crushed stone. Water at room temperature is added there until the consistency of sour cream is thick. The prepared system for elevation is filled with solvent, taking into account the space for the tiles and how the surface will be laid out. You will need to leave approximately 25 centimeters for it. After pouring the mixture, the layer on top is leveled.
Now is the time to wait 2-3 weeks so that the podium under the shower stall is ready for subsequent work, such as installing a drain system, sealing joints and cracks. Then the drain structure is checked and the tiles are laid. The drain must ultimately be located at the level of the built elevation. When the work is completed, you can install the shower stall.
Stages of installing a barrier tray for a shower with your own hands
Briefly summarized, the process is as follows.
- The base is prepared, all necessary exits and openings are marked.
- Install an exit to the sewer and a drain.
- Bricks or blocks are laid and formwork is made.
- They insulate and waterproof. Water protection is done in several stages. First, the floor is treated with mastic in several layers. After this, the thermal insulation film is laid out.
- Pour a layer of screed.
- The finished product is decorated and finished.
Please note that there are no standards or strict guidelines for the size of showers. The most optimal option is considered to be a square option with a side of 80 centimeters.
But you can choose any frame shape: square, rectangle, triangle, polygon. It is also possible to make an intricate tile shower tray lining with your own hands. Experiment! This is precisely why the option of self-production is valuable. And in order to more clearly imagine the whole process, we suggest watching a video on the topic.
Preparing for work
First of all, all distances are measured, marked and a drawing is made. This is necessary so that when laying pipes there is no mistake, which will result in frequent blockages and slow drainage.
The old finish is dismantled, the floor is leveled and impregnated with a primer. At this stage, it is necessary to remove places for the sewer outlet; the slope from them should be at least 2 centimeters. It is advisable to choose a straight pipe, without bends. The angle of connection with the sewer should be about 30 degrees. Choose a drainage system about 50 millimeters in diameter.
To more accurately regulate the position of the drain, it is recommended to fill in the rough screed.
Instagram @pravremont.ru
Instagram @pravremont.ru
Ladder installation
It is better to place the ladder in a corner, where it will experience less stress when walking, which means it will last longer
It is important to install it strictly horizontally. You can check this using a building level
The ladder is placed on pre-equipped brick stands, after which everything is filled with cement mortar and left to dry for a day. To prevent dust and debris from getting inside, the structure should be covered. To prevent it from moving while the solution dries, it is better to tuck the drain with a stop, for example, with the remains of building materials.
Formwork
After the ladder is installed, measurements are taken for the formwork. Formwork is made from boards, plywood, leftover plasterboard or brick. Lay materials according to the previously prepared dimensions of the future pallet.
Instagram @pravremont.ru
Instagram @pravremont.ru
Installing the first layer
The surface is covered with a layer of special mastic, covering part of the wall at the bottom. The height is calculated using the formula: thickness of the concrete layer plus 20 centimeters. Do not leave gaps, as moisture may accumulate in them.
A 10-centimeter layer of mortar consisting of sand, expanded clay, water and cement is poured into the formwork. Then they are strengthened with additional supports, and damper tape is stretched along the walls. If you use brick, you need to add plasticizers to the bonding solution. This will make it more elastic and interact better with water. Both the first and the finishing screed must be reinforced; for this, an iron mesh with cells of 10 millimeters is laid out on the floor.
Instagram @toughbuilder
Instagram @toughbuilder
Installation of thermal insulation
The insulation layer comes after the first screed. Its thickness should be about 50 millimeters. The joints are treated with a waterproofing solution. The insulation is laid on a concrete pad, the joints are filled with sealant. The tray is heated using mats that are held together with staples. The film is stretched along the base with a slight overlap onto the wall. After this, you can pour the final layer of screed.
Instagram @toughbuilder
Instagram @toughbuilder
Screed and final finishing
The screed solution is made semi-dry, using as little water as possible. This mixture is spread in a small layer before laying the tiles. The level is worth noting in advance. All work should be carried out with moisture-resistant compounds: treat the joints with a water-repellent solution, and grout the seams between the tiles with a hydrophobic mixture.
Entrancemakleri
Instagram @slab_design
So, we gave step-by-step instructions and showed a photo on how to make a shower tray. Arm yourself with tools and materials and get down to business.
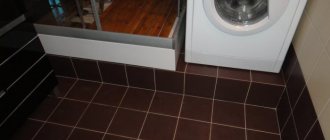
Save space
The most extreme way was to abandon the bathtub, instead of which a drain was installed directly in the floor and a shower mounted on the wall was installed. In order to protect the rest of the space from splashing water, the shower area was separated by a plastic curtain. The freed up space could be used to store a washing machine and install a cabinet.
With the advent of various models of shower cabins on sale, owners of small apartments first of all paid attention to them. Since almost at the same time they began to actively purchase automatic washing machines, it became necessary to allocate space for the installation of this useful unit. There was no room in the small kitchen, where it was difficult to accommodate a stove, table and refrigerator.
Stylish interior thanks to glass
The only possible option that could be used for this purpose was to change the interior of the bathroom, replacing the usual bathtub with a compact shower. For the majority of homeowners, the opportunity to have free space in the bathroom has become an incentive to abandon bathtubs in favor of showers.
If you look at the photos in the catalogs of companies selling plumbing fixtures, you can see how diverse the design of shower cabins offered to customers is. They vary in appearance, size, and functionality.
The most rational purchase option (since we are talking about a small-sized bathroom) would be to purchase a compact semicircular shower stall, with the help of which the interior will become more modern, and the room itself will have enough space to install a washing machine.
Choosing a pallet
Manufacturers offer the smallest tray size for shower cabins, which determines the area of space it occupies, 70 x 70 cm, but you should not expect special functionality from such a shower device. If it is possible to allocate an area of 90 x 90 for a cabin, then together with the cabin you can get a hydromassage, a device for foot massage, a sauna, programming the water temperature and many other “useful things”.
In the photo you can see that the depth of the tray also varies. If there is no bathroom in the room, a deep tray in the shower stall will be very useful. It can be used for minor laundry, soaking clothes, and some even use it for bathing small children.
If you successfully select a shower cabin by color, choose a beautiful and comfortable design for its doors, and a successful design of the appearance, then it will radically change the entire interior of the room, turning it into a modern and stylish bathroom.
In modern bathrooms, instead of a traditional bathtub, there is often a more stylish and original option - a shower made of tiles without a tray.
And this is natural, because homes are becoming more and more functional, and designers offer a variety of interior solutions for them.
What types of showers are there?
Since the times of the Soviet Union, the plumbing industry has made huge strides forward. The stores have a huge selection of all kinds of devices to maintain hygiene. Even shower cabins are available in several types:
- shower boxes;
- with deep tray;
- with low tray;
- combined with a bathroom;
- corner;
- country houses;
- spacious.
Shower boxes
This type includes sealed cabins with a roof and walls. There are multifunctional and simpler cabins, varying in shape and size. Walking inside, you get the impression that you are in a separate room. In order for the box to function, a water filter must be installed.
Shower stalls with deep trays
Cabins equipped with a deep tray have recently become especially popular. They are very convenient, as they combine the functions of a bath and shower. Their sizes are varied, but the choice should be dictated by the dimensions of the bathroom. The current size of a shower stall of this type is meter by meter.
Low tray cabins
This type of device does not have a roof; the walls of the booth fit tightly to the walls of the room. The only thing you can do in such a cabin is take a shower. You won't even be able to sit down. The shapes and sizes of these devices are very diverse.
Cabins with bath
This type of cabin will suit all family members. There is no tray here - neither deep nor low. Instead, an acrylic bathtub is installed, the height of which reaches forty-five centimeters.
Angle view
This species is shaped like a triangle. If you love convenience and practicality, then this is exactly what you need. You can save room space, but still feel comfortable inside.
On sale you can find a good selection of ready-made shower cabins for installation in summer cottages.
Spacious cabins
If saving space is not your thing, then a design of this size will look beautiful in any large bathroom.
Shower in niche
This is the ideal way to position a shower. Pros - easy maintenance, easy to fit into the interior, you can save on arranging the fence. After all, it’s enough to install a door or hang a curtain to protect the rest of the room from splashes. Moreover, in a small room it is best to separate a niche with sliding doors. Built-in recesses in the bathroom are rare in apartments. Most often, homemade partitions are created in the room.
Scrubber dryers are universal assistants. They are used both in everyday life and in businesses. With the help of professional cleaning equipment, cleaning areas is easy and quick, and the result is always at the highest level!!!
Stylish design of a shower in a niche
Corner shower design without tray
Shower design without a tray in the house
To assemble the shower cabin you will need the following tools
The shower cabin is not included in the package!
- Sealant (with application gun)
- Screwdriver
- Drill Ø1-3mm
- Phillips screwdriver
- Pencil
- Pliers or wrenches
- Level
According to the manufacturer, some shower cabins are assembled without sealant. But even for these types of showers, you will still need a sealant. They need to process the shower drain hole, install water traps and magnetic seals, and other small options if available, such as processing the hole for the radio and nozzles.
In all other shower stalls, sealant is required.
With its help, all fixed elements are processed. The joints of the rear wall between the central panel and the pan, the joints of the front frame and the pan, fastening the drain and nozzles, installing seals and water shut-offs.
Glass shower cabins are supplied unassembled, in cardboard boxes. The number of boxes per shower cabin is from 3 to 5 (depending on the manufacturer)
Style and color of shower without tray
Most often, all plumbing fixtures in the bathroom are selected in the same color and style. The room itself is decorated in the same tone, using a maximum of three colors.
A bathroom with a shower cabin without a tray in a three-color design looks original.
It is also better to finish the shower room to match the bathroom itself, unless the design suggests otherwise. Moreover, if the walls of the cabin are made of transparent materials, then the shower room will become a continuation of the room, it will seem transparent, creating the effect of absence, despite the fact that the floor there will be made flush with the entire room.
The ideal solution is a shower cabin, designed to match the color of the bathroom.
As for the mirror, what bathroom functions without this attribute? Even the smallest mirrors are installed in such rooms. The larger the mirror, the wider the bathroom appears. And if the mirror is without a frame, then the effect of increased space is even greater.
A mirror is a must for a bathroom with a shower.
Lighting in the bathroom and shower should be full, without dimming. Therefore, one light bulb is definitely not enough. Several light sources are required, the light must be diffused.
The unusual lighting will add a special charm.
Finishing materials are also selected taking into account the size of the room. For example, small elements do not look good in a small room. Mosaics and small tiles are undesirable here. This finish is good in spacious bathrooms. And in a small one you need large tiles and preferably one-color ones.
Dark large tiles look good if the room is not very large.
If you need to create the effect of increased space, then in addition to a large mirror and large tiles, the shower itself will do a great job. It can be installed in the corner of the cabin, making it more inconspicuous and saving space behind the glass doors.
A shower cabin without a tray is perfect even for a small room.
Drainage device
Before you make a shower corner of this type, you need to think through everything to the smallest detail. The floor in the bathroom lies in the same plane as the bottom covering of the shower stall, and therefore the issue of drainage is quite acute.
At the moment, 2 types of possible water drainage devices under a shower of this type have been invented: using a channel and a ladder. They perform the same functions, but are arranged completely differently.
For reference! If you choose a floor drainage system, the sole itself acts as a tray.
In order to prevent water from spreading around the entire perimeter of the bathroom, you need to design the coating at a slight slope.
It is important to take into account that the ladder network is small in size, and accordingly the floor must be sloped from all edges towards the center of the grid. This point should also be taken into account at the stage of laying the cladding. If the finishing material is mosaic, it will have to be adjusted using specially designed nippers
If the finishing material is mosaic, it will have to be adjusted using specially designed nippers
This point should also be taken into account at the stage of laying the cladding. If the finishing material is mosaic, it will have to be adjusted using specially designed nippers.
Brick pallet lining
Tiling is a complex job and requires care. The tile is durable, but fragile; if handled carelessly, it easily breaks and chips. The masonry algorithm is common, but there are many nuances.
- The layout of the tiles depends on the location of the drain hole. If it is in the center, you need to draw a diagram indicating the location of the kinks. The tiles are cut and sawn according to the drawing according to the size and shape of the resulting fragments. Only in this case will it lie downhill and ensure water drainage.
- The tiles are laid out “dry” , checking how successful the layout is and whether trimming is necessary. It is recommended to number the fragments.
- The flooring begins with finishing the bottom of the shower . The glue is applied to the base with a spatula, leveled and each element is laid step by step in its place. Make sure that the drain grate ends up 2 mm below the tile level.
- After the glue has set, the joints between the tiles are sealed with silicone sealant .
- The sides are lined according to the same pattern. The joints are also sealed with a waterproof compound.
After covering the podium, you can finish the shower walls and install shower equipment.
Nuances of booth installation
Assembling the shower cabin with your own hands must be done according to the attached instructions. The main stages of this work are:
- pallet installation;
- connecting it to the drain;
- connecting the shower to the water supply;
- electrical wiring;
- installation of cabin walls and ceiling panels;
- door installation;
- fastening handles, mirrors and other decorative accessories;
- sealing seams.
At the time of final installation, all inputs and outputs must be securely connected to the appropriate components of the structure, and the correct functioning of the electrical system must be tested.
An important point in the process of assembling a shower cabin with your own hands is to achieve full compliance of the design with safety regulations. This is especially true for a hydromassage shower cabin, where pumps and compressors are used for injection. The shower stall should be grounded and equipped with a residual current circuit breaker.
Shower drain Connecting an instantaneous water heater to the electrical network How to repair a crack in a shower cabin Foam generator for washing Toilet bowl for a country toilet Corrugation for a toilet bowl Do-it-yourself outdoor shower (drawings) How to install a water heater in a bathroom Do-it-yourself shower cabin assembly Steam generator for a shower cabin
Optimal shower sizes
The size of the shower depends on two factors: the size of the room in which the cabin will be installed and the height/weight of its visitors.
If the size of the room allows, the cabin can be fenced off by more than a meter in length and width. You can install two shower heads or a shower plus a sink there. It all depends on the needs and wishes.
For a large bathroom, you can install a shower cabin with several shower heads.
If the bathroom is small and the cabin is planned to be installed in place of the former bathtub, then there is not much choice here; they even install a glass corner cabin in order to save space.
A standard shower stall takes up little space.
In addition, in order to install a stack, you need to raise the floor in the shower area by at least 10 cm. At the same time, the cabin itself will rise, which is difficult in apartments with low ceilings.
The height of the cabin can be different - up to the ceiling or covering a person’s head.
The shower stall does not have to be up to the ceiling.
How to make a base
Specific materials and technologies must be selected taking into account the overall thickness of the concrete. In our case, the layer height exceeds twenty centimeters, which is quite a lot. To simplify and reduce the cost of work, we offer the following technology.
- Up to the level of the junction of the drain pipe with the sewer pipe, you can make a screed from cement-sand mortar with expanded clay. By using expanded clay, the amount of cement is reduced, work is simplified and the floor under the shower is additionally insulated. The solution should be prepared in the following proportions: one part cement, one part sand and two parts expanded clay. Water as needed.
Formwork, corrugated cardboard along the walls
Filled with expanded clay mortarFilling with liquid solution, leveling
- A layer of waterproofing is laid on top of the hardened solution, and on top is a slab of extruded polystyrene foam approximately five centimeters thick.
Thermal insulationThe cracks are covered with agrofibre. You can use simple tape
- The last layer is a cement-sand screed for ceramic tiles. The thickness is approximately five centimeters, it is advisable to use a semi-dry solution. It is much easier to work with it, it is possible to save materials and time. In addition, such a screed has two more advantages: a low thermal conductivity coefficient compared to ordinary concrete and a short hardening time. Ladder reinforcement
Reinforced screed
Mark lines on the wall along all layers; there is no point in following them exactly, but such marks will be useful for orientation.
Important. Before pouring the solution, be sure to waterproof the joints between the floor and walls. Use any existing materials and technologies for this. Practitioners recommend using liquid mastics and special waterproofing tapes made of non-woven materials. Their cost is insignificant, and their efficiency is at the appropriate level.
Before starting pouring, you should carry out a set of special construction measures to connect the drain; we will discuss them below. The base must be completely hardened before the top tile can be laid.
Screed
Frozen screed
How is the drain connected?
Before starting construction work, carefully study what parts the ladder consists of. This knowledge will help you correctly resolve issues that arise during pouring and avoid mistakes when marking.
Step 1. Using a tape measure, determine the exact location of the ladder.
Determining the location of the ladder
You need to measure the height of the ladder
It is advisable to install it in the middle of the shower, but with certain adjustments. We have already mentioned above that the edges of the ladder must rest against the edges of the tiles, otherwise great difficulties will arise when cutting them. And the cut tiles in the center of the floor look very ugly.
Practical advice. If the tiles in the room have already been laid, and only the area under the shower remains to be completed, then the position of the drain must accurately take into account the location of the tile joints.
Don't forget about the slope towards the ladder
Cut tiles should be placed near the walls, where they are not so noticeable. If you cannot match the position of the outlet pipe of the drain and the sewer pipe, this is not a problem. Due to the rubber seals, the device can be slightly moved in one direction or another.
Are these adjustments not enough? The problem will have to be solved by bending plastic pipes. How to bend them? Gently heat the plastic pipe with a hair dryer around its entire circumference, constantly monitoring its temperature with your hand. Once the plastic becomes soft, begin to slowly bend the pipe in the desired direction. Make sure there are no sharp bends. Hold the pipe in the desired position until the plastic cools. In order to speed up the cooling process, the pipe can be cooled with a wet cloth.
Step 2. Make formwork for the ladder. It can be made from OSB board, plywood or moisture-resistant plasterboard. Before production begins, temporarily connect the assembled drain to the sewer pipe and install it in place. Take the dimensions of the formwork. The distance between it and the elements of the ladder should be only a few centimeters. This technological distance is required to facilitate the final installation of the drain.
Making formwork
Knock down the formwork with small nails or self-tapping screws; the height of the formwork should be several centimeters higher than the diameter of the pipelines connected to the ladder.
Putting together formwork
Step 3. Place the assembled formwork on the ceiling, check its position using the lines drawn on the wall. To prevent the structure from moving during concrete pouring, it is recommended to fix it. You can drive several nails or dowels around the perimeter, the main thing is that the formwork does not change its location during work.
Installation of formwork
Step 4. Prepare a cement-sand mortar. If possible, use expanded clay as additional fillers; if not, then fill with one solution. Pour it in turn on each side of the formwork and carefully level the plane with a trowel.
Preparation of the solution
Pouring the solution
Leveling the mortar with a trowel
Step 5. Check that the filling is correct and allow time to harden. The time depends on the composition of the solution used; in most cases, work can be continued a day after the end of pouring.
The solution should dry
Step 6. When the solution has hardened, dismantle the formwork. To do this, use a hammer to carefully beat off the formwork parts one by one, trying not to damage the fill. If during dismantling it is discovered that the solution has often not reached the minimum strength, stop dismantling and wait another day.
Dismantling of formwork
Important. If the room is very warm and dry, then the solution should be moistened generously with water every day. Without water, chemical reactions cannot proceed optimally, and the solution will never gain the planned strength.
Step 7. Install the ladder in the prepared place, check its position.
Laying the ladder, checking its position
Most devices have height-adjustable legs, which greatly facilitates installation of the equipment. Connect the drain outlet pipe to the sewer pipe. The device includes a plastic pipe for these purposes. Measure the required length and cut.
Pipe length marking
You can cut with a grinder with a metal disc or a hacksaw. After cutting, be sure to remove the burrs and make a chamfer. Burrs are cut off with a sharp knife; they can be chamfered with a grinder. Hold it in one hand and carefully press the end of the pipe against the flat surface of the disk with the other. Rotate the pipe constantly until a chamfer is formed. There is no need to be upset if the width of the chamfer is not the same around the entire circumference; this parameter has no meaning. The chamfer is needed only to ensure that the rubber seal is not damaged when connecting the elements. Before joining, the surfaces should be moistened with soapy water or any oil used.
Cutting a pipe with a hacksaw
Practical advice. In some models of drains, the pipes are connected with glue, this somewhat simplifies the installation process. There is no need to make chamfers; the ends of the pipes are lubricated with glue and inserted into each other.
Applying glue (on both sides of the pipe)
The pipe connects the drain and the sewer outlet from the wall
Step 8. Cover the surface with waterproofing. It can be purchased separately, but there are options for completing devices with waterproofing. Level the surface of the material, be sure to bend it at the junction of the floor and walls. The height of the hem should be 1–1.5 cm lower than the plane of the ceramic tile.
Step 9. Check the tightness of the connections. To do this, pour water into the drain hole, wait a little and inspect all connections. The water should completely go into the sewer pipe, and the surface under the drain elements should remain dry.
Waterproofing flooring and checking the tightness of connections
Checking the reliability of leaks
Step 10. Trim off excess waterproofing, taking into account the height of the hem. Make marks at the extreme points and use the end of a mounting knife under the ruler to remove excess. Attach the bends to the wall with waterproofing mastic and allow time to dry completely. The length of the overlaps at the corners must be at least 10 cm.
Trimming excess waterproofing material
Applying mastic
Bonding waterproofing to the wall
Step 11. Insert a plastic cup into the drain.
Manufacturers specifically make its height with a margin, which allows, if necessary, to reduce the element. Using a level, determine the slope of the floor plane and adjust the glass to the required height to ensure the required value. Cut with a hacksaw, remove burrs with a file or knife. Lubricate the outer surfaces of the glass with oil, put on the rubber o-ring and insert the element into place. Cover the hole with a temporary cover. It prevents the solution from getting inside, and is removed after laying the tiles.
Installing a glass in the drain
Trimming excess with a hacksaw
Sealing ring
Fastening the glass
Closed lid
Step 12. Apply marks to the bent waterproofing, along which the screed will be made for the base of the ceramic tiles. Do not forget about the slope, check the markings several times for correctness.
Marking
Step 13. Prepare the screed solution and pour it onto the waterproofing in stages. Use a trowel to level the surface. This is the most difficult operation for beginners. The point is that you need to simultaneously make a slope and divide the square into four identical segments.
Filling with mortar, leveling
How it's done?
- When leveling the mortar, pay attention to the marks on the wall. This is the first line of control. The second is the edge of the ladder; the screed should be about a centimeter below the upper plane.
- Using a level, check the horizontality of the screed along all edges of the area, correct deviations if necessary.
- Using the tip of a trowel, draw straight lines from each corner of the ladder to the corner of the floor. If it’s difficult with your hand, then use any long, straight ruler.
- Using a trowel, slowly remove the mortar on each segment in small portions, trying to remove any existing curves. Keep in mind that you will have to work by eye, do not rush. If you see mistakes, then sketch out the solution again and start all over again.
Screed with slope
Don’t be discouraged if it doesn’t work out the first time, over time you will gain experience and the work will go much faster. At the finish, you can use a special grater; it has one end in the shape of a triangle. If you don’t have such a tool, then select any strip according to the length. The dimensions of the slats should be 1–2 cm smaller than the distance from the ladder to the wall. Place the bar in the center of the segment, let one end rest against the ladder, and slowly move the other to the left/right and level the surface in this way. A small bump near the wall is then leveled with a grater. Everything is fine - leave the base to harden.
Laying finishing tiles
If the base is made with high quality, then there will be no big problems with laying the tiles. Before laying tiles on the floor, finish the areas of the walls adjacent to the floor. The technology is ordinary; to maintain the same width of the tile joints, use standard crosses.
Applying glue with a notched trowel
Gluing tiles to the wall
Next, you can begin laying tiles around the drain. This is where the difficulty arises: you need to trim the tiles at the joints on each segment.
Step 1. First, the second tile is laid. Its angle should lie at a distance of 2–3 mm from the line dividing the square into segments. The distance depends on the width of the seams and is selected in each case individually, taking into account the characteristics of the materials.
Applying glue with a spatula
Laying tiles on the floor
Step 2. Continue laying the entire tile up to the second boundary of the segments.
Step 3. Measure as accurately as possible the dimensions of the tiles that need to be trimmed. Use a cutter to cut off the excess part, check the cutting is correct.
Step 4. Place the cut tile in place and check its position. If it is difficult for you to immediately correctly size the tiles, then first make templates from cardboard. This slightly increases the time it takes to lay tiles, but it allows beginners to avoid annoying mistakes.
The process of finishing the shower floor
Completion of tile laying work
Using the same algorithm, lay all the tiles and seal the seams with grout. Remove the protective element and install the ladder grille. The next day the glue will harden and you can use the shower for its intended purpose.
You need to remove the cover
Installing the drain grate
The shower cabin is ready for use
Using hard material stands
As we have already figured out, lengthening the legs to increase the height of the bathtub is not the best way. Its main drawback is the small area of the supports, which leads to increased load on the legs, as well as deformation of the walls and chips on the enamel of the bowl.
To increase the area on which a fairly massive plumbing fixture rests, you can use stands made of brick, foam blocks or paving slabs instead of legs. The advantages of this method are considered:
- Significant increase in support area . All 4 screw-shaped legs have a total area of no more than 10 cm, and one brick support provides an area of at least 0.3 square meters, making the bath more stable.
Important! With heavy bathtubs made from easily deformable acrylic bathtubs and heavy cast iron models, you need to do exactly this - install them on posts. This is one of the best ways to install hot tubs at non-standard heights. When the bowl is raised on bricks, it stands stable, does not wobble, and does not deform under load.
How to make a foundation
Each site has instructions on how to make a podium from brick and concrete. At the same time, it is somehow forgotten that manufacturers are producing less and less flat low pallets for which this scenario is suitable. Here's what the process looks like:
- Brick is laid out over the entire area.
- Coated with construction mixture.
- Often in the center there is a plate of extruded polystyrene as an additional support for the flat bottom and a heat insulator (so that it is not cold to wash).
Shower box base
We believe that anyone can lay a brick and mix mortar. The siphon is usually built into this structure locally along with the sewer system. The design as a whole is inconvenient because it is difficult to repair and rebuild. What affects if you want to install a shower stall with a tray of a different size or move, and so on.
It was shown above that a high foundation is not required, and it was also said that the height of the podium can be at the level of the lower cut of the smaller diameter adapter closest to the riser. But if you want to increase the level, assemble a frame from polypropylene pipes and place it on it. Don't forget to support the center of the tray so you don't push it with your feet when you wash. The frame made of polypropylene pipes is assembled as follows:
- For each corner, two L-shaped segments are made, ending with T-fittings (tees). One segment is upper, the second is lower.
- The segments are fastened together with vertical pipe sections of the same length as the height of the podium required.
- The four formed structures are connected together using the same polypropylene pipes and serve as the foundation of the pallet.
It is much easier to make a strong support for each leg of the tray, so that the shower stall does not move or tip over. For this, an ordinary hewn board with a rough surface, laid on top of the screed, is suitable. Dealers complain about moisture, which rots the forest, but we ask in response, who would create puddles in the bathroom with their own hands? The cabin has a door, the siphon is sealed with sealant, and sinks are equipped. The puddles have nowhere to come from.
Stable shower tray
Instead of racking your brains over how to make a podium for a shower stall with your own hands, we’ll buy a hewn board 4 cm thick, cut it into pieces for each leg, assemble a pedestal of the required height, adjust it and use it for decades.
Raising to your feet
Often, factory bathtubs come with specialized legs that are attached specifically to the plumbing system. But their length may not always be enough. What to do if the factory legs for the bathtub are quite short? It's quite simple: you should purchase new, longer screws.
At home, you collect 1 leg, and then with it, as an example, you go to a nearby plumbing supply store, or to the market. There you search for and purchase screws with the length and thread size that suits you. Then, upon returning home, you simply replace the purchased screws with factory ones and install them on the bathtub.
When purchasing, attention should be paid to the quality of the product. Do not forget about the load that the legs will hold - this is a bathtub filled with water in which a person is sitting
For excellent durability of the bath, and the safety of your loved ones, you should select only products from trusted companies.
This option will give you the opportunity to raise not only ordinary bathtubs, but also unusual models with artistic legs. Raising the bathtub this way is not difficult, and the new screws will be virtually invisible.
Making a template for the future podium
At the next stage, it will be necessary to make a template for the outline of the bottom of the shower stall. This outline will be used several times, so it is best to cut it out of plywood or a piece of drywall using a jigsaw. You can, of course, just cut it out of cardboard or oilcloth. The most important thing is that it ideally matches the dimensions of the shower tray. Otherwise, you will make a structure, but you will not be able to place the pallet in it evenly and stably. To achieve the required accuracy, you simply need to turn the bathtub over from the shower and place it on the material. Then trace its outline with a pencil and cut it out with the appropriate tool.
Recommendations for use
In order for the shower stall to serve for a long time, it is necessary to take care of it - regularly wash and clean it, ventilate it, and then there will be no plaque or musty smell of stagnant water. It would not be superfluous to periodically check the functionality of all hidden and obvious plumbing parts of the structure.
Special treatment of the seams between the tiles will protect against such unpleasant phenomena as the appearance of black stains, mold, and mildew. It is also advisable that the booth be cleaned after each wash. It is enough to rinse the surfaces first with warm and then with cold water, and wipe dry with a towel or napkin. The main thing is to regularly inspect and thoroughly clean the structure.
When cleaning plastic and chrome surfaces, do not use active chemicals, rough brushes or sponges. For glass surfaces, mirror and glass cleaners are suitable. But for an acrylic tray, a special product would be useful. In the absence of one, a soap solution will help deal with dirt. The enamel tray is more resistant to strong agents. A homemade tray lined with tiles can also be cleaned with strong and even abrasive substances, but it is better to use the latter only in extreme cases.
Keep your shower stall clean and tidy. Change your plumbing fixtures in a timely manner, and then your homemade hydraulic structure will last for decades.
Sources
- https://CozyBlog.ru/interery/vannaya/dush-bez-poddona.html
- https://vestnikao.ru/dushevaya-kabina-bez-poddona/
- https://vvt-stroy.ru/interernye-resheniya/gidroizolyaciya-dlya-dusha-bez-poddona-2.html
- https://arbolit.org/poleznoe/dushevaya-kabina-bez-poddona-na-polu-vse-za-i-protiv.html
- https://stroyday.com/dushevaya-kabina-svoimi-rukami/
- https://stroy-podskazka.ru/vannaya/dushevye-kabiny/svoimi-rukami/
Installation of a shower stand, watering can
Installation of fittings is carried out after all work on the construction of the cabin structure has been completed.
As accessories, you can choose ready-made shower stands; they are a system consisting of a mixer, a watering can and a rain shower head. Such systems are widely available in hardware stores specializing in plumbing equipment.
The final design and set of configurations directly depends on the user’s preferences
The main thing is to pay attention to the quality of workmanship, the material of the parts, and the availability of documentation. It is these factors that influence the efficiency of the system and guarantee its durability.
Construction of a podium on stiletto heels
This option may be suitable for those models of shower stalls in which the tray is installed on a special metal frame with legs screwed into it. These legs are made in the form of long threaded pins, one end of which is screwed into the structural elements of the frame, and plastic stands are screwed onto the other, with which the booth stands on the floor. The threads on the rods allow you to adjust the height of the pallet to some extent, but this is unlikely to be enough to achieve your goal. Therefore, the task of raising the pallet to a greater height comes down to purchasing longer studs of the same diameter and installing them in place of the standard ones.
You may not be able to find hairpins that are the perfect length. In this case, you need to acquire a hacksaw and have the skills to work with it. Using this simple tool, studs of suitable length are cut from a long threaded rod. The plastic stands are unscrewed from the old legs and screwed onto the new blanks. The newly created studs are then screwed to the frame and secured with locknuts.
This is how the studs are located on the shower frame
This work can be done by anyone, as there is nothing complicated about it. You just need to be able to hold a hand tool in your hands. After installing the new legs, all that remains is to level their height and secure them.
Features of the design of shower cabins without a tray
The main distinguishing characteristic of a shower box of this design is the absence of a special tray with characteristic side edges. The cabin of any model is equipped with a shower drain that drains water from the shower head.
When you go looking for a shower box, you can choose the best option among a huge range of models. Modern cabins are divided into several main types and differ in the material used to make the elements and in the configuration.