Drywall sheets are the most popular material used in the renovation process. They cover partitions, level walls, and use them to create multi-level ceilings, niches and ducts for water pipes. The material has high technical characteristics and a long service life. But these indicators are preserved only if the installation of the sheets was carried out correctly.
To ensure that products made from gypsum boards do not lose their original appearance for a long time, the seams between the sheets are taped with reinforcing tape. Read our article about how to glue serpyanka to drywall.
Features of sheet building material
Drywall itself is a fairly durable material, but if the sheet loses its integrity, it begins to crumble and quickly becomes unusable. For this reason, the most vulnerable places of gypsum boards are corners and seams. Over time, they can come apart, crack and break.
If the structure is used in damp conditions, the joints between the plates may absorb moisture and swell. Metal fasteners and screws may begin to rust over time, resulting in red spots appearing through the finish and the owners will have to make repairs again. To prevent this from happening, the seams and corners of plasterboard are glued with reinforcing tape. But before gluing the serpyanka onto the drywall, the joints of the plates are treated in a special way.
Serpyanka selection criteria
Reinforcing mesh (serpyanka) is made of fiberglass and can have different densities and sizes. The main purpose of the tape is to restore and strengthen corners, walls and ceilings. The material has an adhesive side, which makes it easy and effective to use.
Serpyanka prevents old cracks from enlarging and new ones from forming. It perfectly prevents the destruction of seams and corners made of plasterboard sheets.
Before gluing serpyanka to drywall, you should familiarize yourself with the types of material and the scope of application of each option. Thus, for indoor work, tape with a width of 3.5 to 5 cm is produced. The length of the roll can reach 10 meters.
Exterior tape is much denser than the previous version and does not have an adhesive side. It is used in facade work, often fixed in plaster. If the dimensions of the serpyanka for drywall (for seams) do not exceed 5 cm, then the façade varieties are much wider. Such products are produced in rolls of 20 meters. The maximum width of the serpyanka is 25 cm.
Wall decoration
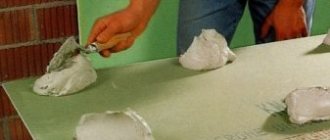
To finish and level the walls, GVL is glued to their surface using putty or glue. If the unevenness on the walls exceeds 20 mm, then 100 mm wide strips of gypsum are first glued to the wall, to which the sheets are then glued using putty:
Here, as in the case of a partition, the sheets are pre-marked and cut, which are then glued to the walls, creating the most even surface possible. If you don't mind the higher price, use waterproof products.
Important! Don't forget to pre-cut holes for sockets and switches. This is easy to do using an electric drill with a circular saw.
Between the sheets we maintain a standard gap of 5 mm (for gypsum plasterboard) or 1 mm (for gypsum plasterboard), which will then be filled with putty.
If the walls are too crooked, or their internal insulation is required, the frame finishing method is used. To do this, the wall is first leveled with a structure made of PS and PN, which are fixed to the surface with dowels or brackets.
The pitch of the racks and the principle of assembling the frame are the same as when constructing a partition, only here each rack and horizontal part are attached to the wall in three places.
After assembling the frame, it is covered with plasterboard, similar to the frame sheathing from the previous chapter. The space between the wall and the sheathing can be filled with insulation.
Among the many interior finishing materials, plasterboard is recognized as one of the most common. This material is a gypsum board of a certain thickness and size, covered on both sides with a layer of cardboard. Such sheets are used to create volumetric structures, arches, leveling walls and creating suspended plasterboard ceilings of varying complexity.
What you need to know before using serpyanka
Fiberglass tape is used due to a number of advantages. These include:
- low cost;
- resistance to aggressive climates;
- high strength characteristics;
- good adhesion to the base;
- resistance to mechanical loads.
When understanding the question of how to properly glue serpyanka to drywall, you should also know its negative qualities. One of them is the weakness of the adhesive layer. In most cases, the tape has to be additionally secured. If you stick it on a dusty surface, there is a high probability that the material will fall off before applying the putty.
If we compare serpyanka with paper tape, it is less convenient when working in the area of internal corners. Masking tape adheres much better in such places, so experienced specialists use fiberglass material only on the outer sections of the sheet and at the joints of the plates.
What tools and materials are needed to process drywall seams?
The reliability of joints and corners made of gypsum sheets directly depends on the correct processing of them. Simply sealing the seams of drywall with serpyanka will not improve the strength of the product; problem areas must first be prepared and treated.
During the work you will need:
- putty knife;
- gypsum based plaster;
- primer;
- paint brush;
- stationery knife;
- serpyanka
You can choose any finishing mixture as a putty composition. Experts recommend giving preference to its Fugen putty. It is very crack resistant, making it an ideal product for sealing joints.
When working with drywall joints, a serpyanka with a width of 50 mm is most often used. Products with large parameters are not used for these works.
When choosing a primer, give preference to acrylic varieties. They ensure maximum adhesion of the putty to the surface.
As for the spatula, it is better if you purchase 2 tools: one narrow (10 cm) for distributing the composition over the working spatula, and the other wide (25 cm) for directly sealing the seams.
Review of manufacturers
There are currently several major brands on the market.
A popular manufacturer producing high-quality mixtures. To seal joints the following are used:
- “Fugen.” Includes three groups of solutions: universal, ordinary and moisture-resistant. The seam is covered in 2 layers, the thickness of each is 1–3 mm. The composition contains gypsum and special modifiers responsible for plasticity. During site preparation, priming is mandatory. Is it possible to putty drywall joints with finishing putty?
A fairly common option, characterized by a reasonable price and good quality. The mixture consists of gypsum and various fillers. It has excellent adhesion, taking into account the composition's lifetime of 35–40 minutes.
For work with drywall and gypsum boards, a variety marked “Seam” is used. The process involves mandatory priming of the joint and thorough drying. Laying is done in two layers followed by sanding.
To seal the gaps between the slabs, a finishing variety is used. A special feature of the product is the need for installation in dry rooms with stable humidity. The mixture contains gypsum and polymer additives. Available in the form of a dry substance, the solution is suitable for use within 50 minutes. The manufacturer indicates the possibility of laying a thick layer, but it is recommended to divide the process into two stages with mandatory preparation.
A universal variety that is also suitable for sealing joints in objects with constant humidity. Due to the fact that polymer glue acts as a binder, it is possible to achieve excellent adhesion, but this increases the drying time (at least a day).
The products of this manufacturer are highly reliable. For DIY work, a polymer variation is used, which can be dry or ready-made, depending on the group. Excellent for damp rooms, drying time – 24 hours.
For puttying, it is better to purchase compounds that have been recently manufactured.
Preparing drywall for work
Before gluing the serpyanka onto the drywall, carefully inspect the assembled structure. Check the seams: there should be a distance of about 1-2 mm between the two sheets. This is necessary so that if the surface is deformed, the structure does not lose its previous appearance.
Pay special attention to fasteners. The screw caps should not rise above the surface of the sheet, but driving them too deep is also not recommended. The ideal option is when the fastener does not protrude beyond the sheet, but its head does not yet touch the plaster layer.
If there are burrs or burrs on the surface of corners and seams, all defects are cleaned off with a construction knife. The final stage of preparing drywall for work is treating its entire surface with a primer. First, clean the sheets of dust with a broom or sponge, then go over them with a brush dipped in acrylic liquid.
Five popular brands
The best putty mixtures are produced outside the Russian Federation or in our country, but using foreign technologies in branches of European companies. The compositions recommended for use by construction professionals include:
Sheetrock APJC. Ready-to-use putty for final leveling of the surface. It is considered one of the best finishing materials, which allows you to provide a perfectly smooth surface of the highest quality.
Does not require pre-mixing. It is characterized by high ductility and durability. The only drawback is the high cost. Supplied in closed plastic buckets of 28 kg. The cost of one package is 1400 rubles.
WeberVetonit JS. The composition belongs to the category of finishing polymer putties. Used for sealing joints and continuous application on plasterboard sheets before painting or wallpapering.
It is a white dry mixture. The putty is plastic, easily applied to the surface without shrinkage and does not form cracks. Can only be used in rooms with normal humidity. Packaged in multilayer paper bags of 20 kg. The price of the package is about 500 rubles.
Ceresit CT 127. Polymer composition of improved quality at an affordable price for finishing leveling. Supplied in the form of a white fine powder, packaged in 25 kg bags. The putty is easy to use, environmentally friendly, and is recommended for preparing walls for wallpapering.
Cannot be used in rooms with high humidity, as well as for sealing deep seams and cracks. The average cost of a package is 550 rubles.
Knauf Fugen. This putty is designed specifically for sealing joints and gluing plasterboard sheets to walls. The fine grinding of the material allows it to be used for a continuous coating before wallpapering.
Belongs to the category of universal materials for performing initial leveling and finishing. To prepare, mix with a small amount of water and leave for several minutes to swell before use.
It is characterized by high strength and economical consumption. It sets quickly, so it is prepared in small portions. Does not lend itself well to manual sanding before painting walls. The maximum layer thickness is 3 mm. The average cost of a 25 kg package is 400 rubles.
Sniezka Acril-Putz Start “2 in 1”. Universal gypsum mixture for puttying work. Excellent for finishing gypsum boards. It is easy to apply to the surface, dries quickly and is easy to sand (we wrote more about sanding here). It is not recommended for painting as it does not adhere firmly to the wall. May fall off when paint dries.
Supplied in closed plastic buckets of 20 kg of dry mixture. The average cost of one package is 360 rubles.
Do I need to prepare the seam itself?
The question of how to properly glue serpyanka to drywall raises conflicting opinions. Some experts say that the joints of the sheets should be pre-embroidered, while others say that this should not be done. How should inexperienced masters act?
The technology for processing drywall seams has two options. In the first case, the sheets really need to be embroidered, but this only applies to those situations where there are two cut edges of the sheet in the seam area.
In this case, the craftsman should arm himself with a sharp construction knife and make a chamfer on each such connection. The knife is positioned at an angle of 45 degrees, the blade goes 5 mm deep into the material. This way the edge is cut off from each sheet. As a result, you should end up with a small seam, the width of which does not exceed 5 mm. After preparation, all joints are re-treated with primer.
If you purchased a concentrated composition, first dilute it with water in the proportions indicated on the package. The finished working fluid can be applied immediately.
Such work is performed only on sections. If you have factory edges where the plates join, there is no need to unstitch such a joint.
Recommendations
Let's consider a few practical tips that will help you carry out the work correctly:
- Do not make the solution in large portions unless you have a mixer. Such a solution will be difficult to mix, so there will be a lot of lumps in it. It is better to make the solution in small but uniform portions - such a solution will be of high quality and reliable.
- Some people place a heating device next to the structure after applying plaster. However, this is not recommended, since the combined effect of the liquid solution and temperature changes can negatively affect the strength of the drywall.
- The prepared gypsum/plaster gradually hardens, and after 30-40 minutes the mixture becomes hard enough to make its application impossible. Therefore, do not hesitate - after preparing the mixture, immediately apply it to the seam/surface of the drywall.
Processing an embroidered seam
If you had to fill out most of the seams between sheets of drywall, then the resulting recesses should be filled with putty. This must be done before gluing the serpyanka onto the drywall.
Pre-prepare the working mixture. Study the manufacturer's instructions for preparing putty, prepare a container and a drill with a mixing attachment. First, water is poured into the bucket, and the powder mixture is poured into it.
Do not mix putty in large quantities, as it sets quickly and is very difficult to work with in the future. Prepare such a volume of mixture that you can use it within 1 hour.
Next, proceed according to the following technology:
- Fill the embroidered seams between the sheets with the prepared mixture. To do this, use a narrow spatula to scoop up the putty and apply it to the edges of the wide tool. Apply the composition with transverse movements, pressing it into the resulting grooves.
- When all the seams are filled with putty, position the putty knife along the joint and begin leveling it flat. To smooth an embroidered seam, putty must be applied in a wide layer (approximately 150 mm in each direction from the joint).
- After the composition has dried, the surface is smoothed using sandpaper and a sanding block.
At this stage, treat not only the seams, but also the places where the screws are attached. Fill all the recesses with putty and, before treating the drywall joints with sickle, smooth the entire surface.
Is grouting of joints necessary?
After the joints on the plasterboard wall have dried, subsequent grouting is carried out. This is what you need to do:
- The remaining stones from the mixture will interfere with subsequent work and may ultimately ruin the appearance of the room.
- Grouting must be done to achieve a smooth surface.
Grouting is done on a dry surface with sandpaper or a sanding machine. For convenience, so that all defects are visible, use a lamp.
After the work, the surface remains smooth and clean.
Tape gluing process
When the putty is completely dry, the surface must be primed again. If you have factory-made edges at the seams, you don’t have to putty them first. In this case, we immediately proceed to installing the tape. Fiberglass tape is attached to the treated seams after the primer has dried.
How to properly glue serpyanka to drywall seams? To do this, take a roll of tape, place it at the top edge of the seam, fix the tip of the tape on the surface and gradually unwind the roll, moving towards the bottom edge of the seam. As you work, press the tape with the adhesive side to the surface of the sheet.
Re-treat the resulting seam with putty and smooth it with sandpaper. The resulting base does not require further processing; you can proceed to the immediate finishing of the walls.
Making chamfers
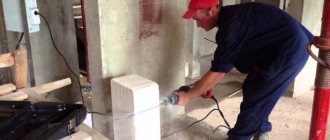
At the joints of plasterboard elements, chamfers must be made in advance. Most standard sheets already have a special thinned edge. But during the installation process, you often have to cut them into pieces, which results in unfinished ends. You can make a chamfer after fixing the drywall with a paint knife, but it is much more convenient to shape them with a plane before fixing.
This photo shows a chamfer cut with a knife after attaching the gypsum board. It turns out not so neat.
This V-shaped recess is necessary to ensure that a sufficient amount of putty gets into the seam. Without a chamfer, even reinforcing tape will not protect against cracks.
How to properly handle corners?
Now let’s look at the question of how to glue serpyanka onto drywall in the corners. Similar processing is carried out on external corner joints of sheets. It is very difficult to glue the internal corners with such tape, since if the serpyanka moves away from the surface in some area, the appearance of the wall will be greatly deteriorated.
To process external corners, a wide serpyanka (100 mm) is used. It allows you to make the surface as durable as possible and prevents cracks from forming in difficult areas.
To carefully stick the mesh onto a corner, unwind a short piece of tape and place part of the tape on one corner. Then carefully bring the rest of the strip over the other part of the corner and press the strip to the base.
Further processing occurs using putty. To make the area as even as possible, purchase a special angled spatula. With its help, you will quickly resolve problem areas with minimal time investment.
Useful tips
To ensure that the work is done efficiently, pay attention to some nuances that affect the final result. Namely:
- When applying the tape, try to avoid overlaps and unevenness. The voids that appear under the mesh lead to cracking in these areas, so try to press the tape tightly against the seam.
- Carefully cut the tape. There should be no protruding threads on the seams. If there are any, treat the edges of the serpyanka with a lighter.
- When sanding walls, store rolls of tape in tight bags. Dust that gets into the skein leads to damage to the adhesive layer, which will negatively affect the quality of the work.
When purchasing serpyanka, give preference to certified products. Its density should be 150 g/m2, and the cell size should be 5 x 5 mm.
Why do you need to seal seams?
Even with the highest quality and correct installation, small seams will appear between the plasterboard boards. They will be visible to the eye, so they will spoil the appearance of the plasterboard structure. But seams need to be sealed not only for aesthetic, but also for functional reasons. If the finishing is not completed, this will be fraught with the following negative effects:
- The drywall base will be uneven. Wallpaper or facing materials will not stick well to it (all bulges and irregularities will be very noticeable).
- There is a risk of cracking the edges of the drywall. Under the influence of temperature, direct sunlight, and humidity, the edges may begin to deform, which will lead to cracking.
- Increased risk of mold formation. If there is high humidity in the room, pathogenic fungus can settle in the seams, which can lead to the formation of harmful mold.