09/08/2021 Wind and moisture protective film is a membrane designed to preserve the internal thermal insulation and external structures of a house; the film allows water vapor to pass through itself and retains air and water. It protects the insulation and the internal parts of the roof and walls from moisture penetrating from outside. Prevents condensation from penetrating into the insulation and inside the roof, inhibiting rotting and freezing, which has a beneficial effect on the protection of the home. Allows you to reduce repair costs. The use of film minimizes heat loss and prevents heat-insulating material from blowing out from under the roof of the house. At the same time, the wind and moisture protective film has high strength, vapor permeability and a water-repellent effect.
When it is necessary to protect the room from steam and moisture penetration
Floor vapor barrier is not always necessary.
Insulation absorbs moisture only when there is a temperature difference, which is observed on the external walls. Moisture condenses inside the heat insulator and turns into droplets of water, which have a destructive effect on the building material. If this does not happen, then it is not necessary to use a protective layer. In warm, damp houses (for example, in bathhouses, heated basements), a vapor barrier must be created. After all, in such buildings warm air with drops of water circulates, which comes out through the ceiling and walls. This leads to the appearance of fungus and mold and destruction of the structure.
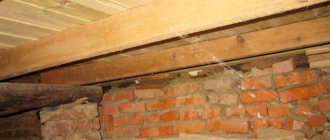
Multilayer structures must also include a layer that is resistant to steam. Ventilated external walls and facades require wind protection. It is provided by an anti-condensation coating, which protects the outer insulation from overload and softens the air flow. An example is a brick building, insulated from the outside with mineral wool and covered with siding. The created barrier prevents the building from being blown through. At the same time, excess moisture is removed from the surface of the windproof layer. Read about proper ceiling vapor barrier here.
What would be good to do, but is hardly possible
It would be great to tear off the outer upholstery, tear off the OSB, tear off the insulation that was under the OSB, and seal everything with clapboard (imitation timber, blockhouse, siding) without any insulation. Then the steam that would penetrate the wall would freely come out of the wall outside, into the cold, and we wouldn’t have any drops. In addition, even if our cotton wool got wet, it would dry out at the first warming. To prevent the cotton wool from flying into the air, you can cover it with a windproofing layer.
But developers are not ready for this, because it is comparable to rebuilding the entire house. So let’s forget this option as good, but impossible due to technical and economic parameters.
Preparing the bathroom for tiling
Those who want to use tiles in a frame house should take into account that simply laying them on the floor covering sheets will not work. It is necessary to attach gypsum fiber board sheets to the surface, and then the finishing can be glued onto them.
Alignment
Frame construction technology allows you to set floors level even at the installation stage. And when covering plywood with sheet materials, you can get fairly smooth surfaces.
However, only flat surfaces can serve as a base for ceramic tiles. This means that if the walls and floor of the room have unevenness, this defect should be eliminated. In addition, if the difference in floor surface heights is more than 2 cm, leveling is necessary by pouring a screed.
Primer
Before applying the primer, it is necessary to clean the bathroom floor and walls to a height of 10-20 cm from debris and dust.
If surface unevenness does not exceed 2 mm, you can begin priming. The base is primed in two layers, with the second layer being applied perpendicular to the first to eliminate gaps. Do not forget that the floor of the bathroom should be lower than the floor of adjacent rooms. Otherwise, a threshold is made at the entrance to the bathroom.
Waterproofing
For wet rooms, it is necessary to take measures to protect building structures from penetration of moisture into their thickness in order to avoid the occurrence of fungus and mold. This is why waterproofing bathrooms in frame houses is so important.
Coating waterproofing is most often used, because such a coating:
- has no seams;
- can be applied to any base, on a damp surface;
- has an inexpensive cost;
- does not require the involvement of qualified performers.
Waterproofing the bathroom of a frame house is done in such a way as to obtain a monolithic waterproof pan consisting of a floor surface and a 20 cm wall height. Additionally, it is recommended to cover the perimeter of the walls with a special tape to protect the most likely areas of cracking of the waterproofing coating.
The material is applied over the entire surface in contact with water. If a shower corner is planned, at the location where it is located, the walls are waterproofed up to the ceiling and 50 cm to the sides from the edge of the shower stall. The same applies if the bathtub is adjacent to the wall. Near the mixer, the composition is applied 20 cm above it, in the same way at the attachment point of the shower head, washbasin and 50 cm to the sides from the edge.
Coating waterproofing can be easily applied with a roller, brush or spatula (the choice of tool depends on the consistency of the composition). When applying the material, empty areas should not be allowed; it is better to apply a coating of 2-3 layers.
When the above work is completed, you should proceed directly to installation. Everyone chooses to do it themselves or entrust it to the masters, but if you have doubts about your own abilities, it is better to turn to specialists.
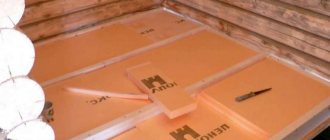
Insulating fill
Applying fill helps smooth out differences in height and unevenness at the joints of wood boards. Upon completion of the pouring, we obtain a homogeneous and durable base for facing work. Also, pouring shows high quality of insulation from water and its creation takes little time.
The raw material for insulating floor pouring is heated bitumen or asphalt concrete. Filling is carried out in several passes. The final thickness of the insulation is 2-2.5 centimeters.
Preparation for pouring begins by cleaning the slabs and sealing the cracks between them. Formwork is installed along the walls. As a primer, apply a small layer of hot solution and allow it to harden.
Next, the next layers are poured, which are best removed from corners and places where water pipes come out of the floor. To distribute the solution evenly, use a notched trowel. It is convenient to remove air bubbles from the thickness of the fill with a needle roller.
How to make a bathroom in a frame-panel house
Details section: How to do
After the construction of a frame house has been erected, the question of comfort naturally arises, and, naturally, first of all the bathroom. Technologies and materials today make it possible to create a bathroom in accordance with any wishes of the customer. Installation and finishing are no different from any other home. But the implementation of this stage has its own nuances. Since the frame house is lightweight, the floors are most likely made on load-bearing wooden beams. If the house design did not include a bathroom, then you should know that there will be a serious load on the floors. It may be necessary to further strengthen the beams. It is first necessary to provide waterproofing of the walls, vapor barrier and ventilation. A frame wooden house has walls made of wood, so it is necessary to treat the wood with an antiseptic and insulate the walls from moisture. Fungal mold is practically not removed from wood. In conditions of humidity and heat, the wall collapses in 7-9 years. After antifungal treatment, the walls can be finished with decorative plaster. This solution will give the walls an aesthetic appearance and additionally protect them from moisture.
- The drain into the sewer should be equipped with the possibility of repair and cleaning. It is safest to hide communications inside the walls.
- The floor should be protected with waterproofing. In the case of a flat and stationary floor, the simplest and cheapest option is to install a linoleum pallet. Linoleum needs to be laid with a reserve using glue and silicone. The margin bends upward. It is much more reliable to make the floor on a screed. The solution is laid on the boards along the reinforcing mesh. Next, waterproofing is installed to cover part of the wall. A layer of mortar is needed on top of the waterproofing.
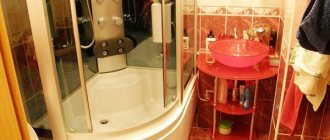
- It is more advisable to place a bathtub or shower stall near a wall so that the load is distributed over a larger number of beams.
- A suitable material for wall decoration is moisture-resistant plasterboard. At the finishing stage, ceramic tiles are usually used.
- Heating radiators are mounted on hooks. There must be a gap between the wall and the radiator to prevent deformation from constant heating.
- The ceiling can be made suspended. It will perfectly hide electrical wiring and ventilation. Electrical wiring in the bathroom must be installed in a corrugated metal pipe.
The key to the absence of defects and a long service life of the bathroom is high-quality materials and the most professional work on the arrangement of the bathroom.
Average cost of work
The cost of installing wind protection depends on the type of material: roll or slab, the type of installation - internal or external, and the cost of the material; the more expensive it is, the more expensive the installation. Average prices across the country for installing wind barriers on wooden buildings are presented in the table.
| № | Type of work | Dimension | Cost, rub. |
| 1 | Installation of wall sheathing under thermal protection made of timber | m2 | 324 |
| 2 | Installation of double sheathing of timber walls for thermal protection, two-layer | m2 | 519 |
| 3 | Installation of Izospan | m2 | 83 |
| 4 | Installation of superdiffusion membrane | m2 | 90 |
| 5 | Internal cladding with wood fiber boards Green Board GB600 | m2 | 286 |
| 6 | ISOPLAAT external cladding on scaffolding | m2 | 486 |
| 7 | External cladding with STEICO Universal board on scaffolding | m2 | 430 |
| 8 | External cladding with Beltermo slabs on scaffolding | m2 | 370 |
| 9 | Finishing the facade of the building with a vinyl blockhouse | m2 | 536 |
Vapor barrier of bathroom and toilet walls
Moderator: Izospan
Vapor barrier of bathroom and toilet walls
Alexey8 » Feb 28, 2016, 11:11 pm
Please advise on a method for installing a vapor barrier on the walls of a bathroom and toilet in a brick house insulated from the inside with mineral wool. The wall between the bathroom and toilet will be adjacent to the outer wall of the house. Now the walls of the bathroom and the insulation in the place of the bathroom have been dismantled. It is planned to make all the walls from GVLV on a 5 cm steel frame filled with mineral wool. The questions are:
1) Is vapor barrier needed only for the outer wall and the perimeter of the bathroom? Those. Do we vapor-proof the wall between the bathroom and the toilet only on the bathroom side, so as not to trap moisture in this wall? Do we not vapor-proof the wall between the toilet and the room at all? We also don’t vapor-proof the room side of the bathroom wall (so as not to trap moisture there), only from the inside?
2) Should there be something to cover the cotton wool where vapor barrier is not needed (toilet-room wall, bathroom wall on the side of the room), toilet side of the toilet-bathroom partition? Or is GVL enough?
3) Vapor barrier material - Izospan FD + FL?
4) How to attach a vapor barrier to a steel frame?
5) Will the vapor barrier work without a ventilation gap between the FD and the GVLV?
Re: Vapor barrier for bathroom and toilet walls
Izospan » February 28, 2016, 11:42 pm
Installing a vapor barrier on the walls from the inside of a wooden house allows you to improve the heat transfer resistance of the enclosing structures and increase the durability of the structure. The key to success is the correct arrangement of layers from the inside out.
Briefly about the main thing
If you don’t know how to install a vapor barrier on the floor of a wooden house correctly, you can find out within a couple of years that it has begun to rot, and the insulation has gotten wet and stopped working. The main rule is not to use impenetrable films that are prone to condensation accumulation for vapor barrier of wooden structures. The material must retain excess moisture and gradually evaporate it. Special films and membranes have these properties, some of which are intended for indoor use, others for outdoor use. During installation, it is important to take into account that such materials are double-sided and to lay them correctly.
Types of vapor barrier and materials for it
There are internal and external vapor barriers Rockwool. The choice of a specific option depends on the area of the walls in the bathroom and the material from which the structure is constructed. If the house has a veranda, then heat loss is reduced. In this case, the costs of creating a barrier are minimized. Protection against condensation of concrete buildings, houses made of aerated concrete and foam blocks is characterized by complexity. This is explained by the fact that such buildings are characterized by high rates of heat transfer and thermal conductivity.
External steam protection is carried out using one of the following methods:
- Ventilated facade.
- Gluing a heat-vapor barrier to the surface.
- Sandwich (wall, thermal insulation, external finishing).
The advantage of these methods is that installation can be carried out at any time of the year. You can process individual areas, joints, corners, without disturbing the architectural appearance of the building.
There is no universal material that is suitable for all types of buildings. Therefore, manufacturers offer a number of anti-condensation products. To buy the most suitable option, you need to familiarize yourself with the technical and operational characteristics of each.
Below are the types of vapor isolators that builders most often use:
- Polyethylene film. The main disadvantage is the creation of a greenhouse effect. Therefore, when installing it, you should take care of organizing high-quality ventilation. Cellophane does not allow air to pass through. Therefore, some craftsmen perforate it before using it (make many holes using a roller with nails). The resulting pores allow water droplets to pass through. Therefore, polyethylene is not the best choice for steam protection. It is preferable to use it for waterproofing.
- Membrane film. It has many small holes through which air passes. At the same time, moisture is retained. There are three types of products: outdoor, indoor and vapor barrier with reflective screen. The most prominent representatives are Izospan and Megaizol.
- Mastic. Suitable for gypsum plasterboard. It allows air to pass through well, but retains condensation. This coating agent is applied before finishing work.
Craftsmen also often use liquid rubber, roofing felt, glassine and aluminum foil, which are highly resistant to diffusion.
Expert advice
When choosing a vapor barrier, pay attention to the recommendations of the experts:
- Glassine is an inexpensive product option suitable for installation in rooms with low humidity levels. Vapor permeability no more than 70 mg/m2.
- Polyethylene film is another budget option. Pass no more than 5 mg/m2 of steam per day. Reinforced materials are better, they are more resistant to UV rays and can withstand the pressure from bulk insulation.
- When laying double-sided polymer material, make sure that the rough side rests on the heat insulator - the smooth surface does not release moisture at all.
- It is better to carry out the work with an assistant, this way it is more convenient to install the tapes of insulating material so that they do not break.
- If you decide that foil material is better, then the vapor permeability of the product is minimal and can be mounted in rooms with very high humidity and temperature.
- Diffuse type membrane products have a throughput capacity of 3-20 mg/m2. Membranes should be laid above the thermal insulation layer.
Knowing everything about vapor barriers, there will be no problems determining which one is better and buying the right amount of material. When choosing the thickness of the sheets, if the insulation layer is supposed to be thick, give preference to 2 layers of sheets 1.5 cm thick than 1 layer of a sheet 3 cm thick. Two sheets of smaller thickness retain their shape longer, do not flatten, and therefore do not lose their characteristics.
Well-known manufacturers and prices
Different manufacturers produce membranes and films. It is better to give preference to well-known companies and not to buy cheap products, the purpose of which can be found on forums. Its operational parameters depend on how much the product costs.
Below is a list of popular brands of vapor barriers and their costs:
- Ondutis. It is a complete system of breathable membranes, steam-, hydro- and wind-proofing films that are suitable for any structures and floors. The manufacturer is Ondulin. The price starts from 705 rubles per roll.
- Produced by Tyvek. DuPont reliably protects against precipitation, condensation and wind. The average cost is 6,000 rubles.
- Yutafol products reliably protect the heat insulator from the destructive effects of moisture. Approximate price – 1470 rubles.
- Tacofol. These are reinforced polyethylene films with microperforation. They have high vapor and waterproofing properties. They cost the same as
- Fakro logo. The product is made on the basis of durable synthetic compounds, PVC membranes. It is characterized by strength and durability. The cost starts from 4400 rubles per roll.
- Klobert. High-quality products from Klober. The average price is 7650 rubles.
- The company produces the most advanced membranes for hydro- and vapor barriers. A roll costs 5,900 rubles.
- TechnoNIKOL. The domestic manufacturer specializes in the production of protective films and membranes. The approximate cost of the product is 1,700 rubles per roll.
- Rockwool. It is used to protect interfloor ceilings and roofs from water droplets formed in the room. One of the surfaces is rough. This allows moisture to evaporate better. The material is intended for frame structures. The price is very high. Therefore, Rockwool is not affordable for everyone.
- Izolon. This is a foil fabric with high vapor barrier properties. A roll costs from 60 to 140 rubles.
Thus, vapor barrier of pitched roofs and interior walls protects the insulation and structure of the house from the penetration of moisture and wind from the street. There are several types of barrier material. Films are most often used. They are easy to install. The main thing is to take into account the type of product and technical parameters of the building. If the installation was done correctly, then the house will always be cozy and warm. You can watch a video on the topic below.
Does vapor permeability change when changing sides?
All of the above modern barriers are divided into the following types:
- for one-sided installation, which need to be rolled out with a certain side up and it is recommended not to confuse them;
- and for double-sided use, usually with membranes that can be laid on either side.
You will be interested to know that the first membranes, which had the same properties as modern roofing membranes, were used in astronautics. And from there they were borrowed for construction and the national economy. But until recently, there were not as many problems with their installation as there are today.
There is a strong opinion among ordinary people: if you lay the vapor barrier to the roof insulation “on the wrong side,” then the entire structure will not last long. In fact, the correct choice of side affects exclusively the service life of the interior finishing of the roofing pie, because the rough side has the same abilities as the smooth side and has absolutely the same vapor permeability. But how much it will retain droplets of condensate is a little-studied question.
Moisture and air protection concept
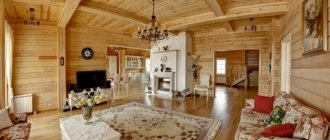
The advantages of wooden houses are the good permeability and thermal insulation properties of the material itself. Its naturalness allows us to hope for the absence of harmful emissions in the air.
But timber or logs, when used as a structural material, also exhibit significant disadvantages. The ability to absorb moisture entails a decrease in heat transfer resistance and biological decomposition of the material. The development of mold negates all the advantages of an environmentally friendly design. Warping due to periodic wetting and drying worsens the tightness of the joints. They start to blow out.
There are a huge number of sources of water vapor in a living room:
- cooking food;
- evaporation of water in the bathroom;
- the breathing of the inhabitants of the house;
- flowers on the windows;
- periodic cleaning of premises.
If there is no vapor barrier on the walls, the breathable structure allows moist air to pass through itself and retains some of the water from it. Overmoistening of the walls of a wooden house can and should be combated.
Vapor barrier device for a wooden house
It is enough to place a barrier permeable to air, but not permeable to moisture, at the junction of warm indoor air and colder enclosing structures. This will significantly improve the working conditions of wooden elements. Let the steam leave the house when ventilating and through the ventilation system.
The residual moisture of the material further complicates the work in such buildings. After all the elements have been erected and the seams have been sealed, the tree continues to lose moisture for about 5 years. This leads to its deformation and loss of tightness. It is advisable to let the structure stand for several years, re-caulk the joints and only then carry out interior and exterior finishing work. It is very difficult to fix anything under a sealed vapor barrier.
Exterior finishing should not include layers that retain water vapor - this interferes with natural drying. For external insulation, materials that have greater permeability relative to wood are used. On the street side, a gap is left between the surface of the wooden wall or the breathable insulation on it and the waterproofing and windproofing coating under the exterior finish. This layer creates conditions for air circulation. It should enter freely under the plinth and exit under the roof. This way the log house and the insulation on it will remain dry. To insulate wooden walls from the outside, basalt wool, low-density foam concrete, wood concrete and other breathable materials can be used.
The vapor barrier is installed on top of the insulation
Wind protection: which one to choose?
Of course, the buyer first of all studies products in the price range available to him, but one must remember that the desire to save money and purchase, for example, polyethylene film instead of a high-quality superdiffusion membrane, will ultimately result in new expenses.
Be that as it may, the main parameters that you should pay attention to are: Material safety. Toxic films that emit harmful substances are not suitable for residential premises under any circumstances.
Lifetime. If the repair is being done permanently, for centuries, it is better to think about purchasing the most durable material possible, albeit at a higher price.
Characteristics. Resistance to ultraviolet radiation, the temperature at which wind protection can be used, its strength - all this must be taken into account. Familiarize yourself with the properties of the purchased material in advance - the manufacturer is obliged to indicate all the characteristics of its product in the description.
Main characteristics of high-quality wind protection:
Temperature Range. Shows the minimum and maximum temperature at which the product can be operated. Be sure to take protection with our winters in mind!
Water resistance, or waterproofing. Indicates resistance to moisture. The higher the better.
Equivalent diffusion thickness. A number characterizing the correspondence of the thickness of the material to the thickness of dry air. This characteristic is needed for professional builders; it will say little to the average user.
Weather resistance. A parameter that shows how long the membrane can last without a finishing coat.
If we talk about external parameters by which we can judge the quality of wind protection of a wooden house, then it is better to:
the outer surface of the membrane was rough - so the condensate formed on it would not flow into the space between the walls and under the roof, but would evaporate naturally.
the film was tear-resistant - the stronger it is, the more difficult it is to tear, the longer it will last.
had high resistance to ultraviolet radiation - especially if you decided to hold off on finishing the cladding for now.
Practical implementation
Vapor barrier of walls can be carried out directly on the inner surface of the log house, but this option is low-tech. It is better to pre-make the lathing, which will become the frame for the interior decoration.
Vertical slats are sewn along the surface of the wall. They need to be immediately leveled. To do this, wooden wedges are stuffed into the depressions, and excess material is removed from the protrusions. The outermost strips are installed first. The intermediate ones are aligned along them using a cord. The location step is selected depending on the type of interior decoration. So, for plasterboard sheathing it will be 60 cm, and for lining - 40 cm.
Attaching the vapor barrier using a construction stapler
A vapor barrier is stretched across the sheathing using a construction stapler in horizontal sheets from bottom to top.
Carefully study the markings on the film. An additional guideline can be the roughness of the vapor-repellent surface of vapor barriers from many manufacturers. The matte rough layer reduces the likelihood of condensation. This side should face the inside of the room.
Don't try to stretch the fabric too much. As the house dries out over time and there is movement in it, the tension may increase even more. Then the vapor barrier of the walls will simply break.
The joints of the panels are overlapped and taped with double-sided tape. It is more convenient to use a film with a self-adhesive layer along the edge. This speeds up the process. As you move, the adhesive-based protective coating comes off and the joints are pressed tightly against each other.
Finishing materials can already be sewn onto this base. But it’s better to add counterbattens along the sheathing. This will further secure the vapor barrier and create a gap between the inner lining and the insulation. If condensation forms on the latter, the casing will remain dry. The presence of a gap will also reduce the likelihood of damage to the blade during subsequent work.
Video description
The correct arrangement of an insulated interfloor ceiling is shown in the video:
Work order
Before laying a vapor barrier on the floor in a wooden house, all wooden surfaces must be impregnated with special antiseptic agents. This is a powerful additional protection of wood from rotting, damage by insects and microorganisms.
When installing the floor of the first floor, the sequence of work should be as follows:
- roofing felt waterproofing is laid on concrete or brick intermediate supports for logs;
- skull blocks are attached to the mounted logs, to which subfloor boards are sewn;
Advice! It is better to lay subfloor boards with gaps for better ventilation.
Installation of subfloor Source freevilladge.com
- membrane waterproofing is spread over the subfloor with the smooth side up; it should cover not only the flooring, but also the joists;
- the material is laid with an overlap, gluing the joints with tape to ensure tightness;
- the next layer is insulation, tightly laid between the joists;
- the thickness of the insulation should be slightly less than the height of the log, so that there is an air gap between it and the vapor barrier;
- the vapor barrier material is rolled out over the insulation across the joists, overlapping the walls;
- it is attached to the walls using double-sided tape, and fixed to the joists with a stapler so that between them it sag slightly and is not tense;
- all strips are laid with a good overlap and connected with tape;
- After installing the vapor barrier, counter-lattice bars are laid and secured along the joists, which are necessary to create a ventilation gap between it and the finished floor.
Scheme of installing an insulated wooden floor using joists Source grind-wood.ru
The last stage is the installation of plank floors or sheet flooring for the final coating.
Tile selection
When choosing a tile, you must first evaluate its quality. You need to select the material according to the following parameters:
- the difference in diagonal sizes is less than 1 mm;
- the products do not have chips or other damage;
- the ribbing on the reverse side is more than 1.5 mm high.
It is important to know the difference between floor and wall tiles:
- The floor often bears shock loads from objects falling on it, so during production the enamel coating, like the tile itself, is made thicker.
- Floor tiles have a denser structure and are more difficult to cut; you will need a special tile cutter for the job.
- To provide slip resistance, the surface of floor tiles is embossed or matte.
When purchasing ceramic tiles, you should take the material with a margin of 7-10%; this amount will be used for trimming.
Wood floor protection technology
Before installing waterproofing, experts recommend lowering the bathroom floor level a few centimeters below the floor level of other rooms in the house and installing a small threshold. This will hold water in case of a leak.
The coating waterproofing process consists of several stages.
Preparation
First of all, you need to find out the condition of the floor in the bathroom. This will allow us to identify the scope of work, select technology and materials.
The base is cleaned of dirt, dust and foreign objects. Waterproofing requires careful preliminary cleaning. If there are cracks and holes in the floor surface, they need to be sealed with wood mastic to create a reliable protective layer. After this, the floor is once again cleaned of dust and debris.
At this stage, it is necessary to treat the wood with an antiseptic impregnation to avoid the formation of mold.
Primer treatment
To ensure high adhesion of the waterproofing material to the base, the floor of the room is primed. The best option is to use a primer mixture of the same class as the waterproofing material.
The primer solution is prepared as follows: take one part of the dry mixture, dilute it with one part of water to the consistency of thick sour cream.
After this treatment, the floor in the house should be completely dry. Corners and joints must be taped with a special waterproofing tape: this way, all vulnerable spots will be completely protected from moisture.
Preparation of waterproofing solution
The liquid component and the dry mixture are diluted in equal proportions and thoroughly stirred until smooth. You can purchase ready-made bitumen-based mastics. Material consumption – 2-3 kg/sq.m. m.
Applying the mixture
To treat the surface of the floor of a wooden house with a waterproofing compound, use a roller, spatula and brush.
The first time the mixture is applied in an even layer using a roller. In hard-to-reach areas, use a spatula and a brush.
It is necessary to treat the walls with a waterproofing mixture to a height of approximately 10 cm above the floor level: this way moisture will not penetrate into the room.
The first layer of waterproofing must dry completely (4-6 hours). After this, you can apply a second layer, running it perpendicular to the first.
The surface treated with waterproofing compound must be dried within 24 hours. After this, you can begin other types of repair work.
General installation recommendations
Ceiling vapor barrier is recommended to be done from inside the room. Exceptions are regions where air temperatures in winter can reach -32°C. In such climatic conditions, it is recommended to install a vapor barrier on both sides.
Features of ceiling vapor barrier
The method of installing a vapor barrier material depends on its type and the surface on which it is attached. But in any case, general recommendations must be followed.
Before laying the vapor barrier, all surfaces are carefully sealed
Particular attention should be paid to joints near the chimney, ventilation ducts, etc. Vapor barrier is laid between the room and the insulating layer. The material should cover the entire surface without gaps or tears. The secured material should not sag, but it should also not be pulled too tightly, since temperature changes will cause it to rupture. During operation, strips of material are laid overlapping (approximately 10 cm)
Joints in corners are unacceptable; a solid sheet is laid in them to ensure high-quality coverage of the entire surface of the corner.
The vapor barrier material must be laid with an overlap (approximately 10 cm)
The allowance around the perimeter of the ceiling must be at least 20 cm. Before installation, the ceiling surface is cleaned of dirt and dust, then thoroughly dried.
Performing adhesive moisture protection
If you use the adhesive method of waterproofing bathroom floors, you need to follow a certain sequence of work:
- preparation of the base (cleaning the floor of debris and dust, eliminating cracks and crevices); cutting strips of rolled material of appropriate length;
- uniform application (1.5 mm layer) to the surface of bitumen mastic;
- rolling out sheets or rolls of waterproofing;
- edge treatment with waterproof putty for waterproofing work (layer 1-1.3 mm).
The pasting method is the installation of a waterproofing carpet in several layers.
In the process of waterproofing using the pasting method, it is necessary to maintain a certain thermal regime. Polymer-bitumen materials are installed under high temperatures (45-50 ° C), which requires certain tools and practical experience in performing such installation.