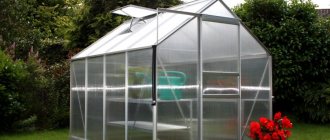
A mini-greenhouse for an apartment is a greenhouse that helps you obtain fresh vegetables and herbs throughout the year without leaving your home. It can even be placed on a windowsill. It is characterized by efficiency and compact dimensions. A mini-greenhouse can be purchased ready-made or made by yourself.
Mini-greenhouse for an apartment
Purpose
The main purpose of the design is to obtain a harvest of fresh vegetables and herbs at home throughout the house. Inside, the device creates an optimal microclimate necessary for normal growth and development of plants.
A greenhouse helps not only to grow plants at home, but also to prepare seedlings for the new season for further planting on the site.
A greenhouse helps not only to grow plants at home, but also to prepare seedlings
Greenhouse, winter garden, greenhouse?
The first winter gardens were created by the ancient Egyptians: the richest and most noble of them installed large flowerpots with greenery in their palaces. Over time, the fashion for maintaining a “green oasis” in a residential area appeared among the French and British in the 19th century, and then spread throughout the world. Today, a winter garden in a private house is not uncommon. However, it is important to understand what exactly you are planning to create in your home: a greenhouse, a greenhouse or a real winter garden.
Distinctive features of a winter garden
Table 1. Difference between a winter garden and a greenhouse.
| Design name | Peculiarities |
| Greenhouse | It is placed on the roof of the house or separately from it. Sometimes it may be adjacent to housing. Created for breeding and cultivating fruits, vegetables and flowers, both local and “overseas”. For a greenhouse, it is important to create special conditions, an ecosystem for the comfortable growth of crops. |
| Greenhouse | A mini-greenhouse located separately from the home. Used for growing fruits and vegetables or heat-loving plants. Plant comfort is a priority. Externally, the building is not very attractive, lacks decorations, and is quite budget-friendly. |
| Winter Garden | Most often they are attached to housing and designed in advance. Plants are kept and grown inside, but they are created for people (relaxation, receiving guests). Based on this, the design should have an attractive appearance and be functional inside. |
Requirements for mini-greenhouses
Home greenhouses must meet the following requirements:
- maintaining the microclimate inside the structure necessary for plants. Only in this case can you get a rich harvest;
- ease of use. The structure should be easy to open so that you can access the plants at any time, perform irrigation, etc. All plantings must be visible when viewed from any angle;
- aesthetics. The design of the structure must fit into the interior of the room in which it is installed;
- strength, reliability. The device must withstand repeated opening and closing;
- transparent walls. They provide light access to plants.
Transparent walls in the mini-greenhouse provide light access to the plants
Choosing a form
At the stage of planning a winter garden, it is very important to decide on the optimal form of construction for this room. A separate building can be anything: a sphere, a hemisphere, a cylinder, a cube. However, it is usually rarely installed separately, due to the high price and complexity of implementation.
Most often, a winter garden is part of a living space, in which case its shape also differs. There may be several options:
- a rectangular extension with a pitched roof (the simplest and most popular);
- a structure adjacent to the outer corner of a residential building;
- quarter-polygon (extension to the inner corner of the house);
- structure with a combined roof;
- bay window design;
- L-shaped extension with a gable roof.
Types of structures
Please note: you can design the building the way you need it.
Types of structures
There are several types of greenhouses that can be used at home. Each of them has advantages and disadvantages that need to be taken into account when choosing a greenhouse.
Simple
It is a metal frame on which a cover made of polyethylene film is fixed. On one side there is a rising flap, providing free access to the inside of the greenhouse.
The cover can be easily removed. This allows the structure to be used as a flower stand.
Another version of the product is with glass or plastic walls.
There are several types of simple structures, which are distinguished by size, number of shelves, and method of arrangement. You can purchase a compact greenhouse to place on a window or a floor-mounted greenhouse of impressive size.
The main task of a simple design is to maintain the optimal temperature inside the device. Additional lighting, ventilation, and irrigation are provided by the user.
Attention! Simple designs are placed near the window. This allows plants to receive natural light, which promotes their growth and development.
Automated
They are greenhouses that provide plants with complete care. Functions of structures:
- maintaining optimal temperature inside the device;
- automatic irrigation of crops;
- organization of additional lighting;
- regular ventilation in automatic mode, etc.
Attention! There are other additional options, depending on the type of greenhouse, manufacturers. They increase the functionality of the product, but increase its cost.
Hydroponic farm cabinet
Automated greenhouses can be placed anywhere in the apartment, regardless of the light source. This is due to the fact that the devices are equipped with lamps. For this reason, they do not depend on natural, artificial light.
There are several types of automated mini-greenhouses:
- Growbox. It is a closed structure. A reflective coating, lighting fixtures, and a ventilation system are installed inside. Occupy an apartment area of up to 4 m2;
Growbox, greenhouse for an apartment
- thermobox. A device that completely relieves the user of caring for plants. The design is equipped with an automated system that regularly irrigates crops, monitors the level of humidity in the greenhouse, controls the supply of nutrients, and turns the lights on and off in a timely manner. Allows you to grow plants even at sub-zero ambient temperatures;
Thermobox, greenhouse for an apartment
- Aerogarden. A device in which crops are grown not on soil, but on aeroponics. This is a material that is a nutrient solution in the form of a mist. Plant roots are placed in it. The nutrient solution promotes the rapid growth of crops and their proper development, which allows for a rich harvest. In addition, an optimal microclimate is maintained inside the greenhouse.
Aerogarden, greenhouse for an apartment
Foundation
For the construction of a foundation, a beam with a cross section of 100x100 mm or 150x150 mm is suitable. It is measured and cut according to the required dimensions. Before laying in prepared trenches, lumber must be treated with an antiseptic.
Advice! For the foundation for a wall-mounted greenhouse, it is best to choose larch timber, as it is characterized by high strength and moisture resistance.
Immediately before laying in the trench, the beams must be connected to each other. The connection can be made using a metal corner and self-tapping screws; fastening with dowels is often performed by connecting “into a paw” or “in half a tree”.
The resulting box of beams is then carefully placed in the trench, after which the box is leveled horizontally using a level.
The last thing to do is fix the foundation made of beams. This can be done in two ways:
- Drill a through hole in the beams at the junction, and then drive a metal rod at least 50 cm in length into the ground through it.
- Install metal pins 50 cm long at the inner corners, driving them firmly into the ground.
After the foundation of the greenhouse is securely fixed, you can begin to assemble the frame for the extension to the house.
DIY apartment design
It is not necessary to buy a greenhouse for an apartment. You can make a greenhouse with your own hands. There are several ways to do this.
From the aquarium
To make such a greenhouse, you will need an old aquarium of large dimensions. And they simply cover the plants or seedlings.
Aquarium greenhouse
From plastic bottles
To set up a greenhouse you will need empty plastic bottles. The bottom is cut off from the containers. The tops are fixed onto pots with culture.
Pranik made from plastic bottles
Greenhouse showcase
This design looks aesthetically pleasing and fits into any design. Make the device as follows:
- Assemble a rack whose dimensions correspond to the size of the window opening.
- Install shelves made of plexiglass.
- A lighting fixture is fixed on top.
- Transparent material is fixed on all sides. Typically, polyethylene film is used.
The design of the Miya-greenhouse looks aesthetically pleasing and fits into any design
Details you shouldn't forget
In conclusion, we will give some tips that may be useful in planning and arranging a home “oasis”:
- calculate the approximate cost of the planned structure;
- determine the location of outlets in advance;
- choose natural materials for furniture (wicker, rattan, wood);
- plan methods and methods of planting;
- take care of fertilizers;
- Shade the garden in hot weather.
A mirror will help to visually enlarge the space of a small room.
Pros and cons of a homemade greenhouse
Advantages of compact greenhouses for an apartment, made by yourself:
- low price;
- ease of creation;
- mobility.
Flaws:
- To effectively use greenhouses, it is necessary to maintain optimal conditions in the apartment. It is necessary that the room is always warm and dry. Low temperatures and high humidity will lead to a lack of seedlings and poor crop growth. Consequently, the user will not be able to get a rich harvest;
- the need to organize an additional lighting source. This will lead to higher energy costs;
- can only be used in an apartment. Cannot be placed on a loggia or balcony, otherwise the plants will die;
- external unattractiveness. This especially applies to plastic bottles. Because of this, the entire design of the room is spoiled. The exception is the display greenhouse.
Compact greenhouse for an apartment
Choosing a ventilation system
Any room needs regular ventilation, and the winter garden needs constant ventilation, because the green “residents” of your cozy corner need fresh air. He can get from the street inside (and vice versa) in two ways.
- Natural . Simply put, windows need to be provided with vents and transoms. This is a cheap option, there is little noise from such ventilation, and by opening and closing the holes you can easily regulate the air flow. However, such a system will fail in the warm season, when the temperature difference is minimal.
- Mechanical . Involves the use of technology, such as fans or more complex systems. They will create an excellent microclimate, but noise may interfere with your relaxation. It is also worth considering installation costs and electricity bills.
Ventilation diagram in a house with a winter garden
Greenhouse lighting
If simple or homemade greenhouses are used, it is important to provide them with natural light. To do this, the structures are placed on the windowsill or near the window.
Such greenhouses also require additional light sources. Usually special devices are used. It is important to choose the optimal lamp color for plants:
- blue, purple. These colors promote photosynthesis. Thanks to this, crops grow actively and bring a good harvest;
- yellow green. They impair photosynthesis. This leads to the appearance of pathologies in plants. For this reason, these colors are not used for greenhouses;
- red, orange. Lamps with such shades are used during the flowering period of plants, the formation of ovaries, and the formation of fruits. However, red and orange colors are served in doses. Its excess can lead to the death of the entire crop.
LED seedling lighting
It is also important to choose the right type of lamps:
- incandescence. They provide high-quality lighting and heat the air. However, they are rarely used for greenhouses, since they promote leaf curling and cause burns on plants.
- luminescent. These lighting fixtures can be used for home mini-greenhouses. They are characterized by low heat transfer, low energy consumption, and moderate cost.
- ultraviolet. They have different wavelengths, which allows you to select a lighting device for specific crops.
- mercury. Used for photosynthesis, but in limited dosages. Usually used at the stage of fruit formation.
- LED You can use several ribbons of different shades to create the optimal color scheme for the crop. The devices are characterized by durability and low power consumption.
- infrared. Optimally suitable for plants. Their light is identical to natural light, which has a beneficial effect on the development of culture. In addition, infrared lamps heat the air.
Greenhouse lighting
Creating a wireframe
To create a frame, it is best to use a profiled pipe with a cross-section of 40x20 mm for frames and 20x20 mm for spacers. Measure the required length and cut the required number of pipe sections. Then they begin to attach the inside of the frame to the wall. To do this, you can use brackets or clamps. If the wall material allows, then you can fasten the pipes using dowels. External supports are also fixed
Important! There must be a gap of at least 40 cm from the overhang of the roof of the house to the highest point of the wall-mounted greenhouse. Otherwise, icicles growing from the roof of the house can damage the roof of the greenhouse.
Then horizontal transverse pipes are installed from the internal pipes, which are directed from the wall to the external supports. They are fastened (you can make a screw connection or use welding). Then they begin to install the rafters. Their tilt can be arbitrary, but not less than 30 degrees. The length of the rafters should be such that they extend beyond the outer edge of the frame up to 25 cm. Also at this stage it is necessary to consider the presence of a window in order to create natural ventilation inside the wall-mounted greenhouse.
If they plan to make an attached greenhouse to the house more than 2 m, then the installation of additional spacers is required.
Upon completion of the frame assembly, it is advisable to paint the profiled pipe to prevent corrosion.
Advice from professionals
When organizing a home greenhouse, it is recommended to listen to the advice of professionals:
- The windows should be decorated with blinds or small curtains that are fixed directly to the frame. This will help control sunlight, which can cause burns on plants, especially on young shoots.
- Instead of soil for crops, you can use hydro- and aeroponics. These nutrient mixtures saturate plants with substances necessary for normal growth and fruit formation. As a result, the gardener reaps a rich harvest even at home.
- A window for ventilation and irrigation is placed on top of the structure. This ensures a uniform air outlet and a fresh, clean flow inside. If the door is made at the bottom, then cold air will enter the structure, which will negatively affect the health of young shoots.
Video - How to make a mini-greenhouse at home
A mini-greenhouse for an apartment is a small greenhouse that will allow you to enjoy fresh vegetables, berries, and herbs all year round. You can make it yourself, or you can purchase a ready-made version. It all depends on the desire of the user and the size of the budget.
Excavation
The very first thing that needs to be done is to clear the construction site. Be sure to remove all debris, remove weeds and other vegetation. If there is a flooded blind area near the wall of the house, it should be dismantled. Afterwards, the surface of the site is leveled and excavation work begins.
Mark the contour of the foundation using pegs or small pieces of reinforcement and rope. Then, along the marked border, they dig a trench of the required depth for laying the timber frame (the depth and width of the trench should be slightly larger than the cross-section of the timber). A sand cushion is formed at the bottom of the trench, followed by leveling the sand using water and a tamper. Afterwards you can begin building the foundation.
Arrangement of the vestibule
Another important point that can be implemented in the process of planning a greenhouse at a dacha 3 m by 8 m is the vestibule. In the future, the vestibule can be used to store garden tools. It is very inconvenient to constantly carry everything you need to care for your crop from home or a barn to the greenhouse; it is much more convenient and comfortable when everything you need is at hand. To do this, it will be enough to fence off a small space at the entrance to the greenhouse where you can place shovels, rippers, fertilizers, gloves, and a hoe.
For maximum convenience, during the internal arrangement of a polycarbonate greenhouse, it is recommended to install special fasteners for fixing the cuttings of working tools, which will allow you to properly use the free space.
Other options
a ready-made aquarium as an apartment greenhouse . If you have old window frames , you can put together a greenhouse out of them, remembering to remove the glass before nailing them together.
Rice. 4. Greenhouse in a house made from an aquarium (photo).
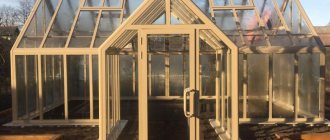
A self-made wooden frame does not have to have the shape of a rectangular parallelepiped . It can look like a triangular prism or be made in the form of a “house” .
You can also use a ready-made container, for example, a plastic barrel . Cut holes in it and cover them with transparent plastic film - and no installation is required.
Rice. 5. Greenhouse-barrel.
Master Class. Example of winter garden construction
So, now you know about all the winter garden systems and its internal structure, and therefore you can proceed directly to the construction process.
Important when building a winter garden
Step one . First, determine which side of the house the building will be located on. It is better to give preference to the western or eastern wall. Also, the winter garden can be located from the south, but in this case a serious ventilation system will be needed to maintain the optimal temperature inside in the summer.
Step two . The construction site is cleared of plants, stones and debris. After this, the foundation is poured - a shallow shallow foundation.
Step three . The lower frame frame is mounted on the base, and there must be a waterproofing layer on it. The position of the lower harness is controlled using a tape measure, stretched ropes and a building level.
Installation of the bottom trim
Step four . Horizontal/vertical elements of the future frame are mounted, which will serve as the walls of the garden. It is important that all connections are secure.
Installation of vertical frame elements
Installation of horizontal frame elements
Step five . Next, the top frame is mounted and the roof beams are installed. It is important that all wooden elements used are pre-treated with an antiseptic impregnation.
Installation of the top trim
Installing roof beams
Step six . Rubber sealing profiles are prepared and glazing of the structure begins. Sheathing elements are transferred using vacuum suction cups - this is not only safe, but also convenient.
Glazing of the winter garden
Glazing process
Step seven . On the outside, the seals are covered with an aluminum profile, which is necessary for protection from moisture and sunlight.
Glazing is almost complete
Installation of aluminum profiles
Step eight . The cornice profile is installed. It is advisable to additionally equip it with a drain.
It is advisable to supplement the cornice profile with a drain
Step nine . When the construction of the garden is completed, water and electricity are supplied to it, and irrigation and ventilation systems are equipped. Places for plants are being marked out and the interior decoration of the winter garden is being carried out.
On a note! As a result, you will get a comfortable and beautiful room where you can spend your free time surrounded by your favorite plants throughout the year.