Repair
0
17 295
Share
In old houses built under Stalin, the bathroom was often combined with the kitchen. Moreover, several families could live in a communal apartment. While one family prepared food, another could shower behind the curtain. Today it seems strange and inconvenient.
- Layout options in old houses
- Kitchen bath designs
- The practical side of repair
- What to do if the bathroom is out of place
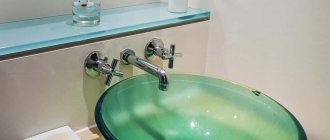
Install a modern shower holder
A shower holder can also be a decorative element. There are many options - regular, with a suction cup, in the form of a barbell. The latter are the most convenient. in them you can adjust the height of the nozzle, in some - the angle of inclination. You can attach a soap shelf to the vertical rod.
But such holders have a problem. If you constantly change the height, the chrome wears off over time. But there are advanced models made of stainless steel. To secure the holder you will need to drill 2 or 4 holes in the wall (depending on the model). You can install it in 5-10 minutes.
Fixed shower holder. Without the ability to adjust the height and angle of the nozzle.
Vertical shower holder with the ability to adjust the height and tilt of the nozzle.
Wallpapering walls
Wallpaper for the bathroom
Wall decoration with wallpaper
For wallpapering, you can use only waterproof types. This finishing method has a number of undeniable advantages.
- Low cost allows you to have exclusive and reliable coverage with small material losses.
- High technology. Of all the possible ways to decorate walls in a bathroom, wallpapering is the simplest. The work is completed within a few hours, the room can be used for its intended purpose the very next day.
- It is possible to frequently change the design of the premises. In some cases, re-pasting can be done without removing the old one - the repair time is significantly reduced and the amount of construction waste is minimized.
Washable wallpaper
Waterproof wallpaper
Disadvantage: in terms of physical strength, wallpaper is inferior to traditional materials. But, if you behave carefully and avoid mechanical damage, the period can be calculated in many years. In addition, defects on wallpaper can be easily eliminated; after pasting there will always be a small amount of material left. Don't throw it away, keep it “just in case” for repairs.
Which wallpaper to choose for a bathroom
It goes without saying that only waterproof ones. When purchasing, pay attention to physical strength, and it depends on the material of manufacture.
| Wallpaper type | Brief performance indicators |
| Vinyl on non-woven base | The most modern ones are distinguished by high levels of mechanical strength and can have long-term direct contact with water. They are produced in a wide range of colors, can be plain or with various patterns and ornaments, with a structured or smooth front surface. Disadvantages - relatively high price, the need to use special glue. |
| Washable | The cheaper segment is inferior in performance characteristics to vinyl. It is recommended to use in areas of the wall that are not exposed to splashes of water. |
| Self-adhesive | They are made from a special polymer film and have a huge number of design solutions. Disadvantages - relatively high price and complexity of finishing. In addition, they can only be used on perfectly flat surfaces. |
How to glue wallpaper correctly so that you don’t have to constantly re-glue the peeling areas?
Step 1. Surface preparation
The most important point in the production of work, of course, is not counting the correct choice of wallpaper. The linearity parameters of the wall affect not only the appearance of the wall, which is very important, of course. It is even theoretically impossible to stick waterproof wallpaper on an uneven wall. This means that there will definitely be air pockets and other places where the wallpaper is not glued. While using the bathroom, these areas constantly increase in size, and this continues until the peeling becomes noticeable. Repair will be required; perfectly aligning the wallpaper after repair is quite difficult, and in some cases impossible. What are the requirements for the wall surface?
- Roughness cannot exceed ± 1 mm.
Run your hand along the wall, your palm gets scratched badly - that’s a problem. Use a strong steel scraper to cut off any protrusions. Sand away any rough edges - For plastering, only durable cement-sand mixtures should be used. All others, under the influence of moisture, significantly reduce their strength indicators, the glue falls off along with the smallest pieces of the solution, and the wallpaper sag.
- The surface must be perfectly dry. There is no air gap between the wall and the wallpaper; natural ventilation is completely absent. Fungus will inevitably appear on a damp wall, and it will certainly destroy the plaster. You will have to make expensive repairs, remove the old plaster, saturate the surface with special chemical compounds (very poisonous, by the way), and plaster and paper the walls again.
- The maximum size of recesses and protrusions cannot exceed several millimeters. Manufacturers tell the truth that some types of wallpaper hide small irregularities. But they don’t say anything about the fact that unglued areas appear in these places with all the negative consequences described above.
Surfaces must be primed in two layers, this increases the reliability of adhesion and serves as additional protection against moisture penetration.
Wall primer
Calculate the surface area, make a small reserve. Each roll of wallpaper is indicated on the length, width and total area. Use this information when purchasing materials. Do the same when choosing glue.
Step 2. Algorithm for gluing vinyl wallpaper
Prepare your tools
Pay attention to the manufacturers' recommendations on which side to apply the glue. There are options for spreading it on the wallpaper, on the wall, or on both surfaces, it all depends on the specific characteristics of the wallpaper.
Glue preparation
Mix thoroughly
Ready-made wallpaper glue
Measure the height and width of the wall, cut the required number of strips. The stripes, depending on the pattern, can be applied end-to-end or overlapping. Cut with a small margin in length, it will then be removed with a knife, the uneven cut will be buried in the ceiling and floor skirting boards.
Cut a strip of wallpaper with scissors or a decorative knife
Make sure that the cut is strictly at right angles
Practical advice. It is most difficult to glue wallpaper in the corners of the room. The fact is that they can have slopes, and this has a negative impact on quality. To prevent such consequences, never make strip joints at the corners; try to have them in the middle in these places.
Next you need to do this.
- Glue the strip coated with glue to one wall of the corner, align it strictly vertically.
- Carefully bend the wallpaper, but not all the way into the corner, lightly glue the strip to the second wall.
- Slowly begin to bend the wallpaper towards the corner, while constantly monitoring the displacement of the second edge, it should always be in a vertical position. An uneven wall angle is not a problem; even if there are air pockets in some places, the main thing is that the edge of the wallpaper on the second wall is vertical.
Definition of vertical
Apply a thick layer of glue evenly with a brush
After applying the glue, fold the left edge of the wallpaper strip towards the middle
Read the wallpaper label to see how long the glue needs to sit on the wallpaper before it sticks to the wall.
If you do not pay attention to this nuance, then on the entire adjacent wall the stripes of wallpaper will be slanted, and this is a big waste.
To apply glue you will need a large room; the bathroom, as a rule, does not have such dimensions. Decide where exactly you will prepare the wallpaper. Take measures to prevent contamination of floor coverings, do not allow glue to get on the front surface. When wallpapering walls, accuracy is one of the important conditions for quality work.
Gluing the first wallpaper
Smooth out wrinkles and bubbles under wallpaper
Cut off the excess
Immediately wipe off excess glue with a damp sponge.
Gluing the second wallpaper
Smooth out wrinkles and bubbles
Carefully squeeze out the air from under the wallpaper. You can use rubber spatulas or rollers. But it is best to do the work with clean, dry hands. This way you will feel the irregularities and be able to eliminate them in a timely manner. It happens that an air pocket is discovered late, several strips of wallpaper have already been pasted. It's not a problem. Poke the air bubble in 2-3 places with a needle, after which you can press the wallpaper again, it will take the desired position.
In the inner corners, stick one strip so that it overlaps the corner by 1-2 cm
Apply the wallpaper across the outer vertical edge of the door frame with a slight allowance, immediately smooth or trim the allowance
Also glue the next strip on top of the frame, smooth it out and cut off the rest from the bottom
Without pressing, cover the switch with wallpaper and make a diagonal cut through it. Carefully cut out the edges and press the wallpaper to the wall
Once the glue has completely dried, cut off the excess length and attach the baseboards. Skirting boards are fastened with liquid nails or other methods, taking into account the material they are made of.
Wallpaper in the bathroom
Let there be light!
Experiment with lighting. Change the shade on the main lamp, choose something stylish and suitable for the interior of the bathroom. An additional lamp can be installed.
Install lamps above the mirror. If it fits tightly to the wall and you don't want to drill holes for fasteners, you can find inexpensive suction cup lights. If there is a gap between the mirror and the wall, you can find an option with a clip-on clip. There are inexpensive options that are powered from the mains and with a built-in battery.
There is a modern, economical solution - LED strip. It can be glued in any way - from above, from below, along the perimeter of the mirror, at a distance or end-to-end. This solution is not only stylish, but convenient. It will be more convenient for men to shave, and for women to use cosmetics.
In large online stores you can find original budget-class lamps.
You can buy a ready-made mirror with LED lighting, or make it yourself.
A few words about design
To make the combined areas look attractive, it is recommended to use light colors when decorating. Due to the fact that the area is filled with multiple objects, visually it may appear smaller than it actually is. Therefore, do not miss the opportunity to create a bright, spacious room in the kitchen and bathroom.
Modern finishing materials will help in this matter. So for the kitchen part, you can use wallpaper, paint for painting the walls in beige, light yellow, light green, sky blue. By diluting the light palette with a few bright accessories, you will get a beautiful interior design. It is also recommended to decorate the sanitary area in light colors. To do this, you can use sand-colored tiles, snow-white plumbing fixtures, and milk-colored accessories.
Thus, if in your apartment the bathtub is located in the kitchen, do not be upset. Several recommendations from designers, successfully implemented in practice, allow you to create a beautiful and comfortable interior design. Of course, the issue of redevelopment requires a serious approach, during which various nuances and features of old apartments are taken into account. But you and your family will probably like the end result.
New floor on old tiles
A good option to update your bathroom without renovating is to install new flooring. One of three options is suitable for this:
- Vinyl tiles;
- Vinyl in rolls;
- Linoleum.
Vinyl tiles take a long time to lay, so it’s better to stick with vinyl in rolls or linoleum. Both coatings resist moisture well. But vinyl is more durable. Linoleum is cheaper, and the design wears off faster. Both options can be laid on an existing surface - tiles, laminate, etc.
To install, you will need to unscrew the baseboards. After this, lay vinyl or linoleum, trim it to fit the pipes and walls. Then screw the baseboards into place. The new floor is ready and the bathroom has been transformed! If you make a mistake by 1-2 cm when trimming, don’t worry - everything will be hidden by the baseboard.
Linoleum imitating tiles.
Vinyl floor in the bathroom.
Layout options in old houses
A bathtub in the kitchen in a St. Petersburg apartment is not uncommon, especially if the house was built in the 1930s. In this way, the costs of combining plumbing fixtures were reduced. But today, many families are looking for a remodeling method that would separate such an intimate room as the bathroom from the kitchen.
Options:
- Dividing the kitchen into two separate rooms. This is easy to do using a plasterboard structure; even an inexperienced craftsman can build it.
- Installing a shower instead of a bath. A closed space with opaque walls will allow you to keep intimate details secret from other family members. Plus, it takes up less space.
- Extension of the toilet. Often there is a toilet next to the kitchen. If you break the partition and move it to another place, you will get a separate kitchen and a combined bathroom.
- Zoning using screens and curtains. If the bathtub does not bother you, you can separate it from the cooking area with screens, curtains or cabinets.
Options that involve the demolition and construction of walls must be agreed upon with the building management. Otherwise, you may encounter difficulties when selling your apartment. You may not be allowed to remove walls if they play an important role in the structure of the house. If, as a result of redevelopment, you damage the pipes and an inspection comes to you, you will have to pay a fine for illegal redevelopment.
Kitchen bath designs
If, on the contrary, you want to save space and install a bathtub in the kitchen, you need to think about how to implement the project. Firstly, think over the flooring so that splashes of water do not spoil it; laminate and parquet will not work. Secondly, organize a screen or curtain that will protect the bathing person from prying eyes. Thirdly, think about how to protect the entire room from high humidity. It can damage wallpaper, wooden furniture and doors. Before you make a bathroom in the kitchen, think about whether it will be convenient for you to wash in this room, where you will hang towels and other necessary things.
Hide communications
There are many options for bathroom layouts. In many of them, water and sewer pipes are visible. To give more aesthetics, you can hide it. The easiest way is to make a plasterboard box to cover the pipes. For this you will need:
- Wooden beam 40x40 or 40x30 mm;
- drywall;
- self-tapping screws 35 or 4 35 or 40 mm long;
- putty;
- water-based paint.
Make a frame from a wooden beam to cover the pipes. Secure drywall to it on all sides using self-tapping screws. Level the screw heads, cracks and joints with putty. After all, paint the box with water-based paint. After the first layer has dried, paint the resulting structure a second time.
The practical side of repair
If you decide to separate the bathroom from the kitchen, you need to choose hydrophobic materials. Partitions can be made from moisture-resistant plasterboard. You can stick tiles on top of it, but before doing this it is necessary to treat it with antiseptics, which will prevent the appearance of mold and fungi.
When installing partitions, the area of the room will decrease. To save space, use sliding doors or accordion doors. You can separate zones using different wall coverings, different-level floors, and lighting.
Do not forget to submit an application to the building management for approval of the redevelopment. Please note that you may be refused, then you will have to look for another way out of the situation.
What to do if the bathroom is out of place
If the bathtub in the kitchen is permanently installed and you do not want to move it, you can separate it with design techniques. For example, today it is popular to make a bathroom with transparent walls. You can build a glass box around the bathtub, separating it from the kitchen in this way.
Other design techniques for sectioning a room:
- Different floor and ceiling levels;
- Different wall decorations, for example, paint in the kitchen, and tiles near the bath;
- Different lighting, bright lamps near the work area, but dim light in the shower;
- Screens and curtains.
Bathtub painting inside and out
A great way to update your bathtub is to paint it with acrylic paint (liquid acrylic). You can paint it both inside and outside. The choice of color is up to you. Acrylic paint lasts much longer than any other. To paint, you will need to dry the bathtub. The top and drain can be closed or removed. Remove the bottom drain and place a container under it to drain the remaining paint.
How to paint a bathtub, step by step description:
- Clean its entire surface. It is advisable to completely remove the enamel, but not necessary. It is enough to give the walls sufficient roughness. This can be done with coarse sandpaper, but it is better to use a drill or grinder with a wire brush attachment.
- Rinse the bathtub of old paint. Wipe dry and dry with a hairdryer if possible. Treat the surface with any degreasing liquid.
- Cover the edges of the bathtub with oilcloth to protect the walls from paint (see photo).
- If you don’t have ready-made paint, prepare it. To do this, add a hardener to the acrylic. Wait the time specified by the manufacturer.
- Apply acrylic to the entire surface of the bathtub, leveling it evenly. A rubber spatula or roller is best for this. The durability of the coating depends on the number of layers.
- Cover the bathtub with film or oilcloth to prevent dust and dirt from entering. Then wait until the paint hardens completely and check the quality of the paint.
- If necessary, apply an additional layer.
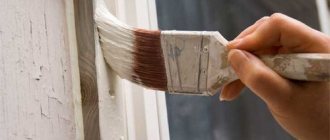
DIY wall painting
Painting walls is considered one of the easiest and least expensive finishing methods. It is important to choose the right paint and prepare the surface of the walls.
Painted walls in the bathroom
Bathroom decoration
Advice! Create a design project for your bathroom. It is not recommended to paint absolutely all surfaces; it is advisable to cover the areas near the bathtub and sink with moisture-resistant panels or trim them with an apron made of inexpensive ceramic tiles.
Step 1. Choosing paint for the bathroom
Bathroom paint should have antibacterial properties and be moisture resistant. Otherwise, the appearance of fungus and peeling of the coating cannot be avoided.
Moisture-resistant paint Moisture-resistant paint for walls and ceilings Moisture-resistant paint for walls and ceilings “Optimum”
Moisture-resistant paint for walls and ceilings matte Tikkurila Luya (Luja Tikkurila)
Due to their low cost and excellent performance characteristics, latex, silicone, and acrylic paints are most widely used. At the same time, water-based mixtures do not have an unpleasant pungent odor, and silicone paints can act as a water barrier.
NovaTech Interior paint for walls and ceilings
Traditional oil paints do not have this advantage, and also quickly become covered with cracks, so it is better to immediately abandon this option.
Oil paint
When choosing shades, remember that it is inappropriate to paint small bathrooms in dark colors, as this will visually reduce the space even more. Do not overdo it with the number of bright spots or complex patterns and their quantity so that the interior does not look vulgar. Soft pastel colors will visually expand the room and fill it with light.
Choose shades from the manufacturer's catalog
Please note that paints can be matte, glossy or semi-gloss. Of this variety, it is matte enamels that best hide small defects on the walls, while drops and streaks are clearly visible on glossy surfaces. However, if you cannot make a choice, consider a combination of glossy and matte surfaces. This technique will make your bathroom modern and stylish without significant costs.
The photo shows a combination of matte and glossy paints
bathroom paint
Step 2. Preparing the walls for painting
Don’t forget to remove all the furniture from the bathroom, remove the mirrors, cover the faucets with masking tape, and cover the plumbing fixtures with film or newspaper, because preparing the walls for painting is the dirtiest and most time-consuming stage.
You should not apply new layers of paint over the old peeling one, nothing good will come of it. If you have a drill in your arsenal, get a couple of sanding attachments for it and clean off the old paintwork from the walls. Remember safety precautions.
Removing paint with an angle grinder
Don't have a drill? Use paint strippers, a scraper and a putty knife. The method is effective, but it is better to work with a respirator and thick rubber gloves.
Remover for old paint
Chemical paint removal
Scraper
If the paint on the walls was applied a long time ago, chemicals will not cope with it.
You can remove paint using thermal methods, for example, using a torch or a hair dryer. Heat a section of the wall and scrape off the peeling coating with a narrow spatula.
Removing old paint from walls using a gas torch
When all the old paint has been removed from the walls, it is necessary to repair cracks and potholes and knock down protrusions.
Fill cracks and gouges in the wall
Crack repair
Step 3. Preparing materials and tools
Prepare paint and tools, follow manufacturer's instructions. To apply paint you will need a roller, brushes, if you have a spray gun - great. Before purchasing, measure the area of the surfaces to be coated and adjust the amount of material taking into account the volume. For high-quality painting, it is better to apply two layers, keep this in mind when purchasing.
Brushes, rollers, cuvette
Step 4. Preparing the workplace
Clear the work area near the walls of unnecessary objects; if you are not going to redo the flooring, then cover it with film or paper. Carefully protect the bathtub and sink from contamination.
Protect surfaces with masking tape
Surface protection when painting walls
Start your work from the most inconspicuous corner, in this place you can learn the properties of the paint in practice and, if necessary, dilute it to the optimal consistency. We recommend painting the walls with a roller, and using a brush to treat only hard-to-reach areas, corners and borders of joints of different colors. Panels in the bathroom are still in fashion; if you plan to make them, mark the height on the wall and draw a horizontal line.
Step 5. Start coloring
Apply a deep penetration primer to the wall. It will not only improve the appearance, but also increase the durability of the coating and reduce the likelihood of paint peeling.
Applying primer
Allow the primer to dry for 3-6 hours
Apply a second coat of primer over the first and wait 24 hours
Pour a portion of paint into a special plastic tray for rollers. Dip the roller into it, turn it several times, remove excess paint on a horizontal surface.
Practical advice. To minimize the chance of paint getting on the floor, give the roller a spinning motion before blowing it out of the tray.
Step 6. Painting technology
First paint the surface with a brush along the edges
Start painting from top to bottom, this method reduces the likelihood of drips forming, they are immediately smeared, and the roller “rolls” over them. Paint carefully, do not allow any omissions. Don't be upset if the first coat looks ugly, this is expected. The fact is that there are areas on the wall with old and new plaster, remnants of un-removed coating, etc. They all absorb paint differently, which is reflected in the appearance. The second coat will correct all problems, the finish will be uniform.
Apply the first coat
How to paint walls with a roller
Paint in small areas, correct difficult areas immediately with a brush. The paint should smooth out lint marks on its own. If this does not happen, add solvent to it. Pay attention, so that he is conscientious, read the instructions for use. If in doubt, test the solvent for compatibility with a small volume of material; if the paint has curled, change the solvent.
It is advisable to apply the second layer when the first one is not completely dry, this increases the adhesion coefficient between them. It’s easy to check the readiness of the surface - run your fingertips along it, they should not get dirty, but only “creak” a little.
Paint application scheme
Level the paint along the ceiling by rolling the roller long horizontally without loading it with paint.
If you are making a multi-colored panel, then you need to paint the surface in the second color only after applying two layers of the first. In this case, start working from the top of the wall; the panel is finished last. This way you will be protected from paint getting onto finished areas. Apply masking tape along the border line. Make sure that the paint does not flow under it; paint only with a brush, moving in the direction opposite to the tape. Never apply tape to paint that is not completely dry, this is very important. If you glue it to a freshly painted surface, then during removal it is likely that part of the paint will be removed along with it, and you will have to redo everything.
Marking a wall for striped painting
Apply masking tape
Apply paint
Creating stripes
Stripes can also be horizontal
Original wall decoration
The color transition is achieved by using color and a regular sponge
Example of non-standard wall painting
Bottom curtain (not screen)
Many people cover the sides of the bathtub with a screen made of plastic, tiles, or drywall. But the most budget option is to hang a curtain made of oilcloth. A regular bathroom curtain with an ornament or pattern will do.
As a base, you can use a sliding curtain holder (rod). If you have a hammer drill, you can stretch the wire under the side of the bathtub. Secure it to two self-tapping screws driven into the walls along the edges of the bathtub. Hang the curtain on the wire, threading it through the fasteners or eyelets.
How to secure a curtain rod in the bathroom so it doesn't fall (without drilling);
DIY sliding screen for a bathtub made of plastic panels.
Skirting boards even on the ceiling
A good way to add some color to your bathroom is to install plastic skirting boards. To trim them, you will need a utility knife and a hacksaw for metal (with fine teeth). It is better to use silicone sealant for fastening. Before installing the baseboard, you can paint it with enamel or acrylic paint. Or you can buy a suitable color in advance.
It is best to install skirting boards around the perimeter of the bath. This will protect the joints from leaking. For greater aesthetics, they can be glued around the perimeter of the ceiling or floor. If there is a screen installed on the bathtub, glue the baseboard along it. The main thing is to choose a good color so that the baseboard fits into the design.
Plastic plinth on the bathroom ceiling.
Skirting on the sides of the bath.
Everything unnecessary goes to the top!
This option will not only update your bathroom, but also save space in it. Install a cabinet or shelf 2 meters above the floor in any free space. There you can put away everything that should not be always at hand. This could be household chemicals, supplies of cosmetics, shaving accessories, towels and much more.
The cabinet or shelf must be made of waterproof material or painted with waterproof paint. Then they will not be affected by humidity, they will last for more than one year.
How to “separate” a combined kitchen and living room
- Columns, arches, small screens and partitions are also often used for zoning.
- Also a good solution is lighting; the kitchen should have bright lighting, and the living room should be more subdued and cozy.
- Hang blinds in the kitchen and beautiful curtains in the living room.
- Perhaps the most popular way of zoning such a room is a bar counter, which separates the kitchen space from the living room. This option is especially suitable for young families who like to host friendly parties and buffets. The bar counter is quite a functional thing; it can be used as a place to eat, as a work surface, and as an interior decoration.
Hide the ventilation
Every bathroom has a vent. It leads either to the toilet or to the exhaust shaft. Buy an inexpensive plastic grill and install it. They cost mere pennies and are secured with clips. The latter are adjusted with 2 or 4 screws.
The second option is to install a grille with a fan. It will provide air flow and hide the standard hole. Installing a grille on your fan hood is a great way to get rid of bad smells in your bathroom. A constant flow of fresh air is a good way to get rid of mold in the bathroom.
Inexpensive plastic ventilation grille.
Ventilation grille with built-in fan.
Location near the kitchen
If the bathroom is located next to the kitchen, separating the toilet room from it is necessary. The air ventilation system and expensive air fresheners cannot guarantee 100% elimination of unpleasant odors.
Placing the toilet separately from the bathtub allows you to remove the source of unpleasant odors from the place of eating and cooking.
Add greenery, living and inanimate
Ordinary plants do not take root in the bathroom. It's connected with:
- High humidity;
- Temperature changes;
- Lack of light.
But nothing stops you from decorating your room with artificial plants. There are many options, from the simplest to those no different from the real thing. Can be chosen to suit any budget. And where to place them depends on the layout, bathroom furnishings and your imagination.
If you live in a private house and there is a window in your bathroom, then everything is simpler. You can choose live plants that will get along well in it. But you need to be careful when buying - you need to take into account the temperature and humidity conditions, the presence of ventilation.
What plants can be kept in a bathroom without windows.
Even one living plant can significantly transform the interior of a bathroom.
If the bathroom has a window, you can create a small green corner.
Preparation
Let's look at some of the nuances that need to be taken into account at the stage of planning a home.
- There must be harmony and symmetry of both halves of the house, this will make the structure whole. Achieving this is not always easy, especially if buildings of different sizes and separate entrances are planned.
- The common communications line, which is divided into two parts in the house, will require the coordination of future neighbors.
- Layout. It is necessary to create a visual project that will show absolutely all the rooms of both apartments. A drawing version of the facade and adjacent area is also required.
- Materials. Here it is important to come to a common decision; most often houses are built from SIP panels, foam and cinder blocks, timber, and brick. Each of them has its own advantages and disadvantages, so even at the stage of drawing up the project, you need to agree on what the duplex will be made of.
Add ergonomic accessories
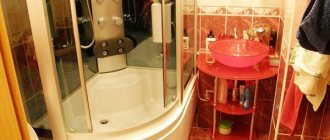
This is a relatively inexpensive and ergonomic way to update your bathroom without renovating it. Go to any plumbing store, market, or online store. You will be surprised how many different shelves, hangers, and mirrors you can find.
They will not only decorate the interior, but will help organize the place. For example, a soap shelf that attaches to a vertical shower holder is an irreplaceable thing. Wall shelves made of metal grids installed above the bathtub are convenient for storing cosmetics, shampoos, washcloths, etc.
Before choosing a rack, shelf or stand, decide what you will store on them. Everything in the bathroom should be located ergonomically. There is no point in keeping floor cleaner on a hanging shelf near the shower. But there is no place for shampoo or hair conditioner. In order not to lose sight of anything, we recommend reading the article: What accessories should be in the bathroom.
A shelf for the bathroom that won't take up much space.
A shelf that is attached to a vertical shower stand.
Agreed upon options for remodeling the bathroom and toilet.
2.1. Remodeling the bathroom in the house p-44t.
dismantled-erected structures
apartment plan after redevelopment
Above is a typical redevelopment of a bathroom in p-44t with its combination and expansion through the corridor and the creation of a separate entrance to the kitchen through the room. In most homes, the bathroom and toilet are made using “glass” or “hood” type sanitary cabins. They are non-load-bearing and their dismantling is painless. The main thing, as mentioned above, is not to affect the ventilation shafts.
2.2. Remodeling a bathroom in Khrushchev.
The illustration shows a non-standard multi-room apartment for Khrushchev. A redevelopment of the Khrushchev building was carried out with a small bathroom and its expansion through the corridor.
2.3. Remodeling a bathroom in a panel house.
before redevelopment
after redevelopment
These illustrations show the redevelopment of a toilet with a bath in a panel house. In many ways, similar measures were taken here to the reconstruction already discussed, only this time an additional toilet was placed in the corridor area, while expanding the bathroom itself.
2.4. Remodeling a bathroom in Khrushchev.
But this option is already the most typical for Khrushchev and Stalinist buildings. The corridor leading to the gasified kitchen became part of a combined and expanded bathroom, and the kitchen itself was combined with the room through roller shutters.
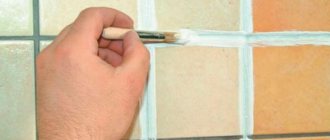
Change the grout
This is a banal, but uncomplicated and inexpensive way to update your bathroom without renovation. If you have tiled walls, there is grout between the individual tiles. You can replace it with a new one by choosing a different color.
To do this, use a spatula to clean the seams from the old grout. Dilute the new one with water to a uniform consistency. If desired, you can add dye. Wear rubber gloves and simply rub it into the seams with your finger or a rag. You can work with a spatula, but it takes a long time and requires some skill.
Important
Use high-quality plastic grout. Cement with plasticizers, silicone or latex are suitable. Compositions that harden after drying and are unable to shrink or expand are one of the reasons for the appearance of cracks on tiles.
Tiles on the wall of the bathroom. Before and after replacing grout.
The process of changing grout on a bathroom floor.
Kitchen-living room - photo
Look at our photos and get new interesting ideas from them!
Update tiles without replacement
Of course, you shouldn’t replace the tiles with new ones. If your walls, floor or ceiling are lined with plain tiles, you can experiment. It is not necessary to repaint the entire tile. It all depends on your imagination. But not all types of paints are suitable for these purposes. Holds up best:
- Acrylic paints;
- Epoxy-based enamels;
- Oil paints.
Before painting, the selected tiles must be washed and degreased. It is best to apply the paint with a brush to avoid getting it on the grout and adjacent tiles. Once the process is complete, do not use the bathtub, shower or sink until the painted tiles are completely dry.
Tile on the bathroom floor. Before and after painting.
Possible difficulties
Sharing a bathroom incurs lower costs. But it may be impossible if the wall between the rooms is load-bearing.
If the location of the plumbing changes during redevelopment, the flooring will have to be changed. Plumbing leaves traces of its presence.
Communication systems will need changes. The most difficult thing is moving the sewer canal. It needs to be masked, while maintaining a minimum angle of inclination for good drainage.