It’s easy to apply, inexpensive, and masks surface defects well—it’s not for nothing that self-leveling acrylic for bathtubs is so popular. You can carry out restoration work yourself and without the use of special tools. After hardening, the mixture is characterized by high strength and durability.
We'll cover how to find the best polymer blend. We'll tell you which market offer will be most suitable. Let's look at the assortment and see what parameters you need to pay attention to when choosing this material.
Repair of serious defects
Damage that leads to a leak in the bathtub and water constantly appears in the room after taking a shower is considered serious. To fix the problem you need fiberglass. Proceed as follows:
- The edges are cleaned with a knife.
- The problem area is sanded with sandpaper.
- Treat with an alcohol solution.
- Epoxy resin is applied.
- Wait for the layer to harden.
- Treat the area again with sandpaper.
- The smooth coating is wiped with alcohol.
- Polish is applied.
Damage that leads to a leak in the bathtub and water constantly appears in the room after taking a shower is considered serious.
Types of defects, their elimination
There are many ways to damage an acrylic bathtub. All defects can be grouped according to the severity of damage:
- minor defects (roughness, small scratches);
- small cracks, large scratches, chips;
- large cracks;
- through holes.
A separate type can be called stratification.
Universal glue will not be suitable for repairing an acrylic bathtub, since acrylic has low adhesion (the ability to firmly adhere to other surfaces). You need to purchase glue of a special composition with moisture- and heat-resistant characteristics.
Types of 2-component adhesive for acrylic bathtubs:
- Contact.
We remove heavy deposits and “water stone”
If the bathroom has not been maintained for a long time, a plaque may form that will be difficult to remove. However, there is a remedy that can cope with such plaque:
- Take detergent
, dilute with water and mix until it becomes a paste. - Add 2 tbsp.
l. white and 1 tbsp. l. vinegar _
This mixture must be applied to the surface using a plastic or rubber spatula and left for 20 minutes. Then take a soft sponge, pressing lightly, and wipe the problem areas. Rinse the mixture with running water and wipe the bath dry.
Repair of minor defects
Minor defects can be quickly and easily eliminated by expanding the size of the crack, degreasing the area, preparing paint and applying it to the damaged area. Cover the top with masking tape, leave it on for 5-6 hours, then remove the tape. Treat with alcohol and polish. The seal is completed with a coating of polish.
The seal is completed with a coating of polish.
Preparing the paint
From a bucket of water-based paint for wet rooms, pour about 1/10 of the part for other color layers into a small container. (You can use a mayonnaise bucket.)
Add the color you choose to your liking to the bulk of the paint and mix well to obtain the desired color. This will be the main tone of the wall.
By the way, the advantage of this method is that it is not necessary to ensure a perfectly even layer of paint.
Using a roller and brush, cover the wall with paint. Wait for it to dry and prepare the next color.
If you need a darker shade and there is paint left from the first coat, you can add drops of color to the previous paint.
How to remove a crack on an acrylic bathtub. Step-by-step instruction
Cracks on the acrylic surface of a bathtub form for various reasons. For example, while bathing, a person might drop the shower head or a heavy soap dish. The repair process will take longer than eliminating scratches, since cracks are serious defects and special repair kits will not be necessary.
Step by step guide:
- The area around the crack and inside it is treated with sandpaper.
- Artificially enlarge a crack. To do this, use a drill with the smallest attachment (no more than 1 mm). The process is required because the crack will subsequently grow on its own, so all the repairs performed will be in vain.
- Rinse the surface. It is advisable to use pressurized water to remove all the smallest particles. It is also important to allow time for the crack to dry completely.
- Use alcohol or formic acid to degrease the surface. Otherwise, the restoring composition will not be securely attached to the surface of the bathtub and will begin to crumble after a couple of days of use.
- Apply acrylic composition. It includes 2 components, and they must be mixed immediately before use. When the crack is deep, a multi-layer application of the composition will be required.
- Wait until the solution dries completely. It will take several hours, and during this period it is important to ensure that the bathroom is not used or the water is turned on.
- Sand the composition with fine-grained sandpaper.
- Polish the surface until it is as smooth as the rest of the acrylic tub.
Polyurethane foam
Construction foam is actively used by craftsmen for repairs or construction of a new building. It is also suitable for creating sound absorption in the bathroom. You can purchase it at any construction or hardware store. Before use, protect your hands, head (wear a hat or scarf), and face. Read the instructions.
How to use: turn the container over and degrease the surface. It is enough to treat it with an alcohol-containing composition. Then slowly cover the bathtub with a thick layer of this foam. Apply carefully in a dense, even layer, trying to avoid gaps. Act slowly, then the foam has time to harden without dripping. Having finished processing the side of the bathtub, turn it over to the second one, but after the foam has completely dried.
Plastic film will help enhance the effect. Polyethylene, used by summer residents to create greenhouses, is suitable. It is dense, inexpensive and quite elastic. After applying the foam, cover it with a piece of film prepared in advance. Pressing it more tightly with your hands, form a crust resembling a shell.
Important instructions:
- foam intended for indoor installation is suitable;
- It is better to carry out very presentable processing in the summer;
- To ensure an even layer, you should buy a special nozzle or “gun”;
- before processing, preheat the container (hold it under the tap, turning on the water hot) and shake;
- leave the overflow area free;
- review the indicated expiration date and use the foam before it expires.
Surface preparation
The preparatory stage is required when the defect is already old and operating conditions have caused the problem to worsen. If you decide to fix the chip right away, the process will be shorter, without preparation. But, if the crack is old, then carry out the steps described below:
- Remove the rust layer using a knife, needle or screwdriver. You can use a special solution.
- Wash the surface so that no dirt remains, use detergents without abrasive elements.
- Get a clean base, then dry it with a hairdryer.
- Use acetone to degrease the base, then dry it with a hairdryer.
The preparatory stage is required when the defect is already old and operating conditions have caused the problem to worsen.
Application technology
When choosing a product for restoring a bowl, people often wonder: painting the bathtub with acrylic or enamel, which is better and easier for use at home. Each material has different application rules and tools. Let's look at the features of application technologies.
Working with acrylic
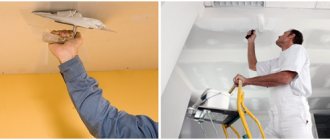
You can restore the bowl with polymer material yourself. During work, be sure to use a respirator and mask, and open the windows in your home for ventilation. To avoid poisoning from toxic fumes, professionals recommend leaving the premises without residents or pets for a day.
All things are taken out of the bathroom, leaving the bathtub and toilet. It is better to cover furniture and household appliances with polyethylene, and tiles with masking tape. Old enamel in the bowl is removed with sandpaper or a grinding machine. The roughness of the walls will ensure good adhesion and prevent delamination of the material. The debris is removed with a vacuum cleaner, washed with warm water and, after drying, degreased with acetone. The siphons are unscrewed and reservoirs are placed under the holes.
Correctly applied coating will last at least 15 years. It is more convenient to work with liquid acrylic at a room temperature of 21-26 C. Before the procedure, add hot water to the bathtub, drain it after 30 minutes and thoroughly wipe the walls.
Liquid acrylic is prepared before use. The hardener is added to the container with the substance according to the instructions and stirred carefully. If the connection is poor, areas will appear on the surface that do not harden. The stains will begin to peel off, so restoration will have to be done again.
Liquid acrylic is applied to the surface by pouring at home. For convenience, the composition is poured into a small container. The resulting solution is poured in a thin stream along the side of the bathtub, gradually moving along the perimeter of the plumbing. The width of the strip should be 5 cm. The thickness of the product is such that the mass slowly flows off the surface, leaving no streaks or bubbles.
The first layer of liquid acrylic should fill 50% of the bowl (wall), then proceed to processing the bottom. To ensure an even coating, you need to apply 2-3 layers. If the technology is followed, smudges will not be visible. If necessary, areas not filled with polymer mass can be leveled with a soft rubber spatula.
Liquid acrylic will harden within 24 hours. It will take 4 days for the polymer to dry completely. Professionals do not recommend using quick-drying compounds that have a short service life. A week must pass before the first use, otherwise the material will begin to delaminate. During polymerization, you cannot check the degree of hardening and you must protect the plumbing fixtures from dust, otherwise volumetric defects will remain.
Installation of acrylic liner
The polymer structure is installed using special technology. Before restoration, the surface of the bowl is cleaned with a powdered detergent. To ensure that the acrylic liner adheres perfectly to the walls, the old layer is removed with sandpaper or a sanding machine.
Areas with rust are cleaned and coated with a converter. After the manipulations, wash the bathtub with soapy water and rinse thoroughly. After drying, the surface is degreased with acetone and dried. Before installation, pour hot water into the bowl, drain and unscrew the siphons.
Before installation, the acrylic liner is inserted into the bathtub, checking the fit. Holes for drains are cut, protruding edges are trimmed. The structure is removed, and a special compound is applied to the inner surface of the plumbing fixtures. Polyurethane foam or silicone glue is used as fastening raw material; sealant is used in the siphon area.
After treating the walls with adhesive, an acrylic liner is installed in the bath. For more reliable fixation, tighten the structure with clamps. Siphons are installed in the holes, connected and pressed with force. Any foam (glue) protruding from the edges is removed with a dry cloth.
To ensure that the acrylic liner is evenly pressed against the bowl, the plumbing fixtures are filled with water, the temperature of which is +40 C. A correctly and carefully installed structure is glued to the walls as firmly as possible, so the seams between the old and new coating are not visible. Hardening lasts a day, after which the liquid is drained, the protective film is removed and the bath is ready for use.
We repair chips
Chips on an acrylic bathtub are a common occurrence. They are formed as a result of careless use, accidental impacts with massive metal objects, etc. The choice of repair method depends on the size of the chip.
If it is minimal, try to solve the problem of restoring the surface by simply polishing. Before performing this, the chip must be rubbed with coarse sandpaper, and then polished with fine-grained sandpaper. You can speed up the work by using a drill equipped with a polishing attachment. Having completed polishing, you need to remove dust and wash the restored area of the coating with a soap solution.
ABRAforce sandpaper, fabric 100mm x 5m, (P60), art.500024839
If the size of the chip is significant, then again you cannot do without a repair kit. When restoring chips, you need to proceed in the same way as when eliminating cracks. First, the working area is cleaned with sandpaper of different grain sizes, after which the chipped area is washed and degreased. Then follow the same steps as when sealing cracks. Liquid acrylic must be applied carefully and just enough to level the surface. Excess applied restoration mass must be removed immediately, avoiding the formation of a tubercle at the chip site. The restored bathtub should be dried for 6-12 hours, depending on the temperature and humidity in the room, after which the working area is polished and washed off with water.
The final stage of wall finishing is varnishing.
Construction stores have a large selection of glossy, matte and transparent varnishes for walls. Even for a beginner it is not difficult to work with varnishes. Choose a varnish to your taste. Use a roller or brush to coat the wall once or twice. The varnish layer will further smooth out small flaws if you had any. The walls are ready. You can use this method in any room of your apartment.
The uniqueness, strength and shine of your walls are guaranteed for a long time! Good luck!
Means for sealing cracks, potholes and chips
You can renovate a bathroom using different means. The choice of substance also depends on the nature of the damage, whether the coating is cracked, whether a gap or hole has appeared, etc. For chips and cracks, car putty is suitable. If there are only small flaws on the surface, then you can quickly eliminate them with the help of enamel, which is applied with a brush to the defective areas.
The surface can be filled, this helps to completely renew the coating. There is a product on sale called Stakryl, which creates a new thick layer that covers all defects in the base.
Stakryl creates a new thick layer that covers all base defects.
What you need to know about enamels
There are a lot of enamel restorers for baths. They differ not only in composition, but also in the method of application.
The enamel can be applied to the base with a brush or roller. In this case, the composition should be quite thick. It is best to use a hard brush to make it easier to rub the enamel over the base. It is advisable that the bristles do not come out of the brush; this will ruin the attractive appearance of the bowl.
Using a roller makes it easier to apply enamel. It distributes the composition as evenly as possible, but it is impossible to completely process the entire bowl with a roller. Where it bends you will need a brush.
Another method of applying enamel is spraying. Professionals most often use a spray gun in their work. A liquid composition is poured into it, which is applied in several layers. For non-professionals, this option is often unacceptable due to its complexity.
Perhaps the best way to apply enamel for bathtub restoration is to use a spray gun. This is exactly how experienced professionals work
You can use an aerosol can with special enamel. When applied correctly, the result is a fairly durable and uniform coating. If the work is carried out incorrectly, the coloring may be uneven and spots of different shades will appear on the surface of the bowl.
Some experts believe that enamel in the form of an aerosol is best used to mask small defects, but not to restore the entire bathtub.
When purchasing a product, you should pay attention to its contents. It's best if it includes a bowl pre-treatment, perhaps even a special application tool.
It is advisable that the kit includes tinting compounds that allow you to obtain any desired shade. If you purchase two-component enamel, you should look at the color of the hardener. Dark colors are not recommended. They can impart an undesirable tint to the finished product.
How to repair an acrylic bathtub?
There is no need to rush to quickly get rid of the plumbing fixtures if a crack has just appeared in the acrylic bathtub. Most often, such damage can be easily repaired. If the acrylic bathtub bursts or small defects appear on its surface, the instructions for restoring plumbing will help to eliminate them; for more serious damage, a slightly different approach will be required.
Repair of minor defects. First, you need to understand how to repair an acrylic bathtub that has chips and small scratches on the surface. To do this you will need the following materials:
- two-component acrylic;
- epoxy adhesive;
- sandpaper;
- special tape.
Using epoxy glue, you can repair the surface if it has a crack up to 3 mm in size. For larger defects, tape must be used. In this case, the repair will begin with degreasing the surface of the plumbing fixtures. After that, a special tape is glued to the crack, from which the film must first be removed.
An acrylic bathtub with minor defects, the length of which does not exceed 5 mm, can be repaired using only the specified materials.
Recovery instructions:
- in order to improve the adhesion of the surface of the plumbing fixtures to the glue, it is necessary to slightly expand the boundaries of the cracks with a knife;
- the surface is degreased;
- acrylic paint must be diluted with a hardener;
- the area that needs to be repaired must be treated with a small amount of the resulting composition;
- We seal the treated areas with tape for five to six hours;
- after which it is necessary to remove the film, after which the plumbing must be treated with alcohol and sanded;
- The restored area is coated with polish to obtain a shiny finish.
Acrylic peels off. Most people who purchase acrylic sanitary ware are faced with the problem of bathtub bloating. Sometimes the acrylic comes away from the fiberglass, i.e. swells. This happens for a number of reasons:
- The acrylic bathtub wobbles and the load on the surface is not distributed evenly, which creates a high probability that the acrylic may lag behind the walls of the plumbing fixtures.
- The reason may lie in low-quality products made from cheap materials.
In order to glue polymer materials you will need special glue. In the place of the swelling, you need to make holes in order to introduce glue there; after the layers are glued together, you can begin work on eliminating a regular crack. This work process was described above.
Large defects are cleaned with a special tool, after which a new protective layer of enamel is applied to them. Details in the article - Liquid acrylic will return the bathtub to its original appearance. If an acrylic bathtub is leaking, this means that it has serious through damage. In this case, the usual cosmetic elimination of defects will not help; reinforcement will be necessary. If the acrylic bathtub is not level, it is better to reinstall it, otherwise it will leak sooner or later.
We begin the next stage of painting with a different color.
Use a knife to make cuts on an old, worn-out washcloth or piece of foam rubber and pluck out small pieces. Dip this “tool” in paint, lightly blot it on some wooden or dense surface (for example, a piece of plywood) and begin to leave “traces” on the wall, approximately evenly distributing the density and frequency of these marks. You can first try it on any surface to get your hand “stuffed.”
Don't worry if it feels like you're making dirty spots at first. By the end of the work, this scribble will turn into a spectacular pattern reminiscent of marble.
You can rotate the washcloth in any direction, but try not to hit the same area on the wall too often. When the paint no longer shows through, dip the washcloth again and continue the procedure until the wall becomes two-colored.
By the way, when there is little paint left on the foam rubber, you can use it again to go through those places that are not brightly printed or, on the contrary, you need to lighten very colored ones.
As a result, if you have a very good marble effect at this stage, you can complete the painting even at this stage. But to give a more impressive pattern and look to silk wallpaper, you can add color spots on top: contrasting or tint. You can make a mixture of different colors that you want in your room.
So, after the second layer has dried, you (if desired) pass a piece of foam rubber (smaller and more plucked) and leave other “spots” of different or the same color.
When to repair damage
Before you begin to decide what to do if the enamel on the bathtub has chipped, you need to understand whether such measures are required.
There are several opinions on this matter:
- There is no need to repair the chip, since a quality result will still not be achieved.
- If you repair the chip, the bathtub will begin to rust under the patch.
- It is necessary to repair the damage, but this procedure is quite complicated and will take a lot of time.
We can say with confidence that it is imperative to take action to restore the enamel if a way to solve such a problem is known. Of course, a perfect restoration will not work, since such events are carried out at a special temperature and under certain conditions, but you can make the bathtub attractive with your own hands.
It is worth mentioning one mistake that some home craftsmen make when repairing chipped bathtubs. To eliminate chips on an enamel container, they heat the problem area using a gas torch or blowtorch. According to such craftsmen, the patch will be better fused with the main coating. Professional plumbing equipment repairers do not recommend performing such measures, as in the future this may cause the entire enamel coating to peel off.
As for the pockets of corrosion that can form in the damaged area, they can form if the question of how to repair a chip in the bathroom is incorrectly decided. In most cases, rust forms when using a regular sealant on stains. This situation leads to the need to solve the problem of removing rust stains.
Noise insulation with polyethylene foam
Foamed polyethylene is also suitable for soundproofing a steel bathtub with your own hands. The material is familiar to any builder or installer. It has excellent thermal insulation, sound insulation, and waterproofing properties. Available, can be purchased at any specialized (construction) store.
Among the assortment there are enough varieties of polyethylene, but for a bath a regular inexpensive option is suitable.
How to use - glue parts of polyethylene, “seating” them on strong glue or take special polyethylene mats with a sticky base. The procedure itself is not complicated, because the polyethylene is lightweight, the surface of the pasting is smooth, and in addition, there is no task to do it beautifully.
What materials to use for repairs
When restoring an acrylic bathtub yourself, the correct choice of repair materials is very important. If you use substances for this that are similar in appearance to acrylic, but differ in technical characteristics and performance properties from the material used to make the bathtub, then all efforts will be unsuccessful. Very quickly, the repaired defects will appear again, cracks will begin to grow, and the new coating will peel off and chip.
The main factor that dictates the choice of material for carrying out restoration work on the surface of an acrylic bathtub is its production technology. Manufacturers of this type of plumbing use two technologies:
- vacuum-type molding from acrylic sheet;
- spraying an acrylic coating onto a base made of ABS plastic.
Determining how your bathtub was made is very simple. If upon purchase it was wrapped in a protective film package, then it was made by molding. If there is no polyethylene protective film, then you are dealing with acrylic-coated plumbing fixtures. If you didn’t buy the bathtub, then you can use another method to determine the technology for its manufacture. To do this, carefully inspect the cut of the side, especially the white top layer. If its thickness is 5-6 mm, this indicates that the bathtub is molded from an acrylic sheet. If the layer of white coating does not exceed 2 mm, your bathtub is made of ABS plastic. After clarifying these technological features, you can take care of the materials for the restoration. For a molded bathtub you need to buy liquid acrylic; for a sprayed bathtub you need to use a special repair kit, which can often be included with the sanitary ware when sold.
Choosing the right varnish
When going shopping, you need to understand exactly what properties of varnish you need. If, for example, you plan to cover the surfaces with varnish in the bathroom, then it should be a coating with high moisture resistance. And if you plan to paint in a children's room or bedroom, then you need to choose the most non-toxic product. The type of base materials also influences the choice of decorative protective agent.
For indoor work (residential, non-residential, public), water-based solutions are considered the safest. Water-based acrylic composition is very popular, despite the price not suitable for everyone.
- the composition does not include organic solvents, which makes the product environmentally friendly;
- no odor;
- creates a durable and elastic film on the surface;
- in the original acrylic varnish is colorless, transparent, does not turn yellow over time, which does not affect the natural shade of the color of the base materials (especially wood);
- tinting is acceptable;
- by degree of gloss: high-gloss, glossy, semi-gloss, semi-matte, matte;
- non-flammability;
- easy application (brush, roller, spray);
- fast interlayer drying;
- Wide range of applications: for any wooden surfaces (including painted ones), brick and stone masonry, plastics, metal, etc.
- final drying – 24 hours;
- the final polymerization period is too long - up to 2 weeks;
- subject to abrasion during intensive use of premises (on wooden floors).
Not only acrylic varnish is water-based, but also one- and two-component polyurethane. There are many advantages to using it:
- no odor, non-toxic;
- short drying time: 2-3 hours between layers, 8 hours - you can already walk in socks, 3-4 days - calmly bring in furniture;
- uniform, easy application;
- good adhesive properties;
- strength, abrasion resistance, durability;
- chemical resistance;
- versatility of application.
But if you want to varnish the outer brick or wooden wall of the house, then it is better not to use water-based varnish (acrylic or other), since the protection will not last long. In this case, compositions based on organic solvents, for example, alkyd, are used. A significant disadvantage of such solutions is that the drying period is too long. But with the addition of special hardeners, this process can be accelerated.
Such varnishes form a durable film that is resistant to various influences, including moisture. Light and heat resistant, easy to apply, almost transparent, and have an attractive appearance.
There are other varnish compositions based on organic solvents:
- nitro varnishes;
- urethane group;
- oil varnishes;
- epoxy;
- bituminous.
Shellacs stand out separately - natural types of varnishes, difficult to obtain, difficult to work with, expensive, but having unique decorative properties.
How to remove a chip on an acrylic bathtub
First of all, you should understand that a chip is not a scratch and simply polishing the damaged area will not work. In addition, deep defects often become breeding grounds for fungus, mold and bacteria, so restoration work must be completed.
Surface preparation
First of all, the area where the defect is found needs to be prepared. Otherwise, no one can guarantee you that the chip will not appear again in a short time. Surface preparation is as follows:
- Sand the area with sandpaper, starting with a coarse grit and ending with a finer one.
- The chip should be washed thoroughly using detergents with a disinfecting effect. This is done in order to completely remove dirt.
- Next, the area should be degreased to remove fat from the surface. If you ignore this preparation stage, then it is likely that the putty that you will apply simply will not “adhere” to the acrylic.
- At the end of all preparatory work, the surface of the bathtub must be dried very well. To speed things up, you can use a hair dryer or dry rag.
Once you have completed all the steps, you can proceed directly to removing the chip on the acrylic bathtub.
Removing chips on the surface of an acrylic bathtub
A masking pencil is not suitable for removing this type of damage, since it will not be able to repair the pothole itself. To restore the evenness of the surface, you will need special repair kits. As a rule, they all have the same equipment, and it includes:
- liquid acrylic (varies in shade);
- hardener - added to acrylic to increase hardening properties;
- sandpaper for grouting;
- polishing paper;
- degreasing agent;
- epoxy glue for fixing small scratches.
Of course, the repair kit may differ in content, but, as a rule, it is a standard set that includes all the necessary components. Additionally, the repair kit includes a special rubber spatula for easy application of liquid acrylic.
Further, the principle of work is as follows:
- dilute acrylic with hardener according to the instructions;
- apply the mixture to the damaged area flush with the surface of the bath, distributing it evenly with a spatula;
- level the mixture as much as possible;
- cover with film (ordinary food film secured to the wall with tape is suitable);
- leave until completely dry, but not less than 24 hours;
- remove the film and degrease the surface (for example, with alcohol);
- polish the area.
In conclusion, we can say that removing a chip on an acrylic bathtub is certainly not an easy task. However, if you approach this issue correctly and responsibly, you can restore the appearance of the bathtub in less than three hours.
TOP 7 best offers for self-leveling acrylic
Bulk or liquid acrylic is a group of substances that are intended for the restoration of bathtubs using a specific method. The method of restoring the attractive appearance of the container involves mechanically cleaning the surface, degreasing, drying and applying (pouring) the composition.
The self-leveling acrylic kit includes a base and hardener. The standard shade is white or colorless. If necessary, the mixture can be tinted. The main advantage of the technique is its cost. Self-restoration costs 15-20% of the price of new plumbing.
If the estimate includes the services of a bathtub painting specialist, the amount will be about a third of the cost of purchasing and delivering the bathtub. The rating includes acrylic from different manufacturers. They differ in price, composition, and features of use. Let's take a closer look at popular brands of acrylic.
The polymer can not only paint over the walls of the bathtub, but also flow into pores and scratches, making the surface even and smooth.
Place #1 - FINNACRYL-24
Used to restore cast iron plumbing fixtures and metal bathtubs. The coating is glossy and smooth. The pot life of the material after mixing the components is 60 minutes. If the composition is not used within the specified time, it will be unusable.
In addition to the basic set, you can purchase blue, green, yellow, brown, red, burgundy, purple colors or buy ready-made color mixtures
Characteristics:
- , Saint Petersburg;
- flow rate - 1.7 m (4 kg), 1.5 m (3.4 kg), 1.2 m (2.7 kg);
- White color;
- hardening time - 24 hours;
- shelf life - 12 months.
At temperatures above 25 degrees, acrylic hardens within a day. If the temperature ranges from 17 to 25 degrees, it will take 30-36 hours to form a durable film.
Before use, it is recommended to place the mixture in the bathroom so that the ingredients warm up to an acceptable temperature. After combining the components, the working composition must be thoroughly mixed with a drill-mixer for about 10 minutes and left to brew for another 5 minutes.
The base and hardener must turn into a homogeneous substance so that no film remains on the walls and bottom of the bucket. If you use a poorly mixed mixture, yellow spots will appear on the surface.
FINNACRYL-24 produces a thin, durable film that spreads evenly and does not form bubbles or sagging. Provided that the surface is well pre-cleaned and the technology is followed, the material shows the best results in terms of durability and aesthetics of the coating.
Users are somewhat confused by the positioning of the company itself. Previously, the official website and packaging indicated that production was located in Finland. But by 2022, the origin was changed to Russian. As practice has shown, the quality of the product did not suffer from this.
The manufacturer’s line includes liquid acrylic 24T, which differs from the main composition in its increased fluidity. There are also kits with a hardening time of 16 and 8 hours.
Place #2 – ECOLOR glass
The mixture appeared on the market among the first products in this category (2005) and is still popular. According to most craftsmen, it is “Stakryl” that has the highest strength characteristics.
Two-component enamel is made from raw materials from German companies Basf and Dow. After hardening, the coating is uniform, glossy and smooth.
Positive statistics may be due to the fact that the material has been used a lot for a long time when compared with competitors
Characteristics:
- , Saint Petersburg;
- flow rate - 1.2 m (2.7 kg), 1.5 m (3.4 kg), 1.7 m (4 kg);
- White color;
- hardening time - 24 hours;
- shelf life - 12 months.
The composition remains fluid for 60-70 minutes. It is impossible to dilute the mixture with a solvent in order to increase this time - it immediately liquefies, quickly flows to the bottom of the bath, and a very thin coating is formed. Complete polymerization of acrylic is achieved in 2-4 days. The thickness of the layer varies between 1-6 mm.
The material is superior to its analogues in terms of final strength and smoothness; it is practically not afraid of abrasives, scratches, and detergents. The bath can be used 1-2 days after restoration.
This acrylic is tinted with proprietary toners of blue, pink, light green, violet, beige, and turquoise. Shades are selected from a light palette to a dark one.
A significant disadvantage is that glass acrylic requires skill in application. The slightest mistake when preparing the composition or during the application process will result in bubbles, drips, and clots forming. The second disadvantage buyers note is the strong smell.
The manufacturer’s line includes another type of product - Stakryl Profi. This mixture takes 16 hours to harden.
Place #3 – Ekovanna Lux
The composition is made without solvent. It is cheaper than the two previous analogues and has lower consumption.
The manufacturer uses products from the transnational company HUNTSMAN, German companies Evonik and Byk Chemie as a raw material base. The recipe was developed taking into account surveys of control groups of master restorers.
You can add xylene to the mixture in an amount of up to 60 g per set. A pronounced odor will appear, but fluidity will increase
Characteristics:
- , Moscow;
- flow rate - 1.2 m (2.45 kg), 1.5 m (3.01 kg), 1.7 m (3.57 kg);
- White color;
- hardening time - 24 hours;
- shelf life - 12 months.
The material is designed for independent non-professional use, so when kneading the substance is as homogeneous as possible, without lumps, which makes application easier. There is no strong smell.
It is easy to apply, no bubbles or drips are formed. The composition is characterized by good adhesion, fluidity retention and long-term hardening. A significant advantage is excellent fluidity. Even a thin layer of the mixture can mask unevenness and uneven color of the surface.
"Ekovanna Lux" completely polymerizes within 24 hours. The film used to enamel the bathtub is characterized by minimal thickness, but durability.
The line contains acrylic with silver ions, which prevents the development of bacteria in a humid environment. The enamel actively prevents the proliferation of fungi and microbes, and in terms of characteristics and price it does not differ from the main composition.
Another representative of the line is “Shungite”. Natural shungite is added to this acrylic, so the material is black and has bactericidal properties. All other parameters are the same as the standard composition.
Place #4 – SipoFlex-24
This self-leveling acrylic is made from raw materials from leading European and American brands - Basf, Du Pont, Dow. The material is characterized by excellent quality and adhesion to cast iron and metal surfaces.
The material is easy to work with: it is quite elastic and spreads well when applied. Even a non-professional master can handle the restoration of a bathtub.
In addition to self-leveling acrylic, the company produces hot-curing compounds for chemical anchors, polymer floors, epoxy compounds, adhesive compositions, which indicates the scale and responsibility of the company
Characteristics:
- manufacturer - Sipo, Moscow;
- flow rate - 1.2 m (2.53 kg), 1.5 m (3 kg), 1.7 m (3.63 kg);
- White color;
- hardening time - 24 hours;
- shelf life - 12 months.
Acrylic does not have a strong odor, and no allergic reactions to the components of the drug have been identified. It is toxic only in liquid form, like other substances. After hardening, the film is not hazardous to health. The technology for preparing and using the composition is similar to the previous ones. Its service life is 70 minutes.
During the application of the mixture, no air bubbles or smudges are formed. When SipoFlex hardens, it turns into a bright white, smooth and glossy surface. In addition to the main composition, the product line includes acrylic with a hardening time of 16 hours.
Place #5 – PlastAll Classic
The correct pronunciation of the name is “plastol” (not “plastal”). Acrylic is produced without the addition of harmful solvents (acetone, butyl acetate, nonylphenols, mutagens, etc.). This is the only composition in the rating that shows good adhesion not only to cast iron and metal, but also to ceramics, plastic, wood, and concrete.
Liquid acrylic "Plastol" does not turn yellow, maintaining the ideal surface color. The manufacturer guarantees the absolute whiteness of the coating for 8 years.
Characteristics:
- , Tolyatti together with PABREC, Slovenia;
- flow rate - up to 1.2 m (2.5 kg), 1.2-1.5 m (2.8 kg), 1.5-1.7 m (3.4 kg), from 1.7 m ( 3.9 kg);
- White color;
- hardening time - 36 hours;
- shelf life - 60 months.
The mixture recipe includes raw materials from Germany, Holland and the USA. The product is certified according to the European standard DIN EN 71-3, which indicates its complete safety for children in the solid state.
The product range up to 1.2 m (2.5 kg) is specially designed for the restoration of shower trays. The pot life of the diluted substance is 90 minutes. When applying the mixture, almost no bubbles or drips appear. Temperature resistance - up to 120 degrees.
The material for restoring cast iron bathtubs and steel sanitary ware completely polymerizes in 36 hours. The coating is durable and durable. There is practically no smell. In addition to the classic composition, the company’s assortment includes 4 more mixtures. They differ from each other in viscosity, fluidity, and hardening time.
“Premium” dries in 24 hours, but it also needs to be applied within an hour. "Titanium" leaves a thin film, but it is more difficult to level than "Classic". “Super” dries in 16 hours, but is applied within half an hour. “Light beige” has a milky, creamy tint.
Specialists of the manufacturing company have organized a network of professional restorers PlastAllProfi. The site allows you to choose a master who has passed examination tests and received a certificate for the right to work with the material.
Place #6 - YarLIsoat 616
This pourable acrylic was developed in 2010. The composition uses components from the American company DuPont, German manufacturers Dow and BykChemie. The material gives a coating thickness of up to 6 mm. Can be used for restoration of containers in which drinking water is stored. This fact is confirmed by relevant documents.
The Yaroslavl plant has its own research center where product tests are carried out, which is a guarantee of high quality acrylic
Characteristics:
- Manufacturer: Yaroslavl Paint and Varnish Products Plant;
- flow rate - 1.2 m (2.9 kg), 1.5 m (3.4 kg), 1.7 m (4 kg);
- White color;
- hardening time - 36-48 hours;
- shelf life - 12 months.
The product is supplied in a metal Euro container, which eliminates the risk of counterfeiting and damage during transportation. The design of the bucket protects the contents from premature opening of the goods by unauthorized persons.
The composition can be tinted in a signature tone of blue, emerald, black, yellow, red, blue-violet, burgundy, red-brown. The smell during the bath renovation process is insignificant and disappears in a couple of hours.
The pot life of the mixture is 40-45 minutes. If the room temperature is more than 24 degrees, the time of working with the composition is reduced to 20 minutes. Acrylic differs from competitors in its long hardening time. The coating remains snow-white for many years and does not turn yellow.
You can use the bathroom after two days. But it is recommended to change the mixer, lay tiles and work that is mechanically hazardous to the coating every other week.
Place #7 – EkACRYL
The composition does not contain solvents; no air bubbles are formed when pouring. The mixture is moderately thick, applied in a thick layer, but after dripping, about 2-3 mm of the substance remains on the walls, and 5-6 mm at the bottom.
After drying, the film remains plastic for some time and you can easily cut off drops on the sides of the bathtub, they do not break off. The coating is glossy and smooth.
The material is characterized by good adhesion to steel and cast iron surfaces, resistant to hot and cold water, detergents
Characteristics:
- Manufacturer: Yaroslavl Paint and Varnish Products Plant;
- flow rate - 1.2 m (2.7 kg), 1.5 m (2.7 kg), 1.7 m (4 kg);
- White color;
- hardening time - 16 hours;
- shelf life - 12 months.
The two-component material mixes well until smooth. The mixture does not have a pronounced chemical odor. Plasticity and fluidity make EkACRYL easy to work with. The viability of the substance lasts about an hour.
But restorers note the lowest strength of this acrylic among its “colleagues”. The coating can even be damaged by a falling shampoo bottle.
Damage Prevention
To avoid having to renovate your bathtub too often, it is recommended to take advantage of practical expert advice on maintenance. Firstly, for cleaning you cannot use products with an abrasive base (powders, soda, etc.). They quickly scratch the surface, and the cracks become clogged with dirt and germs. Therefore, the product becomes not only unaesthetic, but also unhygienic.
Secondly, you cannot use household chemicals based on ammonia. Such a chemical substance greatly damages the acrylic surface, and the first defects may appear after the first contact.
To clean an acrylic bathtub, it is recommended to buy detergents designed specifically for such surfaces in specialized stores. These products are made on the basis of synthetic formic acid, which perfectly cleans acrylic, but at the same time does not spoil it.
Choosing a bath cover. Review of the main types of enamel and paints
Aging bathtub enamel does not bring joy to the owners with its untidy appearance, and a new bathtub coating, as reviews show, is quite in demand in the modern construction services market.
What kind of coating should you prefer so that the price is affordable and the durability is acceptable? Of the entire variety of coatings, coating repairs are most often used with compositions based on nitro enamels, epoxy resins and acrylic polymers. Coatings made from these materials help restore the bathtub to its original appearance, but the resistance and durability of the coating differs markedly, sometimes several times.
The glass-ceramic coating of the bathtub, applied at the factory, is subjected to high-temperature treatment, providing high resistance to mechanical wear and resistance to chemicals and temperature changes. It is impossible to restore such a coating at home, but restoration of the bathtub coating can be done using one of the repair technologies.