When building a roof, special attention is always paid to the structure of the attic. After all, it is important that its covering is done technologically correctly, does not put unnecessary pressure on the walls and is able to withstand the load from things stored under the roof and sometimes an entire set of furniture.
Therefore, in this article we will understand in detail how an attic floor on wooden beams should be installed correctly: the features of its installation, calculation of loads and fastening. And our detailed illustrations will help you.
What is an attic ceiling?
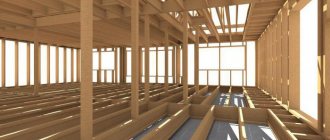
The ceiling is a horizontal load-bearing structure that separates the living floor from the attic space, and at the same time takes on the load from the weight of everything that is under the roof.
The floor itself is a necessary element of rigidity, which also provides stability to the entire structure. Among all the others, today we will highlight the attic floor, namely its specific type. Note that the general rules apply to all types, but there are still some technical features in the arrangement of attic floors along beams.
The first of these is rigidity and strength. Those. the overlap should be:
- Capable of withstanding design loads and not bending or collapsing. For example, the permissible deflection is only 1 in 250 of the span length.
- Secondly, the attic floor should not be flimsy, and in no case should it vibrate when objects are moved on it or people move on it.
- And finally, soundproofed to avoid unpleasant squeaks when someone climbs into the attic.
In private construction, two types of floors are mainly used: wooden and reinforced concrete. The former are built on strong wooden beams, and the latter – on beams, slabs and in a monolithic version. Also, the beams themselves can be steel if it is necessary to cover fairly large spans. But it is precisely in private housing construction that the choice of flooring material is most often influenced by the economic factor.
The cost of installing floors usually amounts to up to 20% of the estimate for the entire construction of a house, and labor costs - as much as 25%. Therefore, the construction of a wooden attic floor is still quite popular - all thanks to its high performance characteristics and good sound insulation.
And one more important point: when making wooden attic floors, you do not need heavy lifting equipment, especially a concrete pump.
Advantages and calculation of beam floors
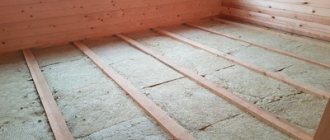
The entire structure consists of beams and boards, which are called rough. The beams themselves can be load-bearing, located simply next to each other, or fixed in a special way, which is much more reliable. The standard sizes of beams are 20-40 centimeters in height and 15 meters long, plus 8-20 centimeters in width.
Unlike reinforced concrete attic floors, wooden ones are installed dry. It is much lighter in weight, so in private construction it is better to use just such an overlap. On the other hand, wooden floors are the least soundproofed, so you will have to spend money on additional measures.
The beams are located at a distance of 60 centimeters to 1.5 meters. Of course, the more often you install them, the greater the load the attic will be able to withstand in the future, but the foundation of the house will also have to endure a greater load.
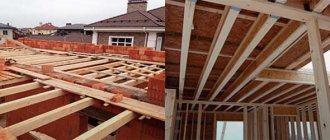
Light partitions are usually mounted on a wooden attic floor - most often frame ones, to which the attic rafters are directly attached. They need to be installed perpendicular to the beams or edgewise.
But if for some reason the internal walls of the attic have to be placed parallel to the ribs or beams, which is not at all according to the rules, then the structures in these places must be strengthened. Most often, fragments of boards are used as such elements, which are attached perpendicular to the ribs of the floor.
And this graph will help you calculate the required number of beams and the load on them:
If you work alone
It’s hard to find a good helper, so sometimes a builder has a question about how to line a ceiling with boards alone. In general, the principle of filing a rough ceiling remains unchanged, but here you will have to choose building materials more meticulously. In particular, when working alone, it is better to give preference to lightweight materials that you can easily hold yourself, such as PVC panels or MDF. If it is intended to be hemmed with boards, then it is better to lay the lumber on top of the interfloor floor beams.
It is noteworthy that you can also attach the boards to the bottom, but here you will have to use homemade spacers that will support one end of the board, replacing the missing assistant. You can also use various hooks on which one end of the board is hung until secured.
Options for installing attic beams depending on its type
Many people ask the question: where is the correct place to install wooden floor beams? Into the walls, onto the walls, or even bring them out a little? It depends on what type of attic you have and whether you will use it as a living space in the future. The attic is very popular today!
So, here is an economical option that allows you to convert the attic into an attic in the future without any problems. True, very tight:
Therefore, if you have such plans and even now you are not sure whether there is another place in the project for a personal office or a billiard room, then make the walls higher in order to install the floor beams lower.
What will it give? In such an attic there will be much more usable space, fewer sharp corners and it will be much warmer:
But if in your project the attic was initially planned as a separate and spacious room, as if built on top of the house, then the attic beams need to be installed as strong as in the interfloor ceiling, and also secured to anchors in the reinforced belt:
Here is an excellent step-by-step example of how such attics are built and how strong such a floor should be:
Conclusion
The advantages of a steel-reinforced concrete floor over a conventional monolithic one have already been considered by the developers of STO 0047-2005. Whether to use this technology in its original or unsupported version or to prefer another type of floor is up to everyone to choose for themselves. But the fact that the method works has been tested by many of our craftsmen.
To verify the viability of such an overlap, it is enough to study the relevant topic on the forum. What kind of ceilings there are in general - in the material about their varieties. In the video - another type of floors, prefabricated monolithic.
Subscribe to our Telegram channel Exclusive posts every week
Types of floor structures
There are several types of attic floors with wooden beams. Each of them has its own purpose and its own pros and cons.
Platform: for a cold attic
As for frame houses, the floors in them are recommended using the “platform” system. That is, after installing the walls, beams are laid and a certain platform is created, as it were, and a working foundation for the future floor of the attic at the same time. It is important here not to put unnecessary pressure on fragile walls, so the attic covering will also not be designed for a piano in the corner.
In this case, the beams are installed on a strapping beam, which is used as a power plate:
Rigid board: for uniform shrinkage
But in a house with walls made of logs or timber, according to the rules, a rigid shield is installed as an attic floor, which, when the walls shrink, will smoothly lower with them, and always evenly.
Economy flooring: to save time
Prefabricated wooden floors should be highlighted as a separate type of attic floors. Their main feature is the use of special fasteners, which are made of galvanized steel. Their thickness and quality are calculated depending on the level of future loads on the floor.
Standard attic floors on beams with beams and wooden joists appeared at the end of the 20th century, and after them floors made of wide boards became more fashionable.
Ready-made trusses: for a residential attic
Today, special ready-made companies for arranging attic floors are also in fashion. In fact, this is not a new thing in the construction market; such companies appeared at the end of the 16th century and found their rebirth at the end of the 20th century. Canadian companies that were involved in construction developed special calculation programs for such companies and their exact shapes with assembly lines.
Ribbed beam floor: for private housing construction
In our country, new types of wooden floors are beginning to appear, which until now were popular only abroad. These are light wooden floors. They are relevant for private construction, when a fairly light wooden frame is used as a system.
The essence of the overlap is that “ribs” are installed every 30-60 centimeters, and they are covered with sheathing. Wooden beams with a height of about 20 and 28 centimeters, a thickness of 45 centimeters, and a length of up to 5 meters are taken as “ribs”. They are made from natural wood and connected with special bundles of boards, covered with chipboard or fiberboard sheathing.
Therefore, we highlight quick and simple installation as the main advantages of a ribbed attic floor. Of the minuses: the need for treatment with a fire retardant, less strength and low sound insulation properties. And, of course, such boards are more sensitive to sudden fluctuations in humidity and temperature. And also, if a fungus or some insect decides to eat such a ceiling in a few years, it will eat it much faster than thick beams.
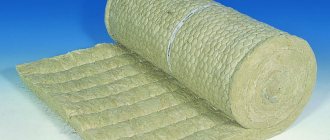
From below, this structure is covered with a suspended ceiling made of plasterboard slabs. Mineral wool is placed between the ribs on top. It is this that will provide fire resistance and sound insulation to the entire wooden floor.
Ribbed attic floors are much cheaper than beam floors - this is quite reasonable and rational if you do not insulate a non-residential premises and make a residential attic out of it. Then you don’t have to worry about the load-bearing capacity of such a foundation. The only negative is that beams are more common for Russian houses, and the ribbed ceiling is almost no different in appearance from the monolithic one. Therefore, in Russian houses, ribbed beam attic floors are more often installed.
The beam for constructing such an attic floor must be taken in a rectangular shape, and strictly, and not in a diamond shape. And be sure, when buying such timber, take with you the most common school ruler, because it often happens that many people are going to build a floor from 15x15 cm timber, but in the end they are built from 14x14 cm timber. And then, on your site, be sure to prepare a place for storage such timber and its processing.
By the way, today many even install ordinary timber in a wooden floor on its edge. The fact is that even a ruler, no matter what material it is made of, easily bends along its entire length, but if you place it edgewise, it will be almost impossible to bend it:
Lay a finished floor on the rough floor made of boards, and install a suspended ceiling underneath. But often the wooden floor of the attic is left without additional finishing on purpose, in view of the interior design concept, but then all its details are done very carefully and even with a decorative slope:
The suspended ceiling itself imparts a certain rigidity to the ribbed ceiling.
Materials for filing a rough ceiling
You can hem the rough ceiling with various building materials, but here you need to take into account the specific use of the room.
Drywall. This is one of the most popular and sought-after materials on the construction market. GLA attracts attention with its practicality and affordable price, however, the sheets are very sensitive to a humid environment, therefore, if we are talking about damp and unheated rooms, you need to choose a material with a moisture-resistant coating. Drywall is installed on a metal profile frame or glued directly to the base.
PVC panels. A universal material that fits organically into any interior. The advantage of plastic is its neutrality to any external environment; in addition, due to its light weight, it does not create additional load on the supporting structures and foundation. The only drawback: low resistance to mechanical damage, but given the fact that we are talking about ceiling finishing, this nuance can not be emphasized. The panels are mounted with a stapler on a prepared frame or glued with liquid nails. The second option is used in cases where the base forms a perfectly flat surface.
Lining. A beautiful, but relatively expensive way to cover a rough ceiling. The slats can be installed on a base or a pre-prepared frame. For fastening, self-tapping screws or thin nails without heads are used.
MDF. Plastic panels that subtly imitate natural coating: stone, plaster, wood. Considering that the material is of artificial origin, it can be used even in rooms with high levels of humidity, such as kitchens or baths. MDF panels are attached to the frame using clamps (special fixing brackets), which reliably press the edge of the panel to the base.
Plywood. An inexpensive and practical finishing material, which after installation forms an almost perfectly flat surface, which significantly simplifies the finishing process. To ensure that plywood lasts a long time, it is pre-treated with antiseptic compounds.
Board. A fairly common option for filing a rough ceiling. As in the previous case, the building material is treated with an antiseptic; the evenness of the sides does not play a special role here: the surface will be covered with a finishing coating.
When choosing a material, you need to be guided not only by cost, but also by technical characteristics. For example, any products made of plastic, PVC and MDF, have low thermal insulation properties, so installation will require laying a thick layer of insulation. Drywall gets wet when exposed to moisture for a long time, and even a water-repellent coating cannot solve this problem. Boards made of coniferous wood are not suitable for lining a sub-ceiling in bathhouses: when heated, the lumber will release resin, which is not very good in terms of fire safety.
How to embed attic beams into walls made of different materials?
Today there are several ways to attach attic beams. Basically, installation is required perpendicular to the support beam, which is equal to the maximum length of the floor beams. If the design does not provide for additional stiffening beams, then the attic floor beams should lie along the axes of the load-bearing wall posts. According to standards, floor beams must rest on the top frame of the walls and are attached to it with two nails 3.5x100 millimeters on each side.
But often in construction it is also necessary to use special fastening methods, and in order for you to better understand them, we have prepared high-quality master classes for you.
It is necessary to design a wooden attic floor based on the loads that will affect it. But keep this point in mind. Quite often, residential buildings are built with the expectation that they will be enough for the whole family. And such loads are divided into distributed and concentrated.
When designing an attic floor, you need to take into account distributed loads, and you can learn more about them from modern SNiPs. Concentrated loads should only be taken into account if you are definitely going to install some objects with a large mass in the attic.
For example, today it has become fashionable to arrange SPA salons, a billiard room, dance floors and rooms for musical training under the roof. But in practice it often turns out that 10 rooms in a house is not enough. And under the roof there is excellent ventilation, a beautiful and quiet space to set up your personal office there.
The need to use special fasteners depends on what technology for arranging the attic floor you have chosen in general. So the most reliable way is to support the beams on the load-bearing surfaces of the walls or on the floor beams. Then there is no need or sense at all to use metal elements - the beams are fastened with self-tapping screws or nails. In all other cases, it is necessary to secure the attic floor.
Therefore, we advise you to initially make such a strong attic floor that in a couple of years you can rebuild it into an attic with a clear conscience. And our special tables and computer programs will help you make special calculations. Your task is to correctly select the optimal cross-section of beams and their pitch. Everything else is just details.
Is a reinforced belt required?
First of all, decide whether you need an armored belt to install attic floor beams. Armopoyas is a reinforced belt, which is a closed structure along the entire contour of the building. The task of such an element is to distribute loads.
When installing wooden beams of the attic floor, it is necessary to install an armored belt only if:
- The walls of your house are built from gas block or foam block. After all, such material has a rather fragile structure, and at the same time the wooden beam floor has considerable weight. Due to its design, it always creates a point pressure on the blocks. And our task is to distribute this pressure and make it linear. So that the Mauerlat takes on the entire load.
- Also, whether the foundation for your house is prefabricated FBS blocks, or the foundation itself is shallow, it is also important to correctly distribute the load from the attic over the entire base area of the house.
In all other cases, you can safely do without an armored belt.
Fastening beams to beams or frame
When floor beams are attached to a log frame or rounded logs, the easiest way is to use the frying pan technology. In simple terms, simply insert beams into the walls, like parts of a construction set.
Please note that the floor beams are fastened together with metal brackets:
Attaching to a metal I-beam
If you have to split floor beams along their length, then their parts should be joined with an overlap or with the help of special overlays, and spacers will also be needed between the beams themselves.
And if we are talking about planning a large area, then it is better to use a steel I-beam or a particularly strong one made of laminated wood as a support for the beams. In this case, be sure to leave a gap of 10 millimeters between the attic beams and the steel I-beam. It is important that the steel beam does not touch the ceiling sheathing. To prevent the floor beams from creaking in the future, lay additional soundproofing material or make the ceiling sheathing quite dense:
If you use auxiliary beams, they do not have to be placed inside the floor. These can be easily built into the wall or even used independently. And the beams themselves need to be mounted on so-called beam shoes:
The first step for such beams is to make a strapping. Moreover, it is not at all necessary to attach the harness itself to the walls of the first floor, as many people think.
The main thing is to properly prepare such beams for installation. And to do this, they must be treated with an antiseptic (and at a temperature not lower than 5 degrees Celsius). Then leave them to soak for a day. Now cut and lay such boards and a supporting beam on a wooden Mauerlat, previously impregnated with its fire and bioprotection. All that remains is to secure all the floor beams to the shoes.
And, when the ceiling of the beams is ready, make a subfloor, at least so that it is convenient to move on it.
Fastening to brick walls
If we are talking about attaching a wooden beam to a brick wall, then it is necessary to create a nest in it, even at the stage of constructing the walls themselves. The nest should be located 160 mm inside the wall (this is the minimum), and on a special board.
When inserting a beam into the wall, you need to fill it with cement mortar or leave it open - everything here depends on the thickness of the wall:
- So, a closed version is necessary when the wall thickness is two bricks.
- Open - with a wall thickness of two and a half bricks.
In addition, the beam ceiling of the attic with brick walls must be reinforced with anchors in every third beam. The anchors should cover it from below and on the sides, and themselves should extend into the wall by 30–50 millimeters. It is also possible to connect beams to each other and on internal walls.
Beams should be attached to a brick wall using the following technology:
Attaching to fragile block walls
If you are attaching wooden beams to a block wall, then you will need to build a reinforced concrete lintel. This is the same reinforced belt that we talked about earlier. It needs to be installed under a beam, specifically under a wooden box that goes into the wall. The beam itself will need to be installed on a reinforced belt in the wall, also at a minimum of 160 mm. And do not forget also about such an important point as the insulation on the side of the block and the gap on the side of the beam, which will ensure the escape of moisture.
Therefore, in order for modern lightweight blocks to withstand the wooden beams of the attic floor, follow this scheme:
If the blocks are quite strong and their physical qualities are close to brick, then use the following installation scheme:
Working with lumber
Natural wood is the most environmentally friendly option that holds heat well, lasts a long time and looks aesthetically pleasing. The option of lining the ceiling with boards is more often considered. It can be edged, unedged, made of deciduous or coniferous wood. Also in demand are lining, block house, calibrated river (20*30 mm), blanks with veneer. More expensive options such as knee and heat-treated wood also look interesting.
An example of a ceiling made of edged boards with open floor beams Source na-dache.pro
Let's consider what size board to choose for lining the ceiling. If we start from the ceiling area, then 15 sq.m. is taken as a guideline. In a small room, a canvas made from narrow blanks up to 100-120 mm wide looks better. Large structures are usually decorated with boards, lining or block houses 150-180 mm. To make such a ceiling more attractive, you can divide the area into separate sectors. Here, floor beams can be considered an excellent solution, regardless of the degree of their opening in height.
Installation of the ceiling, regardless of which board it is decided to sheathe it with, is carried out in two ways: on top of the beams or on the sheathing. The difficulty of the second option lies only in creating a flat plane across the entire working area. You can visually hide unevenness by using an unedged board by laying it in two layers (the bottom one overlaps the seams in the top one).
An example of using unedged boards for a ceiling with beams Source par-torg.com
Which timber is better to choose for the ceiling?
If you have now smoothly approached the issue of installing an attic floor, the first problem you will have to face is finding good quality boards. It is very important that neither the beams nor the flooring have any flaws, are not weakened and certainly do not suffer from any mold. Otherwise, such overlaps are life-threatening for the lives of household members.
Option #1 - beams made from ordinary boards
Let's separately note which beams need to be used when constructing an attic floor. The best option is boards 20-30 centimeters wide. The material used is pine or larch, which work well for deflection. It is this kind of wood that is durable in terms of deformation and less susceptible to cracks. According to official estimates, when using such material, it is possible to reduce the consumption of all wood by as much as 20%.
Option #2 - beams made of laminated veneer lumber
Glued laminated timber is also often used today as beams, the strength of which is several times higher than that of ordinary wood. The thing is that any glued wooden products are stronger. The whole secret is that the glue that is used gets into the pores of the two parts being glued together and forms many strong threads between them - much stronger than the fibers of the wood itself. And therefore, laminated veneer lumber as beams is a completely normal option.
In appearance, they do not differ from solid wood, especially when, for aesthetic purposes, the best grade of wood is used in their outer layers. Such beams are made from lamella boards, which are cleaned of defects and glued together. The main advantage of this method is that the total length of the beams can now be up to 12 meters, and it will be much stronger, just with a wooden beam with the same parameters.
What many also don't take into account is that solid wood can have hidden problems that may show up a few years later in the form of a beam breaking down the middle. For example, such a cause is often rot or parasitic insects, which at the time of purchase of the beam have not yet had time to develop. Second point: it is quite difficult to find an absolutely flawless long beam made of pure wood, without knots and other problems. And the knots themselves are bad because in these places the wood does not work well in tension, it is denser, and as a result the beam, with the constant dynamic stress that contributes, reacts to it unevenly along its entire length.
Option #3 - OSB beams
To make strong beams from OSB boards, they are cut into strips of different widths and milled. Next, the blanks are glued together, and they form a long endless strip, from which templates of a certain length are made. The main advantage of using such beams for attic flooring is their low weight and excellent strength and bending resistance.
Option #4 - I-beams
Another type of beams popular in Russia is I-beams. This is one of the strongest types of beams, and any flooring can be installed on top of them, not just plywood. And the plasterboard is hemmed underneath. These beams are so strong that it is more appropriate to install them as an interfloor ceiling for fully residential rooms, not only for the attic, and even more so for a cold attic.
The so-called Canadian I-beams are also popular. They are made in a factory from wooden blocks, OSB boards, special moisture-resistant boards, laminated veneer lumber or coniferous wood.
Option #5 - beams from ready-made trusses
For example, one of the most recent developments is ready-made attic trusses. Their height is 350 millimeters. They are made from dry wood with a cross-section of 100x50 mm. In the factory, such elements are combined into one structure using a special press with metal plates. Moreover, during the manufacturing process of such trusses, engineering communications are even placed inside them.
Option #6 - LVL beams
It is also worth noting that a relatively new material on the domestic market is LVL beams. These are high-strength homogeneous materials that are made by gluing under special pressure. Several layers of veneer are used, and during the manufacturing process of the beams the fibers are arranged strictly parallel.
The characteristics of such beams are special. The main advantage is that which beams have a large selection of sizes. The material itself lends itself well to processing with almost any cutting tools. But given the price of LVL timber, we advise you to purchase it only if your attic floor will be located over a large span and your priority is quality and safety.
Option #7 - HTS beams
Another new type of attic beams is the German HTS. They are also an I-beam, where the top and bottom layers are made of wood, but the middle layer is made of OSB board.
Between these layers a profiled steel sheet 0.5 millimeters thick with a special polymer coating can also be inserted. Moreover, the steel itself has a wavy shape, due to which the beam has high load-bearing characteristics. And there may not even be one such wall, but two, which is even better for bending resistance. And to prevent the HTS beam from bending and twisting, hidden transverse connections are installed between the layers at a certain pitch.
Video description
The installation of an insulated ceiling with visible beams is illustrated in this video:
Most modern lumber for decorative finishing is made with longitudinal and end edges that are different in purpose, but similar in shape. This was done to make it easier to mount a solid sheet using the tongue-and-groove system. The main thing here is to ensure that the comb is driven evenly into the recess and to avoid distortions. To fix the workpieces, a hidden type of fastener made of terminals and nails is used. The latter are often replaced with small self-tapping screws.
An example of a fastening element for lining Source baykalles.ru
Tips for working with drywall
To assemble a frame with a large area, experts recommend using only a special metal profile and guides and stands. This will ensure the reliability and durability of the ceiling regardless of the complexity of the design solution. To fix the drywall, self-tapping screws are used, the heads of which must be recessed into the canvas by 1 mm.
Before finishing, all joints must be filled with plaster. To do this, the edges are cut at an angle. First, the recess is primed, dried and filled with solution. Then, after the composition has hardened, reinforcing tape (serpyanka or construction bandage) is laid and a leveling layer of putty is applied. The heads of the self-tapping screws are also primed and hidden by puttying. After sanding the surface and treating it with a primer, you can perform decorative finishing.

