The feeling of comfort in a living space depends on many factors, including heat. With the onset of cold weather, when centralized heating has not yet been started or its power is insufficient, a heater becomes an indispensable thing. The same applies to the bathroom; special devices are used to maintain a comfortable temperature here.
Bathroom heaters create warmth in small spaces; they are compact in size and can withstand high humidity and frequent temperature changes.
Depending on the space occupied, such devices come in the following types:
- Wall-mounted.
- Floor-standing.
- Ceiling.
According to the method of heat supply, devices are divided into:
- Ceramic.
- Infrared.
- Oily.
- Convector.
- Gas.
- Inverter.
- Fan heaters.
When choosing a heater for a bathroom, you should pay attention to:
- Power.
The area of the heated room directly depends on this indicator. If the bathroom has central heating, then the calculated value is 100 W per 1 sq. m, if there is no heating in the room at all, then the calculation is made according to the formula: 150 W per 1 sq. m. - Placement method.
The installation location depends on the size of the bathroom and how cluttered it is. Ceiling models take up the least space. - Dimensions.
The size of the heater can be any, but not less than 30*30 cm, the choice depends on the available space in the room. - Type of control:
electronic, mechanical, touch. - Moisture protection.
Bathroom fixtures can have different levels of sealing. Minimum protection cannot withstand splashes of water; with maximum protection, the heater can even operate under running water. - The presence of a thermostat.
Such a device is designed to turn off the device when the set temperature is reached, thereby saving energy. - Additional functionality.
This includes protection against overheating and tipping over, control of the device from a smartphone, child lock, built-in timer and more.
We present the rating of bathroom heaters 2022. The best 11 devices that were selected by our experts based on reviews and ratings.
| Rating (2021) | Prices, ₽ | A country |
| 1. Nobo NFK 4S 10 | from 8800₽ | Ireland |
| 2. Noirot CNX-4 Plus 500W | from 10200₽ | France |
| 3. Electrolux ECH/AG-500 PE | from 6900₽ | China |
| 4. Redmond SkyHeat 7002S | from 4000₽ | Russia |
| 5. Thermor Evidence 3 Elec 500 | from 3700₽ | Ukraine |
| 6. Atlantic F119 Design 500W | from 4000₽ | Ukraine |
| 7. Ballu BEC/EZMR-500 | from 3000₽ | China |
| 8. Hintek IW-03 | from 3300₽ | Russia |
| 9. STN R-1T | from 3300₽ | Russia |
| 10. Kalashnikov KVCH-E05M-11 | from 3300₽ | Russia |
| 11. Resanta OK-1000 | from 2700₽ | China |
Costings
The estimate for installing the system includes the following costs:
- materials - basic and heat-insulating: damper tapes, films, adhesive tape and others;
- components: sensors, thermostats, fasteners, hardware and others;
- screed solutions, glue, etc.;
- surface preparation;
- installation work, installation of wiring, sensor, thermostat;
- screed and cladding.
This is a very approximate list, rather a rough diagram, since the list is individual for different types of sex. This will be discussed in more detail below. It is difficult to name exact costs, since the price of different types of materials fluctuates significantly. And the cost of installation depends on many factors. We can say that the entire set can cost 2–5 thousand rubles per “square”. Laying can cost about one and a half thousand rubles per square. Consultants on our website polaremont.ru will help you choose the appropriate option and outline its cost.
The harm from electromagnetic radiation from heating mats is greatly exaggerated
Insulation of the ceiling in the bathroom
Important! If we are talking about a private house, then the ideal solution would be to insulate the floor on the floor above. In this case, when finishing the ceiling directly in the bathroom, you can limit yourself to a vapor barrier followed by hanging drywall, taking into account the ventilation gap.
For interior ceiling decoration, the best material would be polystyrene foam or polystyrene foam. The process looks like this:
- The ceiling is pre-leveled, cleaned of dirt and old finishes;
- Special glue is applied to the insulation sheets. It is better to coat the elements around the perimeter with a slight deviation from the edges, as well as in the middle with a zigzag;
- The sheets are pressed against the ceiling and fixed for a minute until the glue sets. It is better to carry out further work, including processing of cracks, no less than an hour later;
- A fiberglass mesh is installed on the material and putty is applied with a waterproof compound;
- The final finish can be water-based paint. It dries quickly and withstands high humidity well.
Determination and calculation of heating equipment power
Equipment power is one of the most important characteristics. It is this indicator that must be taken into account when purchasing a heater for a specific type of room. To determine the power, first of all you should find out the area of the entire room that needs to be heated.
To determine the correct parameters, you will need to study the list of room areas and the power required to warm them up:
- 5-6 square meters – 500 W.
- 7-9 square meters – 750 W.
- 10-12 square meters – 1000 W.
- 12-14 square meters – 1250 W.
- 15-17 square meters – 1500 W.
- 18-19 square meters – 1755 W.
- 22-23 square meters - 2000 W.
- 24-27 square meters – 2500 W.
TOP 3 best heaters
Not every household appliance is suitable for use in the bathroom. Equipment must be safe, easy to maintain and functional. Among the popular electric models, we will highlight 3 of the best.
Nobo NFK 4S 07
The power of the convector heater is 750 W, which is enough for a room of 11 square meters. The body of the device is made in an ultra-thin design - 55 mm. When installed on a wall, the device hardly sticks out, therefore saving usable space.
The control of the convector heater is electronic, but without a screen. Mechanical switches (sliders) are located on the rear panel. The equipment operates in 2 modes, there is an auto-shutdown function when overheating, tip-over protection and heat maintenance at sub-zero temperatures. High cost is the only drawback.
Convector model Source expertology.ru
Instructions on how to properly foam a steel hot tub?
Typically, this method is used to insulate and soundproof steel bowls, but it can also be used for acrylic bathtubs.
Be sure to read articles about other methods of insulating and soundproofing bathtubs.
STEP 1: Place the bathtub upside down on the floor. Don’t forget to first place pieces of cardboard underneath it so as not to scratch the enamel surface.
STEP 2. Be sure to thoroughly wipe off dust from the surface on which you are going to apply foam. Then you need to degrease it; for this you can use a universal degreaser, alcohol or dishwashing detergent.
STEP 3. Before use, it is better to prepare the balloon. It needs to be shaken well and heated a little by placing it under running warm water for 5 minutes. It would be enough.
Under no circumstances should you heat the cylinder in a kettle or boiler, as many resources advise. Due to a significant increase in pressure, it can explode.
STEP 4. Spray the bath generously with water using a spray bottle. This way the foam will stick to the surface much better. If the bowl dries out during application, repeat the procedure.
STEP 5. Place the can on the gun and get to work. It is better to apply the foam in dense layers using a snake. Start with flat surfaces and gradually work your way up. There are no special recommendations for the sequence of surface coating
It is important not to leave any spaces
Sometimes the drain needs to be replaced, so it's best to leave a little space around the hole.
STEP 6. Now you need to leave the font until completely dry for 5-6 hours. After the foam has completely dried, cut off any excess foam at the leg attachment points using a knife.
We insulate the walls in the bathroom with various materials
First of all, you should abandon mineral wool, as it absorbs moisture and increases its heat transfer capacity. If you use rolled material, it is better to use basalt wool, which is mounted in a similar way, but almost does not absorb moisture. However, such material still needs an effective vapor barrier. And therefore, after reading the construction forum, you will find advice to take a closer look at other methods. Now let's look at other insulation materials:
- Styrofoam. An excellent option for the bathroom. The high fire hazard in the case of this room does not play a role, since fires almost never occur in the bathroom. But low cost, environmental friendliness and ease of installation are the undoubted advantages of this choice. Its thermal insulation qualities are excellent, and the foam is not afraid of moisture. However, the material almost does not “breathe” - it has low vapor permeability. Placed on pre-cleaned and leveled walls using an adhesive composition;
- Polyurethane foam. This polymer layer is sprayed using a special apparatus, and it is better to trust the process to professionals. Like polystyrene foam, polyurethane foam is not afraid of moisture, and its adhesion is great with almost all materials. On the material side there is high vapor permeability, fire resistance, insulating qualities and environmental friendliness. Usually sprayed on walls with a pre-arranged frame. The latter helps in further finishing;
- Warm plaster. It differs from the usual one by the presence of filler in the form of polystyrene foam, vermiculite or sawdust. The goal is to reduce thermal conductivity by using less dense materials or air cavities. The advantages are that we not only insulate, but also at the same time level the walls for further finishing. Manufacturers talk about the high thermal insulation quality of their products, but in reality the effectiveness of such plaster is not so high, and it should be applied in a thicker layer, which is more difficult and expensive;
- Cork insulation. Before use, the material is waxed to make it more moisture resistant. Mounted on pre-prepared walls using a special adhesive composition. The disadvantage of such insulation is its high price;
- Extruded polystyrene foam. The most attractive insulation for indoor and outdoor use, and not just for the bathroom. Low thermal conductivity, minimal moisture absorption, low specific gravity. It is superior to regular foam in almost every way.
How to insulate a metal font with your own hands
Below are detailed step-by-step instructions for insulating an iron bathtub using foil polyurethane foam (penofol).
For detailed instructions on thermal and sound insulation of a bathtub using polyurethane foam, see our special article.
Step 1. Place the bathtub against the wall or lay it upside down on the floor, after covering it with cardboard or cloth. This is necessary to avoid damage to the enamel.
Step 2. The next step is to degrease the surface. A universal degreaser is perfect for this. But if you don’t have it, it doesn’t matter, you can use alcohol or regular dishwashing detergent. Wipe the entire surface thoroughly and let it dry for 10-15 minutes.
Step 3. If you have insulation in rolls, cut a piece of the required length so that the bowl is covered crosswise from side to side, as shown in the photo. Don't forget to peel off the film from the adhesive layer.
After you have glued the sheet to the bathtub, you need to trim off the excess and once again iron the insulation tightly with your hand so that there are no bubbles.
Step 4. Measure the width of the most even areas and cut strips of 15-25 cm. Then glue them to the bowl in the same way, cutting off the excess.
Step 5. Next, glue the remaining empty spaces with the same small strips.
Don't forget to cut a hole for the drain.
Step 6. Tape the insulation joints with reinforced tape.
Step 7. Remove the insulation from the mounting points of the legs.
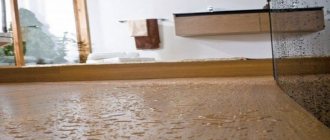
What are the dangers of low temperature in the bathroom?
It doesn’t matter whether we are talking about the walls in a wooden house or concrete structures - the combination of the high humidity characteristic of a bathtub with low temperatures, as well as insufficient ventilation, leads to the formation of fungus. And the active growth of mold on the walls not only spoils their appearance, but can also have a detrimental effect on human health. We wrote about this, as well as about methods of combating mold, in one of our previous articles.
Features of internal wall insulation in the bathroom
In addition to the fact that internal insulation is always less preferable than external insulation, in the case of a bathroom there is another difficulty - a high level of moisture. Consequently, the material used for this must not be afraid of moisture and not become saturated with it, reducing its performance characteristics.
Important! It is often necessary to insulate not only the walls, but also the ceiling, since large heat losses also occur through it.
In addition to this, you must also keep in mind the following:
- When insulating walls in a bathroom, the vapor permeability indicator is often violated, so you should install a good ventilation system in the room;
- Before finishing with insulation, walls should be treated with antifungal impregnations. It doesn’t matter whether we are talking about a wooden wall structure, or brick or concrete, the risk of mold formation is equally high;
- The formation of cold bridges must not be allowed, so pay close attention to the absence of gaps between the insulating boards;
- To prevent moisture from affecting the insulation, it is necessary to use a water barrier.
Classification of heated towel rails
Dryers are divided into different groups according to type, size, installation method and material.
By type of coolant connection
The type of connection also determines three types of heated towel rails, and the type of connection plays one of the key roles when choosing a specific model.
- Water heated towel rail. Connects to the hot heating system. Heating occurs during the passage of a heated working environment. It is important to choose a model made of material that is resistant to aggressive water. During operation, there may be a risk of destruction of the structure of the internal walls, so the level of rigidity is an important factor when choosing . Made from stainless steel with a chrome finish , this is an excellent option that will last for many years.
- Electric heated towel rail. Does not depend on central heating . Requires an outlet at the installation site. Allows you to use yourself when necessary. There is a function for self-regulation of temperature data. Characterized by increased energy consumption.
- Combined heated towel rail. The most practical scheme for installation at home. You choose the connection type that is convenient for you. Alternating the heating method is optimal in different seasons of the year. So, you save money on utility bills. The cost of this modification is an order of magnitude more expensive than the above analogues.
Divided by size format
This variety is more of a design definition than an actual characteristic; it all depends, trivially, on the ratio of height and width.
- Horizontal heated towel rail. Combines the features of a dryer and radiator for heating. Installed as a window sill option. Will fit into any design. Does not take up a large area during installation.
- Vertical heated towel rail. It takes up an order of magnitude more space to be placed on the wall. Provides a large usable drying area. Available in exclusive shapes that will make your home decor stand out.
Type
There are 3 types:
- Mermen. Powered by hot water. The advantages include durability, strength, no additional maintenance costs, and low cost. There are no maintenance requirements; replacement is required primarily not due to breakdown, but for aesthetic reasons. The disadvantage is the dependence on hot water supply or heating (to which the dryer is connected). Some devices only work in winter, when the apartment is heated. Others become cold when there is no movement of hot water through the pipes.
- Electric ones are connected to the network for continuous operation. Their disadvantage is expensive maintenance. They are easier to install than water ones, because you don’t need to drill the walls, connect to the water supply, or use additional fittings.
- Combined ones combine the characteristics of both types. These heated towel rails are connected to both a hot water source and an electrical outlet. The ability to change modes allows you to always maintain a comfortable room temperature.
We recommend: Malfunctions of the Junkers gas boiler: error codes and methods for eliminating them
By material
Dryers are made from different materials:
- Stainless steel will withstand high pressure. The walls of the pipe must be at least 3 mm thick.
- Steel is a cheap material. Dryers made from it are no longer sold, but most old houses have them installed.
- Copper is resistant to corrosion and conducts heat well. Such a product will not be heavy and looks good in appearance. Check that the pipe is galvanized on the inside for greater protection against water. The disadvantage of this option is the expensive price.
- Brass has the same “advantages” as copper. Products made from it are cheaper. The "disadvantage" is fragility. You should only buy dryers with chrome-plated inner walls.
Other non-ferrous metals and alloys (for example bronze) can also be used. Such products are rarely used due to their high cost.
Non-ferrous metals are often used to create designer dryers of non-standard shapes and colors.
Insulating the floor in the bathroom
This part of the bathroom can be insulated using heated floors, but we will consider the option with foam plastic. For this purpose, you should choose foam with a density of 25 kilograms per cubic meter or higher. We will mount the sheets on the floor with tile adhesive, after gluing damper tape on the sides. In this case, reinforcement in the form of a mesh is laid on top of the foam plastic and the screed is poured with a layer of at least 3 centimeters. The latter will be the basis for the final finishing - most often with tiles.
Before pouring the screed, it is important to make sure that the foam sheets do not spring, otherwise the finish here may crack in the future.
https://www.youtube.com/watch?v=xc7T99cXd6E