To decorate a room with a unique piece of furniture, you can create a table from epoxy resin. Such furniture always looks beautiful and unusual; it easily gives the design an elegant look. Guests who see such a product in the house will be completely delighted and will study the coating for a long time, because it always turns out to be original. You can make such an item with your own hands. The required materials, intricacies of work and types of these tables will be discussed in detail below.
Types and design features of tables
Making furniture pieces from epoxy is popular, but it is most often used to decorate countertops. An epoxy table can be made using different methods and look completely different. To create them, different types of epoxy resin are used; either hot or cold curing material can be used. The last option is more convenient, because it can be implemented at home.
In addition to its aesthetic appearance, epoxy creates a water-repellent layer, and the surface also withstands abrasive effects. This material allows you to realize various ideas, because it can be used in a variety of ways.
Next we will talk about popular options that look impressive, and the features of their manufacture.
In addition to its aesthetic appearance, epoxy creates a water-repellent layer, and the surface also withstands abrasive effects.
River table made of epoxy resin
Creating an imitation of a river on a countertop using epoxy material for this purpose is in demand today. To achieve this effect, the table is made of epoxy resin and wood.
Typically, a tree plays the role of two banks, and a synthetic substance is responsible for simulating a river. At the same time, the master can show imagination and arrange the material in different ways. The shapes of the countertops are also chosen in different ways. They can have a round, rectangular, square shape. Such products are suitable for dining tables, coffee tables, and office options.
At the same time, designers add pebbles, shells and other elements to the fill to make the surface more interesting.
The material consumption to create water is approximately 13-14 kilograms if it occupies 210x15x5 centimeters.
Such products are suitable for dining tables, coffee tables, and office options.
Coffee table
The use of wood allows you to get a variety of variations, because this material is malleable, and the raw edges are in good contact with the resin. In this case, the weight of the product will not be too large, and the strength will be good. So the production of coffee tables is now in demand.
They can also have any shape, and the legs are made of metal, wood and other materials. The size and base of the structure determines how much load the product can withstand.
The use of wood allows you to get a variety of variations, because this material is malleable, and the raw edges are in good contact with the resin.
Wooden tables with epoxy coating
You can create an epoxy coating on a wooden table to protect its surface from water and other influences, but you can also leave various elements under the coating that will give it a unique appearance. For this, completely different things can be used, ranging from coins to natural objects. So, you can choose cuts of old wood, moss, planks, or buttons, decoration elements and more. Under such a covering, all these objects will freeze in eternity, and such furniture will attract the views of others.
A table made of epoxy and wood will have a lot of weight, so the legs must be strong.
Under such a covering, all these objects will freeze in eternity, and such furniture will attract the views of others.
General principles for making epoxy countertops
In order for the epoxy table to turn out exactly the way you intended it, the mold must be poured at the appropriate stage of hardening of the mixture. Thus, at the liquid stage, the resin flows freely from the stirring stick. This material is excellent for pouring molds and filling cavities and corners. When the epoxy reaches the consistency of honey, it can be used as an adhesive. The material at the rubber stage resembles plasticine; various elements can be sculpted from it. When the resin reaches the solid stage, the table is ready for its intended use.
The countertop can be made in one color, with a combination of colors, with various attachments, with a combination of materials, or entirely from epoxy. In the latter case, it is necessary to make a template (formwork) from a glass base and aluminum corners. The glass must be thoroughly washed, wiped, and treated with degreasing agents. Aluminum edges must be attached to the glass with window grease and rubbed with wax mastic. This treatment is necessary so that the mold can then be easily removed from the frozen tabletop.
Counting the amount of epoxy resin
After choosing the required type for the job, the logical question arises, how much resin will you need to purchase? After all, in many ways it is the volume that will affect the project budget. Each manufacturer indicates on the packaging the approximate consumption of resin, but in general the amount usually does not vary much. Therefore, you can determine the volume while sitting at home, without studying the instructions.
Professionals say that on average 1.1 liter of epoxy is required per 1 square meter of surface, this is taking into account a layer a millimeter thick. Knowing these indicators, calculating the volume of required material will not be difficult.
These figures reflect the consumption of the finished composition, taking into account the hardener mixed with the resin.
Professionals say that on average 1.1 liter of epoxy is required per 1 square meter of surface.
DIY table - technology
When combining wood and resin, you also need to pay attention to the wood itself. Any piece of wood is not suitable for a tabletop; slabs are used for this purpose; these are pieces of expensive wood that are chamber dried. The most popular options are slabs made of oak, poplar, and ash. The species must be a hard wood.
When the material is available, they decide how it will be arranged. And they move on to preparing it. It is necessary to create a flat surface, it is processed with a milling cutter and sanded. Places that will come into contact with the resin must be covered with it. This will seal the holes to prevent air from escaping and causing bubbles to form.
During drying, the resin must warm up, those areas where bubbles appear are heated. After drying, the surface is sanded again and given an even coating.
Afterwards you can proceed to pouring the epoxy itself.
During drying, the resin must warm up, those areas where bubbles appear are heated.
Necessary materials
You shouldn’t be distracted when carrying out work, so it’s better to prepare the necessary materials and tools in advance. You will need:
- Epoxy resin;
- A corrector for epoxy resin, it helps to level the surface, or a gas burner, working with it is somewhat more difficult;
- Sealant for formwork processing;
- Separator, either wax, Vaseline, oil;
- Dyes, if necessary, give a different shade to the coating;
- Drill and screws;
- Level;
- Sander;
- Plane;
- Mixer;
- Glue;
- Plastic and materials for the formwork base;
- Containers for preparing the composition.
You shouldn’t be distracted when carrying out work, so it’s better to prepare the necessary materials and tools in advance.
Preparation of epoxy
Manufacturers include instructions with their products on how to prepare them for use. Preparation is carried out immediately before starting work. You must strictly follow the specified proportions and rules. Typically the composition consists of two components: resin and hardener.
If it is necessary to give the solution a certain color, the dye is added before mixing the composition with the hardener.
After thoroughly mixing the components, you can proceed to adding the hardener. Mixing is best done by hand; the components should be well mixed. In this process, bubbles may also appear; they are removed using a hair dryer, and this is done carefully.
Different viscosities are used for different types of tables:
- Liquid, drains easily, can fill all cavities, intended for coating using decorative elements;
- Semi-liquid is suitable for round countertops;
- Thick, used only for restoration work on vertical surfaces.
Preparation is carried out immediately before starting work.
Manufacturing process
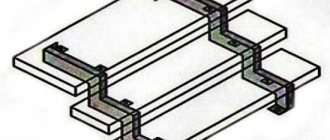
The first step is to prepare a form into which the composition will be poured. For this purpose, he uses any type of smooth sheets; they are made higher than the thickness of the wooden parts, connect them together with sealant, carefully covering the joints so that the resin does not leak out through them.
If the resin is also on the edges of the tabletop, then the width of the mold is made larger than the wooden base. The sealant must be leveled after hardening.
Having placed all the necessary elements on the surface in the intended places, they proceed directly to pouring the resin. After all, it hardens quickly. You need to pour the prepared solution starting from the middle, so it will be evenly distributed over the surface. If the table is made large, then the filling is expanded. After filling the entire composition, it is leveled using a trowel. After leveling, leave the product to dry.
You need to pour the prepared solution starting from the middle, so it will be evenly distributed over the surface.
Plain or transparent tabletop
Making a table with a single-color tabletop begins with cleaning and degreasing the workpiece. If a material that absorbs liquids (for example, wood) is used as a base, then it must first be primed with resin. This will prevent bubbles from appearing during operation. The next step is to make an epoxy mixture and pour it into the mold.
If the table is to be made in color, then the appropriate coloring pigment must be added to the resin, and it is desirable that the dye be from the same manufacturer as the epoxy. If you want the color of the tabletop to be combined, then during the pouring process you need to use resin with dyes of several shades.
After pouring, you need to leave the countertop for 10-15 minutes, and then remove any bubbles if they appear. After two days, you can grind and polish the product. After a week, the table is completely ready for use.
Product care rules
These products require compliance with a number of rules for their care:
- Periodic treatment of the surface with wax or special oil should be carried out;
- The surface is wiped daily with a damp cloth, then the table is wiped with a dry cloth;
- If there are complex stains, they are wiped with universal detergents;
- Tables with slabs made from certain types of trees cannot be placed next to heating devices, and in places of direct sunlight, and they should not be placed on the street;
- It is better not to place hot dishes on the coating itself.
The surface is wiped daily with a damp cloth, then the table is wiped with a dry cloth.
A resin table will take its rightful place in any interior. The ability to create various types of surfaces allows you to get a unique table that will look good among other furniture. It is important to choose a quality resin and prepare the slabs so that they look beautiful together. The layout of materials should also be thought out in advance. The pouring process itself is not so complicated, you can do it yourself, it is important to take your time and prepare carefully.