It is quite difficult to disassemble an Electrolux washing machine for spare parts or for repair purposes without having the skills and experience of such work.
Errors made during the disassembly process can become the final verdict for the further operation of the household appliance.
For those who are faced with such work for the first time, detailed step-by-step instructions on how to disassemble an Electrolux washing machine will come to the rescue.
By adhering to it, disassembling and reassembling the washing machine will be done as quickly as possible and without any problems.
Design features of Electrolux washing machines
If we talk about the design features of Electrolux washing machines, it should be said that in general they are no different from washing machines from other manufacturers. This brand from Sweden produces not only front-loading machines. Its lineup includes more than a dozen models with vertical loading.
In order to better know the features of a particular model of washing machine that is to be disassembled, cleaned or repaired, you will need to study the diagram. It is located in the instructions for the specific washing machine model.
As a rule, there are no serious differences in terms of design between the models of this manufacturer. Although if you compare models with horizontal and vertical loading, there will be differences. For example, loading laundry into a vertical washing machine is carried out from above, and above, on a special panel, there is a control panel. At the same time, in front-loading models, laundry will be loaded from the front of the machine.
At the same time, there will be no differences in the principle of operation here. The only difference will be in the location of certain elements - drum, heating element, and so on.
Prices
We value your time and tell you the approximate cost of repairs in advance. To calculate it, leave a request by phone or online. Within two hours, the technician will call you back and estimate the approximate cost of repairs based on the description of the breakdown. Here is a list of basic services for LG washing machines with prices for repair work.
| Type of work | Cost* (work only) | Cost* (work only) | Working hours | Guarantee |
| Visit of the master | For free** | For free** | Within 24 hours | — |
| Diagnostics | For free** | 10-40 minutes | — | |
| SMALL REPAIR | ||||
| Replacing a button | from 1300 rub. | from 1300 rub. | 30-50 minutes | 6 months |
| Replacing the hatch handle | from 1700 rub. | from 1700 rub. | 30-40 minutes | 6 months |
| Replacing the door hinge | from 1600 rub. | from 1600 rub. | 20-30 minutes | 6 months |
| Sunroof glass replacement | from 1700 rub. | from 1700 rub. | 30-50 minutes | 6 months |
| Replacing the hatch | from 1600 rub. | from 1600 rub. | 20-40 minutes | 1 year |
| Opening the hatch without repair | from 1300 rub. | from 1300 rub. | 20-30 minutes | — |
| Replacing the mains filter (FPS, starting capacitor) | from 1800 rub. | from 1800 rub. | 30-50 minutes | 6 - 12 months |
| Replacing the drain hose | from 1600 rub. | from 1600 rub. | 20-40 minutes | from 1 to 2 years |
| Replacing the inlet hose | from 1200 rub. | from 1200 rub. | 10-20 minutes | 1 year |
| Replacing the drain filter | from 1700 rub. | from 1700 rub. | 20-50 minutes | 1 year |
| Replacing the detergent dispenser | from 1200 rub. | from 1200 rub. | 10-20 minutes | 2 years |
| Cleaning the drain filter | from 1300 rub. | from 1300 rub. | 15-30 minutes | — |
| Cleaning the filler filter | from 1300 rub. | from 1300 rub. | 15-30 minutes | — |
| Replacing the drive belt | from 1200 rub. | from 1200 rub. | 20-50 minutes | 9 months |
| Removing shipping bolts | from 1400 rub. | from 1400 rub. | 20 minutes | — |
| MEDIUM REPAIR | ||||
| Replacing the heating element | from 1800 rub. | from 1800 rub. | 30-60 minutes | 6 months |
| Replacing the drain pump | from 2100 rub. | from 2100 rub. | 30-70 minutes | 6 months |
| Replacing the hatch cuff | from 2100 rub. | from 2100 rub. | 40-90 minutes | 1 year |
| Finding and eliminating blockages in the drain tract | from 1400 rub. | from 1400 rub. | 20-70 minutes | — |
| Replacing UBL (hatch lock) | from 1700 rub. | from 1700 rub. | 30-60 minutes | 1 year |
| Replacing motor brushes | from 1800 rub. | from 1800 rub. | 30-70 minutes | 6 months |
| Motor repair or replacement | from 2600 rub. | from 2600 rub. | 40-80 minutes | 1 year |
| Replacing shock absorbers | from 2900 rub. | from 2900 rub. | 40-90 minutes | 1 year |
| Replacing springs | from 2500 rub. | from 2500 rub. | 30-70 minutes | 1 year |
| Replacing the pressure switch (level sensor) | from 2100 rub. | from 2100 rub. | 40-60 minutes | 6 months |
| Replacing the filling valve (KEN) | from 2000 rub. | from 2000 rub. | 30-60 minutes | 6 months |
| Remove foreign object | from 1700 rub. | from 1700 rub. | 30-70 minutes | — |
| Replacing the control or display unit | from 2600 rub. | from 2600 rub. | 30-80 minutes | 1 year |
| Repair of control or indication board | from 3300 rub. | from 3300 rub. | 40-90 minutes on site or 2-3 days (taken to the workshop) | 6 months |
| Replacing the program selector | from 2600 rub. | from 2600 rub. | 30-70 minutes | 6 months |
| Repair or replacement of aquastop | from 2600 rub. | from 2600 rub. | 30-90 minutes | 1 year |
| Repair or replacement of pipe | from 2000 rub. | from 2000 rub. | 30-70 minutes | 1 year |
| Replacing the drum pulley | from 2100 rub. | from 2100 rub. | 30-50 minutes | 1 year |
| Replacing the temperature sensor or thermostat | from 1700 rub. | from 1700 rub. | 30-60 minutes | 6 months |
| Replacing the drying heating element | from 2100 rub. | from 2100 rub. | 40-80 minutes | 6 months |
| Replacing the drying fan motor | from 2300 rub. | from 2300 rub. | 40-80 minutes | 6 months |
| Replacing the wiring harness | from 2000 rub. | from 2000 rub. | 40-80 minutes | 2 years |
| Replacing the circulation pump | from 2600 rub. | from 2600 rub. | 40-70 minutes | 6 months |
| Replacing the upper counterweight | from 2300 rub. | from 2300 rub. | 30-60 minutes | 2 years |
| Replacing drum curtains (for top-loading machines) | from 2500 rub. | from 2500 rub. | 40-70 minutes | 6 months |
| COMPLEX REPAIR | ||||
| Bearing replacement | from 4300 rub. | from 4300 rub. | 1-4 hours | 1 year |
| Replacing the cross | from 3800 rub. | from 3800 rub. | 1-3 hours | 2 years |
| Replacing the tank or drum | from 4600 rub. | from 4600 rub. | 1-3 hours | 1 year |
| Replacing the tank support | from 4300 rub. | from 4300 rub. | 1-2 hours | 1 year |
| Replacing the lower counterweight | from 4600 rub. | from 4600 rub. | 1-2 hours | 2 years |
| Replacing drum curtains with tank disassembly | from 3800 rub. | from 3800 rub. | 1-3 hours | 6 months |
*Amount is indicated without spare parts.
**Departure and diagnostics - 0 rubles. If you refuse repairs, the payment is 400 rubles.
The final price is calculated after diagnosis. It is influenced by:
- complexity of repair work;
- type of spare parts (if required);
- additional work (dismantling and installation of furniture if the machine is built-in).
Diagnostics
Without special equipment, it is simply impossible to check a number of elements of the washing machine. For example, an electrical part or a control unit. If we are talking about mechanical problems with one or another element of the machine, then you still need to disassemble the device, then look for the problem and decide whether it can be fixed with your own hands, whether a specific element can be repaired or whether replacement and other spare parts are needed.
After all, even if we talk about the problems from the list presented above, we can see that the cause of a particular breakdown can be several different cases.
And even a technician cannot always immediately determine the cause of a washing machine malfunction. Therefore, the diagnostic question will be individual in each case and depend on the operating rules of the washing machine.
Full embedding
A built-in machine in the kitchen is beautiful because it itself is not visible, everything is hidden behind the facades. The unity of style is maintained, the room seems spacious and tidy. This is one of the most common options for installing equipment, but there are several disadvantages :
This option is suitable for owners of small kitchens, for example, in Khrushchev-era apartments, when it is necessary to visually expand the space.
Manufacturers of built-in appliances clearly indicate the dimensions of cabinets for installation in their instructions. Below you will find a diagram for installing the Candy CWB 1372DN1-07 washing machine.
And here is a diagram for installing a Whirlpool AWOC 0614 washing machine:
There is a built-in cabinet. This allows you to raise the machine to the desired height, without losing precious space, since there will be storage boxes or other equipment, for example, a microwave oven, under and above it.
How to repair an Electrolux washing machine with your own hands
Among the many brands of washing machines, Electrolux is in constant demand and popularity. Modern models are distinguished by wide functionality and convenient operation. But, sooner or later, in any technology, various malfunctions and breakdowns arise. You have to contact warranty service centers or try to repair the Electrolux washing machine yourself.
Self-diagnosis capabilities allow you to identify a breakdown and take timely measures to avoid more serious consequences.
Electrolux washing machine does not turn on
This situation occurs quite often. This may primarily be due to a lack of electricity. The circuit breaker trips for various reasons, mostly due to a short circuit. Sometimes a residual current device is triggered when current leaks into the washing machine body. Triggering of an RCD often occurs due to poor-quality electrical wiring. Lack of power is often due to a faulty outlet.
- Another reason is often a surge protector. For testing purposes, it is recommended to connect the washing machine directly to an outlet. Sometimes the cord from the machine itself turns out to be faulty, constantly experiencing mechanical stress. A multimeter is used to detect a breakdown. If there is a break, it is recommended to completely replace the wire, since twisting will not ensure reliable and stable operation.
- Quite often the power button fails. In some Electrolux models, power is directly supplied to it. When checking, the washing machine must be de-energized. The functionality of the button is checked using a multimeter turned on in buzzer mode. During testing, the button alternates between on and off. In the ON position, the multimeter will beep, which indicates its working condition. When disabled, the button will not be detected.
- Sometimes the problem is a faulty noise filter. The filter dampens electromagnetic waves generated by the washing machine. If it breaks down, the electric current stops flowing through the circuit and the washing machine does not turn on. The filter is checked by testing. At its input there are three wires - phase, neutral and ground, at the output - only phase and zero. If there is voltage at the input but not at the output, then the filter is faulty and requires replacement.
- The most serious reason for the Electrolux washing machine not turning on is due to a malfunction of the control module. Complete replacement of the device is very expensive; the control module can be repaired yourself. However, this is not always possible to do at home, so in this case it is recommended to use the services of a service center.
When you turn on the washing machine, the RCD is triggered
Most washing machines are installed in the bathroom, therefore, in accordance with the PUE, they must be protected from leakage currents using a separate RCD or differential circuit breaker. However, situations often arise when protective devices begin to constantly operate for no apparent reason. There are several most likely options that cause such an unplanned operation.
- First of all, operation can occur as a result of incorrect connection of the differential machine. This happens when trying to ground the device in the absence of a grounding wire. In another case, the phase is passed through the device, and the working zero is simply duplicated or connected directly to the common zero bus. According to the rules, the current of the phase and neutral conductors passes through the internal circuit of the protective equipment. Part of the current passing through the common zero bus is perceived by the RCD as a leak, so the power is immediately turned off.
- Another reason is a faulty protective device. Before checking the RCD, all outgoing wires are disconnected. After this, voltage is applied to the switched on RCD or differential circuit breaker and the TEST button is pressed. As a result, the protective equipment should be disabled. If this does not happen, then the RCD is faulty and must be replaced.
- If the RCD is working properly, you should carefully inspect the washing machine itself and assess its condition. This applies to old units because they have damaged internal wiring, worn insulation of electric motor windings, deformed housings of internal parts and other damage that can cause current leakage. The test is done using a multimeter by checking the resistance between the machine body and the plug electrodes.
- If all previous checks did not reveal any malfunctions, then the cause is most likely faulty wiring. It may be pierced by a nail or self-tapping screw, or placed too tightly in the panel or distribution boxes. Quite often moisture ingress is observed. These faults are especially pronounced when the insulation is damaged or worn. If damage cannot be detected, the entire cable line must be replaced.
The water does not heat up during operation of the Electrolux washing machine.
A characteristic feature of modern Electrolux washing machines is that they do not depend on the presence or absence of hot water in the water supply system. The unit itself heats it to the desired temperature. Therefore, the situation becomes quite unpleasant when the collected water does not heat up and remains cold.
- The malfunction can be detected approximately 30 minutes after the start of washing. It is enough to place your palm on the glass of the hatch, and if it is cold, then the water is not heating up.
- The main cause of the problem is considered to be incorrect installation of the washing machine, when the height of the pump and sewerage system do not correspond to each other and do not provide normal drainage. In this case, water entering the tank immediately leaves the machine through the drain. The heating itself occurs, but due to the constant supply of cold water, it simply does not have time to warm up.
- Wrong washing mode selected. Some of the programs are not designed for strong water heating and the heat will not be felt through the hatch cover.
- A breakdown of the water heater - heating element, after which the machine simply stops heating water. This mainly occurs due to the formation of scale, leading to overheating and burnout of the heating element. It often fails due to voltage surges in the electrical network.
- Sometimes heating stops as a result of a failure of the temperature sensor. This leads to an automatic stop of water heating to avoid overheating of the heating element.
- The biggest problems are caused by a faulty control module that controls all processes, including water heating. In this case, independent actions can only aggravate the situation, so it is recommended to contact a service center.
Water does not fill into the tank
If water does not fill up, do not panic and immediately run to the service center. First of all, you need to try to figure it out yourself and check for the presence of certain reasons.
First of all, you should make sure that the water supply system is working properly. Sometimes there is simply no necessary pressure in the city network. In some cases, owners forget to open the tap that supplies water to the washing machine, which was closed after the previous wash.
If the water supply system is working normally, then the reasons for the lack of water in the tank are related to the washing machine itself. It could be an inlet valve that is clogged due to poor quality water. The valve can burn out due to voltage surges and other electrical network problems. If the heating element is broken, the washing program is not activated and water is not collected. Another reason is a faulty control board. Not everyone can handle complex electronics on their own, so most often the only correct solution is to contact a service center.
Water does not drain from the system
If the water in the Electrolux washing machine does not drain. Here too, there are certain reasons that cause this malfunction.
Most often, it's all about a clogged drain filter, pipes or sewer. Therefore, these elements require careful cleaning. These actions are not repairs and refer to preventive maintenance that can be performed independently.
If there is no blockage, be sure to check the pump or drain pump that is constantly in contact with water. If a malfunction is detected, the device must be replaced. Often the pressure switch, that is, the sensor responsible for the water level, fails. The incorrect signal it supplies leads to incorrect operation of the control module. Another reason could be a faulty board or software glitch, which can be repaired at specialized service centers.
The Electrolux washing machine is very noisy during operation.
The Electrolux washing machine begins to make extraneous sounds in the form of creaking, crackling, noise and others.
This may happen for the following reasons:
- Loose drum pulley fastening, accompanied by a jerky whistle and crackling sound. Such fasteners are unscrewed and reinstalled on the sealant. The pulled pulley must be replaced.
- A foreign object has gotten between the drum and the washing tub, as evidenced by humming and squeaking noises during operation.
- Failed bearings are indicated by vibration and hum, like an airliner. First, under the influence of moisture, the seals that seal the shaft wear out, and then the bearings themselves begin to rust and break. As a rule, bearings and seals are replaced at the same time.
- In addition, the springs and shock absorbers may be worn out, causing the entire device to rumble. In this case, the tank shifts and tilts, so during operation it knocks on the inner walls. The same thing happens when the counterweight fails. All faulty elements must be replaced.
Typical malfunctions of SMA Electrolux
To determine a malfunction, it is not always necessary to disassemble the Electrolux washing machine; it is enough to pay attention to the behavior of the CM during operation.
Let's look at the reasons for breakdowns that are inherent in Electrolux Intuition, Electrolux Inspire and other models.
SMA does not turn on
Have you decided to start the wash, but the machine won’t turn on? Don't panic. Let's understand the reasons:
- Perhaps there is no voltage in the network, or it is not enough to start the SMA. How can I check this? All you need to do is connect any household appliance to an outlet. If the device works, it means the problem is not in the network. If not, then you can call an electrician or wait for the electricity to come on.
- Defective power cord. Carefully inspect the cable and plug for damage. If there are any, you need to replace the cord.
- Check the hatch door. Perhaps it did not close until it clicked, so the process does not start.
- The contacts of the start button have oxidized. To check, you will have to remove the control panel and do the repairs yourself.
- Problems with the main module. A control board failure is a serious matter. Sometimes a professional technician may be required.
Problems with water supply and drainage in an Electrolux car
It happens that the Electrolux washing machine does not fill or drain water. For what reasons does this happen:
- Weak water pressure. The inlet valve is not open properly.
- The water intake hose is bent. It needs to be inspected and restored to work.
- The inlet valve, which is responsible for supplying water to the system, could have failed.
- A mesh filter is installed in front of the inlet valve, which protects against the penetration of small particles from the water supply. It needs to be cleaned. This can be done under water pressure.
- The washing machine pump has failed. In this case, the water will not drain.
- The drain pipe is clogged. Water does not drain due to blockage. The drain system needs to be cleaned.
No powder collection
After pouring the powder into the dispenser tray, the machine releases a stream of water through a special valve. Along with the water, the detergent also goes away. Over time, the CM may stop picking up powder.
What caused the Electrolux washing machine to malfunction?
- The most common cause of the problem is a clogged dispenser. To eliminate it, just remove the tray and rinse it under the tap.
- If everything is fine with the tray, the inlet valve may be worn. Then it needs replacing.
- Washing in the Electrolux machine does not start, the drum does not spin
- If you have a problem like this, you can try to fix the problem yourself.
To do this, you need to open the hatch of the Electrolux washing machine and take out half of the laundry. Having thus reduced the load, try to start the SM again. If there is no result, then:
- There is probably a problem with the car's engine. The drive belt may be worn or loose, or the electric brushes may be worn out. It happens that the engine burns out due to a short circuit.
- Failure of the main board elements can lead to failure of any part of the washing machine. Additionally, you can check the wiring between the module and the motor.
No water heating in Electrolux machine
How can you tell if your SMA is not heating the water? After starting the wash, wait 15-20 minutes. Then place your palm on the sunroof glass. Warm surface - there is heating. And if washing is done in cold water, the reason for this is a malfunction of the heating element.
The thermostat or voltage stabilizer could also be faulty.
Rinse mode does not turn on
A top-loading Electrolusk washing machine did the wash as usual, but does not go into rinse mode? Most likely, the heating element (heating element) has broken. Since the water does not reach the required temperature, the rinse does not start.
The cause of such a breakdown could be the control module. If a system failure occurs, it is enough to reboot the SM within 15-20 minutes. If this happens constantly, you will have to replace the module.
Turning on SM Electrolux leads to knocking out plugs
When you turned on the washing machine, did the automatic transmission break out? This means that there are problems in the electrical network. Never turn on your Electrolux machine again. It's better to call an electrician to find out what the problem is.
What can cause a short circuit:
Breakdown in the heater body.
Oxidation of start button contacts.
Electronic board malfunction.
Moisture gets into the electric motor, causing a short circuit.
Spin doesn't work
For what reason does the Electrolux washing machine not spin out clothes?
- The tachogenerator, which controls the number of engine revolutions, has failed.
- Motor malfunction.
- The pump is broken, which is why the water is not draining.
- The electric motor is malfunctioning or its brushes are worn out.
- A breakdown of the pressure sensor also leads to a similar malfunction. Since the water level in the tank is not detected, the machine cannot switch to another mode.
Electrolux hatch door does not close
- Subsequently, the Electrolux washing machine does not start.
- Check the door handle and lock for serviceability.
- Check the UBL (electronic lock) device.
How to dismantle the top panel on PMM of different brands?
Let's look at the procedure for dismantling the panel in cars from leading brands.
Instructions for Bosch and Whirlpool
The easiest way is with a Bosch dishwasher. Proceed like this:
The manual for Whirlpool machines is similar - the top panel is also held in place by plastic latches.
Manual for Indesit and Hotpoint Ariston
The procedure is almost the same, with minor differences:
On a note! It is very important for the further validity of the warranty card that the procedure for removing the cover is regulated by the manufacturer. If the manufacturer does not indicate the possibility of dismantling, then by removing the panel you will lose the warranty and the possibility of free service in the event of a breakdown.
Procedure for Beko brand PMM
Your actions and rules for their implementation:
In some Beko models, the top cover can only be removed together with the back panel. In this case, work is carried out like this:
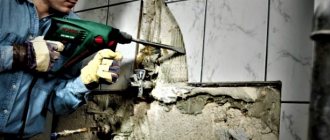
Disassembling the case
Whatever the problem, it will almost always be necessary to disassemble the washing machine to get to its insides and find out what the problem is. Let's try to figure out how to do this. The disassembly process begins with the fact that the device must first be disconnected from the outlet. Now unscrew the inlet hose, having first shut off the water supply to the washing machine. Now you need to remove the top cover. It is held on by 2 bolts located on the rear panel. They should be unscrewed.
Now you need to make an effort and pull it towards you. After this, you should unscrew a couple of bolts on the top panel on one side. They are responsible for securing the back wall.
It is important to say here that most Electrolux machine models are made in such a way that they can be disassembled into two halves. There are hidden screws in the side wall that are located in the middle. They are hidden by plugs. And to gain access to them, the plugs must be removed. Unscrew both screws. Now you need to unscrew a couple of screws in place of the back wall. This pair of bolts is not found on all models of Swedish brand washing machines.
You need to release the plastic holder, which is secured with a pair of latches. They must be released using a screwdriver and the holder lifted up. Here you need to point out an important point - some car models have a holder consisting of 2 elements that are secured together with a bolt.
To dismantle the holder, unscrew it and unclip the latches. Now we completely pull out the back wall of the device.
This way we have access to the following elements:
- engine;
- tank;
- water pump;
- pump;
- belt;
- drain hose;
- heating element;
- shock absorber
Of course, this is the most common instruction for disassembling a washing machine from a Swedish manufacturer. If we talk about disassembling vertical washing machines of the brand, it is carried out like this:
- First you need to pry the control panel with a slotted screwdriver, then pull it up and slide it back;
- we tilt it a little and photograph exactly how the wires are connected, after which we unscrew the fasteners and dismantle the board;
- remove the fill valve, having first removed the hoses from the clamps and disconnected the wires;
- screw in the fasteners and remove the panels on the sides;
- Now we see fasteners, by unscrewing which we can remove the bottom cover and gain access to the most important components of the washing machine.
Top Loading Models
If the “vertical” cover is broken (for example, hinges, lock, powder receptacle), it can also be dismantled.
The first stage is preparation:
The second stage is dismantling the control panel:
Unfastening the panel will give you access to the bolts that hold the moving part in place. Unscrew them and you're done!
How to disassemble the top of the vertical SM can be found here:
As you can see, the process does not take much time and does not require expensive, rare equipment. A suitable screwdriver in skillful hands - and it's done.
Source
Repair Tips
Here are some interesting repair tips that, if followed, can help not only in repairing a washing machine, but also in prolonging its operation. To maximize the life of your Electrolux washing machine, you should take care of it as carefully as possible. For example, a rubber seal should be wiped after each washing process, because hair, animal fur and water accumulate there. If you don't do this, the drum will smell unpleasant.
Another important point is that you need to regularly clean the pump filter, because there are often small objects in it, which can cause poor drainage.
You should not allow scale to form, because it has a bad effect on the operation of the device. To prevent its occurrence, you need to use special powders. In addition, you should use powder formulations specifically for automatic washing machines.
If we talk about home repairs, it would not be superfluous to lubricate mechanical parts so that they work as long and efficiently as possible. In addition, you should understand what exactly you are doing and be guided by the device diagram. Otherwise, you can consult a specialist from your nearest service center.
Cleaning
Soap scum, lint and hair remaining on perforated walls after washing, mold and mildew that actively multiply in a humid environment are not only a source of unpleasant odors, but can also cause serious damage to household appliances.
Regular cleaning of the drum will maximize the period of uninterrupted operation of your LG washing machine.
Modern models of washing machines are equipped with a “drum cleaning” mode. Launching the program is simple:
- press the “Start” button and wait for the sound signal;
- We find two buttons with the “*” icon on the control panel and press them for a few seconds (at this moment the washing machine stops responding to any other commands);
- Press the “Start” button again (the self-cleaning program starts).
Cleaning lasts 90 minutes. A sound signal will indicate the end of the program.
The “drum cleaning” mode is started with an empty tank, without using any detergents. As soon as the self-cleaning process is completed, the hatch door is opened to allow the inner surface to dry thoroughly.
Call the master
Sometimes you can’t do everything yourself, or it’s just scary to get into the washing machine without experience in performing such work. In such cases, it is better to call a specialist.
There are several options:
- Contact a specialized company. You can find companies that do repairs online. The advantage is that you can immediately get acquainted with the reputation and reviews of the company, the disadvantage is that it will cost more than calling private craftsmen.
- Services for freelancers. There are special services, for example, “You Do”, where you need to set a task, describe the approximate breakdown, if possible, set a price. The master can respond to the task. Such services usually also have reviews and ratings, and the price is lower than on companies.
- Private advertisements. Private craftsmen post information about repair services on bulletin boards and social networks. But you should be careful with this method; there is always a risk of running into a scammer.
- The cost of services depends on the pricing policy of a particular company or master and even on the city of residence.
Other, less difficult to install components, for example, a power cord, a hatch latch, or removing a third-party object, will cost about 1000-1500 rubles including labor.
Unfortunately, there are quite a lot of scammers, because of them you can lose both money and equipment. Common schemes:
- Taking an advance for the visit of the master. Advances are possible only in cases where the master travels far outside the city, and even then not always. Usually, after sending the advance, the “specialist” number does not respond.
- The washing machine is taken to the workshop for repairs. Moreover, the address of this workshop is unknown; in such cases, the equipment can be taken away forever.
- Replacement of working units. A type of fraud when, in order to increase the check, they change something that still works. It is more difficult to understand such a situation; it is advisable to first read reviews about the honesty of the service.
Flaws
Everything has both advantages and disadvantages. And the washing machine in the kitchen is no exception. But basically, the disadvantages are not related to the machine itself, but to its “extras”.
Storing dirty laundry
Dirty laundry has an odor, and if you store it in the kitchen, it will also absorb kitchen odors. And this means that it will have to be carried to the kitchen either from the bathroom or from another room. Some people find this very inconvenient - although in fact, there is nothing critical about it.
Storing powder in the kitchen
With powder the situation is more complicated:
There are several ways out of this situation:
ADVICE. It is most convenient to store the powder in the kitchen either next to the machine or under the sink.
Open door
After washing, the machine door should be opened and the drum ventilated to prevent mold from growing in the appliance. This can interfere with passage, especially if the machine is built-in - after all, you need to open not only the machine door, but also the cabinet door.
Difficulty of change
Once the machine is already installed, it is difficult to move it somewhere else, since pipes and electrical wires are laid. But this applies not only to the kitchen, but also to other rooms.
Spoils the appearance
This does not apply to all washing machines, but only those not hidden behind the facade. Dirty laundry stored inside looks especially unsightly.
ADVICE. To make the machine look neater, you should match it to the kitchen facades, or decorate it with vinyl stickers of the same color.
If both options are not suitable, then the machine is hidden behind a beautiful matching curtain. This is especially true for kitchens in the style of Provence, Country and others.
Electronic module errors
Very often, the processor unit or wiring is to blame for the inadequate operation of the washing unit. You can determine the cause by the code, but it is not always possible to repair the module on your own.
To search for a burnt or defective part, you need a special stand, which is available in workshops. Its workers will repair the unit or select a new one.
Reasons for module failure:
- E5A Cooling radiator temperature threshold exceeds 88°
- E5B The DC voltage on the corresponding bus is much lower than the allocated value of 175 V
- E5C The constant potential in the relevant circuit is much higher than the required value of 430 V
- E5D FCV is unable to receive/send operation signal within a 2 second period
- E5E No communication between the processor module and the FCV control board
- E5F Frequent control program resets are observed. Because of this, the FCV board continuously polls the machine configuration
- E84 Recirculation pump signals are not recognized. There is no voltage at its contacts or always has a potential of 5 volts
- E91 The connection between the machine remote control and the processor unit is broken
- E92 The main electronics are not coordinated with the user interface
- E98 Engine control module does not match with processor board
- EBE Protection relay damaged
- EBF, EHF Safety circuit is not recognized correctly
- EB1, EH1 Power supply frequency is not normal
- EB2, EB3, EH2, Mains voltage too high or low
- EH3 Interference in the network or the power supply is faulty.
- If there are errors EB1, EH1 or EB2, EB3, EH2, you must verify the discrepancy between the parameters by measuring them with a multimeter or frequency meter. If the network voltage is often too high or too low, you need to buy and install a stabilizer.
- EH3 appears , you need to stop the machine and check the network. If there is no interference, there is normal voltage and frequency, change the ED.
Program selector
If there are errors related to the device for switching and selecting programs, it is almost impossible to correct them yourself. The simplest thing is to buy an electronic module and replace it.
Very often the configuration fails and you have to re-enter data into memory or overwrite it. The average person does not have such equipment (a stand for rewriting volatile memory), so they have to call a specialist.
Errors and reasons:
| Code | Description | Causes |
| E82 | Selector set incorrectly |
|
| E83 | The selector data is not being read correctly. Code E83 appears only in testing or diagnostic mode on a bench | Electronic module error. It incorrectly detects the device configuration |
| E93, E94 | The washing unit configuration is incorrect | Program cycles fail. Such a defect can only be corrected by entering the correct configuration code. It is necessary to replace the processor board or write new data to non-volatile memory |
| E95 | The connection between the non-volatile memory and the main processor is broken. They are located on the main controller | Possible open circuit between EEPROM and main processor |
| E96 | The configuration of the electronic module does not match the external elements connected to it | Errors in the controller software |
| E97 | The position of the selection selector does not correspond to the software of the processor used | Incorrectly entered configuration code or replace the main unit. |
Sound module errors
Common sound module malfunctions:
| Code | Description | What to do |
| E99 | The sound unit, if present in the unit, does not work or makes inadequate sounds (hum, whistle) | It is necessary to check the sound board and the wires going to it |
| E9A | The software implemented in hardware between the input/output electronics and the speaker is faulty | Check main electronic module |
If, when washing, a hum, a whistle starts to come from the machine’s speaker, or it simply “goes silent,” you need to examine the sound unit. If there is inadequate noise, one of the wires may break. This can be detected with a multimeter.
In all other cases, the sound unit or processor module must be repaired in workshops.