Installing a bathroom door is not the final stage. Because during installation the doorway looks unsightly. To give a finished look, you should create a slope. Few people use the old method of finishing with plaster, as it is a labor-intensive operation. Now they are decorated with wooden planks, MDF parts, and plasterboard. Let's look at how to make door slopes in the bathroom yourself: step-by-step instructions.
They perform not only a decorative function, but also serve to preserve heat in the room. The video clearly shows how to make slopes on a bathroom door:
To avoid staining the door, cover it with plastic wrap and secure the edges with tape. Since during renovation work the doorway has a sloppy appearance, the first step is to prepare for finishing.
The opening is cleared of debris. The cracks are sealed with polyurethane foam, this helps retain heat and provide good sound insulation. Once dry, the remaining foam is cut off with a knife.
Drywall slopes
This material is in great demand for finishing and leveling walls indoors, as it allows this work to be completed quickly and without unnecessary dirt. Slopes made from it also turn out to be even, smooth and inexpensive, and their surface can be painted, wallpapered or tiled in accordance with the design of the surrounding walls.
But you need to remember about the disadvantages of plasterboard, which are due to its low mechanical strength and instability to moisture. The disadvantages include the need for finishing.
Advice! For slopes, it is better to choose moisture-resistant (GKLV) or fire-moisture-resistant (GKLVO) plasterboard sheets.
Before making slopes on windows from this material, you need to decide which installation method to choose: with fastening to a frame or gluing to putty or polyurethane foam.
The first method is not always possible, since in most cases the size of the opening does not allow installing a sheathing in it that would not interfere with opening the window sashes. Therefore, the second one is used more often. In any case, installation begins with preparing the base and taking measurements, determining the angle of dawn.
Layout of slopes relative to the window frame Source i.pinimg.com
For reference! Dawn is the expansion of the opening away from the window into the room or outside. The dawn angle should be greater than 90° to ensure better penetration of natural light into the building.
Frame mounting
The surface on which the wooden or metal frame is attached must be durable. Therefore, falling bricks should be placed on the mortar, major damage should be repaired and the mortar should be allowed to dry. Then cut off the protruding dried foam around the perimeter of the window frame. If the walls are wooden, the installation plane must be treated with antiseptics, as well as the wooden frame parts. It is better not to remove the mounting film from the windows until the work is completed, and if it is not there, then the frames should be covered with polyethylene:
- The frame is mounted taking into account the angle of dawn.
- The internal profile is installed at a short distance from the window so that the gap between them can be blown out with foam, eliminating cold bridges.
- The outer profile should be flush with the wall.
- The entire cavity of the frame is filled with insulation.
Ready-made insulated frame Source myshtukaturka.ru
- Before making slopes for plastic windows yourself, take measurements starting from the top horizontal element. You will need its depth, internal and external width. The dimensions of the side slopes are determined after installing the top one.
- The parts cut out of plasterboard are screwed to the frame with appropriate screws (wood or metal) with the head recessed.
- A reinforcing corner is glued to the corner junction of the slopes with the walls, after which the entire surface is covered with primer and putty.
- After the putty has dried, the final decorative finishing begins.
Plasterboard slopes prepared for putty Source prorab.help
Foam mounting
This method is faster and easier in terms of labor costs. As in the previous case, before installing slopes on plastic windows with your own hands, the opening is strengthened and roughly leveled. The polyurethane foam is first cut flush with the plane of the window frame, and then a groove 5-10 mm deep and slightly wider than the thickness of the gypsum board is cut along its perimeter.
After the measurements, the top piece cut out of plasterboard is tried on in place, the groove is filled with fresh foam and inserted there. The space between the slope and the wall of the opening is also blown with foam or a layer of putty is first applied to the drywall. The slope is set according to the marks, observing the angle of dawn, and fixed in this position with supports.
The next stage is measuring and cutting out the side fragments of the slope, installing them in place in the manner described. After a few hours required for the foam to polymerize or the putty to dry, they begin installing the perforated corners and puttying the surface.
The full process of gluing slopes is shown in the video:
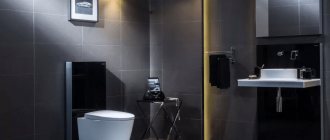
Modern bathroom interior with a window: design, layout, photo
A bathroom with a window in an apartment is very rare and lucky. Even modern developers, especially in economy versions, prefer not to fool themselves with arranging window openings in bathrooms. But, you must admit, it’s so nice to wake up in the morning and wash your face without looking at the mirror, but to watch the rays of the rising sun and feel them on yourself...
CONTENTS 1. What are the advantages of a window in the bathroom 2. View of the window opening in the bathroom 2.1. Window from the bathroom to the kitchen or toilet 2.2. Window to the street 2.3. Falshokno 3. Layout 3.1. Bath under the window 3.2. Sink under the window 3.3. Toilet under the window 3.4. Window as an architectural element 4. Materials for finishing the opening 5. Curtains or blinds 6. Photos of bathroom interiors with a window
But a window in the bathroom is found not only in luxury apartments, but also in cramped Khrushchev and Stalin buildings - at that time it was customary to make a window opening into the toilet or kitchen, which was intended to improve the lighting of the sanitary room. In the 90s, when renovations were done in such apartments, the windows were sewn up, but not everywhere. If you are lucky enough to become the owner of such an apartment, do not rush to mortgage it. Try to play with this architectural element, it’s not difficult, but the result is worth it.
Sandwich panel slopes
A universal solution for making slopes on plastic windows would be to install sandwich panels, consisting of two outer layers of plastic, between which insulation is laid. Such slopes, having the same color and texture, will become a logical continuation of the window and will not require additional finishing.
The obvious advantages of this material over plasterboard include greater strength and absolute insensitivity to moisture, absence of dust during installation, long service life without repair, ease of maintenance and cleaning from dirt.
Note! Such slopes are installed after finishing the internal walls.
Installation of sandwich panels is carried out similarly to plasterboard slopes glued to polyurethane foam. As in that case, first a groove is made around the window in the hardened foam, then panels are cut out taking into account its depth. The parts are installed in the groove, having previously applied foam to the moistened wall of the opening, pressed into the desired position and secured with pieces of masking tape.
Installation of sandwich panels on polyurethane foam Source i2.wp.com
When the foam sets, remove the tape and blow out all the voids, but very carefully so that when the foam expands, it does not squeeze out the panels.
The joints between the panels and the window frame along the entire perimeter are filled with sealant or liquid plastic. And on the outer ends they put on an F-shaped profile cut along the length, the shelf of which is glued to the wall around the opening. First, install the vertical elements, then the upper horizontal, cutting the corners at 45 degrees. Before the glue dries, the profile is also fixed with masking tape.
How to choose the right tile
To make the right choice and finish the slopes with such material, you need to take into account several basic criteria:
- purpose of the premises;
- sanitary condition;
- design;
- the desire of the owner of the room.
For example, in the kitchen you should not decorate with artificial stone. Its uneven surface will be difficult to clean. This material is more suitable for a living room with a corresponding design.
Laying tiles most often occurs in rooms with high humidity. Finishing door slopes in such rooms helps to obtain the desired interior and design.
Decorative textured slopes with stone-like tiles
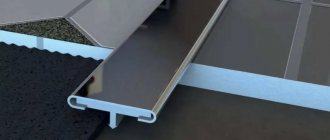
Slopes made of PVC panels
Plastic panels are very similar in appearance and characteristics to “sandwiches”. But they are more varied in the design of the front surface. Before we tell you how to make slopes on plastic windows, we note that this technology is also applicable to MDF panels, laminate, parquet boards, which are also sometimes used to finish the slopes of wooden or plastic windows, but with a decorative wood-like coating. Sandwich panels can also be mounted using this method.
Its difference lies in the use of starting U-shaped, corner and F-profiles, which make it possible to do without mounting foam, putty or adhesive solutions.
The installation procedure is shown in the video:
- The starting profiles are screwed to the window frame with small self-tapping screws, making a step between them of no more than 20 cm.
- A corner profile is installed at the junction of the vertical and horizontal profiles and cut to the level of the wall.
- Holes are drilled along the outer edge of the opening and plastic dowels are hammered into them.
- Install the external F-profile and attach it to the walls of the opening, screwing the screws into the dowels.
- The cavity behind the resulting frame is insulated with basalt wool.
- Elements are cut out from the panels according to measurements taken after installing the profiles and inserted into the grooves.
On a note! It is quite difficult to install panels in 3 profiles at once. Therefore, instead of the F-profile, you can use ordinary plastic corners, which are glued after installation is completed and temporarily fixed with masking tape.
Diagram of the installation of plastic slopes Source okna.only.by
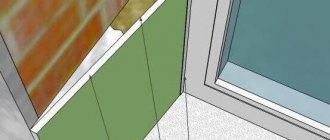
Plasterboard finishing
Holes are drilled along the perimeter of the door bevel at a distance of 20 cm from each other. Then insert the dowels and screw in the screws (not all the way).
Cut slats of the required sizes according to the dimensions of the opening. A guide strip is screwed along the width of the doorway with self-tapping screws.
Apply glue to the back side of the drywall strips, apply it to the wall, and press down. Excess glue is immediately wiped off.
The gaps between the wall and the bevel are sealed with excess glue. After complete drying, you should proceed to finishing work.
Wooden slopes
The choice of natural materials will be quite justified if the windows themselves are made of wood. The same slopes will make them more attractive, especially if finished with the same type of wood from which the frames are made. They will look good with plastic windows in a wooden house or if the walls are lined with clapboard.
It is advisable to give preference to hard or coniferous wood - oak, larch, pine, exotic meranti, etc. If the color of the window frames does not match the wood, you can always use tinting impregnations or varnishes, which will also protect the wood from fungus and moisture.
There are 2 ways to make slopes on plastic windows from the inside in a private wooden house: using an edged board or wooden lining.
Massive
To make a slope from a solid board, it needs to be cut to size, adjusted to thickness and sanded on one side. The end adjacent to the window frame must be cut at such an angle that a gap is formed, but the connection is tight.
Then all the ends and the back side of the board are treated with antibacterial impregnation or drying oil and left to dry Source www.mebel-raduga.ru
The algorithm for installing wooden slopes in a concrete or brick opening is as follows:
- after the final fitting, each part is installed in its place and drilled in the corners, with a distance of 2-3 cm from them. On the outside, the holes are countersunk for the screw heads;
- through the resulting holes, marks are placed on the walls of the opening;
- holes for plastic dowels are drilled at the marked points;
- if necessary, insulation is laid between the wall and the slope. To prevent the mineral wool from screwing onto the screw during installation, metal or plastic tubes are inserted into it opposite each dowel;
- the slope elements are reinstalled in place and screwed with self-tapping screws;
- mounting holes are puttied or closed with wooden plugs;
- the external junction of the slopes with the wall is covered with a platband or wooden corner.
The final stage of installation Source rabotai-sam.ru
Installation in a wooden opening is even simpler - no preliminary drilling or installation of dowels is required.
typesetting
Inlaid slopes made from lining, imitation timber or blockhouse look especially good when the walls are lined with the same material. They can also be used in the case of very deep openings, when it is not possible to cover them with one board.
There is nothing complicated about how to make slopes on windows with your own hands, especially if the walls are already sheathed and there is a wooden frame around the opening. The lining is simply cut into segments equal to the distance from the cladding plane to the frame plus 5-7 mm, into which the end is recessed into the gap between the window and the wall of the opening. As in previous cases, to do this you need to cut a groove along its perimeter in the hardened polyurethane foam.
One end of a piece of lining is inserted into the groove, and the other is nailed to the outer frame with small nails, screwed with self-tapping screws or secured with clamps. The void behind the boards can be blown out with foam or filled with insulation as installation proceeds. The joint is formed with a wooden corner.
The main stages of finishing window slopes with clapboard are shown in the video:
View of the window opening in the bathroom
Small bathrooms and toilets rarely have window openings, but bathrooms with an area of 4.5 square meters or more may well have even a tiny window. A modern bathroom interior may even initially assume the presence of a window, so designers consciously choose to install a false window, because it is not only a source of light, but also a decoration for the room.
Only owners of private houses can afford a variety of fantasies regarding the shape and size of the window in the bathroom. These can be round openings, such as portholes, square, rectangular or irregularly shaped, dormer or French floor-to-ceiling windows. But apartment owners can hardly boast of a variety of shapes and sizes.
Nevertheless, there are three types of window openings in the bathrooms of city apartments. The lighting, ventilation, layout and design of the room depend on the location. We will consider them.
Window from the bathroom to the kitchen or toilet
We are talking specifically about apartments in Khrushchev or Stalinist buildings, where all bathrooms, without exception, were equipped with such windows. They were located at a height of at least 1.7 m and served an important function - natural light penetrated into the sanitary room during the day when the electricity was turned off (and in those days, this happened quite often). In addition, during construction no one paid due attention to the ventilation systems, and the additional window was intended to improve this situation.
In the 90s, during renovations, such openings were often sewn up, since they did not carry a functional load (the situation with power supply had improved). But still, any window can be beautifully decorated. Moreover, if it is located high, the bathroom will be better ventilated, eliminating the appearance of mold on the ceiling.
It would be better to replace the old wooden frames with which all apartments without exception were equipped with opening plastic ones, and use stained glass instead of ordinary glass. Or you can go even further and, during renovation, enlarge the window opening, expanding it downward, for example.
If, however, the design does not provide for an opening window in the bathroom, then you can leave at least the second function - additional lighting - by installing glass blocks in the opening - they are mounted like brickwork, but let in enough light.
Window to the street
This option for the location of the opening is much more convenient and functional than the interior one, as it provides a number of advantages in terms of the location of plumbing fixtures and ergonomic capabilities: the bathroom is better ventilated and illuminated. Depending on where exactly the window faces, it uses either plain glass or grooved glass to reduce visibility from the outside. But you can arrange furniture and plumbing equipment in such a bathroom in different ways:
Viewing the street from the bathroom, however, is only possible if the size of the window opening allows it.
False
A bold solution in a modern bathroom would be a fake one. This unusual element can completely change the interior design of the bathroom, visually expand the space and hide all the imperfections of the walls if necessary.
If we are talking about a small bathroom or there are ledges or niches on the wall that are difficult to decorate, a false wall in the bathroom will be the solution to these problems. You can arrange such an element in several ways:
Please note: printed wallpaper in the bathroom is the most impractical solution due to high humidity. This coating can be protected using varnish or ordinary transparent glass.
A rather bold solution would be a false ceiling, serving as a light source instead of a lamp. To do this, either a molding or a frame is laid out, lighting is mounted inside, and the glass is either frosted or stained glass. But 3D printing with images of the sky is no longer in trend.
Plaster slopes
One of the strongest and most durable, but not the easiest finishing methods to do it yourself is plastering the walls of the window opening. You can prepare the solution yourself from sand and cement, but it is better to buy a suitable dry mixture and dilute it according to the instructions on the package. There are also ready-made latex or acrylic-based plasters on sale; they are easier to work with, since they do not harden as quickly as cement or gypsum mixtures.
How to properly make slopes on plastic windows depends on the initial state of the opening. If its walls are smooth and do not need thickening, the plaster solution is simply applied in a thin layer, smoothed and sanded after drying. But before finishing, you need to remove the old paint, if any, and treat the surface with a primer.
Plastering internal slopes Source otdelka-expert.ru
Broken openings with significant defects and the need for alignment will require a lot of effort. They are plastered over beacons, and if necessary, thick layer devices do this in several stages.
Plastering
The slope is primed and pendulum profiles are installed along the opening.
Next, apply plaster from a cement-sand mortar. Alabaster can be added to improve adhesive properties. The prepared solution is applied to the surface with a trowel and leveled with a spatula, focusing on the beacons. If you plan to paint, the slope must be carefully prepared. To do this, plaster with large fractions is applied to a reinforcing mesh, followed by finishing. For strengthening, a perforated profile (corner) is installed. It is pressed into the wet plaster.
The plaster must be completely dry before it can be painted. Plastering is a cheap finishing method, but requires careful leveling of the surface.
Flaws
For all its advantages, this material has several disadvantages. Firstly, it is high cost. Secondly, laying tiles requires certain skills and knowledge. This facing material requires great care and a lot of time when working. However, the resulting result always compensates for all the disadvantages with its attractive appearance and reliability.
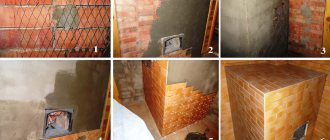
Slopes made of ceramic tiles for the entrance door opening
Description of material
Often, owners of private houses resort to decorative window openings with ceramic tiles. The design move is a continuation of the interior decoration. The most common place where the technique is used is the kitchen. Several types are used - glossy, matte, stone-look tiles, mosaic.
Glossy
It is distinguished by its attractiveness and stylistic design. Gloss transforms the window.
Gloss
Advantages
Regardless of the window opening, wide, narrow, glossy cladding material looks good:
- The reflective coating gives a mirror shine, visually expanding the window opening.
- Practically does not absorb moisture.
- Repels dirt and water. Easy to clean, no powder cleaners required.
Flaws
Daylight reveals the slightest dirt. The factor creates other disadvantages of the product:
- If there is a little dusting, you have to pick up a rag and wipe off the dust. If streaks or smudges appear, remove them using gentle means.
- High degree of light reflection. Reflected glare can blind the eyes; it is not recommended to locate dining areas near the window opening.
Matte
Gives the window opening elegance. The material has practically no disadvantages; its advantages make the decorative coating popular.
Matte
Advantages
Advantages:
- The matte surface does not reflect sunlight; you can place a dining area near the window.
- The surface is rough, practically no moisture collects.
- The appearance of dust is not noticeable; preventative cleaning must be carried out twice as often. Abrasive cleaners do not leave scratches.
- Even if small scratches appear, they will not be noticeable, and the tile will not lose its attractiveness.
Flaws
Flaws:
- The lack of a reflective surface makes the matte finish unable to expand the space. When placed in a small window opening, it will visually make it even smaller.
- There is no water-repellent layer - gloss, the product is more sensitive to moisture.
- Greasy, limescale deposits are difficult to remove.
Mosaic
The mosaic tile finish looks unusual, somewhat original. This type of design is used when lining doorways. You can create ornaments and chaotic patterns.
Mosaic
Advantages
Mosaic is wear-resistant and durable. It will not lose color, attractiveness, or begin to fall off. Tolerates exposure to direct sunlight well. The product consists of small squares and is flexible.
Flaws
The tiles are made from natural materials, expensive. Cheap analogues are made from artificial ones.