The importance of preparatory work
Preparatory work often seems like an extra step in the renovation. Novice finishers consider them unnecessary and often neglect them, saving time on completing the work. However, this is a gross mistake that can lead to irreparable consequences.
Poor preparation results in increased tile adhesive costs. Otherwise, the finishing material simply will not stick.
The presence of emptiness under the tiles, which is formed due to poor quality work, leads to cracks on the surface. Repeated repairs will have to be done in a couple of years. And these are new large financial costs. You can detect voids by lightly tapping the tile.
Saving time on preparation is also doubtful. Laying tiles evenly on poorly treated surfaces is much more difficult and labor-intensive.
What is a notched trowel used for?
A tile putty knife is a small construction tool consisting of a flat piece of stainless metal and a plastic handle. Some spatulas have teeth of various shapes and sizes - this tool is called a comb and is used to distribute the adhesive evenly and economically over the surface of the tile. The tile comb leaves behind small grooves that are filled with glue when the tile is pressed against the wall. Due to this, the following operating features are achieved:
- The quality of the masonry. The adhesive layer will be uniform on each piece of tile, so the tile will automatically lie on one plane (you need a flat base).
- Connection strength. A large amount of adhesive on the tile increases its weight. When using a comb, the amount of adhesive will always be the same.
- Speed of work. There is no need to regularly squeeze out the adhesive from under the tiles and remove its excess. On average, the speed of work increases by 2-3 times.
- Economical. The spatula allows you to use the amount of glue recommended by the manufacturer - you won’t have to overpay for overuse.
- Purity. Since the tiles are not stained with excess adhesive during the process, the end result looks great even without washing the tiles.
Laying decorative stone using a notched trowel
It is most convenient to work with a notched comb with two straight and two smooth sides - you don’t have to change regular and notched trowels - one plays the role of two.
Main stages of preparation
The fundamental stages of preparation consist of:
- Cleaning surfaces from old building materials;
- Meticulous smoothing of all irregularities;
- Good puttying;
- Surface grinding;
- Priming walls;
- Covering with a waterproofing layer.
Some of the work may be omitted depending on the material of the walls.
Where to apply the adhesive: on the tiles or the base?
In fact, there is no fundamental difference in where to apply the glue, the only question is convenience and practicality.
It is precisely because of the issue of convenience that it is better to apply it to tiles. What are the advantages?
Firstly, the surface of the adhesive on the open area will not dry out while the already glued tiles are being leveled. An experienced master may not have problems with speed. A beginner will have to do leveling for a long time. Well, laying it on glue with a dried surface can easily affect adhesion.
Secondly, the cleanliness of the seams (again, mainly on the walls) is not guaranteed when applying glue to the base. If glue is applied to the tile, then the edge of the glue is removed around the perimeter and this guarantees a clean seam, more on this below.
Tools for work
Before starting work, you must prepare the following tools:
- A jackhammer, a small crowbar, special solvent compounds for removing old coatings;
- Waterproofing mixtures, primer, putty, plaster, tile adhesive;
- Rollers with long handles, a wide brush, a trowel, a narrow spatula, a rule for leveling;
- Level (laser level will make the work much easier, but bubble level will be cheaper), beacons;
- A small ladder, buckets for diluting compounds, a spray bottle.
If there are objects in the room where you plan to lay tiles that cannot be removed, cover them with film.
Comb for tile adhesive
Recommendations for using a comb from the most popular manufacturers of adhesive mixtures. Recommendations may differ from generally accepted ones due to the different composition of the adhesive mixture, which affects shrinkage, setting time, mixture density, and viscosity. Carefully study the manufacturers' recommendations, which are indicated on the packaging of the mixture.
Ceresit CM11 Plus
| Tile size, cm. | 5 | 10 | 15 | 25 | 30 |
| Tooth size, mm. | 3 | 4 | 6 | 8 | 10 |
Ceresit CM12
| Tile size, cm. | up to 30 | 60 |
| Tooth size, mm. | 10 | 12 |
Ceresit CM 14 Extra
| Tile size, cm. | 15 | 25 | 30 | 45 |
| Tooth size, mm. | 6 | 8 | 10 | 12 |
VOLMA-Keramik+
| Tile size, cm. | up to 60×60 |
| Tooth size, mm. | 12 |
MOMENT
| Tile size, cm. | 5 | 10 | 20 | 30 |
| Tooth size, mm. | 3 | 4 | 6 | 8 |
KREPS reinforced
| Tile size, cm. | 5 | 10 | 20 | 30 | 40 | 60 |
| Tooth size, mm. | 3 | 4 | 6 | 8 | 10 | 12 |
BEERSMIX ceramics
| Tile size, cm. | 10 | 30 |
| Tooth size, mm. | 3 | 6 |
Surface cleaning
First of all, it is necessary to remove old coatings. Plaster or wallpaper that has been sitting for many years impairs the adhesion between the wall and the tiles, and accordingly negatively affects the service life of the tiles. In addition, the remaining materials do not allow making the surfaces smooth.
Dismantling old coatings depends on the materials that were used previously. Accordingly, various tools will be required.
Decorative plaster
Removed using a punch. If there is a brick wall underneath, then further work is carried out from scratch on the brick. Some specialists do not remove the old plaster in this case.
However, this is not true, since the coating has already served its purpose and laying tiles on it can become difficult.
- If there is wood under the plaster, you need to check the quality of the material.
- Shingles with signs of rot and mold need to be broken down.
These dismantling works are carried out using scrap, and the construction of a new floor will be added to the preparatory stage.
Wallpaper
Tile adhesive cannot be applied to old paper wallpaper. Therefore, the material is completely removed using small spatulas. In addition, the old glue must also be thoroughly washed off.
Whitewash
Whitewashed walls must be thoroughly wetted with water from a spray bottle and left for several minutes. When the moisture is absorbed, the coating is removed using a spatula.
Dye
The paint must be dissolved using special compounds. You can buy it from a hardware store. In addition, you can use sanding discs with fine grains.
Tile
To remove old tiles without damage, you need to clean the grout from the seams using narrow spatulas. Then fill the surface with plenty of water and carefully remove the elements using a construction knife.
If there is no need to save the material, a hammer drill is used. It can be used to remove both tiles and tile adhesive.
Flooring
When laying tiles on the floor, you also need to first remove unnecessary materials. Ceramics are removed in the same way using a hammer drill. The linoleum is simply removed, all the fasteners holding it are removed. If there is parquet or laminate on the floor, it is disassembled and all the backing is removed.
Intermediate stage
After the old surface has been removed, the walls must be sanded. This will remove all irregularities. Then the surface is washed with water to remove all dirt and small dust particles.
After the wall has dried, it should be treated with a primer. This composition will prevent the occurrence of mold and reduce the consumption of other materials.
Alternative to a notched trowel
If you cannot find a suitable toothed tool, and the dubious prospect of working with an ordinary spatula is not encouraging, it is recommended to create a comb yourself. A homemade tool may be even better than a factory one, since stores do not always offer a wide selection of spatulas for various types of work. To create a comb you will need the following tools and materials:
- a metal plate of small thickness will serve as the base of the spatula (it should be sufficiently smooth and rigid to be comfortable to work with);
- a pencil or marker and a ruler - will be needed to apply markings on the metal (it will serve to cut out the ridge);
- a wooden block and a jigsaw - with their help you can create a simple and convenient handle for a spatula (do not forget to sand the wood and varnish it);
- a screwdriver and small self-tapping screws - used to attach a wooden handle to a spatula (an alternative is to use high-quality construction glue);
- A disc grinder is an important tool needed to cut a comb from a piece of prepared metal.
Marking a metal plate
For experienced craftsmen, the entire stage of work should already be clear. But in order not to forget anything in the process, it is better to have before your eyes instructions with a specific algorithm of actions:
- Using a pencil and a ruler, create a drawing of the future spatula on a piece of paper. It is necessary to indicate the exact dimensions of the teeth, their number and calculate the size of the tool.
- Carefully transfer the markings from the drawing to the metal using a ruler and marker. It is important not to make a mistake here so that there are no difficulties with further stages.
- Using a grinder, carefully cut out the ridge of the spatula. Remember to follow safety regulations.
- Using a jigsaw, we cut out a blank for the handle, grind it and coat it with varnish - this will increase the service life of the spatula and prevent splinters from getting under the skin.
- We attach the handle of the spatula to the metal part with self-tapping screws. For convenience, you can use a wooden strip of the required thickness, placing it between the handle and the plate.
There is an easier option for creating a comb with your own hands - you will need a regular flat spatula and a grinder. We simply apply markings to the metal, and then make the necessary cuts of the required size.
Making a comb using a grinder
A comb spatula is an indispensable tool that allows you to evenly distribute the adhesive solution and eliminate the appearance of air voids under the tiles. In order for the job to be done efficiently, you will have to choose the right tool, with the desired shape and size of teeth. Only in this case will the mixture consumption be close to the recommended mark, and the tiles will remain securely on the floor or wall for many years.
Alignment of walls
For high-quality tile laying, the wall must be level. But in reality, this is not at all true, and even in a new house, vertical surfaces can be severely curved.
To correct errors in the walls, they need to be plastered. The second option would be to use drywall sheets.
Puttying
The process will require the use of beacons, a laser level and putty. First of all, you need to install the beacons according to the level. Then, using spatulas and a trowel, apply the appropriate composition. At the same time, make sure that the surface is free of dents or bumps. To do this, use a rule.
After the plaster has dried, it must be covered with a layer of primer. Then make a finishing coat of putty and waterproofing.
Plasterboard wall
Installing drywall is advisable if the curvature of the walls is more than 6 cm. A layer of plaster of such thickness simply will not hold. In this case, the sheets must be moisture resistant.
The drywall is attached to special guides from bottom to top, controlled using a level, and the wall turns out to be perfectly flat. The wall also needs to be primed first.
The seams between the sheets are treated with putty and thoroughly cleaned. Then they prime.
What to look for when choosing?
There are different types of combs for laying tiles. So what should you pay attention to when purchasing so that the tool does not fail during operation?
In order to be able to lay tiles efficiently, you must take into account the size of the tool and the shape of its teeth:
- A product with square teeth is typically used to apply 5 to 10mm thick mixture.
- Semicircular teeth are perfect for working with mixtures that have a synthetic composition. In addition, they can be used for better glue distribution. It is best to apply a compound with a thickness of more than 12 mm using a tool with semicircular teeth.
- In stores there are also specimens with triangular teeth. This type of comb is perfect for working with very liquid mixtures. It can also be used if it is necessary to apply a layer of no more than 5 mm. Thanks to its triangular shape, this type of tool ideally distributes the liquid mixture over the surface.
- There are also universal spatulas on sale that are suitable for laying standard tiles and mosaics, so before you pay attention to the shape of the teeth and choose the right tool, you must know exactly the size and thickness of the tiles that you are going to use for finishing work.
- Consider another important fact: the width of the tool itself must correspond to the width of the tile or be slightly larger, otherwise installation difficulties will arise.
- It is important to pay attention to the size of the teeth. If this parameter is less than a millimeter (0.6-1.2 mm), then this option is perfect for applying a very thin layer of the mixture.
- The 0.3mm size is ideal for working with mosaics.
- For installation of various types of ceramics, a size of 0.4 mm is needed.
- Teeth measuring 6 mm are excellent for installing larger tiles and wall laying.
- To install large floor tiles (thickness more than 12 mm), you need a comb with teeth of at least 10 mm.
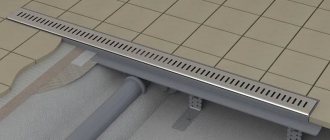
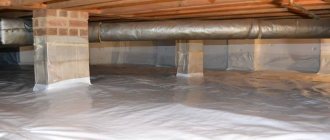
Waterproofing
The last stage of preparation is applying a waterproofing layer. This material is especially important in the bathroom and toilet. The humidity in these rooms is high and contributes to the development of fungus, as well as the rapid destruction of materials.
- It is recommended to lay roll waterproofing on the floor. A hair dryer is used to fix it.
- Special bitumen-based compounds are suitable for walls. They are viscous and apply them with a spatula and then wait for them to dry.
Types of combs for tiles
Renovating a bathroom or kitchen is not a frequent occurrence, so the choice of construction tools should be approached carefully - otherwise, you will have to change the tiles every two to three years. To prevent such a scenario, you need to choose a spatula that will be convenient to work with. Typically, experts divide toothed construction tools into two categories:
- Spatula made of high quality stainless steel. This tool allows you to distribute the adhesive evenly over the tile, and its teeth do not deform over time. A stainless steel spatula can be safely washed under running water - it is not afraid of corrosion. Such a tool is expensive, but it will last a very long time.
- Spatula made from plastic. A budget option for construction tools - purchased for several hundred rubles. The main disadvantage is the low strength of the material. During operation, the teeth may break off or wear off over time. The tool is considered disposable and is not suitable for a professional builder.
The construction tool also differs in the shape of the handle and where it is attached. There are specimens whose handle is located on the working surface, which is quite convenient - you don’t have to put a lot of effort into working. On other varieties, the handle is attached just above the metal plane - it’s not very convenient, but it won’t break.
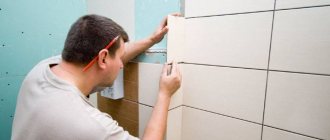
Laying tiles on wooden surfaces
In completely wooden houses, the question often arises of how to lay the tiles. The fact is that wooden houses constantly breathe and are in motion. Walls can shrink in the summer heat and swell from large amounts of moisture.
On average, deformation can reach 6 percent of the area of the house. But tile is a hard material and will not be able to withstand changes.
The only way out in this case is to lay the tiles on sheets of plasterboard or plywood. In this case, the GVL is fastened not tightly to the wall, but at a short distance. This minimizes the risk of coating deformation.
How to lay tiles without a comb
In order for porcelain tiles or tiles to adhere firmly to the wall or floor, it is important to evenly distribute the adhesive solution over the surface. But what to do if there is no ridge, and repairs need to be carried out as soon as possible? Well, you can try to use a regular spatula, although achieving uniform distribution of the glue will not be easy (if you make a mistake, air voids will appear). However, if you accurately measure the required amount of mixture and carefully distribute it over the surface, lightly pressing with a spatula and getting rid of excess material, the tile will hold securely. The main thing is to pay attention to differences in the level of the wall or floor - the most common reason for the formation of voids.
Keep in mind that laying tiles without a comb increases the consumption of the adhesive mixture, which leads to an increase in the cost of repairs. Too thick a layer of mortar reduces the strength of the fastening - the glue cannot withstand the weight of the tile.
Photo of preparing surfaces for tiles
The role and functions of a kitchen apron
As a rule, the size of the kitchen is not always large, so it is impossible to protect yourself from contamination and splashes of water and food juices. The kitchen sink is designed in such a way that a strong stream of water sprays in all directions. In addition, the thermal processing of food is inevitably accompanied by smoke and the formation of a special kitchen fume, which, mixed with the unclean odors of the human body and the water closet, creates an unpleasant spirit of the apartment, so familiar to visitors who can distinguish one home from another by smell.
When choosing tiles for the kitchen, it is important to take into account the features of the future interior
Wallpaper is very rarely installed in kitchens, since the kitchen interior is not designed to solve aesthetic problems or create a certain mood. Frequent cleaning of walls, and, if possible, ceilings, requires a practical and durable coating that does not absorb odors, does not retain drops of grease, blood, etc. and does not deteriorate from frequent wet cleaning and wiping.
This coating is usually carried out in two versions:
- Kitchen apron made of tiles;
- Wall panels made of gypsum fiber sheets.
Experience says that aprons made of glazed and unglazed ceramic tiles are more practical. This coating is practically eternal and unchanged from the very minute it was laid on the walls.
It is better to avoid using unglazed tiles for kitchen renovations, as this coating greatly complicates cleaning
As a rule, the kitchen is equipped with a cutting table, and wall cabinets are located at the level of the human head. Therefore, the wall space between the tabletop and the bottom of the wall furniture must be covered with a special apron.
The size of the apron is such that it extends 5-10 centimeters beyond the boundaries of the hanging furniture and tabletop.
Color solutions
As a rule, light colors are chosen for the kitchen. There are 10x10 tiles, from which a whole panel is laid out, representing an image of an appetizing dish, fruit, or an intricate drawing of abstract content.
Multi-color ceramic tiles imitating smalt are very beautiful and effective. However, the embossed surface with protruding false cubes will become very dirty, and cleaning it will be very difficult.
If you find it difficult to choose tiles that have a pattern or ornament, feel free to take a 10x10 square tile in two colors and lay it out in a checkerboard pattern.
Tiles for the kitchen: sizes, shape and type of ornament
Kitchen ceramic tiles are usually laid on the walls, since soft linoleum is usually laid on the floor. It is not worth tiling the floor, as if you drop porcelain or glassware on it, it will inevitably break.
Kitchen ceramic wall tiles can be rectangular or square. The largest size is 30x50 cm, but in practice there are smaller sizes - 30x40, 20x30, 30x30, 10x10 and 40x40 cm.
Small kitchen tiles look much neater, so they are more preferable
As for the type of surface, glossy, matte or embossed form have their advantages or disadvantages:
- Glossy 10x10 ceramic tiles are easy to clean from dirt, but the reflective surface can create unpleasant optical illusions. Still, in the kitchen, as well as in the operating room, it is best to have diffused light that evenly fills the entire space.
- Relief ceramic tiles 10x10 are beautiful and complement the design, enhancing the perception of the depicted objects. However, the surface scars inevitably become clogged with drops of fat, onto which dust and soot settle, as a result the wall gradually turns black, and it is very difficult to wash it.
- Matte 10 x 10 ceramic tiles seem to be the best option: they are easy to clean and do not create visual imperfections.
Tiles in the design of an apron can be used in different combinations
Marking of products with the letters A or AA - such tiles can easily withstand treatment with any cleaning solutions or gels