Stairs are an integral element of every two-story house or two-level apartment. They allow you to move between floors, sometimes decorate the interior, but it must be recognized that they also take up valuable space. For this reason, it is worth not leaving a void under the stairs, but finding an original way to practically use it. Sometimes the wrong shape of the staircase can make this task much more difficult, but there is no need to despair because there is always a suitable solution for any situation.
Kitchen
Not everyone decides to place a kitchen under the stairs. Indeed, in the process of arranging a working or dining area in such a place, you may encounter a number of problems. But it is quite possible to do this if you take into account many nuances at the stage of building a house and the general finishing of the entire room.
- Communications. Electricity, gas (if necessary), water supply, sewerage - they must be installed in advance, during the construction of the house. It is advisable that already at this stage you have a design for the location of kitchen furniture, because utilities need to be installed in specific places. This is necessary for installing a stove, sink, and dishwasher. It is recommended to immediately install the electrical wiring in the place where the work area is supposed to be located for sockets at a distance of approximately 110-115 cm from the floor at the points you need. If necessary, also provide additional lighting. Don't forget about the hood. We will have to extend a ventilation duct into our area. If this is not possible, you can use a hood without an air duct.
- Risers. It is necessary that they be present in the staircase structure. Open flights will allow dust flying from above to settle on kitchen surfaces.
- Protection of the staircase structure. During the use of kitchen equipment, the stairs will be exposed to unfavorable factors, such as high humidity and temperature changes. This must be taken into account when choosing material for the stairs and methods of finishing and processing. It is also desirable that the design is easy to clean.
When arranging the space under the stairs, it is possible to place a kitchen there with almost any type of layout.
- A one-line kitchen will fit under a flight of stairs. Of course, it will be very small, and some of the upper cabinets will have to be abandoned, but this is a very convenient and space-efficient option, quite appropriate, for example, for a country house.
- An L-shaped kitchen is the most popular and most convenient option for arranging furniture.
- A U-shaped arrangement of elements is possible if, in addition to the space under the flight, there is also space under the second floor platform.
- G-shaped placement is an incredibly stylish and comfortable option with a bar counter.
- A kitchen with an island is a placement method that is possible if there is a free area of at least 20 m2. Very relevant for spacious rooms, especially if the kitchen under the stairs goes into the dining room.
How to decorate the space under the stairs: ideas + photos
When designing or even already building a two-story or two-level house, it is recommended to immediately think through issues of how to design the space under the stairs. Advance will be especially important in cases where the beneficial use of this area will require the provision of various utilities, the installation of which is carried out at the stage of foundation construction.
How to decorate the space under the stairs
Features of the arrangement of the under-staircase space depend on several factors: on the location of the staircase itself, on its dimensions - width, height and length in plan, on the possibility of connecting water supply and sewerage to this area, and, of course, on the planned overall interior design.
There can be many interesting solutions for the useful use of such seemingly “lost space” - it could be a built-in kitchen unit, bookshelves, a sleeping or work place, various cabinets, chests of drawers, a storage room, a hallway and even a bathroom.
Types of stairs, and what kind of space is formed under them
Before you can determine how to usefully use the space under the stairs, you need to choose its design, which will determine how much space it will take up in the house and how much area will be formed under it.
The possibilities for useful use of space are determined, first of all, by the type and size of the staircase
There are many types of stairs, and the choice of a particular one depends primarily on how much space can be allocated for it in the house. It is necessary to understand that the more compact its design, the less space is created under it.
Stairs installed in private houses are divided into single and multi-flight, straight, curved, rotary and spiral. There are many “hybrid” options. To understand what the most popular staircases look like and how much area under the structure remains free, you can look at them in a little more detail.
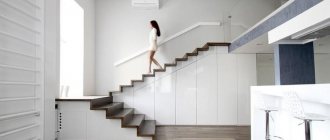
Straight one-flight staircase
Single-flight straight stairs are the most common type, as they are easy to install and can be installed in almost any room. Most often, such structures are located near the wall, and it is under them that sufficient space is formed for arrangement according to any of the options mentioned above.
One of the simplest solutions is that the space is occupied by a sofa
The simplest solution is to build in a sofa, but a more complex but also more functional solution would be to install numerous shelves in pull-out or built-in cabinets.
There is an office under the stairs
A straight staircase, depending on its height and width, allows you to equip a whole mini-room or office with a workplace and all the necessary furniture elements underneath it. This design will add exclusivity and originality to the premises of the house.
Bathroom under the stairs
Under a rectilinear structure that has sufficient width, some home owners install a full-fledged bathroom in order to save space. It is clear that in this case, utilities must be installed - water supply and sewerage. Having thought through and done this rather complex work during the construction stage, you can save a fairly large usable area of the house, which will be useful for other needs.
The space under the stairs has become a completely functional part of the kitchen
Another option that requires communications is to place a kitchen or dining area in this space, and the area under the steps of the structure is perfect for building in numerous cabinets, which you cannot do without in the kitchen. Using this area rationally, allocate a larger area for living rooms.
Stairs with several flights
Stairs with two or more flights, depending on their design and location, will expand the possibilities for arranging the space underneath them.
Both a straight and multi-flight rotary staircase can have several flights. Under a rectilinear structure with several flights and platforms between them, you can organize a space for any purpose. Such a staircase usually has a considerable width, which means that the space under it will be deeper, and the platforms between the flights will make the ceiling in one or even several places under the stairs flat and higher.
Still, most often multi-flight staircases are made turning rather than rectilinear, especially in cases where the rooms on the first floor have high ceilings and free space is limited. But all the same, under such structures there can be storage rooms, small rooms, bathrooms, or a sleeping area.
Hallway under the stairs
If the front door is located under the platform between the flights, then the space under the stairs is often used as a hallway, in which a clothes hanger or even a wardrobe is mounted on the wall, and shelves for shoes are installed.
A very original option for the integrated use of space under and around the stairs
The space around a multi-flight staircase installed in a two-level house can be used even more rationally, for example, as shown in this photo. If the wall along the steps is usually not used in any way, then in this case, there are shelves built into it, on which a large number of different useful things are placed, which are in plain sight, and you won’t have to look for them for a long time. In addition, the space under the stairs is also functionally equipped as a workplace, equipped with a table, a cabinet and various racks and shelves.
Curvilinear turning stairs
Curvilinear structures have smooth turns and take up quite a lot of space in the room, so they are most often installed in the spacious halls of the first floors of two-level houses.
Turning stairs can have an L-shaped design - in this case, their rotation angle will be 90 degrees. When planning their installation, to save usable space, winder steps are used instead of platforms between flights at turns.
Found a place for a home library
Under such stairs you can also organize a useful workspace or even a home library with bookshelves, and, of course, anything else that is most necessary for home owners.
If the staircase turns at a large angle, then, if desired, the space under the stairs can be equipped as a bathroom or hallway.
There is a separate room under the curved staircase
This photo shows a fairly well-thought-out layout of a two-story house with a curved staircase, under which there is a door to a completely enclosed space. It may contain a bathroom, storage room or small office. This design is quite compact, and every square centimeter of space under the stairs is used rationally.
Screw designs
Screw structures are the most compact of all existing ones, so they are installed even in the middle of a large room. There is practically no space left under such stairs, and at best it is used for installing floor flowerpots with indoor plants. However, if such a staircase is installed against a wall, then the space under it can easily be used to build in a cabinet or bookshelves. The design of the cabinets will help make the staircase more reliable, as it will have additional support.
The fewest options are with a spiral staircase, but you can still get creative
If a spiral staircase is installed at the entrance to the house, then under it it is quite possible to arrange a clothes hanger and a shelf for shoes, and depending on the frequency of its turns and the width of the steps, an umbrella stand or ottoman can also fit under it for convenience when putting on shoes .
The spiral staircase, for all its advantages, has a very significant drawback - it is almost impossible to carry bulky things up to the second floor. Therefore, it is most often installed as an auxiliary or decorative element, in addition to the main one.
Calculation of the area under a straight staircase
A straight staircase is selected and installed most often, and the space under it is the most convenient for use for arranging a usable area. Therefore, it is worth considering, using her example, how to make preliminary estimates of the future interior of the house. Having determined how much area such a structure will occupy, you can roughly imagine the size of the space underneath it.
Preliminary calculations can be done as follows. Let's say we take as a basis the distance between the floors of the first and second floor, for example, 3000 mm.
- It is known that the optimal, most convenient step height for the average person is 170÷190 mm. Therefore, first you need to determine how many steps will be needed to “fill” the known height of the room. Let's do a simple calculation:
3000 / 180 = 16.67 , which when rounded to the nearest whole number will give us 17 steps.
- Now you can calculate the length of the staircase in plan. To do this you need to know the width of the step. It is determined by the average length of an adult’s foot, so the optimal size would be 280÷300 mm. Now, knowing this parameter and the number of steps, you can determine the length of the stairs:
17 × 290 = 4930 mm ≈ 5 m
- Typically, the width of a staircase convenient for people varies between 1000÷1500 mm - this parameter depends on the total area of the room, that is, on what part of it can be allocated for the installation of this functional structure. On average, the width of the stairs is 1200 mm.
Now it is easy to calculate the area (S) of the resulting space under the stairs.
S = 5 × 1.2 = 6 m²
As you can see, there is quite a lot of space. Based on this value, you can calculate the number and size of cabinets, bookshelves, sofas or other pieces of furniture.
In this case, the staircase, floor and wall form a right triangle, which is quite large in size. But unfortunately, not every owner has premises with areas where such a structure can be installed. Therefore, it is often necessary to reduce the length, while changing the angle of inclination of the flight, or choose a different type of staircase. If it is decided to install the straight-line option, then in order to make it easier to calculate the parameters, it is customary to proceed in the reverse order:
- first, the width and length of the space on the floor is determined - the space that can realistically be allocated for the stairs;
- ceiling height is taken into account;
- then the length of the stairs is divided by the width of the steps (for example, 290 mm) and their number is determined;
- further, the height of the ceiling is divided by the number of steps - the height of each step is obtained.
After this, it will be possible to evaluate the convenience of this design.
For example, the maximum permissible length of a staircase is 3500 mm, and the distance between the floor levels of the first and second floors is 2750 mm.
3500 / 290 = 12.06 and find that 12 full steps can be placed at this length.
Divide the height by the number of steps:
2750 / 12=230 mm is the height of each step.
The obtained value of the step height shows that the stairs will be quite inconvenient for placing your feet, especially for children and the elderly. The situation can be corrected by making a two-flight staircase, installing a platform between the flights and in the upper part of the structure. In this case, the height of the steps can be reduced.
Prices for corner cabinet
corner cupboard
To estimate the permissible values for the height and width of a step, you can use the following diagram.
Diagram of the optimal slopes of the stairs and the sizes of its steps
If a wooden staircase has the maximum number of steps, and there should not be more than 18 of them in one flight, then the structure will require additional strengthening, especially if free space is left under it for useful use. To do this, it is recommended to install under the steps not two, but three or even four stringers made of boards at least 30÷35 mm thick.
A preliminary calculation of the free space under the stairs will make it possible to determine in advance, at least in general terms, how this area can be used, and how the common space of a residential building saved on this can be usefully used.
Some nuances of arranging the space under the stairs
Homeowners decide for themselves how to rationally use and arrange the space under the stairs, depending on their needs and imagination. If you decide to place, for example, a kitchen unit or a bathroom in this area, then their installation needs to be carefully thought out, taking into account all the specifics of their purpose.
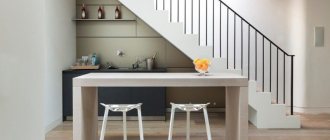
- Kitchen.
There is a long kitchen worktop under the stairs.
If it is decided to place built-in kitchen furniture under the stairs, then all the points without which this work area will not function properly are provided for:
- it is necessary to carefully consider the provision of various communications - this is cold and hot water supply, sewerage and electricity supply;
— various fumes that cannot be avoided when cooking can negatively affect the decoration of walls and furniture upholstery. This means that you will have to determine the installation location and install the ventilation system;
— a rational arrangement of kitchen furniture elements should be provided for comfortable food processing and cooking, as well as for convenient washing of dishes.
Even a simple drawing will be a good help in further work
In order to determine all these nuances, it is recommended to draw up a detailed drawing indicating the location of each of the elements, and put all dimensions to scale. Even if it is a simple drawing, like the one shown in the figure, it will still be easier to navigate when drawing up a detailed plan for your kitchen under the stairs.
- Bathroom.
Another rather difficult, but solvable task is the arrangement of a bathroom under the stairs.
Bathroom in the under-staircase space
If the staircase is located on an external wall, then there should not be any special problems with connecting sewerage and water supply to the area under it.
If there is a lot of space under the stairs, it needs to be organized in such a way that it can accommodate a toilet, a sink, and also mount a mirror and towel racks on the wall. An ideal option if there is also room for a shower stall.
The increased complexity in organizing a bathroom in the space under the stairs is also due to the need to construct a well-fitted door. In addition, it is very important for this room to provide and install effective ventilation, since condensation cannot be allowed to accumulate on the walls, which will negatively affect the wooden elements of the staircase.
It is better to decorate the bathroom in light colors and not choose large tiles, as they will visually make the room smaller. In addition, it is recommended to mount a fairly large mirror on the wall - it will also contribute to the visual expansion of the room. An important point in this case is the correct lighting - it is advisable to make it quite intense.
These recommendations will help you achieve optimal harmony and comfort even in a small space under the stairs that does not have natural light.
- Other space arrangement options.
When arranging a hallway, sleeping area, cabinets, chests of drawers, pantry, workplace or other options under the stairs, a number of other nuances are taken into account:
- you will need to provide power supply and install a switch and socket, organize sufficient lighting of the space;
Of course, the issues of lighting the mini-room being created are being thought through.
— appropriately sized accessories with the required functionality must be thought out;
— a very important requirement is that the ceiling of the room or area under the stairs does not have cracks or gaps. The fact is that dust will inevitably collect under the steps, and when vibrations from steps occur, it can fall from above into the furnished space.
Video: several original solutions for the rational use of under-staircase space
We do it ourselves - an original spacious closet in the space under the stairs
One of the most popular ways to use the space under the stairs is to install shelves or pull-out cabinets. An example of how similar work can be done under an existing staircase, with the space underneath covered with plasterboard, will be discussed below.
Prices for sliding wardrobes
closet
An approximate order of work and recommendations for performing operations are given. Well, the dimensions for the manufacture and installation of all parts are taken in each specific case, of course, locally.
Manufacturing and installation of cabinet frame structure
| Illustration | Brief description of the operation performed |
| In this case, the space will be arranged under a small staircase, which means the area under it will not be too spacious. But even such a small area can be used quite rationally. Earlier, during the construction of the staircase to the second floor, the space under it was sheathed with sheets of plasterboard, part of which, by the way, can be usefully used to create future decoration. | |
| The first step is to mark the previously installed sheets. On them, using a ruler, a building level and a pencil or marker, lines are drawn that define the area that will need to be removed. When making markings, it is necessary to take into account the height of the steps of the stairs, since they must remain covered with plasterboard sheathing. In addition, the location of the guides of the frame structure on which the drywall is fixed is also taken into account. The areas where these elements are installed can be identified by screwed-in screws. Vertical side lines are drawn with an indentation of 25÷30 mm from the screws. The top line of the future cutout should run along the bottom points of the steps and be parallel to the cut line of the drywall attached to the top points of the steps. | |
| The middle part of the plasterboard sheathing is cut out along the drawn lines - an electric jigsaw is perfect for this operation. Here you need to take into account that in places where the drywall is adjacent to the frame guides, it is cut off with a sharp construction knife, and the screws are unscrewed with a screwdriver. | |
| After the excess part of the drywall has been removed, the remaining edges are trimmed using a hacksaw along the entire perimeter of the opening. The vertical sides are cut exactly along the inner edge of the side vertical guides of the frame. In addition to the fact that excess material will be removed, the edges of the resulting triangle will also be aligned, with the lower acute corner truncated. | |
| When the finishing material is removed, a space will open up that needs to be arranged for installing a cabinet in it. The cut out drywall is temporarily removed for now, as it will now interfere with further work. | |
| In addition to the empty space, a wooden frame structure will also open under the stairs, which must also be carefully partially dismantled. | |
| The frame bars are cut along the top line of the drywall at the same angle as the remaining drywall facing. The work is carried out using an electric jigsaw or reciprocating saw. | |
| The vertical posts of the sheathing, cut at the top, are disconnected from the lower horizontal beam, which then also must be carefully removed without damaging the floor covering. | |
| Next, in the lower part of the truncated triangle, at its upper vertex, the angle is measured (in the case under consideration it was 49 degrees). This parameter is necessary for the end cut of the board, which will become one of the parts of the opening frame. The board is taken 150 mm wide and 25÷30 mm thick. | |
| The finished board, cut from the end at the desired angle, is tried on to the place where it is secured. It must be installed exactly flush with the cut drywall. | |
| Next, in the same way, with precise adjustment at the corners, the entire perimeter of the cut-out space is framed. The boards are secured between the scraps of vertical posts remaining after dismantling. As a result, the installed ones should create a solid inner surface, onto which the outer boards will then be attached, which will create a “finish” frame for the cut opening. | |
| This illustration clearly shows the resulting structure at this stage, after securing the internal wooden lintels. Then you need to attach the cut edge of the drywall to them using self-tapping screws - this will achieve maximum strength of the edges of the opening. | |
| If necessary, another wooden strip is attached from below to the stair stringer in order to add thickness to it to the general level of the line of drywall and boards fixed immediately behind it. | |
| Next, a board is attached to the beam, installed vertically on the high side of the triangular opening, from its rear part. It will be necessary to fix the finished shelf structure. | |
| The next step is to finish framing the cut opening. To do this, along its entire perimeter, to the previously fixed internal boards, boards are installed and screwed, which should completely cover the unsightly picture of the drywall cut. | |
| In order for the frame to look neat, the end parts of each of the boards are carefully adjusted to a certain, pre-measured angle. Only in this case will they fit tightly to each other. | |
| Before fixing these structural elements with self-tapping screws, their ends are coated with wood glue and glued together at the corners. In this case, the vertical boards are leveled - if a misalignment is detected, then small spacers are made from thinner wooden wedges between the inner and outer boards. | |
| The next step, at the site of future installation, is to form the frame of the front part of the shelf structure. The boards intended for this purpose are temporarily fixed to the opening framing boards already attached to the stairs. In addition, the frame boards are fastened together at the corners. | |
| Next, the installation of the middle vertical bars is marked on the temporary frame. Marking is carried out using a building level. These elements will be the façade for the walls of the shelf structure. | |
| Then, the bars are cut at the angle of inclination of the stairs. Their height should be equal to the distance between the upper and lower, horizontally installed board. There should be two such jumpers, and they are installed at the same distance from each other and from the side posts, that is, the length of the opening is divided by exactly three. | |
| Next, the temporarily fixed bars are removed from the opening, and the front frame structure for the shelves is laid out from them on a flat surface. Then they are finally fastened together according to the markings. | |
| For the convenience of gluing individual parts into a single structure, short wooden blocks are evenly laid out under the mating parts. They will also help to align the frame to the same level. This is how the vertical bars are positioned and secured, and then the horizontal jumpers. | |
| The transverse structural elements will determine the number of shelves or drawers. They are placed between vertical guides so that the shelves installed in different sections of the structure are at the same level. Of course, it is important to maintain the perpendicularity of the parts being connected. | |
| The connection can be made in different ways - these can be wooden choppers (dowels, dowels), cuts and installation of special fastening parts in them with glue, for example, wooden dowels. After the entire structure is assembled and glued, it is clamped in clamps until the glue dries completely. | |
| This photo shows one of the elements with the help of which individual bars are fastened into a common structure - a wooden dowel installed in the place of the connecting unit. | |
| While the front part of the structure’s frame is drying, you can start making partition walls that will be installed between the rows of shelves. They are made from plywood 10–15 mm thick, onto which a frame of planks cut from the same plywood is attached using glue. These elements are needed to enhance the rigidity of the partitions. | |
| Glue is again applied to the fixed planks and another sheet of plywood is glued on top of them. The entire structure is additionally secured with staples or self-tapping screws, and its thickness is compressed with clamps. In this case, there are three such walls - they have different heights, equal to the vertical bars of the front part of the frame of the structure, which was assembled earlier. Their width should be equal to the depth of the space under the stairs | |
| The next step is to cut out the back wall, which will hold the partitions together. To avoid mistakes, the finished front frame is laid on a sheet of plywood, then outlined with a pencil, and then the required figure is cut out with a jigsaw. | |
| The vertical partition walls are fastened together with a common jumper - a board that will fix them in the front part from above. All planes must be aligned to the building level. Then, the back side of the walls is also fastened at the top with a wooden plank. After this, the rear plywood wall is fitted to the structure and secured. | |
| The structure is rotated and laid on the back wall, which has just been fixed, and the end sides of the front part of the dividing partitions are coated with glue. | |
| The next step is to lay the wooden frame of the front part of the structure on top of the coated end sides. It is carefully leveled and then secured with self-tapping screws. | |
| Now, using glue and then self-tapping screws, you can fasten the lowest wall, that is, the side wall on the truncated side of the triangle. All glued parts of the structure are again fixed with clamps. | |
| Next, the location of the roller guides for the shelves is marked on the inner walls. | |
| Two guides are temporarily secured on both sides of the partition with a special clamp, which allows you to set them exactly in the desired plane and screw them perfectly evenly on the surface and in relation to each other. | |
| The next step is to fix the guides on the walls with self-tapping screws 15÷17 mm long. | |
| After the roller guides are secured, a wide board is dismantled from the top of the structure, which provided temporary fixation of the frame, as it is no longer needed. Instead, a sheet of plywood 8÷10 mm thick, prepared to size, is laid on the upper end sides of the partitions. | |
| The plywood is secured to the end faces of the partitions and side walls using staples or self-tapping screws. | |
| In this photo you can see the fully assembled structure and evaluate its quality. | |
| Then the finished frame is carefully pushed into place - into the opening under the stairs. | |
| Before final fixing it, you must once again check the verticality of the installation. It's not too late to make small adjustments by placing thin wooden wedges in the right places. | |
| After the structure is installed perfectly straight and fixed, the gaps around its perimeter can be closed with a neat narrow glazing bead, and a decorative plinth can be secured at the bottom. |
Making drawers
Now we should consider several important points in the manufacture of drawers.
In this version, the master chose plywood 20 mm thick, but high-quality 10 mm material is also quite suitable for this purpose. Chipboard boards with a standard thickness of 16 or 18 mm are also quite suitable for these purposes.
The main nuances in this process are the preparation of parts and their fastening, which will be discussed further.
The first step is to take dimensions from the opening in which the box will be installed - width, height and depth - and it will be made according to them. In addition, you need to accurately determine the location of the guides along which the shelf will run.
| Illustration | Brief description of the operation performed |
| Based on the obtained dimensions, all the elements of the box are marked and drawn on the prepared sheet of plywood. It is very important to ensure that all angles are right. The next step is to cut out all the parts of the box, and their edges are processed until smooth. | |
| To ensure that the assembly of parts is smooth and strong, first the side walls are installed on the edges of the back, and their place of fastening is drawn. The same is done with the front wall. | |
| The next step is to drill through holes with a diameter of 8 mm in the marked places for furniture confirmations (euroscrews), through which the back and front walls will be screwed to the side ones. There should be two such holes on each side. | |
| Using the drilled holes, the centers of the holes at the end of the side wall are marked, with a diameter of 5 mm and a depth of about 50 mm. The walls are assembled, confirmations are inserted into the holes, and then they are tightened using a screwdriver with a hexagonal bit. | |
| Other drawer junction boxes are assembled in the same way. Confirmats will provide good structural rigidity. True, if plywood with a thickness of 10 millimeters or less is used to make the box, then confirmats will not work, and you will have to use ordinary screws with a diameter of 3.5 ÷ 4 mm. | |
| To find out whether the box is assembled evenly, you need to measure and compare its diagonals - they must be the same length. | |
| Next, a hole is drilled in the front of the drawer through which the handle should be attached to the panel. It must be said that very often an additional panel made of thinner plywood, but slightly larger than the main wall, is attached to the front wall. It is first glued and then fixed with screws from the inside of the box. The size of the screw must be selected so that it is 5 mm shorter than the total thickness of the front wall including the front panel. | |
| After securing the handle, the bottom part is attached to the box - usually this is done using self-tapping screws. The bottom panel will finally fix the box in the required rectangular configuration. After this, the finished box can be subjected to the necessary finishing treatment - sanding with fine-grain sandpaper, polishing, painting, varnishing, covering with laminating film, etc. Sometimes this operation is left until the very end of the work. | |
| The next step is to mark the side walls of the drawer along the roller guides that were previously installed in the cabinet design. A careful fitting is carried out, and if it goes well, the guides can be secured with self-tapping screws, the length of which should also not exceed 15 mm. All the boxes are assembled in the same way, and, as we have seen, their front panel can have a more complex shape, and the height of the side walls can vary. But this does not significantly affect the technology of their manufacture and assembly. After this, it will be possible to carry out the general assembly of the cabinet and its final finishing with all components to perfection. As a result, a beautiful and very functional piece of furniture appeared in the space under the stairs |
For the space under the stairs, cabinets and other, simpler, or vice versa, complex designs can be made, which, for example, extend from niches on wheels, and the division into separate sections and shelves is already made inside. The advantage of this option is that the cabinets can always be completely pulled out from the under-staircase niche in order to carry out general cleaning inside it.
Option with fully retractable cabinet modules
Even if the house has enough space for all the rooms necessary for comfortable living, the space under the stairs will never be superfluous, and it must be used to the maximum rationally. There will always be a lot of useful things in the household that their owners do not use every day, but they should have a designated storage location. An equipped under-staircase niche is also perfect for this.
Therefore, when planning the construction of a two-story house and the distribution of communications along it, it is advisable to decide in advance whether and how the area under the stairs will be used. Well, during the final finishing, all this can be decorated in the same style as the room in which the staircase structure will be located. And then a well-equipped and beautifully designed useful space will organically, without burdening the interior, fit into the overall design, and sometimes even become an eye-catching “highlight” of the room.
Bar and wine shelves
A bar under a flight of stairs can become a real decoration of the living room. It will elegantly fit into the interior, bring coziness and be a spectacular location at various receptions and buffets. Quite often, bottle holders or display cases are placed under the stairs to store a collection of wines.
Decorative finishing
Filling the closet under the stairs in itself serves as an interior decoration. In addition, the complex architecture of furniture will not tolerate a large amount of decor, which will make it look tacky. It is enough to limit yourself to lighting and mirror surfaces. Firstly, the space under the stairs is usually poorly lit, so additional light bulbs will not be superfluous here. Secondly, mirror surfaces will make this corner visually larger and more spacious. You can additionally use furniture fittings: unusual handles, decorative decorations for facades. Cabinet doors can be covered with thermal film with an image and create a real panorama on the surface of the cabinet.
Pantry
The space under the stairs can be successfully used to create a storage room. Various household items, household items, and canned foods will be conveniently located here. On special fasteners you can place a vacuum cleaner, ironing board, mop, children's ice sled and even a small bicycle or scooter. The pantry can be open or closed with a door.
Open structures are appropriate if they do not spoil the appearance of the room into which the stairs descend; these could be utility rooms or a non-front part of a corridor or hallway.
Closed storage rooms under the stairs can be located in the living room or hallway. Sometimes, as part of the overall interior design, doors are decorated.
Types of built-in wardrobes and furniture
The space can be filled with built-in furniture.
The main problem is the high cost of furniture, which specialists build to order. It is quite possible to equip a storage room under the stairs with your own hands, saving on the work of craftsmen.
The following elements are used in the design of the storage room under the stairs:
- rectangular and triangular sections, the shape of which is limited by the walls, floor and inclined flight;
- decorative doors;
- mirror surfaces;
- original lighting.
With the help of built-in furniture, you can fill the space that was previously empty in the corner and decorate the room with unusual facades.
Under-staircase swing wardrobe
For hinged cabinets, the doors open outward.
The doors that open outward are convenient to use, because they give immediate access to all shelves with contents. The disadvantage is that to move around the circle you need a certain space in front of the cabinet, which is not always available.
Swing canvases perform:
- solid wood, plywood, metal;
- glass, trellises, and openwork grilles are inserted into them.
To operate the doors, two canopies are used if the leaves are short in height; otherwise, three elements are used or piano hinges are installed.
Closet
Combined sliding wardrobe
They have doors that move using sliding mechanisms. Furniture can have its own floor, walls, or consist of only one front panel.
There are different types according to design:
- built-in;
- case;
- combined.
The difference in the options is the presence or absence of side walls and a rear panel, and there is also a difference in installation methods. For example, there are models that are directly fixed to the wall in a niche, while other options are inserted into the space under the stairs without fastening.
Drawers and modular designs
Such a system is not only convenient for storing items, but also looks attractive in any interior.
The systems are designed in the form of small pull-out sections or vertical modules that combine several segments in one compartment. Large structures are placed at the bottom of the cabinet - this way they receive additional support from the base of the floor, and smaller ones are placed at the top. Use the entire width of the space, so you can store items of various sizes.
The owner of the house completes the modules himself:
- selects the desired depth;
- arranges drawers in height and width;
- acquires sliding, opening and fixing mechanisms in the cabinet.
Modular options consist of a set of pencil cases, wall chests of drawers, corner cabinets, and drawers. They serve as a sideboard, book storage, and minibar.
You can independently choose the color and decorative finish of the front panels of the retractable modules. Inexpensive but durable materials are chosen for internal surfaces, which will significantly save the total cost of the system.
Open shelving with shelves
Using the back side of the steps as shelving is a practical solution.
The shelving unit contains many shelves, which are combined by type of item. There are several sections in the front wall to focus on similar things. The spacious structure under the stairs creates a feeling of lightness without overloading the space.
The shelves are made so that the joints and joints are not visible, so they are sewn on top with sheets of fiberboard, plywood, chipboard, OSB. Externally, the structure is painted with oil, pentaphthalic, latex or acrylic compounds.
Combined options
Combination of drawers and shelving
Combining design styles allows for more efficient use of under-stair space.
The combination looks organic:
- open shelves on the sides with sliding sections in the middle;
- modular units at the bottom of the cabinet and open shelving at the top;
- The shelves on one side are arranged with hinged doors with built-in mirrors.
In the swing closet you can additionally install drawers and racks for storing shoes. In the upper part, if necessary, leave a large space for hanging a bicycle, a sled, placing an artificial Christmas tree, boxes with New Year's garlands and toys.
Bathroom
The room under the stairs in a private house is quite suitable for placing an additional bathroom there. If we are talking about a country house, then it is a great idea to rationally use the space by placing, for example, a small shower there.
There are several requirements that must be met.
- Minimum parameters for placing a bathroom: 2.3 m (length) x 1.2 m (width) x 1 – 2.6 m (height). So, a march of 10 steps may be quite enough.
- Communications - water supply, sewerage, electricity - must be provided in advance. A ventilation system is required. It is better to entrust its arrangement to specialists.
Creating a successful alliance
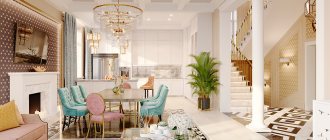
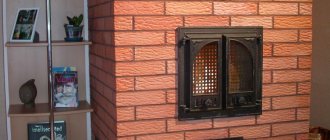
If the presence of a fireplace in the living room is quite logical, then moving the stairs to this area is an extraordinary solution. And despite all the complexity, these structures can coexist perfectly in the same area and complement each other in the interior.
You should initially separate 2 options for organizing the hall:
- staircase and fireplace as free-standing elements;
Living room interior solution with two large structures: a brick fireplace and a wooden staircase
- a staircase around or above the fireplace.
Wooden staircase around a fireplace made of natural stone
If in the first case, it is necessary to combine these structures in a single style and fit into the interior of the house, the staircase and fireplace in the second option should be connected at the level of the construction solution.
It’s worth noting right away that a corner and built-in fireplace are perfect for such a symbiosis. But it is quite possible to create steps with a wall-mounted fireplace, if you successfully fit the overhead chimney into the staircase railing.
Important! Regardless of how you plan to arrange stairs and fireplaces, the first thing you should do is draw up a preliminary zonal drawing of the living room. In this sketch, both structures should be placed in accordance with the scale. When building a fireplace under the stairs, you should draw up a sectional drawing.
The living room must fit into the main interior of the house, so the choice of materials for installing a fireplace near the stairs is initially somewhat limited.
Note: At the same time, the design of a living room with a fireplace and a staircase can be made in almost any style. Along with classic interiors, designers boldly bring to life daring and modern forms. At the same time, the implementation of styles such as loft or high-tech makes it possible to use radical and high-tech materials in the interior.
Subtleties and nuances
The benefits of installing a fireplace under the stairs in the living room are quite obvious. You are getting:
- a cozy and comfortable relaxation area;
- additional heating system option;
- attractive design element.
But, when starting to reorganize the space in order to connect the staircase with the fireplace, you must first take into account some subtleties.
Instructions from the tips to avoid standard mistakes:
- Building a staircase and fireplace with your own hands is quite difficult. In addition to financial freedom, it is necessary to have a large amount of free time and certain skills in the field of chimney installation.
- At the initial stage, the air duct pipe is installed, and only then the firebox is laid and the stairs are arranged.
- Before starting construction, be sure to consider what style the structures will be designed in and what materials will be used for this.
- When building a staircase above a fireplace, take into account the fact that a fire will burn under the steps and the structure will heat up.
Solutions in different styles
Perhaps the photos of the interiors offered below will help you realize your idea, or push you to some kind of design solution.
- The height of the ceilings and the area of the space allows you to install huge fireplaces with interesting air ducts in loft-style living rooms.
- Luxury in the Art Deco style: fireplace rooms for life-lovers.
- Fireplaces and stairs - high-tech design. Such interiors combine the latest technologies, ultra-modern building materials and primitive fire.
- Fireplaces fit perfectly into the Baroque style, which is prone to excess.
- Interiors of living rooms in a rustic style: everything related to country, rustic and everything ethnic is very suitable in spirit with the installation of a fireplace.
- The mystical mood of Gothic, and its craving for high ceilings and arched solutions, make it possible to successfully integrate fireplaces and staircases into living rooms.
- Even in modest Provence, with its desire for simplicity, a small fireplace with a staircase can fit perfectly.
Wardrobe
This is an excellent solution in terms of saving space. Outerwear, seasonal items, boxes of shoes, umbrellas, bags, hats do not always fit into closets located in bedrooms and hallways, and a dressing room under the stairs will help make their storage as comfortable as possible.
This option involves closed structures with various combinations of elements. The internal configuration of a dressing room can include sections of different sizes and shapes. These can be shelves, drawers, roll-out sections, rods in one or two rows, baskets.
You can use one or two swing doors or a compartment. When choosing the latter option, you should allocate a rectangular area for the passage to the dressing area so that the doors can move freely on the rails. You can also find other storage system options on our website.
Installation
You can build a cabinet under the stairs yourself if you properly prepare for the work and follow the step-by-step installation instructions.
Materials and tools
To make this piece of furniture, you will need the following materials and tools:
- materials for frames, internal filling, facades;
- fittings for doors, shelves, drawers, etc.;
- fasteners;
- brackets;
- electric drill, screwdriver;
- jigsaw;
- pencil, tape measure.
Preparing for work
Before starting installation of the product, you need to carefully prepare for work.
The preparation looks like this:
- Make a drawing of an interior item. To do this, calculate the size of the shelves, the height of the doors, etc. In order not to create a project yourself, you can take a ready-made version and adjust your dimensions to it.
- Sawing parts . It is carried out in accordance with the project. First, markings are made on the material, after which the corresponding elements are cut out. Each of them is marked with a serial number so as not to get confused during installation.
- Free up space under the stairs. They remove all unnecessary things and dismantle the flooring if necessary. Next, the floor and interior items located next to the stairs are covered with film to protect them from contamination.
Installation
To install the cabinet, proceed as follows:
- Assembling the frame. To do this, use either a metal profile or wooden racks. The frame is fixed to the floor and stairs using fasteners. At the same time, take into account that you need to leave a small gap for installing elements of the interior item.
- The frame is covered with material. For this, drywall, MDF, etc. are used. Next, install shelves, drawers, hanger bars, etc.
- The doors are fixed. First, the door frame is fixed, then the hinges are attached with fasteners. Only after this the sashes are installed.
Decoration
Decoration of the cabinet is carried out only after the complete assembly of the interior item.
Typically used:
- paint;
- wallpaper;
- decorative panels.
The main thing is to choose a finishing option that will harmoniously fit into the interior of the room.
Important note! Decoration of the sashes is carried out before they are fixed on the hinges.
Lighting
Any built-in closet under the stairs can be equipped with lighting. To do this, it is not necessary to extend wiring to the interior item, groove surfaces, etc. You can simply attach special lamps to battery-powered suction cups. Such lighting fixtures are installed either on the ceiling for general illumination of the space, or on each shelf to illuminate a specific area.
A built-in wardrobe under the stairs is a piece of furniture that does not take up useful space and helps optimize the space in the room. The main thing is to choose the right model for a specific design.
Resting-place
A lounge area will be conveniently located within the free space. Using high-quality finishing materials, textiles and decor, you can create a magnificent, cozy, stylish corner in which you can relax, read, chat with friends, listen to music and just dream about something. For maximum comfort, you should consider lighting modes and, possibly, provide built-in musical equipment, niches or shelves for placing books or other items, depending on the hobbies and preferences of the owners. The location next to a window with a beautiful view will make the area absolutely magical.
Even the idea of placing a mini-bedroom under the stairs is realized.
Study
A very popular option is to place a workplace here. Of course, it is not suitable for every room. It will not be very convenient within high-traffic areas. Here it is unlikely that you will be able to isolate yourself and isolate yourself from the environment for quiet work. In such cases, a closed structure with hinged doors or sliding partitions will help to get out of the situation. The space will be small, but quite suitable for work, which can be a good solution to the problem of lack of free space.
Features of an open staircase in the kitchen
Partial combination of a kitchen with a staircase is possible if at least a couple of square meters are available. There is no need to talk about a full-fledged room; rather, we are talking about an intermediate option called open space. It is based on several principles:
- complete absence of physical partitions;
- maximum efficient use of space;
- creating shelves or cabinets under the stairs, inside it itself.
This style has its advantages
. Not everyone will like this solution: it is unlikely that you will be able to place a large table, a refrigerator, a stove and cabinets there at the same time, so you need to immediately decide whether this area will be enough for convenient work and cooking. Full access to the stove is especially important, since without it it is impossible to brew coffee or fry eggs, much less cook something more serious.
Important. The choice of style for a future mini-room has virtually nothing to do with the number of steps on the flight of stairs to the second floor in the kitchen.
The staircase must be of sufficient width (at least 1 m), and in the highest place any family member or the one who will most often be involved in cooking must pass freely under it.
Small library
Bookshelves under the stairs will look chic. If the owners are connoisseurs of books and have a substantial library, this design will allow you to conveniently place the collection, saving space and decorating, for example, a living room or hallway if the staircase is located there. And since the depth of the shelves will be very small, the free space located behind the racks can be used for other purposes, by arranging there, for example, a storage area for other items or a small closet.
Interesting design solutions with the placement of bookshelves directly in the flights of the stairs. The books form a kind of risers. But it is important to remember that this will not have the best effect on bindings and covers, and washing such a ladder will be very problematic.
Useful tips
You can arrange a work area under the stairs.
Instead of a storage room, a small kitchen is installed in the space, a sofa for relaxing, and a reading chair are placed. If you put a table and a work chair, you will get a place to work on a laptop.
If the staircase is wide and located in the center of the hall, the storage room is built on both sides for two-way access.
They approach the organization of the pantry creatively; there are no restrictions for this work, so the owner chooses all divisions into sections according to his taste.
Children's room
Everyone remembers Harry's famous little room in the closet under the stairs. Modern parents, of course, will not give their children a place in the closet, but setting up a play area in the under-staircase space is a very good idea. A wide variety of options are possible - from simple ones with carpeting and children's toys placed there, to fairy-tale houses that are unique and amazing in their beauty and believability in their details. Such a magical structure will give the child a lot of ideas for games and will develop fantasy and imagination. However, do not forget that the location of the steps of the stairs next to the play space creates the need to provide for the protection of the child. Installing child safety gates is a must.
Place for pets
If you have pets, you can arrange a house or sleeping place for them in a niche under the stairs. Such a room will not require much space, so a pet house can be successfully combined with other functional areas within one design.
Functional areas
Depending on the size, configuration and location in the house, the under-staircase space can be used as independent functional areas or parts thereof.
Hallway
In most cases, the staircase is located near the front door, so some of the furniture from the hallway is placed under it - a wardrobe or hanger and a shoe rack. A small banquette or even a sofa would also be appropriate, on which you can sit while taking off or putting on your shoes.
If you choose furniture to match the main hallway, you don’t have to close the room with a door. Here you can place a coffee table and a couple of armchairs.
In this case, guests, while waiting for their hosts, will be able to leisurely leaf through the latest press. A mirror, an umbrella stand and a bedside table for seasonal items or bags will complete the interior.
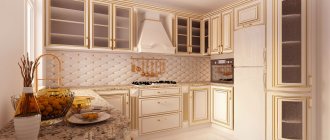
Kitchen
It is placed under the stairs mainly when there is a lack of space, when every meter has to be saved. But with a reasonable approach, even from the space under the stairs you can make a full-fledged kitchen.
Standard furniture will not work here - due to the specifics of the architecture, it will have to be made to order or assembled with your own hands. First of all, it is necessary to think about the laying of communications and exhaust hood. Otherwise, the steam emanating from the stove and sink will quickly render wooden structures unusable. In order to avoid bending over frequently, it is better to install cabinets where there is a slight rise in the flight of stairs, which you will have to use less often.
They also use another option - a room located nearby is allocated for the sink, stove and cabinets, and only a refrigerator, freezer, washing machine and dishwasher are placed under the stairs.
Fireplace
A fireplace heated with wood or coal under a wooden or log staircase is not a good idea. But if the flight of stairs has a concrete base, this option is quite possible. It will only be necessary to think over a place for the removal of burnt fuel - a chimney.
Depending on the overall style, such a hearth can be decorated with tiles, brick, stone or wood.
Installing an electric fireplace under the stairs in a wooden house is much simpler and safer. Moreover, modern models of electric fireplaces differ little in appearance from conventional ones heated with wood.
Library
A small home library with your favorite publications can easily be placed in a niche under the stairs. Shelves or a cabinet are most often installed under the flight of stairs itself, and a small table and a couple of comfortable armchairs are located nearby.
Shelves with books can also be combined with a sleeping area - a small sofa or sofa. In this case, the rather spacious upper part of the niche will not be empty.
Workplace
If it is not possible to allocate a significant area in the house for a study, it is quite possible to use the space under the stairs for these purposes. It can become either a full-fledged room with a computer desk, a comfortable chair, a bookcase, or a small corner with a couple of armchairs, one or two shelves and a coffee table.
Some furniture can be moved outside the stairs. For example, install a computer desk in a niche, and place shelves with office equipment and books nearby.
Please note that the office should be well lit. It will be better if the lighting is not only local, but also spot. To do this, you can use either several lamps built into the ceiling or a floor lamp, which will give the room a special coziness and harmony.
Rest zone
Depending on the size of the space under the stairs, you can equip a full-fledged sleeping place or a small corner for relaxation.
It is possible to install a comfortable couch, sofa or even a single chair even in a small niche. If you make a small window in this place, your household will be able to enjoy the surrounding landscape in the evenings or simply dream half asleep.
Children's play area
The space under the stairs is a ready-made house in which younger family members will spend their free time with interest. A small room perfectly matches children’s ideas about comfort. All that remains is to make a door for it and equip it with children's play furniture. Depending on the child’s inclinations, the room can be decorated in the form of a dollhouse, a sports corner or an art workshop.
Be sure to take care of quality lighting. Twilight in a children's room is unacceptable. To make the room seem more spacious, try to use more light, pastel shades in the decoration. Bright figurines of your favorite cartoon characters on the walls or furniture will help to revive the corner.
You can also equip a children's bedroom in this place by installing a small sofa or a full-fledged single or bunk bed in a niche. Bright pillows and a soft, fluffy blanket will make this corner extraordinarily cozy.
Bar
There is enough space under the stairs to set up a full-fledged bar. The counter and chairs are located in the highest part of the span.
When equipping such a room, it is left open or equipped with a light door. Here you can place a shelf for glasses and a small refrigerator for drinks.
Fireplace
A fireplace is not only functional, but also an amazingly beautiful interior object that can make any room cozy and completely special. It can be placed under flights of stairs, a turntable, and even built into the free space inside a spiral staircase. To install a fireplace, you will naturally have to think about the location of the chimney. An excellent alternative to the standard one can be a biofireplace that runs on special fuel and does not require a chimney. Since the fire in both cases is real, during installation you will need to comply with all the necessary fire safety measures.
Calculation of the required height of the stair railing
If the design project includes a fence, then it is very important to choose the right height. The standard height of the railing is ninety centimeters. However, if only adults live in the dacha, then the height can be increased by twenty centimeters. The width of the handrail should not be less than thirty millimeters.
Mini greenhouse
A small winter garden or flower garden located under the stairs can become a real piece of paradise. As part of the flight of your imagination, a wide variety of options are possible - from the arrangement of single plants to amazingly complex compositions with original decor and magical waterfalls.
Aquarium
The location of the aquarium under the flights of stairs is a very effective interior solution. This detail will give the living room, hallway or dining room a special flavor. After all, behind the glass we see an amazing, colorful, unique and living little universe.
The process of self-reinforcement of concrete stairs
Concrete can wear out and crumble over time. In order for a flight of stairs to serve for a long time, it must be reinforced with reinforcement. To do this, the reinforcement is assembled into a specific pattern and secured together with clamps.
The reinforcement frame is installed in the formwork and filled with concrete. After the concrete has hardened, the formwork is removed. The whole complexity of reinforcement lies only in the correct selection of the reinforcing mesh scheme and its installation.
Decor or exhibition
If there is no need to functionally use the space under the stairs, you can simply decorate it in an original way. Paintings, shelves with photographs, figurines and other interior items can be located here. If one of the owners is a collector, the collected items can be placed in display cases under the stairs, of course, if their dimensions allow this. A niche under a flight of stairs can also be an excellent place for displaying works of art by household members.